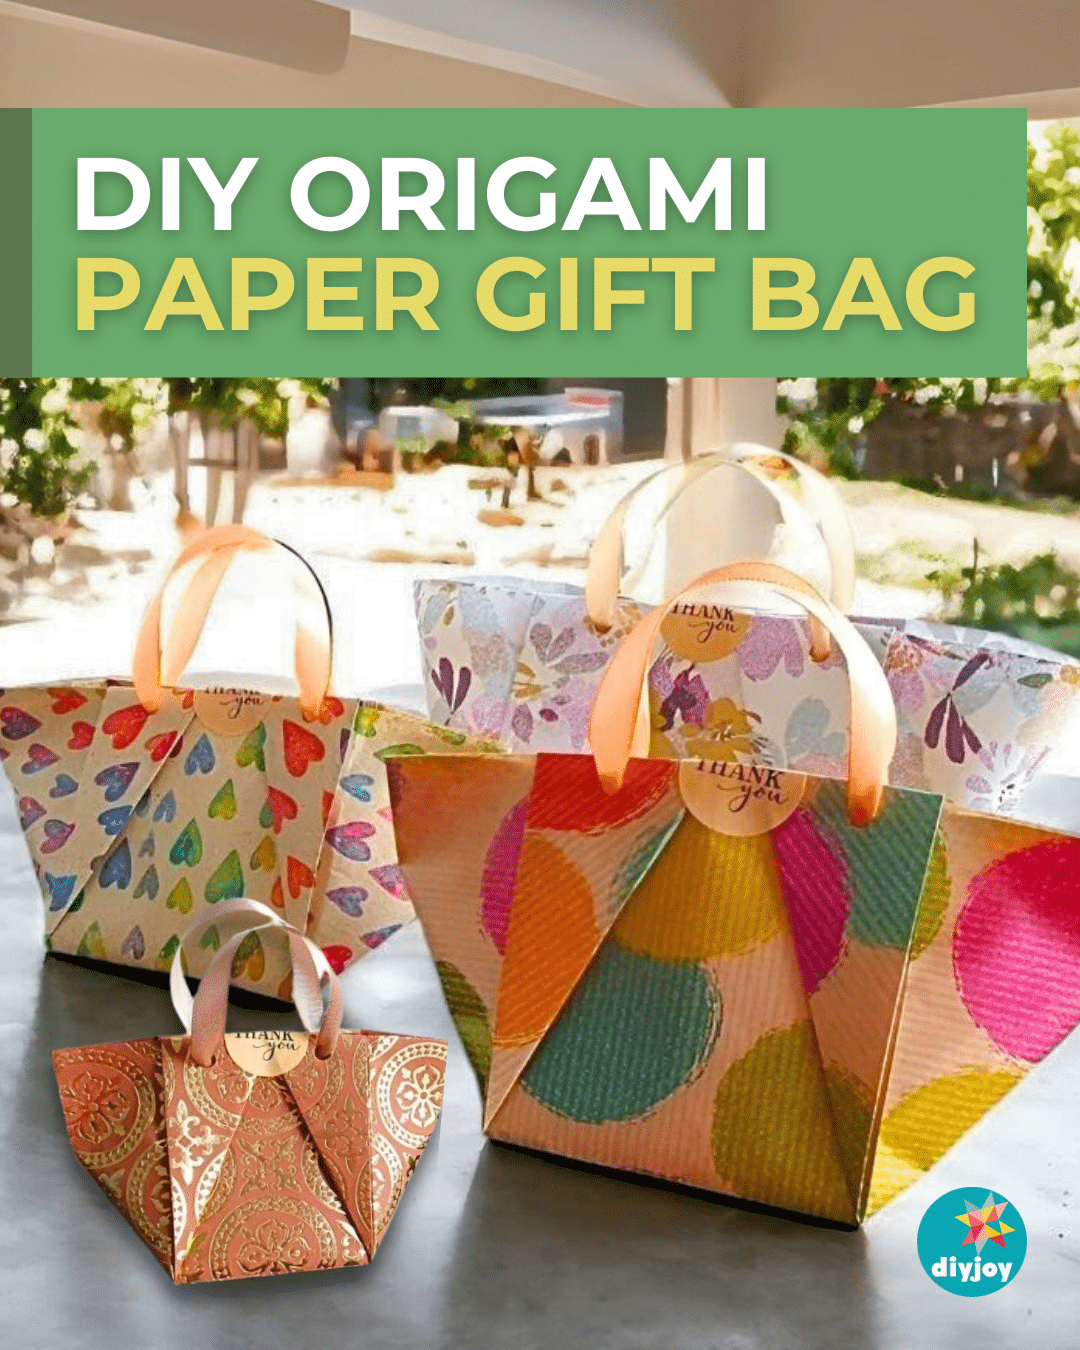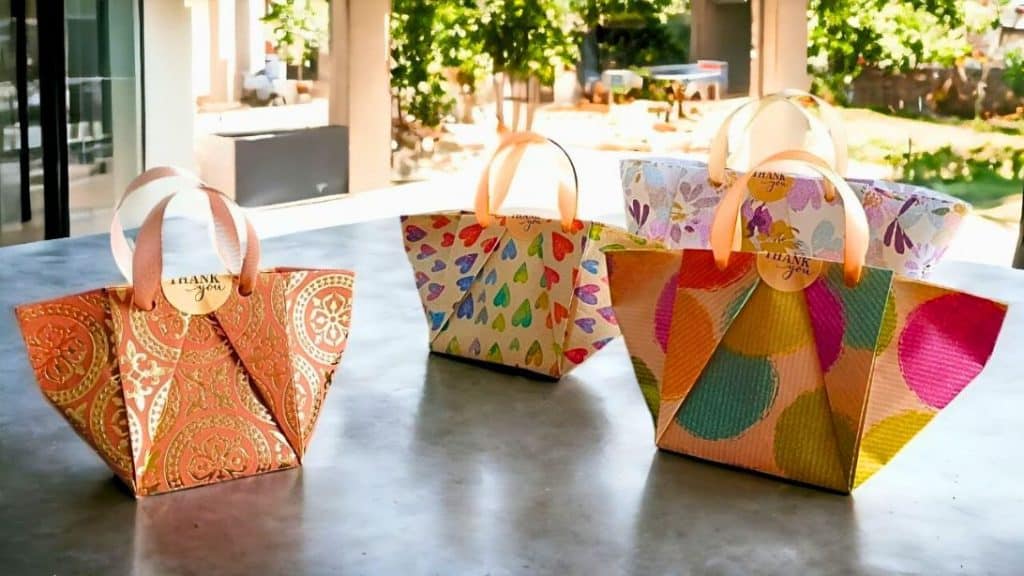
This origami paper bag is a unique and fun way to wrap your gifts this year. I saw this idea from I. Sasaki on YouTube and fell in love with it because the shape is similar to the bag I am eyeing for. Make these origami bags this holiday season, and I bet you’ll get a lot of compliments!
RELATED: How to Wrap Gifts With No Tape
The best thing about these paper bags is that they can be made in different sizes. The paper size below is just for the sample, but the small ones make great goodie bags. You can store candies and chocolates inside for parties. If you are planning to put heavy items inside, use a thicker paper. Watch the video below for full instructions.
Here’s another project for you: Easy Pleated Gift-Wrapping Hack
Easy Origami Paper Bag Materials
- 9″ x 9″ paper
- ribbon
- hot glue
Note: you can make it bigger or smaller
How to Make an Origami Paper Bag
Step 1:
Start by folding the paper in half to make a crease. Open it, then fold it in half diagonally. Open it again, and fold it in half diagonally in the other direction.
Step 2:
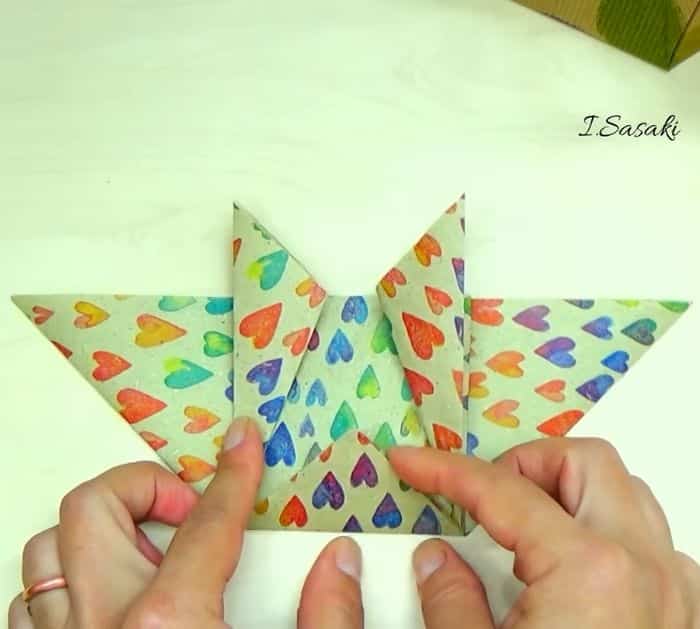
Push the sides toward the center to make a triangle. Flatten it out.
Step 3:
Rotate the triangle so the flat side is facing away from you. Fold about 1.5″ from the tip. Take the right point and fold it so it aligns perfectly with the first one, then fold it in half. Do the same with the left point.
Step 4:
Flip it. Fold the right point toward the center, lining the folded edge to the front sides, then fold it in half. Repeat with the left point.
Step 5:
Fold the points inside the bag, then glue them in place. Open the bag into a box.

Step 6:
Measure the box. Cut a piece of paper into a rectangle with the width the same as the measurement and double the measurement for the length. Fold it in half then glue. Glue it on the inside bottom of the box.
Step 7:
Pull the sides of the box without the folded points to the sides and make two holes using a puncher for the handles.
Step 8:
Cut a small piece of ribbon and slightly heat the edges with a lighter to keep them from fraying.
Step 9:
Insert the ribbons into the holes and glue them in place.
Origami Paper Bag Tutorial