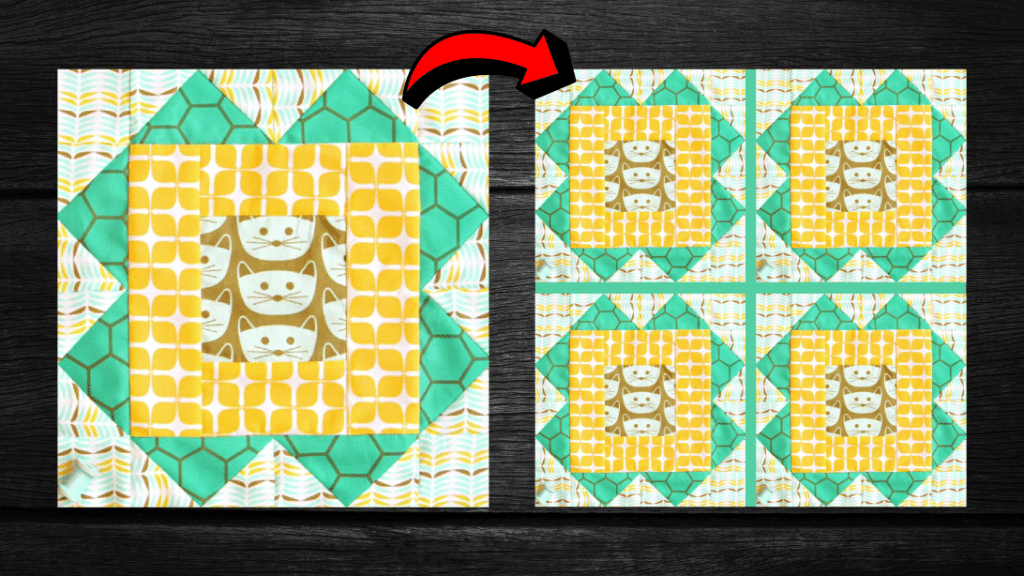
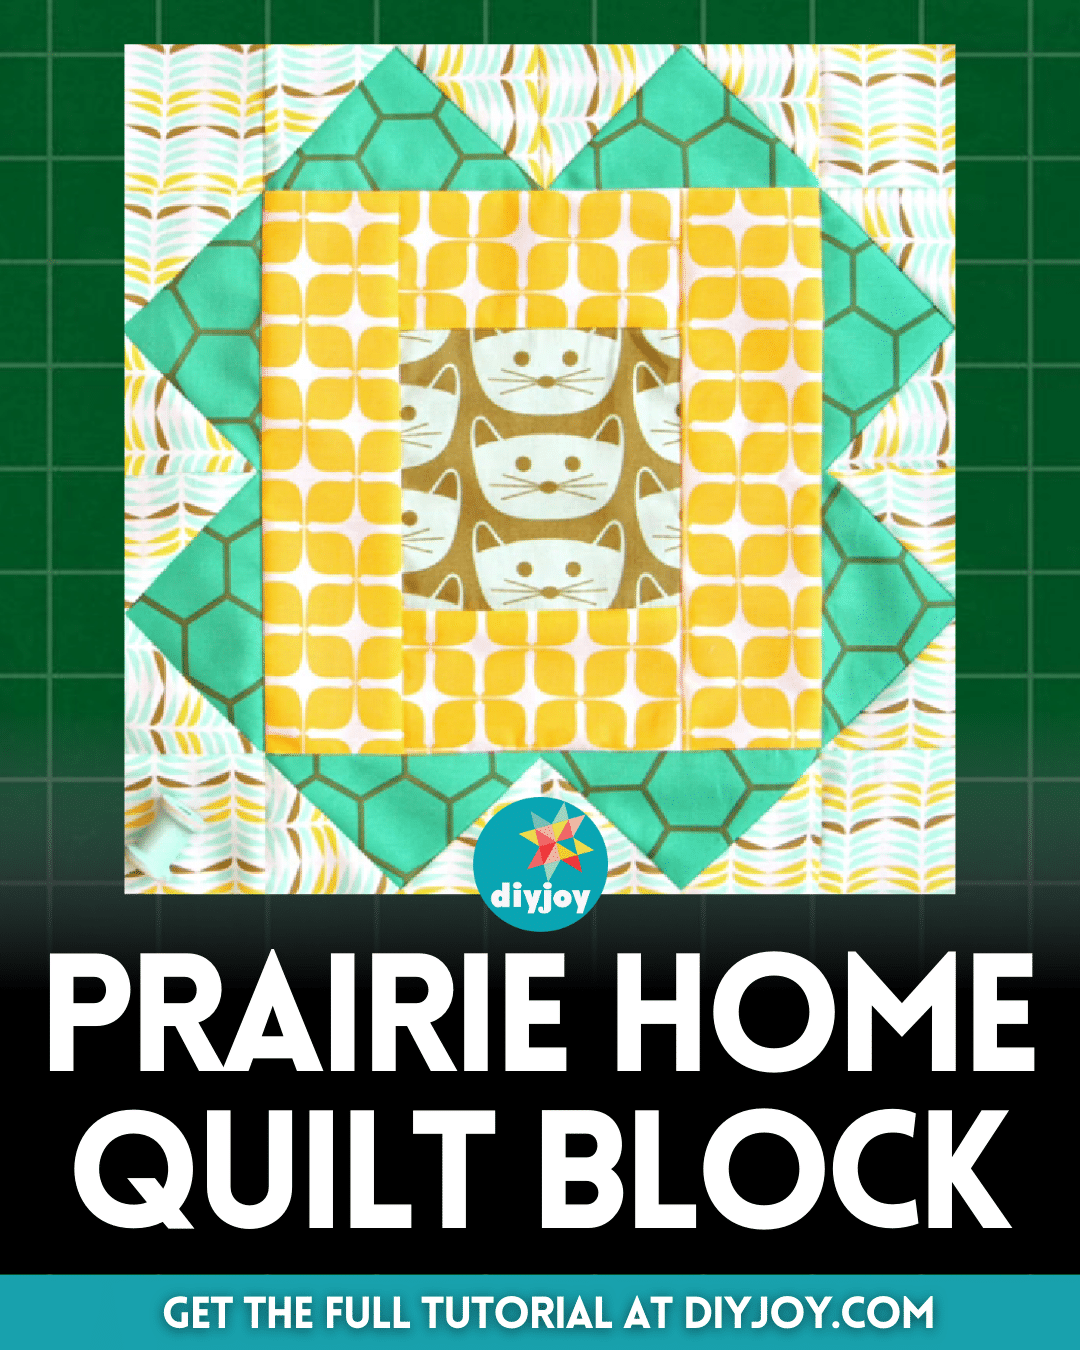
This prairie home quilt block by Art Gallery Fabrics on YouTube features a simple and neat pattern entirely made up of flying geese units, strips, and squares! This is a very easy project and is highly recommended, especially for beginners, I bet you can even finish a single quilt block in just a few minutes.
RELATED: Donna’s Prairie Points Runner Quilt Tutorial (No Pattern Needed)
So if you’re looking for an activity or new hobby to try and pass the time, then make sure to check out this prairie home quilt block, and give it a try. Read the instructions below and make sure to watch the video tutorial below as well for more details. Enjoy quilting!
Materials for Prairie Home Quilt Block:
- 4 print fabrics
- Marking pen, pencil, or chalk
- Ruler
- Scissors or rotary cutter and a cutting mat
- Fabric pins
- Needle and thread
- Iron, for pressing
- Sewing machine
Cutting Requirements:
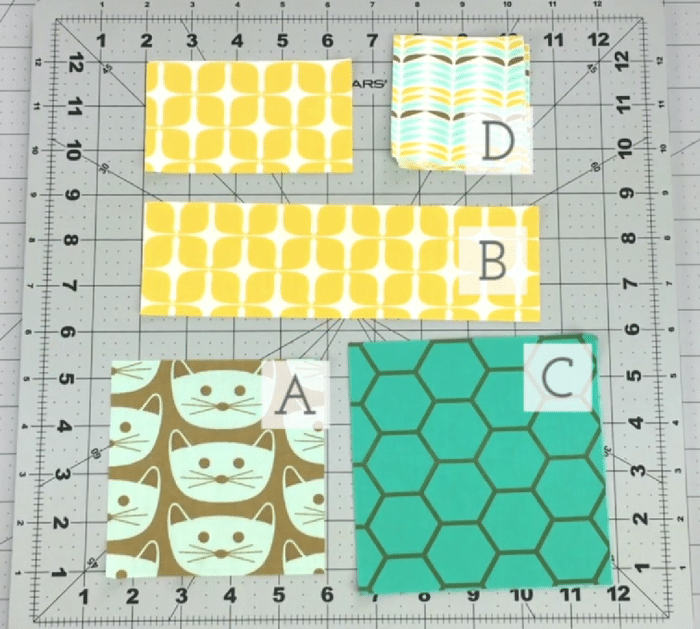
Fabric A
- 1 square @ 4½ inches
Fabric B
- 2 strips @ 2½ x 4½ inches
- 2 strips @ 2½ x 8½ inches
Fabric C
- 2 squares @ 5¼ inches
Fabric D
- 4 squares @ 2½ inches
- 8 squares @ 2⅞ inches
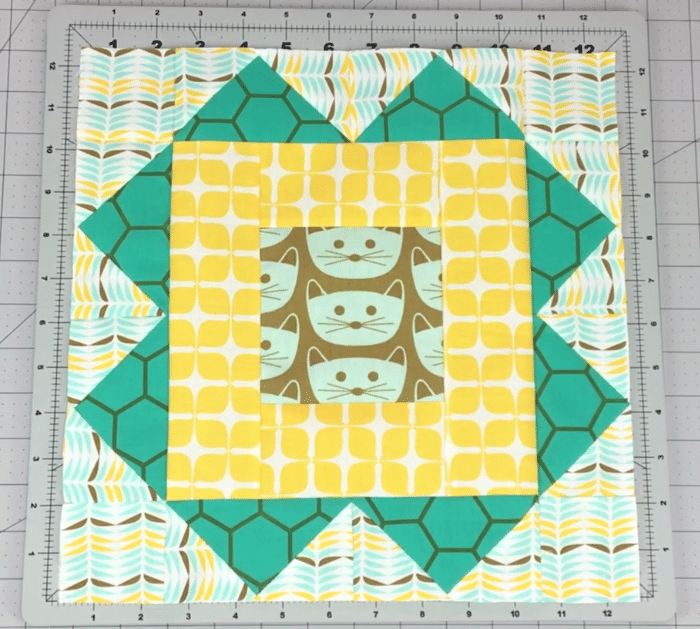
How to Make Prairie Home Quilt Block:
Step 1
Take the fabric A square, then stitch the shorter fabric B strips to the top and bottom, and press the seams open.
Step 2
Stitch the longer fabric B strips to both sides, then press the seams nicely, and set the block units aside to make the flying geese units.
Step 3
Draw a diagonal line on the wrong side of the fabric D squares, then place 2 squares at opposite corners of fabric C squares as shown in the video, and stitch on either side of the line with ¼ inch seam allowance.
Step 4
Cut it apart along the marked line and press the fabric open, then place a square at the lower corner, and stitch on either side of the marked line.
Step 5
Cut it apart, press it open, trim the flying geese units to 2½” x 4½ ” rectangles, and repeat the process to make 4 more.
Step 6
Sew two sets of flying geese units together, then stitch them to all sides of the center block, and fill the empty corners with the small fabric D squares.
*All image credit belongs to Art Gallery Fabrics via YouTube. Follow and subscribe to her channel for more!
Easy Prairie Home Quilt Block Tutorial