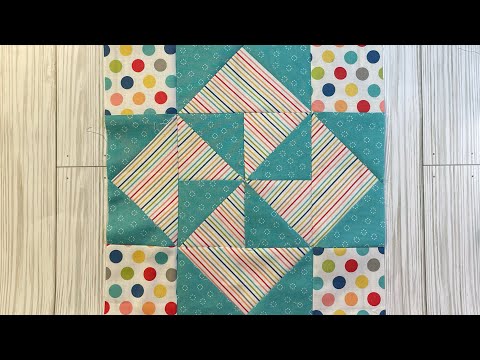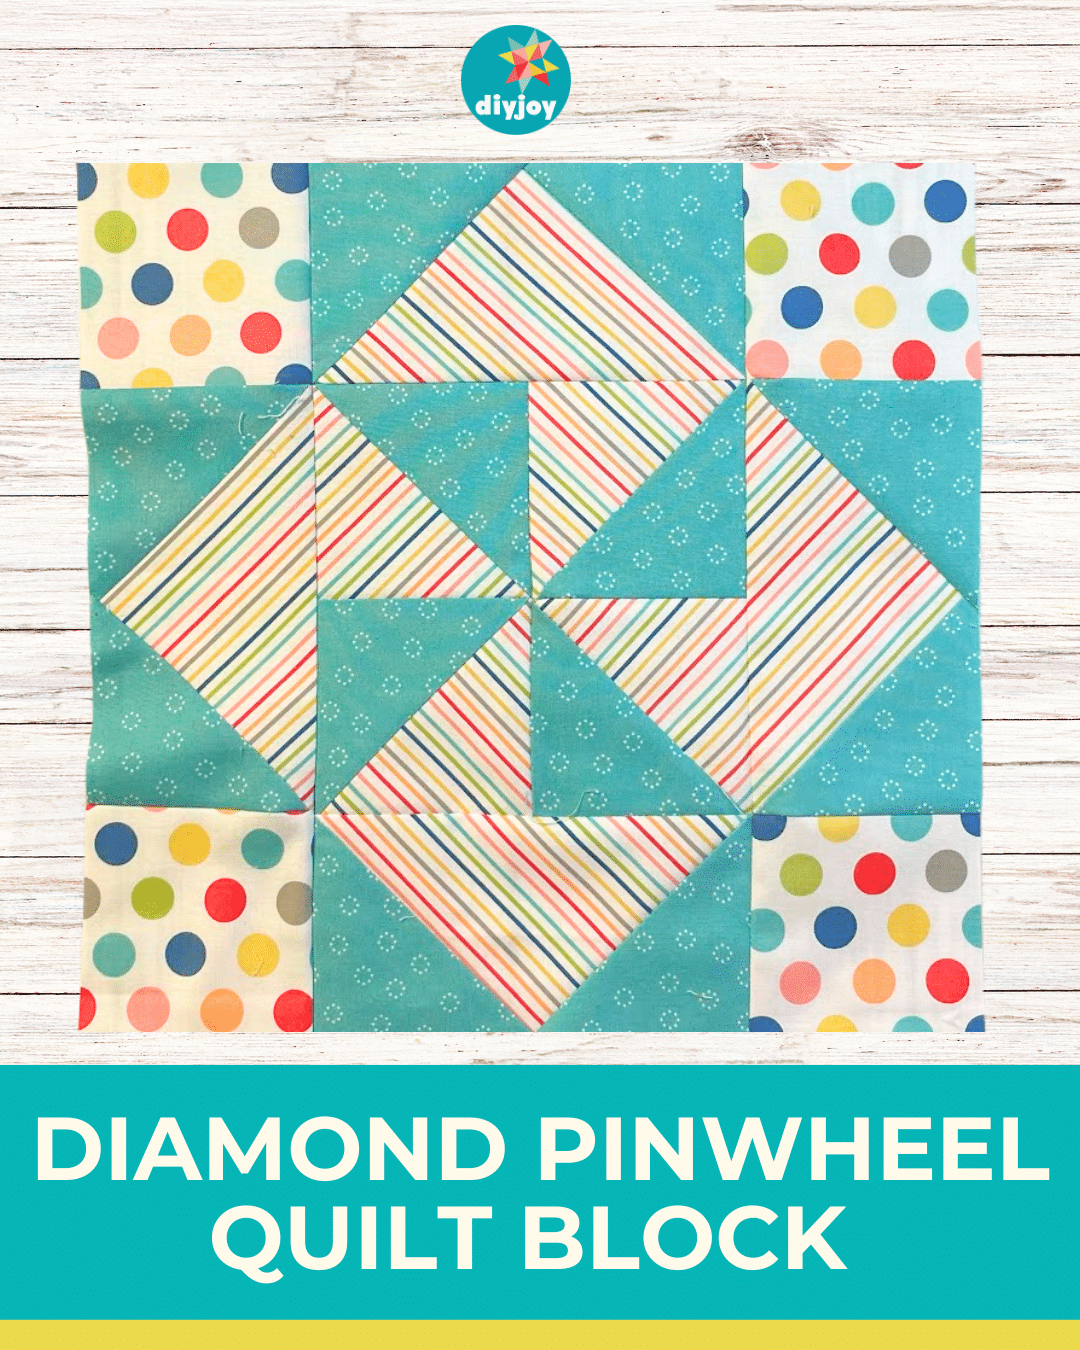
Are you a fan of pinwheel blocks? If you are, consider adding this diamond pinwheel quilt block to your list! Pinwheels are one of the most popular quilting patterns as they are very easy to make and beginner-friendly. You only need four half-square triangles. Arrange them like a four-patch, and you have one block.
You will do the same process for this diamond pinwheel quilt. If you’ve already mastered making one, this quilt block will be a breeze.
RELATED: Painterly Pinwheels Table Runner Quilt Tutorial
I love this pattern by Cut and Create because it is playful. The pinwheel is in the center, which is inside a diamond, and the diamond is inside the cross. There’s definitely a lot going on in this block, but rest assured, the steps are easy to follow. You will only make flying geese units and a pinwheel. I am sure you’ll enjoy making this block. Happy sewing!
Easy Diamond Pinwheel Quilt Block Materials
- 4 pieces of 3 1/2″ Fabric A squares (for the corners)
- 4 pieces of 4″ Fabric B squares
- 4 pieces of 6 1/2″ x 3 1/2″ Fabric B rectangles
- 2 pieces of 4″ Fabric C squares
- 8 pieces of 3 1/2″ Fabric C squares
How to Make a Diamond Pinwheel Quilt Block
Step 1:
Get 4 pieces of 6 1/2″ x 3 1/2″ fabric B rectangles and 8 pieces of 3 1/2″ squares. Create 4 flying geese blocks. Place one square on one end of the rectangle, right sides together. Draw a diagonal line from corner to corner on the square and sew directly on it. Trim off excess and press open. Do the same to the other side. Make sure the lines are in opposite directions forming a V.
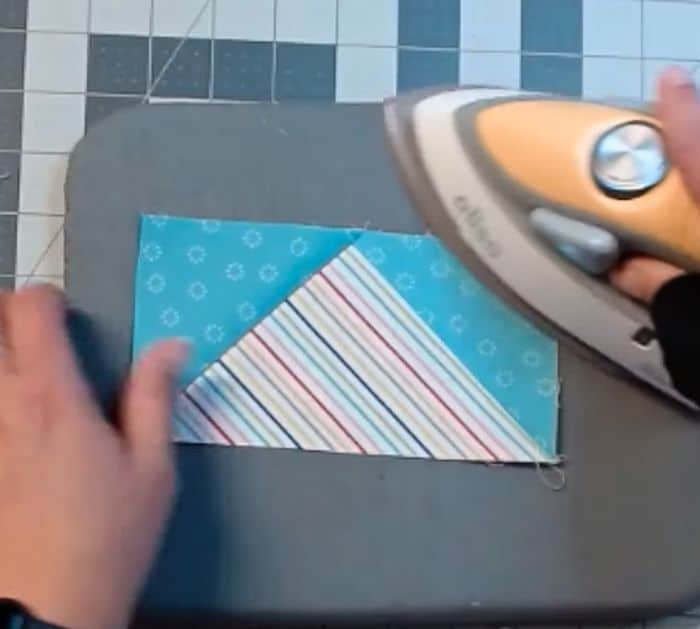
Step 2:
Take the 4 pieces of 4″ fabric B squares and 4 pieces of fabric C squares. Make them into half-square triangles. Place one fabric B square on top of fabric C square, right sides together. Draw a diagonal line from corner to corner and sew directly on it. Trim the corner, make sure not to cut the seams, then press it open. Repeat with the remaining squares. Trim them into 3 1/2″ squares.
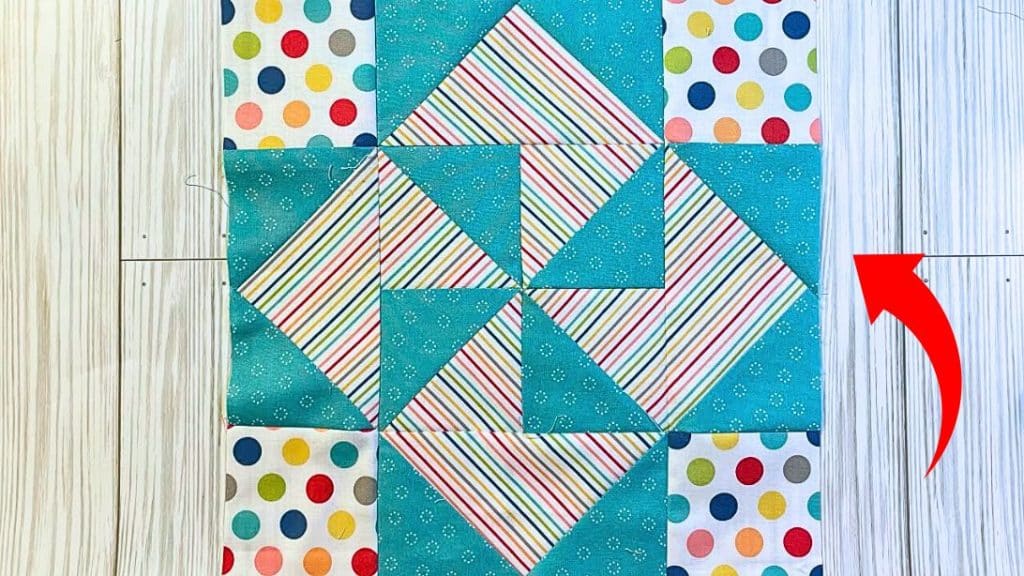
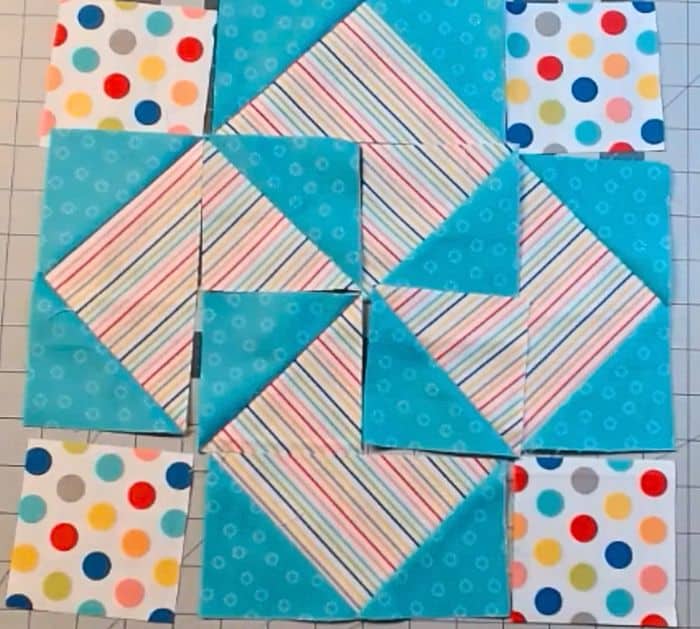
Step 3:
Arrange the flying geese blocks, 3 1/2″ squares, and half-square triangles just like in the photo below.
Sew the center pinwheel first like a four-patch. Press it flat. Next, sew them in rows. Make sure to line the seams.
Once the rows are done, sew them together to make the block. Press it flat and you are done.
Diamond Pinwheel Quilt Block Tutorial