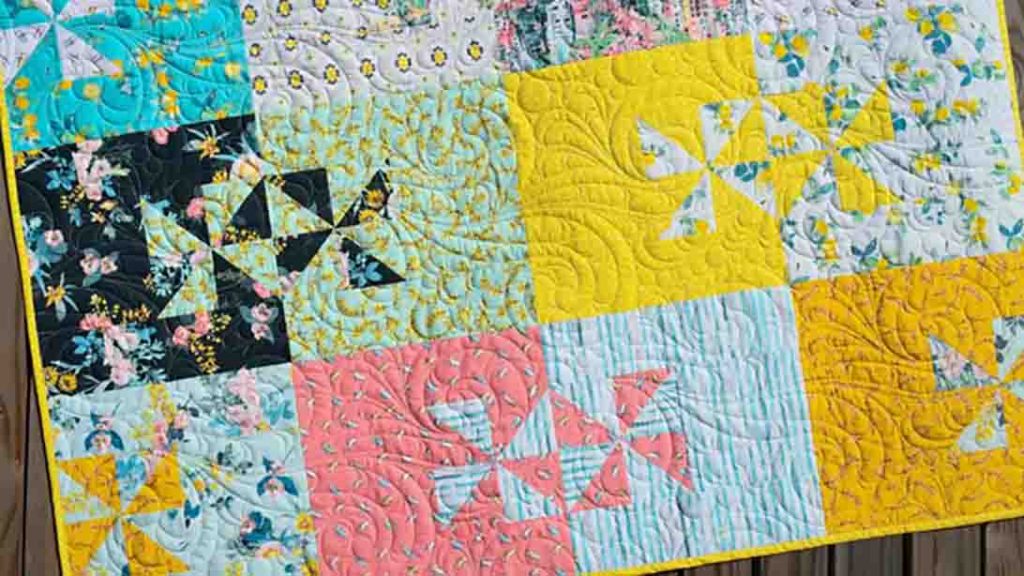
Are you looking for your next quilting project? Try making this capri breeze quilt pattern from Moonkin Stitchery on YouTube! This gorgeous pattern will only need sixteen fat quarters to make. It’s quick and easy and perfect for beginners.
RELATED: Slice and Dice Fat Quarter Quilt Tutorial
In this step by step instructions, Moonkin Stitchery will teach you how to make this pattern with only fat quarters. It’s the perfect personalized gift for your loved ones or if you just looking for a quick quilt to make to pass the time. Check out the video tutorial below for the full instructions.
Materials:
- 16 fat quarters
- rotary cutter
- rulers
- cutting mat
- marking tool
- sewing machine
- iron, for pressing
Directions:
Step 1
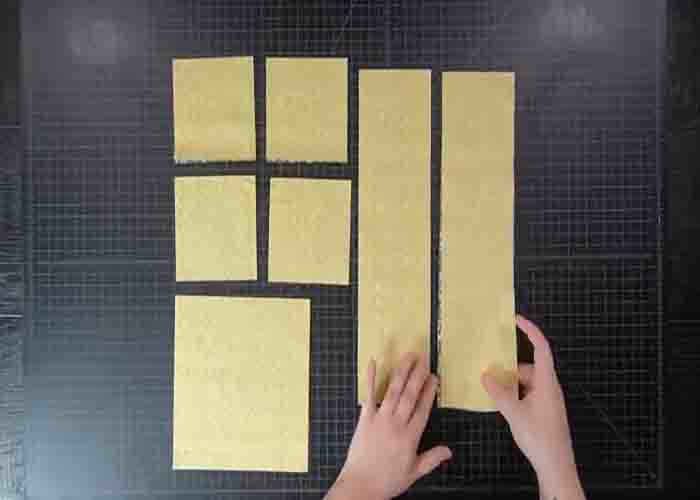
Cut four 4 1/2″ squares, one 7 1/2″ square, and two 4″ x 14 1/2″ rectangles from each fat quarter. Once everything is cut, select four 4 1/2″ squares in one print and four 4 1/2″ squares in a contrasting print. With the lighter fabric square, draw a line from corner to corner diagonally on the wrong side. Then, select one of those 4 1/2″ squares from each print, lay them right sides together, and sew a 1/4″ seam allowance on both sides of that drawn line to create a 4″ half-square triangle. Repeat these steps to make a total of eight half-square triangles.
Step 2
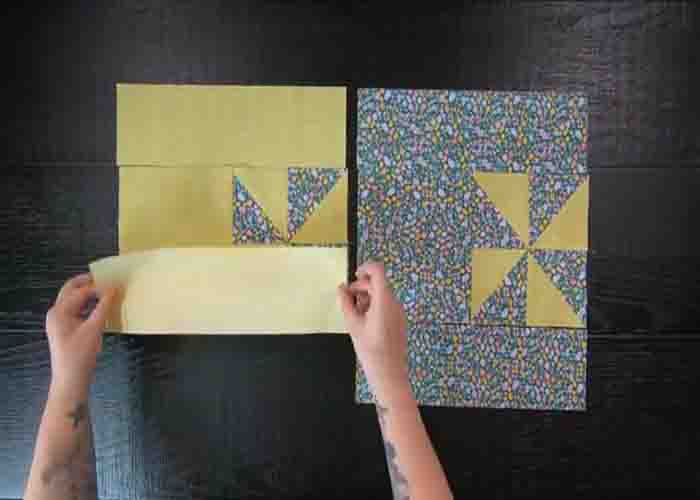
With those eight half-square triangles, make two matching pinwheel blocks. Sew the blocks together to form rows, then sew those rows together to complete a 7 1/2″ square pinwheel block. Next, with those pinwheel blocks, select the matching 7 1/2″ square prints from within your pinwheel. Sew the 7 1/2″ square on the left side of the pinwheel. Make two of these in the opposite prints. Lastly, sew the two 4″ x 14 1/2″ rectangles on the top and the bottom of the matching unit. (You are basically making two blocks that are inverse of each other.) Repeat these steps until you have a total of 16 quilt blocks.
Step 3
Once you have all your blocks, lay each matching set, side by side, with the pinwheels touching in a 4 x 4 block layout. For the even rows, just offset your blocks. Now, sew the blocks together to form rows, then sew those rows together to complete the quilt top.
Capri Breeze Fat Quarter Quilt Pattern