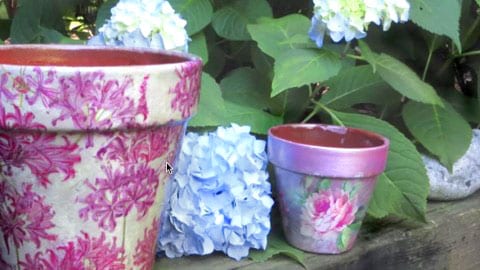
Have you ever painted a clay pot and the paint eventually bubbled up, after leaving it outside in the weather? This is the solution to that problem. There’s so many beautiful wrapping papers, napkins, posters, etc. that you can use when decorating your clay pots. Some people put pictures of movie stars on their clay posts and it looks really cool. This is so much fun and they turn out so lovely. I’ve painted a lot of clay and plastic pots and the weather has a tendency to ruin them over time…well, not anymore! I’m so glad to have found this tutorial. I’m amazed at what people think of!
This would be a beautiful and inexpensive decoration for a wedding or any other special occasions! This is a must do! I made some for my garden and just love the way they look!
She paints the pot the color she wants to show through the designs and paints the inside of the pot with decoupage glue to seal it, and lets it dry for 1 hr. Then she places the pot in a cold oven. Set oven to 300 degrees and when oven reaches that temperature, set the timer for 30 min. and turn the oven off after that and leave pot in oven to cool down a few hours. Prepare your napkins or wrapping paper you want to use on the pot, next she applies the decoupage glue and gently applies the flowers. She uses a piece of saran wrap to gently put pressure on the flowers, in order not to tear them. She also uses a nail file around the top edge of the pot for any paper that is hanging over the edge. Once the decoupage glue has dried and you have all your designs on the pot, brush decoupage glue over the whole pot. Then she sets to oven to 170 degrees and puts the pot in the oven, then she turns the oven off, leaving the pot in the oven for 20-30 min. Next, she uses Rust-Oleum Marine Coating Spar (Clear) Varnish to seal the pot and lets it dry in a box with a closed lid for about 10 hrs.
Watch this step by step tutorial and see how she does this!
How to Decoupage Pots


