Making homemade Halloween decorations starts with choosing a project that fits the supplies and tools you have. These 20 ideas cover paper, yarn, paint, recycled containers, wreaths and softly lit accents for walls, doors, mantels, tabletops and more.
I’m always drawn to the Halloween details that make familiar materials look completely different, from yarn ghosts and paper bats to a staring eyeball wreath. Pick the project that catches your eye, open the linked creator’s complete tutorial before you begin and keep its safety notes with the method.
Table of Contents
- 1. DIY Yarn Ghost Art
- 2. Hot-Glue Spider Web
- 3. DIY Halloween Ghost Ornaments
- 4. Light-Up Ghost Centerpiece
- 5. Cupcake Pumpkin Decorations
- 6. DIY Skull Apothecary Jar
- 7. Canning Lid and Washi Tape Halloween Wreath
- 8. Hanging Paper Bat Flock
- 9. Creepy Halloween Eyeball Lantern
- 10. DIY Halloween Bat Straw Toppers
- 11. Halloween Paper Garland Cutouts
- 12. Raven Poem, Nevermore Banner and Bird Art
- 13. Creepy Halloween Floral Arrangement
- 14. Paper Plate Ghost
- 15. Dripping Red Wax Crayon Candles
- 16. Decorated Paper-Mache Halloween Witch Hat
- 17. Yarn-Laced Mummy Paper Plate Craft
- 18. Geo Mesh Eyeball Halloween Wreath
- 19. Halloween Rocking Paper Monster
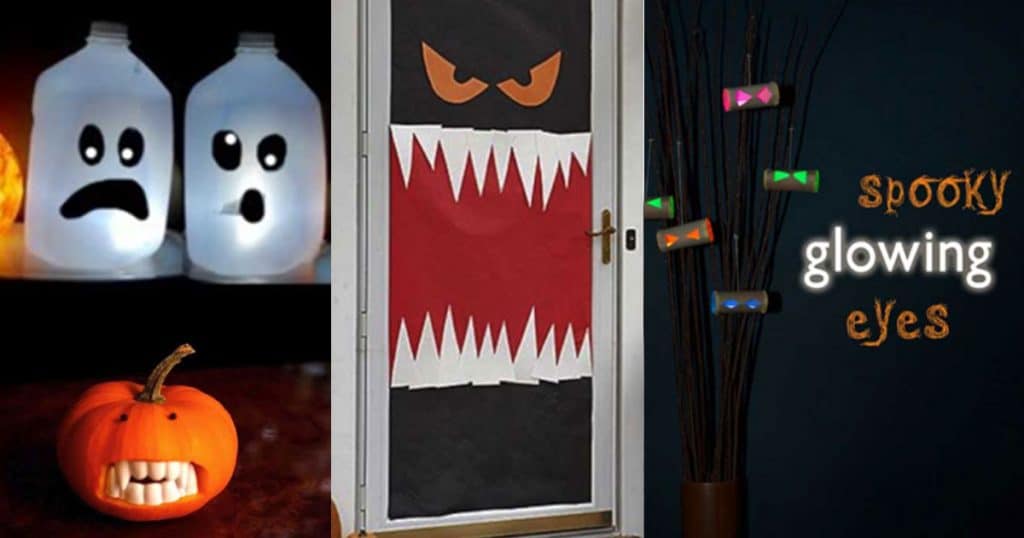
- 20. Recycled Milk-Jug Ghost Luminaries
1. DIY Yarn Ghost Art
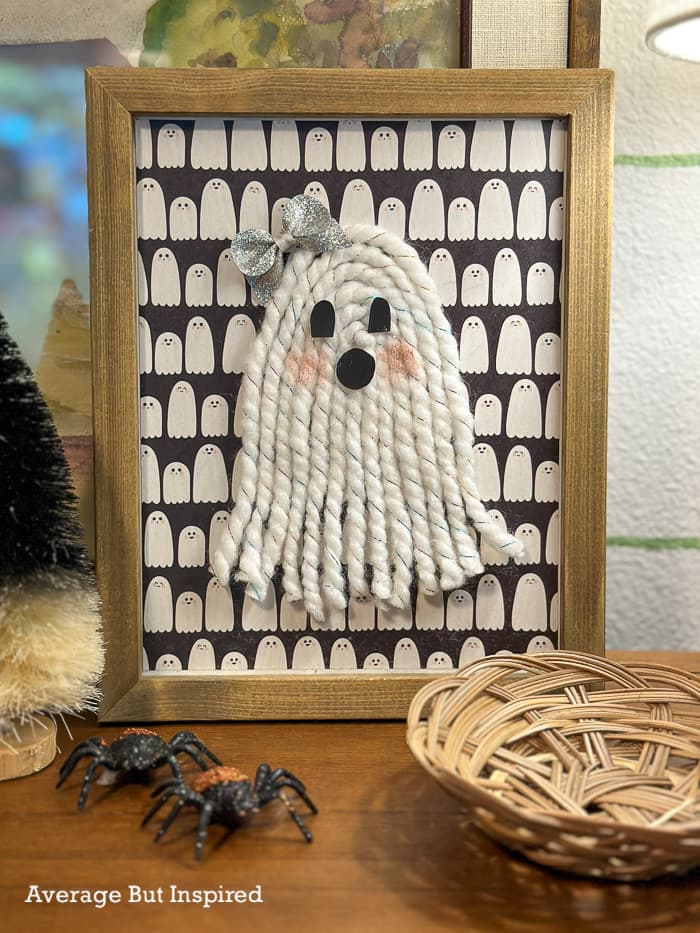
DIY yarn ghost art turns a paper-covered reused frame or wood canvas into a macrame-look Halloween character. Bre glues the yarn arch, lets it dry and trims the ends before adding the black cardstock face; I keep coming back to how an optional bow and rosy cheeks can shift the expression. Visit Average But Inspired for Bre’s complete yarn-ghost tutorial and more of her clever Halloween projects.
2. Hot-Glue Spider Web
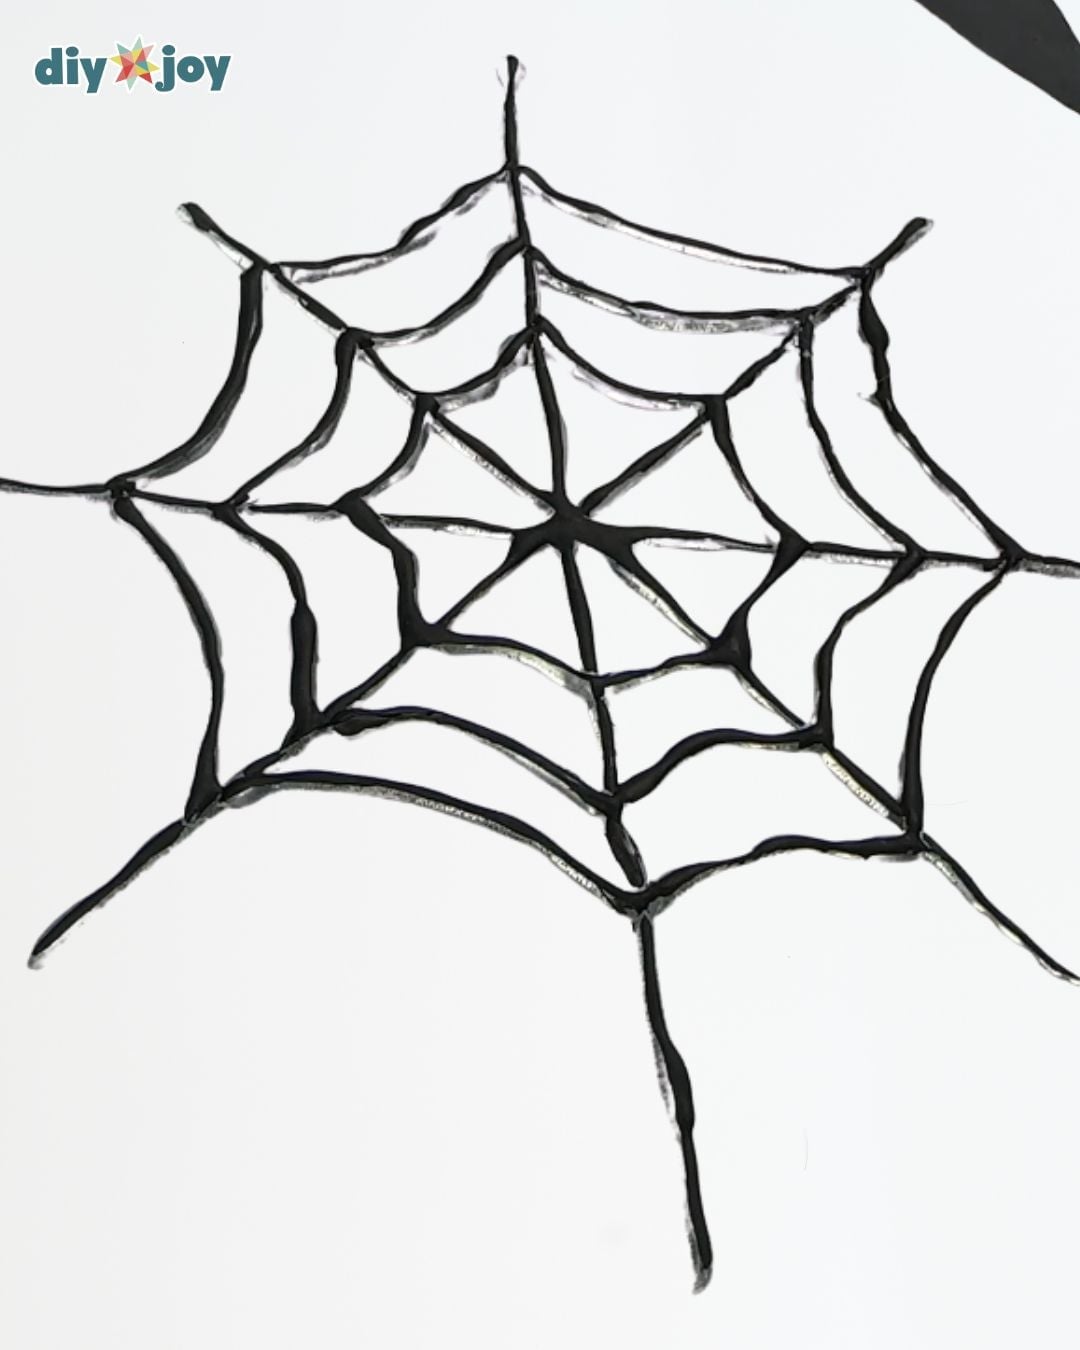
The hot-glue spider web uses a template or hand-drawn guide beneath parchment to shape every strand. I appreciate the simple black silhouette on white. Low-temperature hot glue traces the guide, then needs to cool completely before the web is lifted. Nylon string makes the finished piece ready to hang, and optional marker adds color. Open the DIY JOY project page for the complete traced-web tutorial and more Halloween craft ideas from our team.
3. DIY Halloween Ghost Ornaments
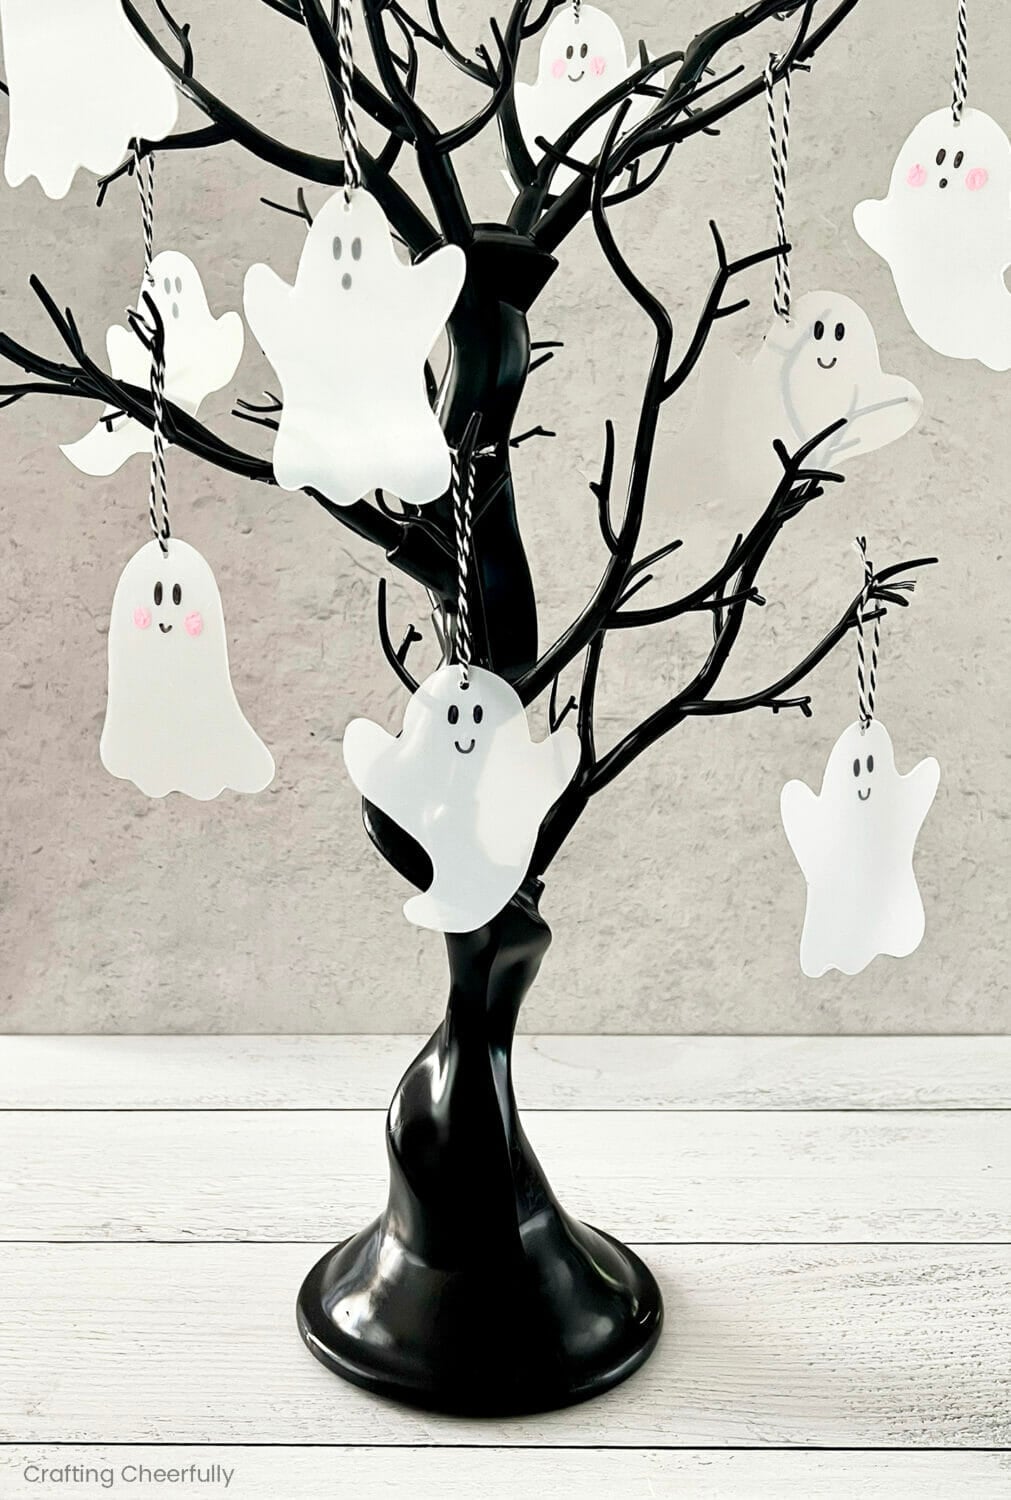
DIY Halloween ghost ornaments begin with thick craft plastic traced from Kim’s template, then get marker faces and optional pink cheeks. Yarn, ribbon, string or baker’s twine can form the hangers. With those curved cuts and small punched holes, I’d rather give sharp scissors the attention they deserve. Crafting Cheerfully has Kim’s complete ghost-ornament tutorial and original template, along with more cheerful seasonal craft ideas to explore.
4. Light-Up Ghost Centerpiece
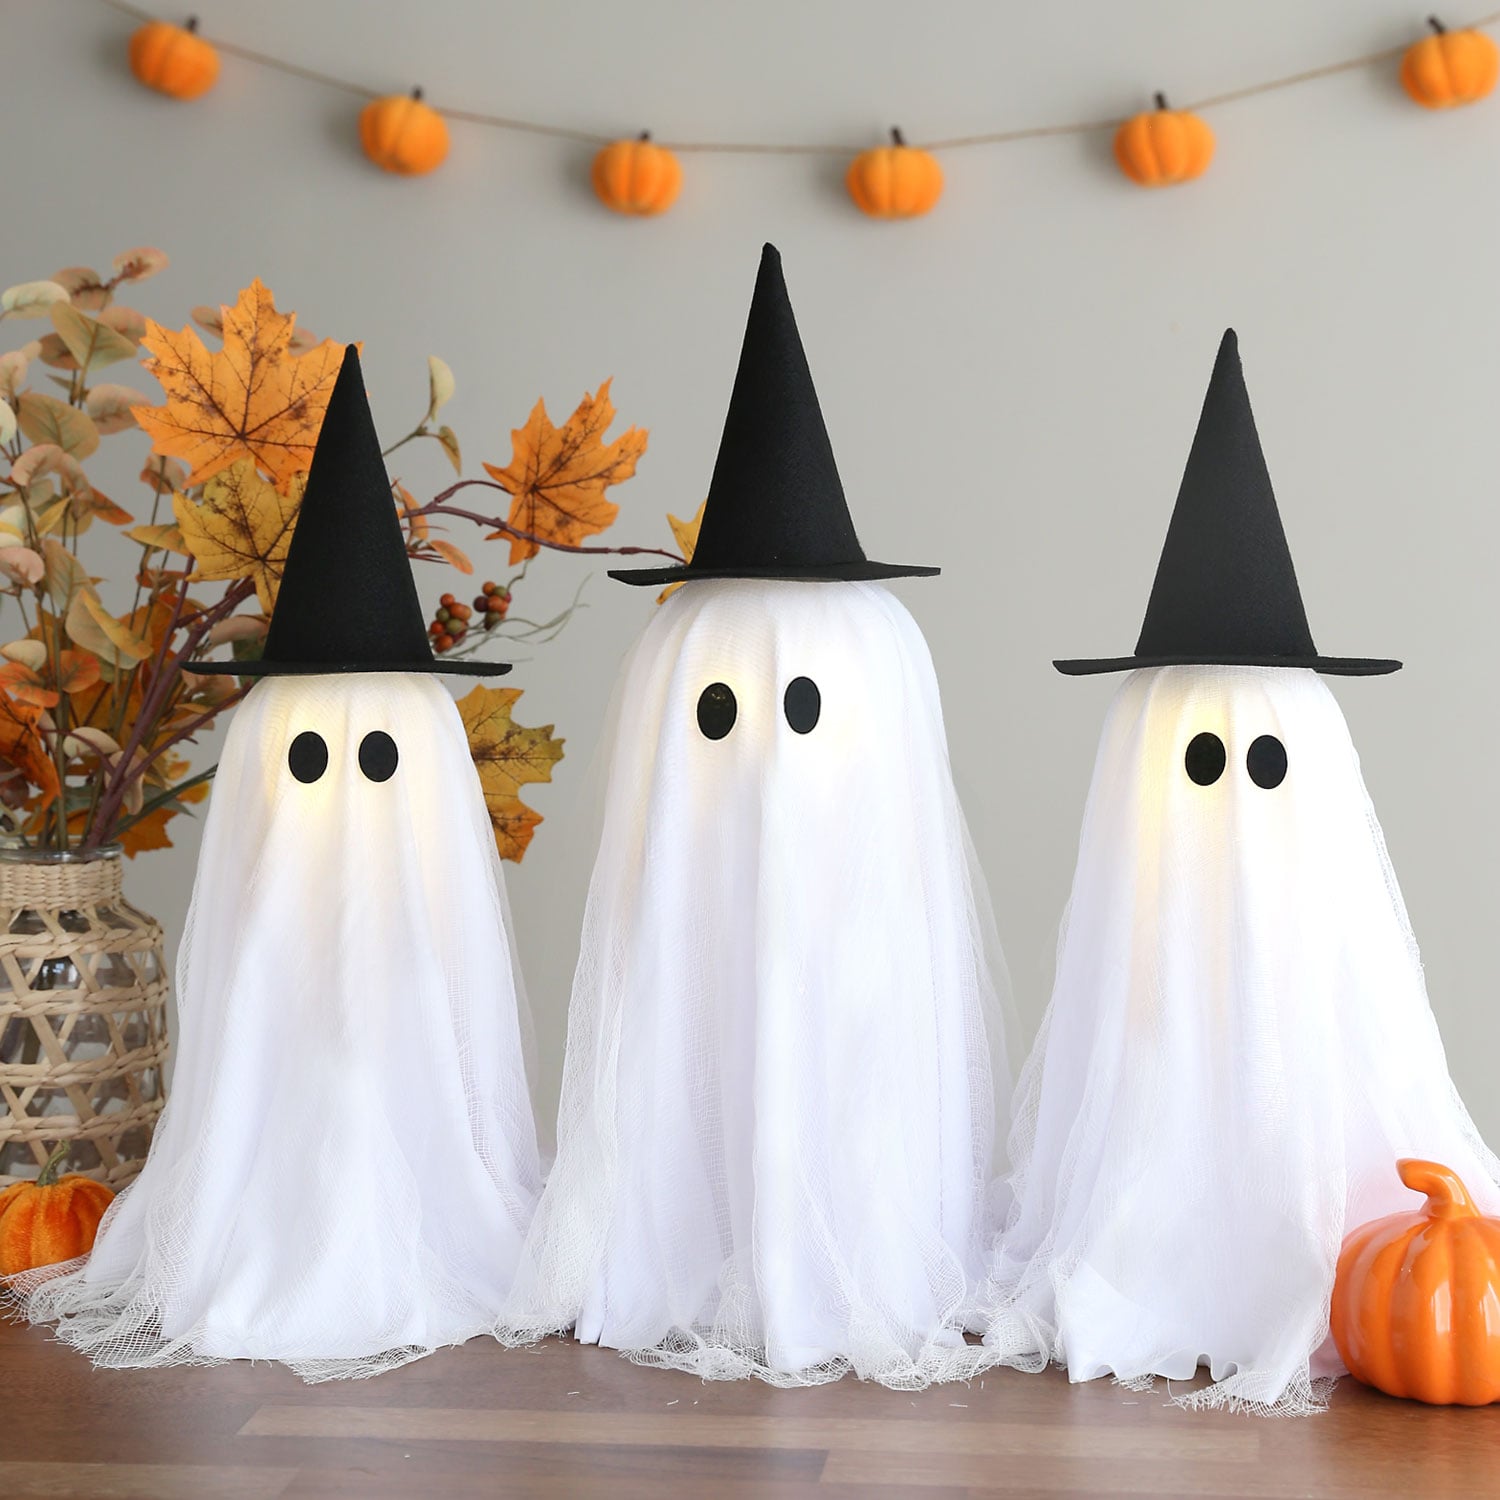
Three lit cheesecloth ghosts with black faces and tiny hats gather beside small pumpkins in the finished centerpiece. Autumn Baldwin created the Light-Up Ghost Centerpiece for It’s Always Autumn, and her post includes Amazon affiliate links. Hot glue belongs with an adult, and the string lights should be switched off whenever you leave the room. Find Autumn’s complete tutorial at It’s Always Autumn, along with more seasonal projects from the site.
5. Cupcake Pumpkin Decorations
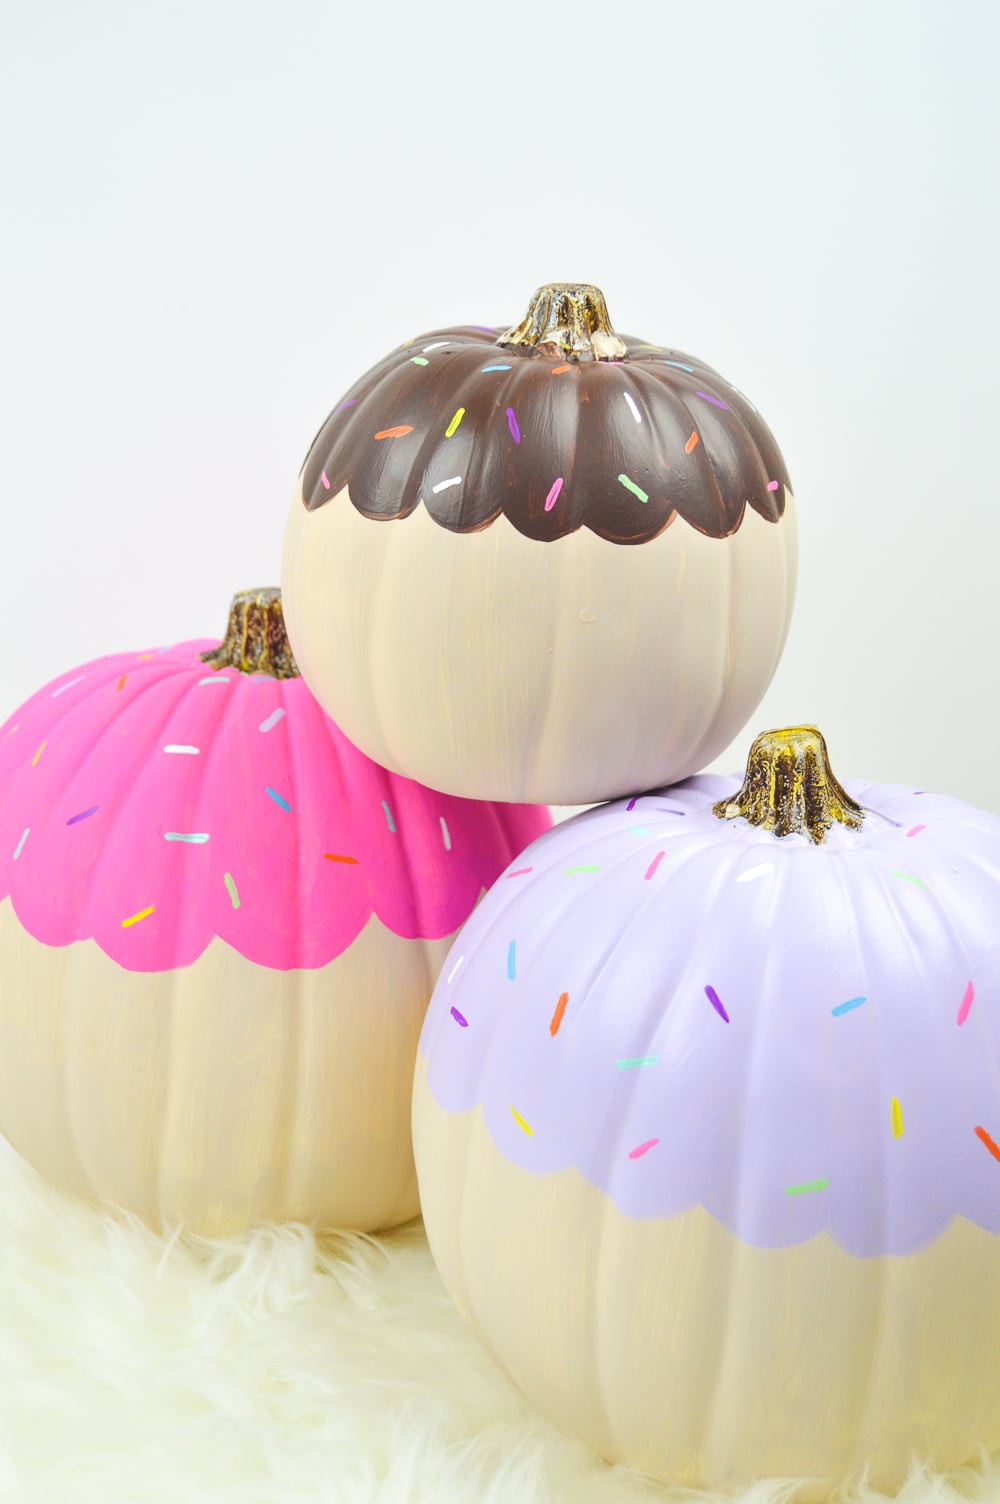
Cupcake pumpkin decorations turn three real or faux white pumpkins into a bakery-inspired display. Holly paints a cream base, adds scalloped frosting bands and dots on sprinkle marks. The brown, pink and lavender combination makes me smile. A second coat and optional stem color can sharpen the finish after every layer dries completely. Club Crafted shares Holly’s complete six-step tutorial plus more playful seasonal projects worth browsing.
6. DIY Skull Apothecary Jar
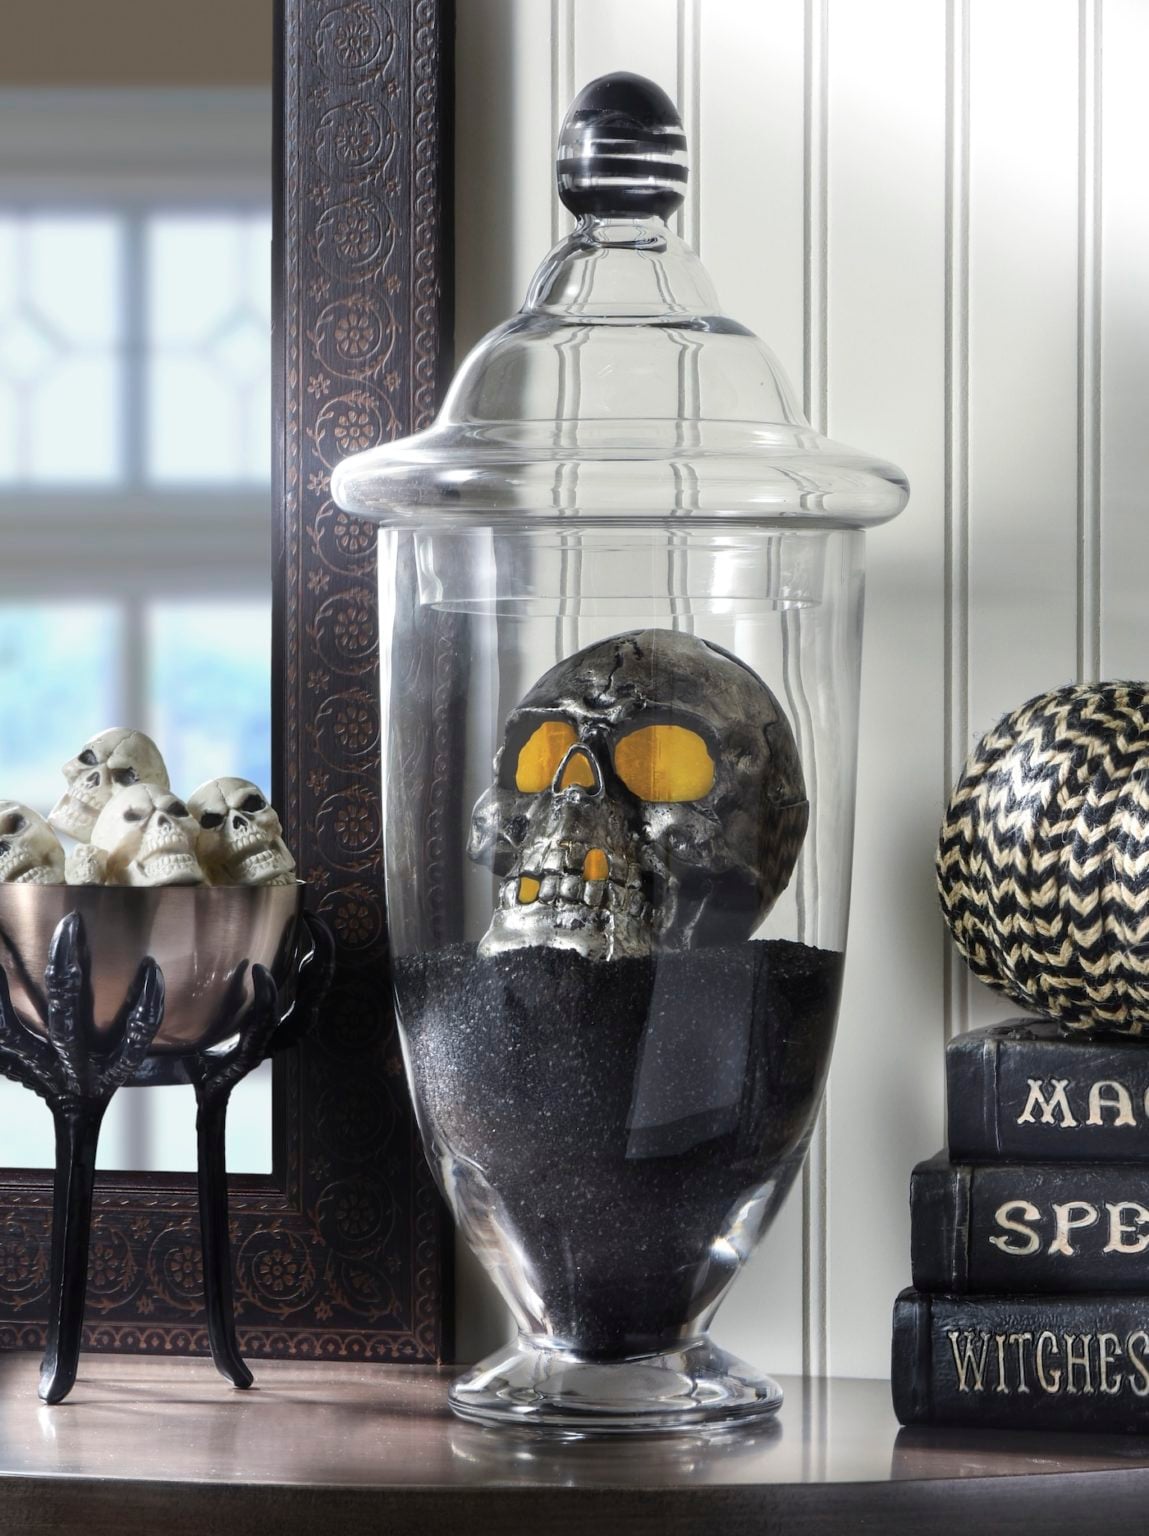
One DIY skull apothecary jar centers a black-painted skull over decorative black granules, with a switchable LED votive glowing inside the clear glass. The glow catches every hollow in the skull, which is the detail I find most dramatic. Amy’s finish involves a taped-and-painted knob, wiped black paint and full drying before the light goes in. For the complete apothecary-jar tutorial and more Halloween decorating ideas, visit Amy at DIY Candy.
7. Canning Lid and Washi Tape Halloween Wreath
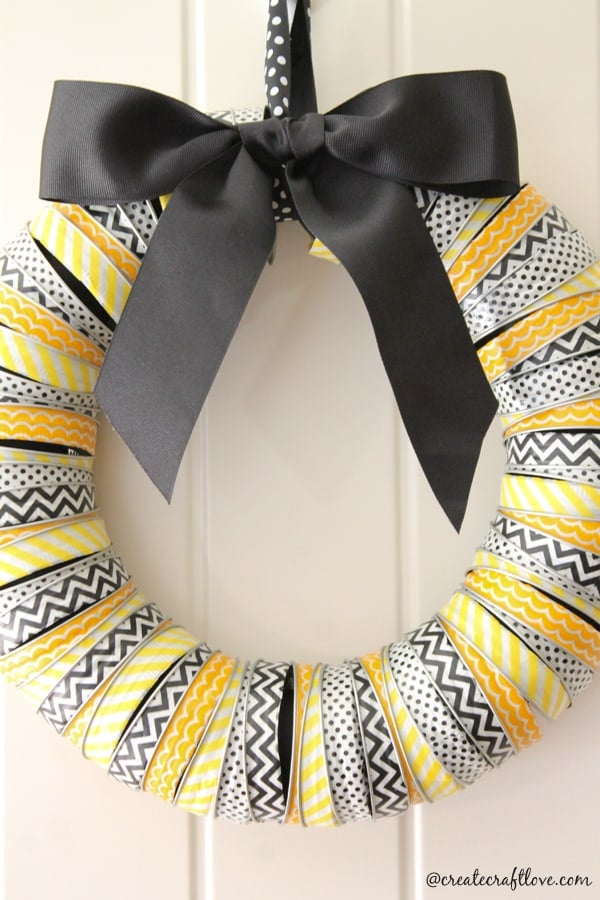
A canning-lid and washi-tape Halloween wreath brings 72 patterned rings into one bold black, white and yellow circle. The project wraps and seals the rings before fitting them to a foam form, but that wide black bow is what makes the repetition feel finished to me; hot-glue steps still deserve careful handling. See Create Craft Love’s complete wreath tutorial, then browse more of the site’s colorful seasonal craft ideas.
8. Hanging Paper Bat Flock
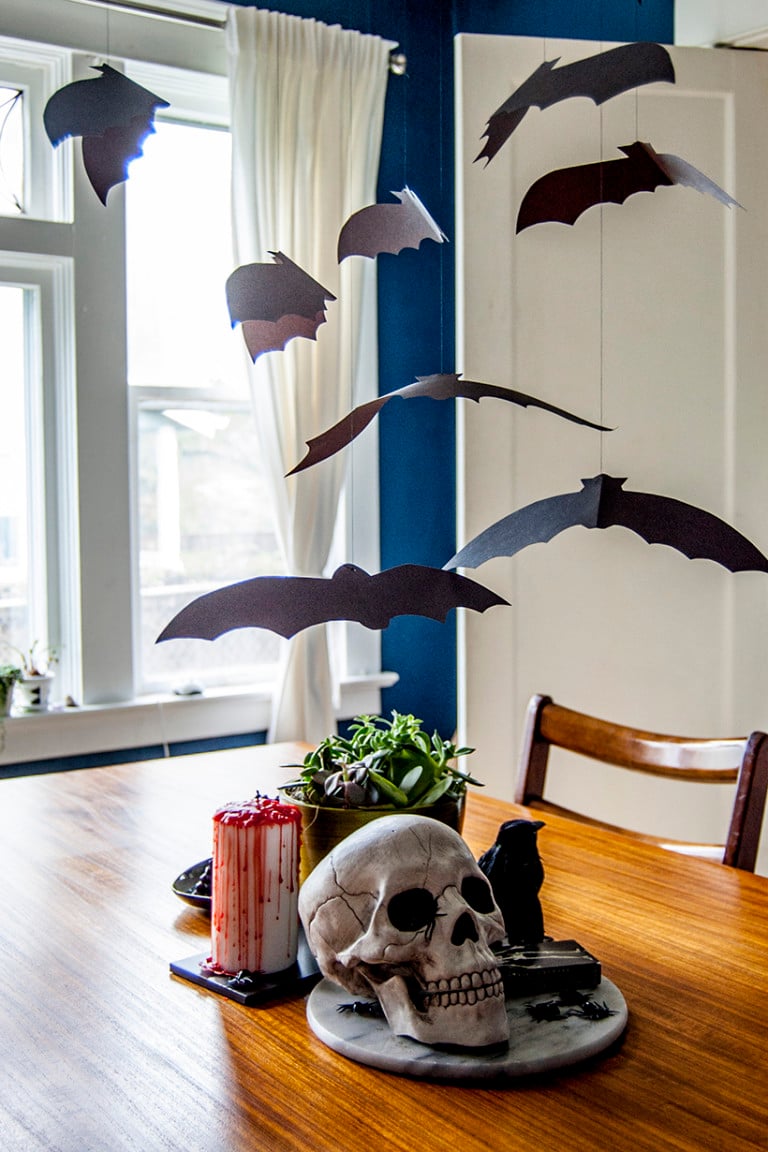
Want a flock that looks as though it’s flying across the room? Rachel’s hanging bat mobile at DIY in PDX uses black construction paper or cardstock, with each bat cut on the fold and threaded through its head at two points. Hung on thread at different angles, the bats have that midflight look. Handle the needle and scissors carefully. Rachel’s complete five-step bat tutorial is at DIY in PDX, along with more of her inventive projects to try.
9. Creepy Halloween Eyeball Lantern
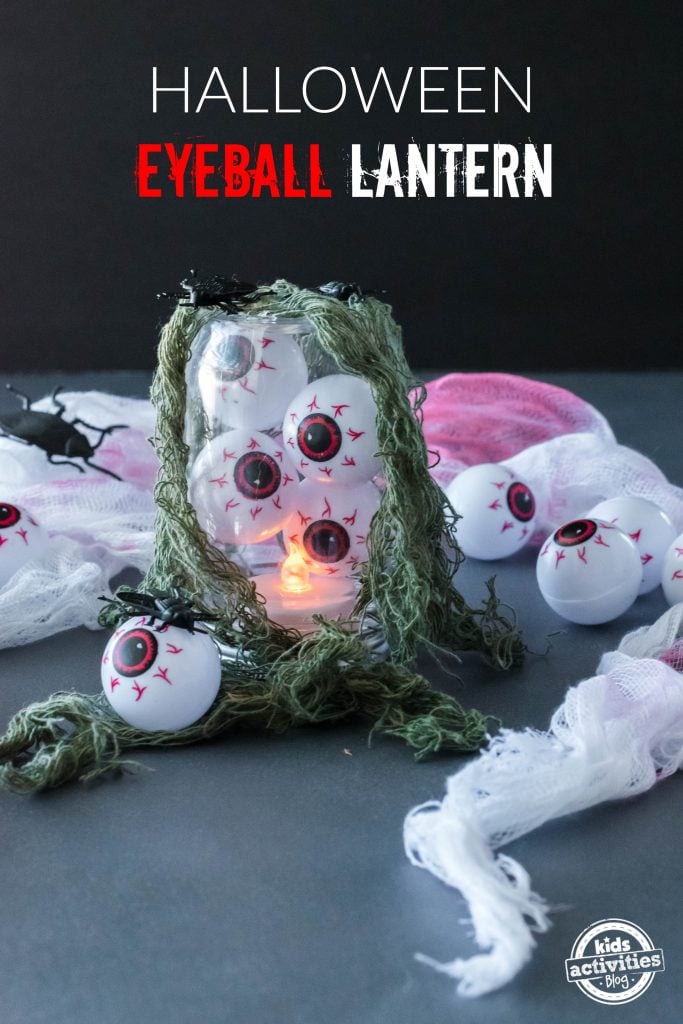
The creepy Halloween eyeball lantern packs loose plastic eyeballs into a plastic mason jar, hides a switchable LED votive beneath the lid and drapes the glow in green creepy cloth; I have to smile at how the eyes seem to stare back without an open flame. Kids Activities Blog has Brittanie’s complete 10-minute tutorial, including double-sided tape, scissors and hot-glue details, plus more of the site’s Halloween activity ideas.
10. DIY Halloween Bat Straw Toppers
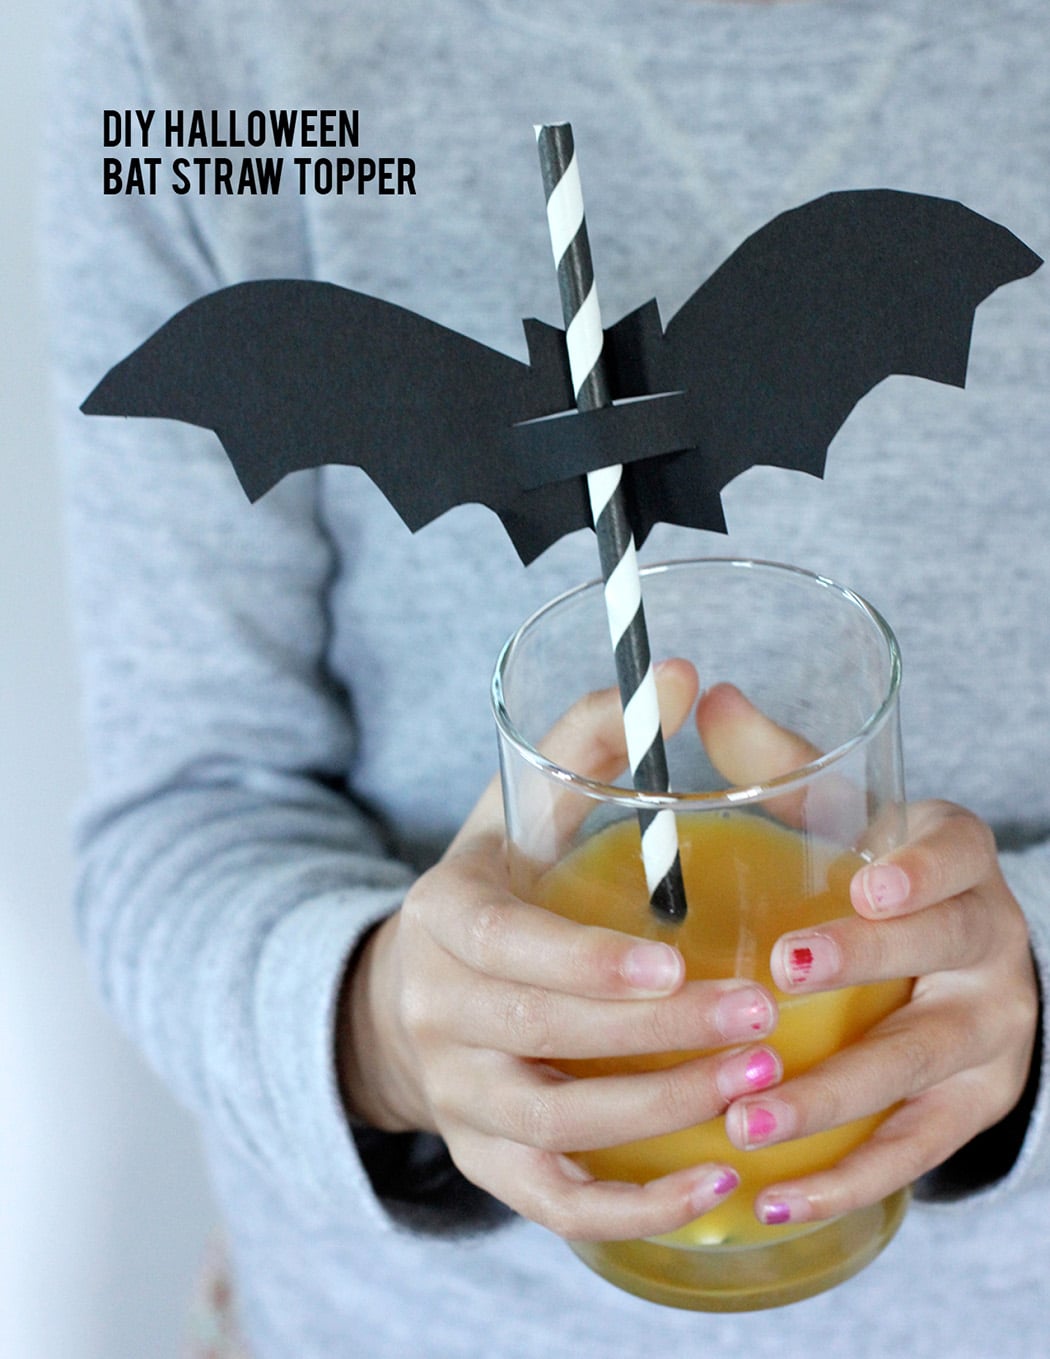
DIY Halloween bat straw toppers slide wide-winged black cardstock shapes over striped straws. I like that each bat dresses the glass without covering the drink. An adult should make the two X-Acto slits before the straw is threaded through. Alice & Lois shares Sara’s complete three-step topper tutorial and template, plus plenty more paper and party ideas to browse.
11. Halloween Paper Garland Cutouts
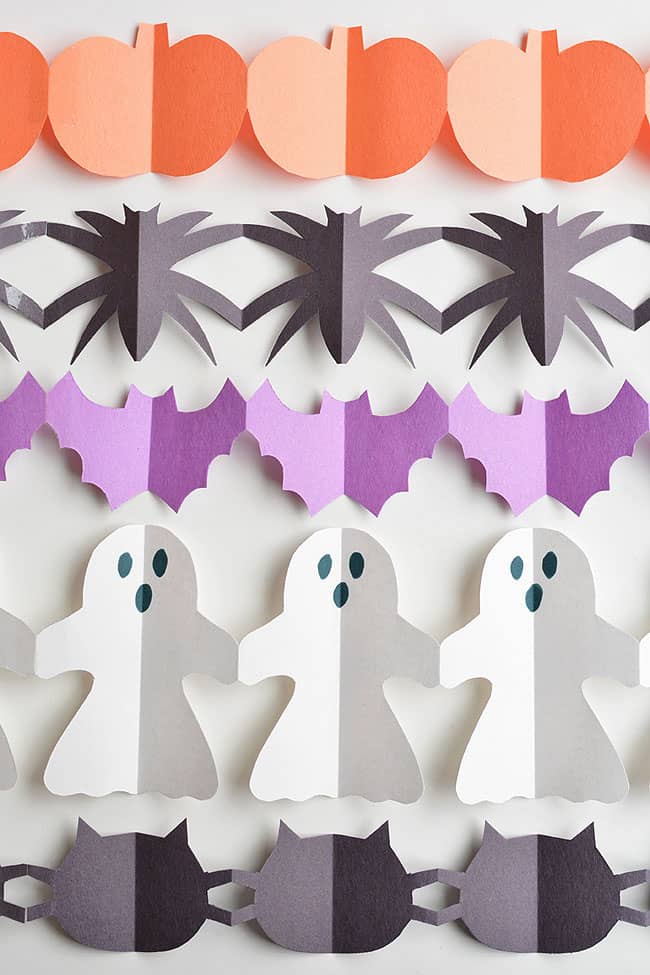
Halloween paper garland cutouts line up pumpkins, spiders, bats, ghosts and black cats in five crisp rows; the connected shapes delight me because they read as one decoration instead of a scatter of loose pieces. Find Debbie’s complete tutorial and original template at One Little Project, then browse more of her project ideas while you’re there.
12. Raven Poem, Nevermore Banner and Bird Art
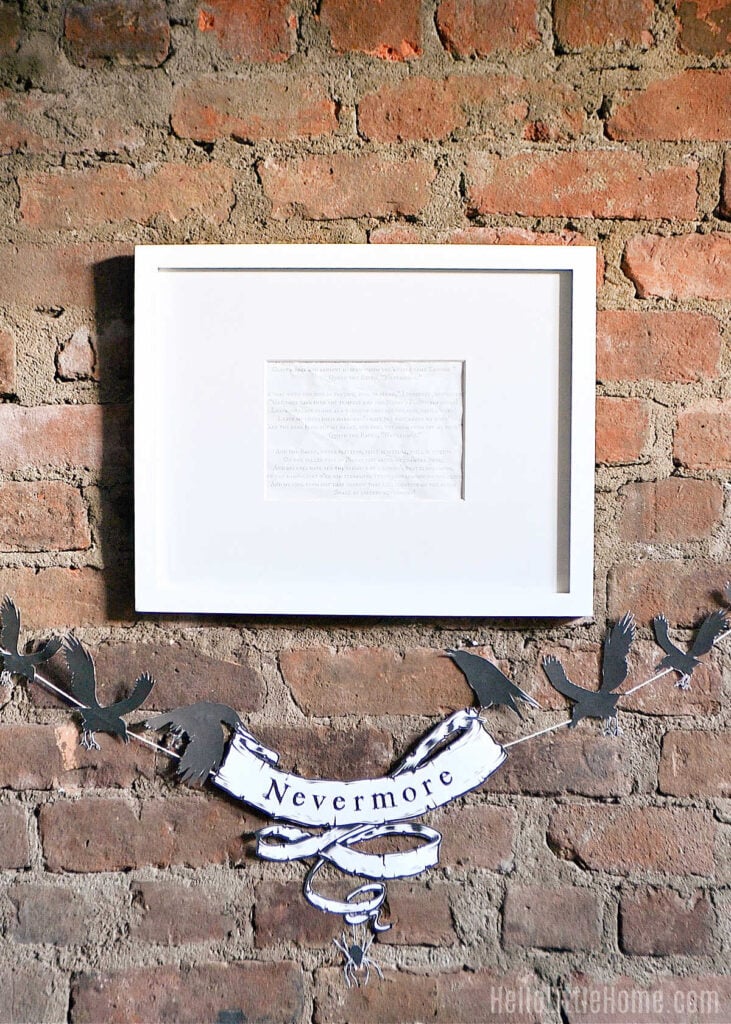
Give your Halloween wall a literary twist with Ginnie’s Raven poem, Nevermore banner and bird art. At Hello Little Home, she pairs a framed print with black birds across the brick, curled banner ends and a spindly spider. It’s moody without feeling crowded. Ginnie shares the complete display tutorial and printable set, with more of her project ideas to explore at Hello Little Home.
13. Creepy Halloween Floral Arrangement
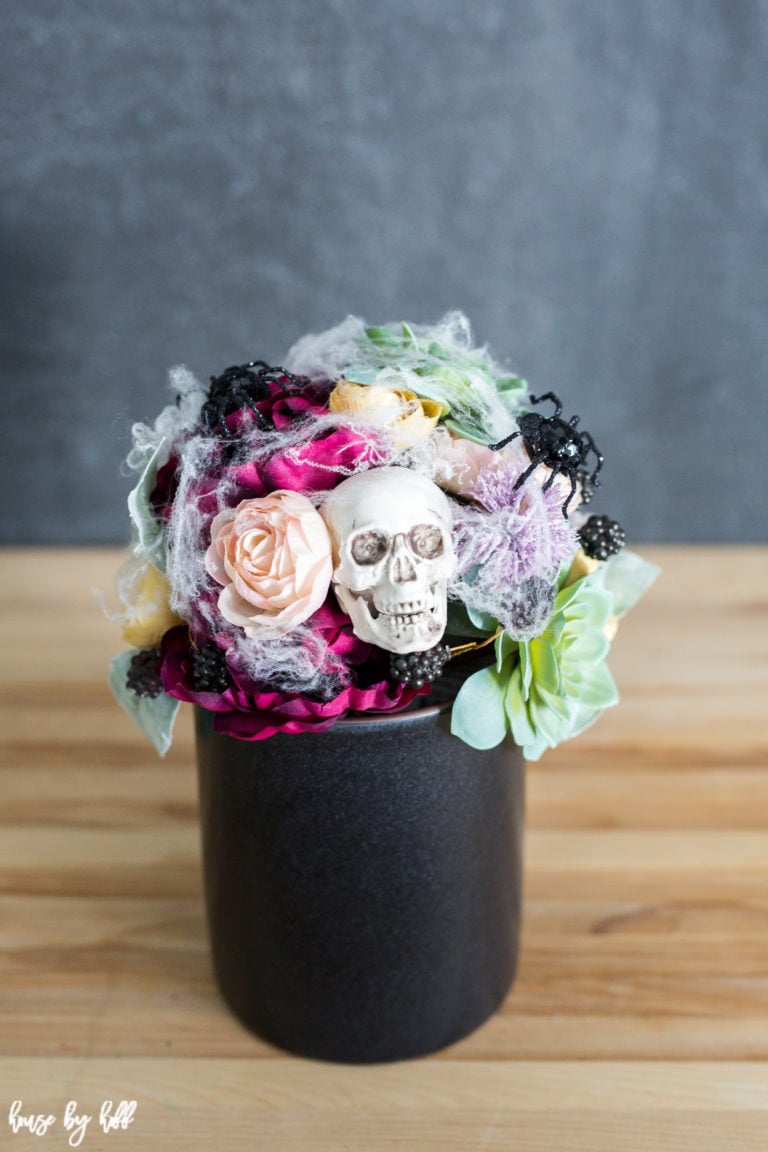
A creepy Halloween floral arrangement tucks skulls, faux cobweb and jeweled spiders into a colorful fall bouquet in a black crock. Against all those soft flowers, that dead-center skull feels more elegant than gory to me. House by Hoff has the complete arrangement tutorial, then plenty more of the site’s decorating ideas to discover.
14. Paper Plate Ghost
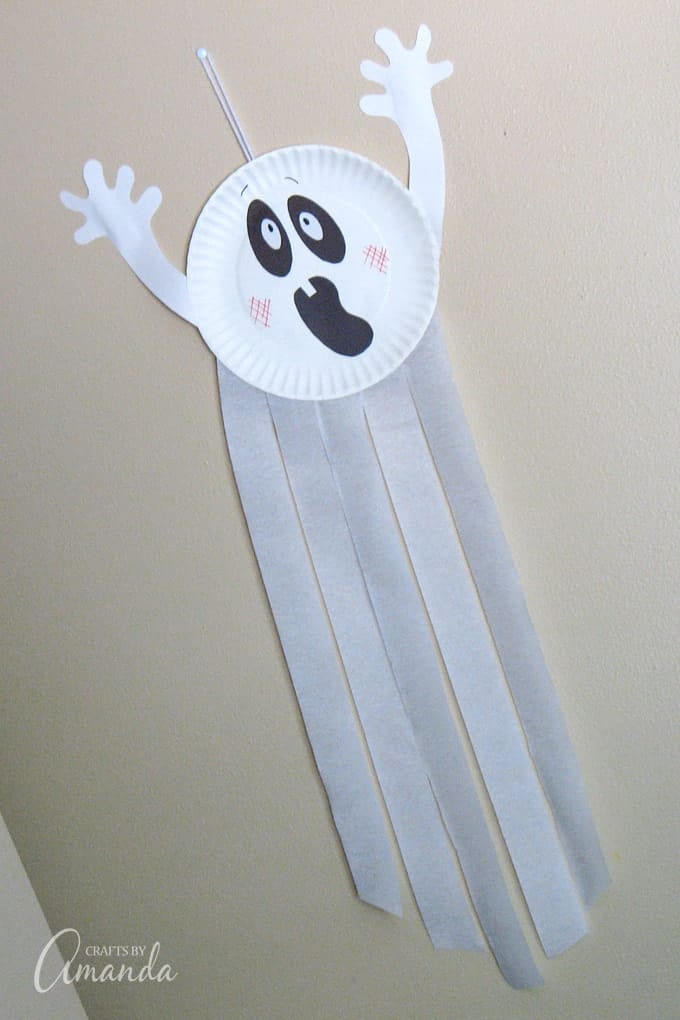
The paper plate ghost has a round face with construction-paper eyes and upraised arms. Five 24-inch crepe-paper streamers fall below it, while a taped yarn hanger holds the finished decoration. An adult should supervise the scissors. I can’t decide whether the surprised mouth or those fluttery strips give it more personality. Head to Crafts by Amanda for Amanda’s complete tutorial and pattern, then see what else she is making.
15. Dripping Red Wax Crayon Candles
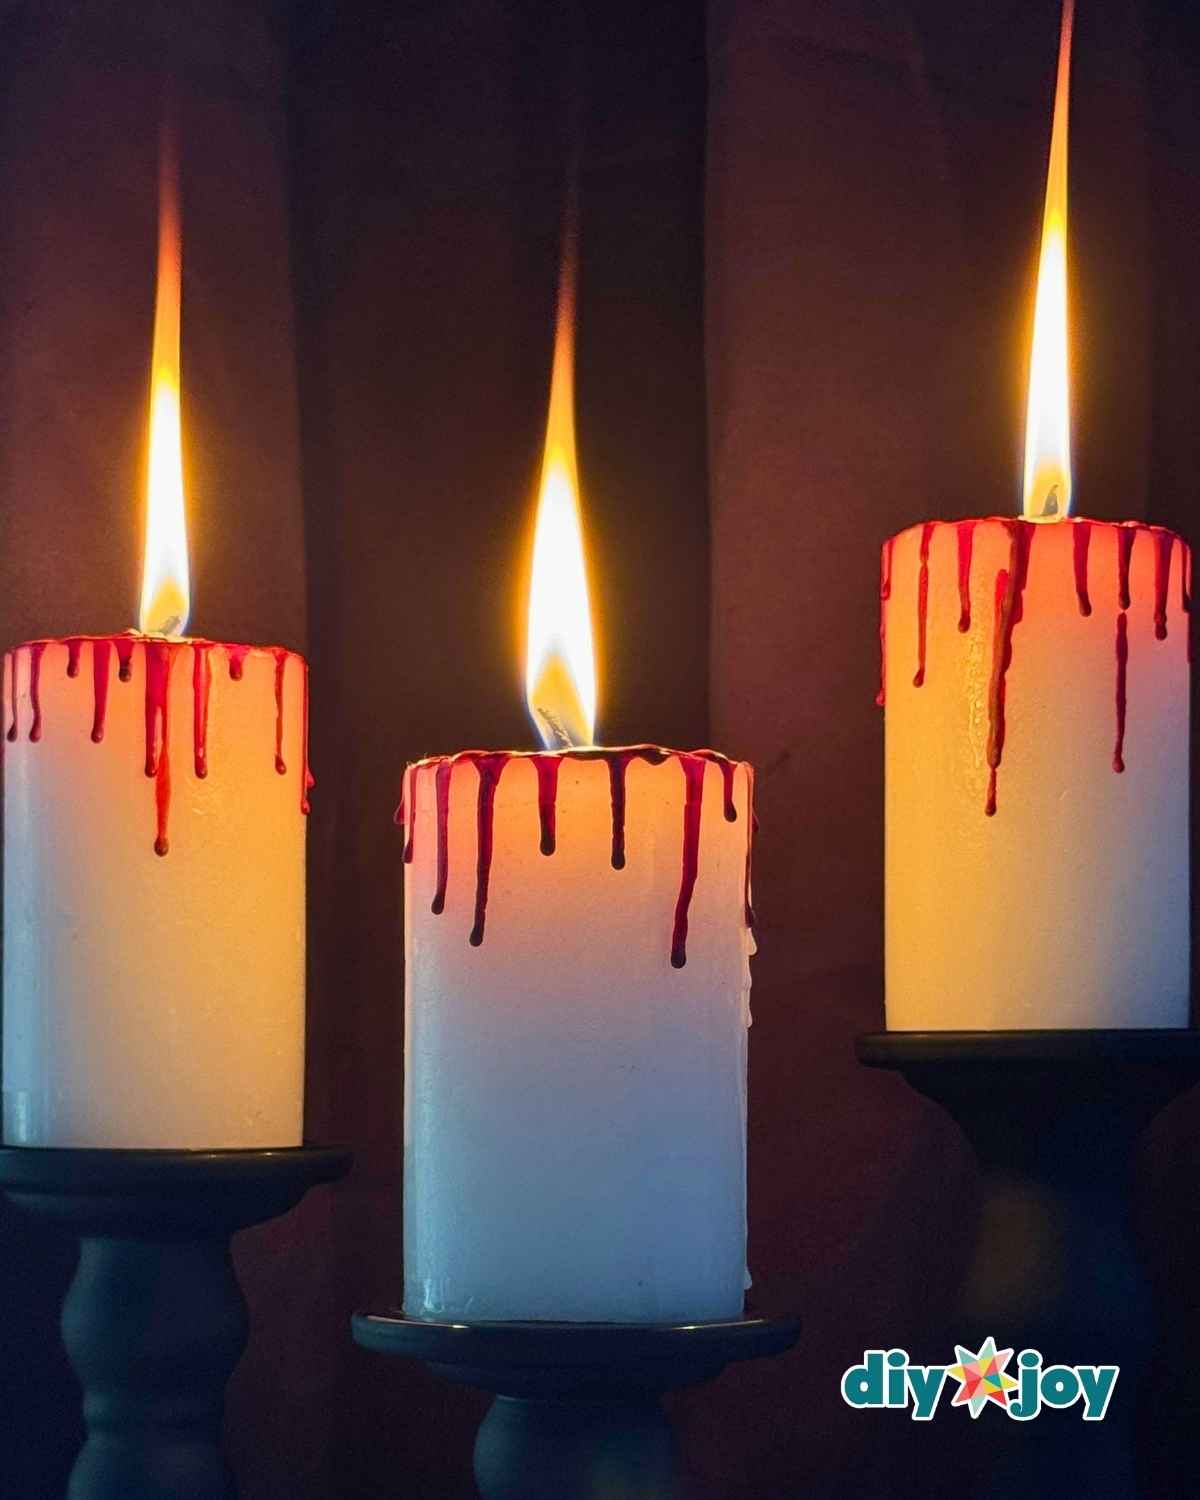
One red crayon and a plain white pillar candle are all it takes to fake a haunted house look on the mantel. Set the candle on scrap paper and light it, peel the crayon (a broken stub is fine), then warm its tip in the flame until it goes soft and runny. Touch it to the rim and the red wax trickles down the sides in long, eerie drips. Work your way around until it looks properly sinister. Plan on ten to fifteen minutes and almost no money, then stand the finished candles on black candlesticks for a gothic finish. Follow the full candle tutorial on DIY JOY.
16. Decorated Paper-Mache Halloween Witch Hat
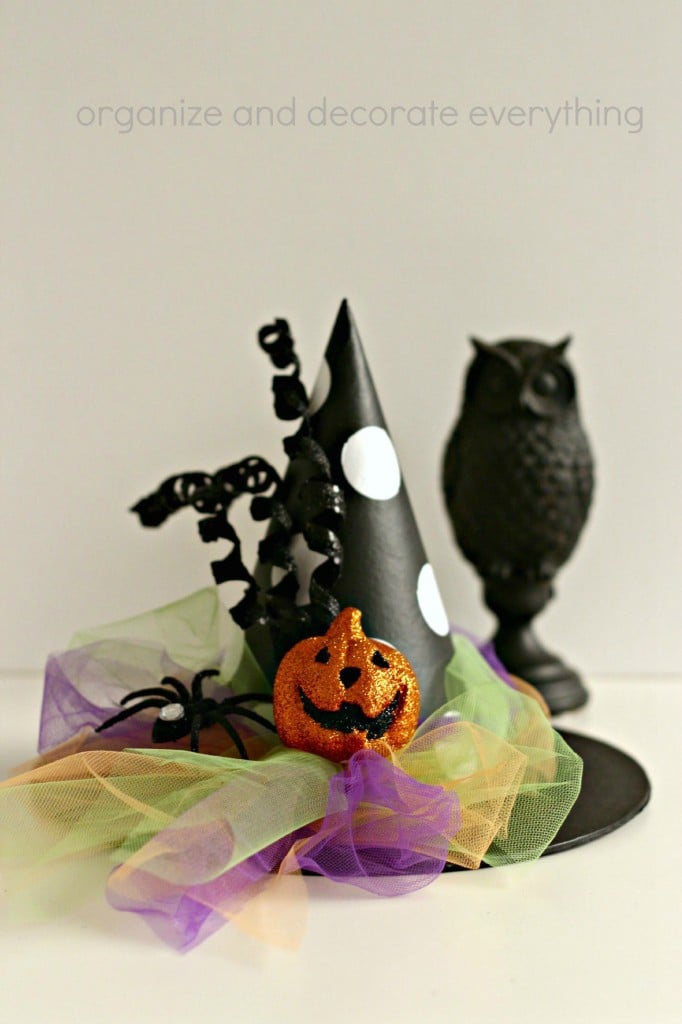
Polka dots on a witch hat? Yes, please! This paper-mache decoration from Organize and Decorate Everything combines a black-painted form and punched white vinyl dots with colored tulle. Hot-glued spiders, bats and a glitter pumpkin make it ready for a mantel or bookcase; leave the hot glue to an adult. The tidy dots and unruly tulle are such a fun contrast. Find the complete witch-hat tutorial at Organize and Decorate Everything, then browse more seasonal decorating ideas.
17. Yarn-Laced Mummy Paper Plate Craft
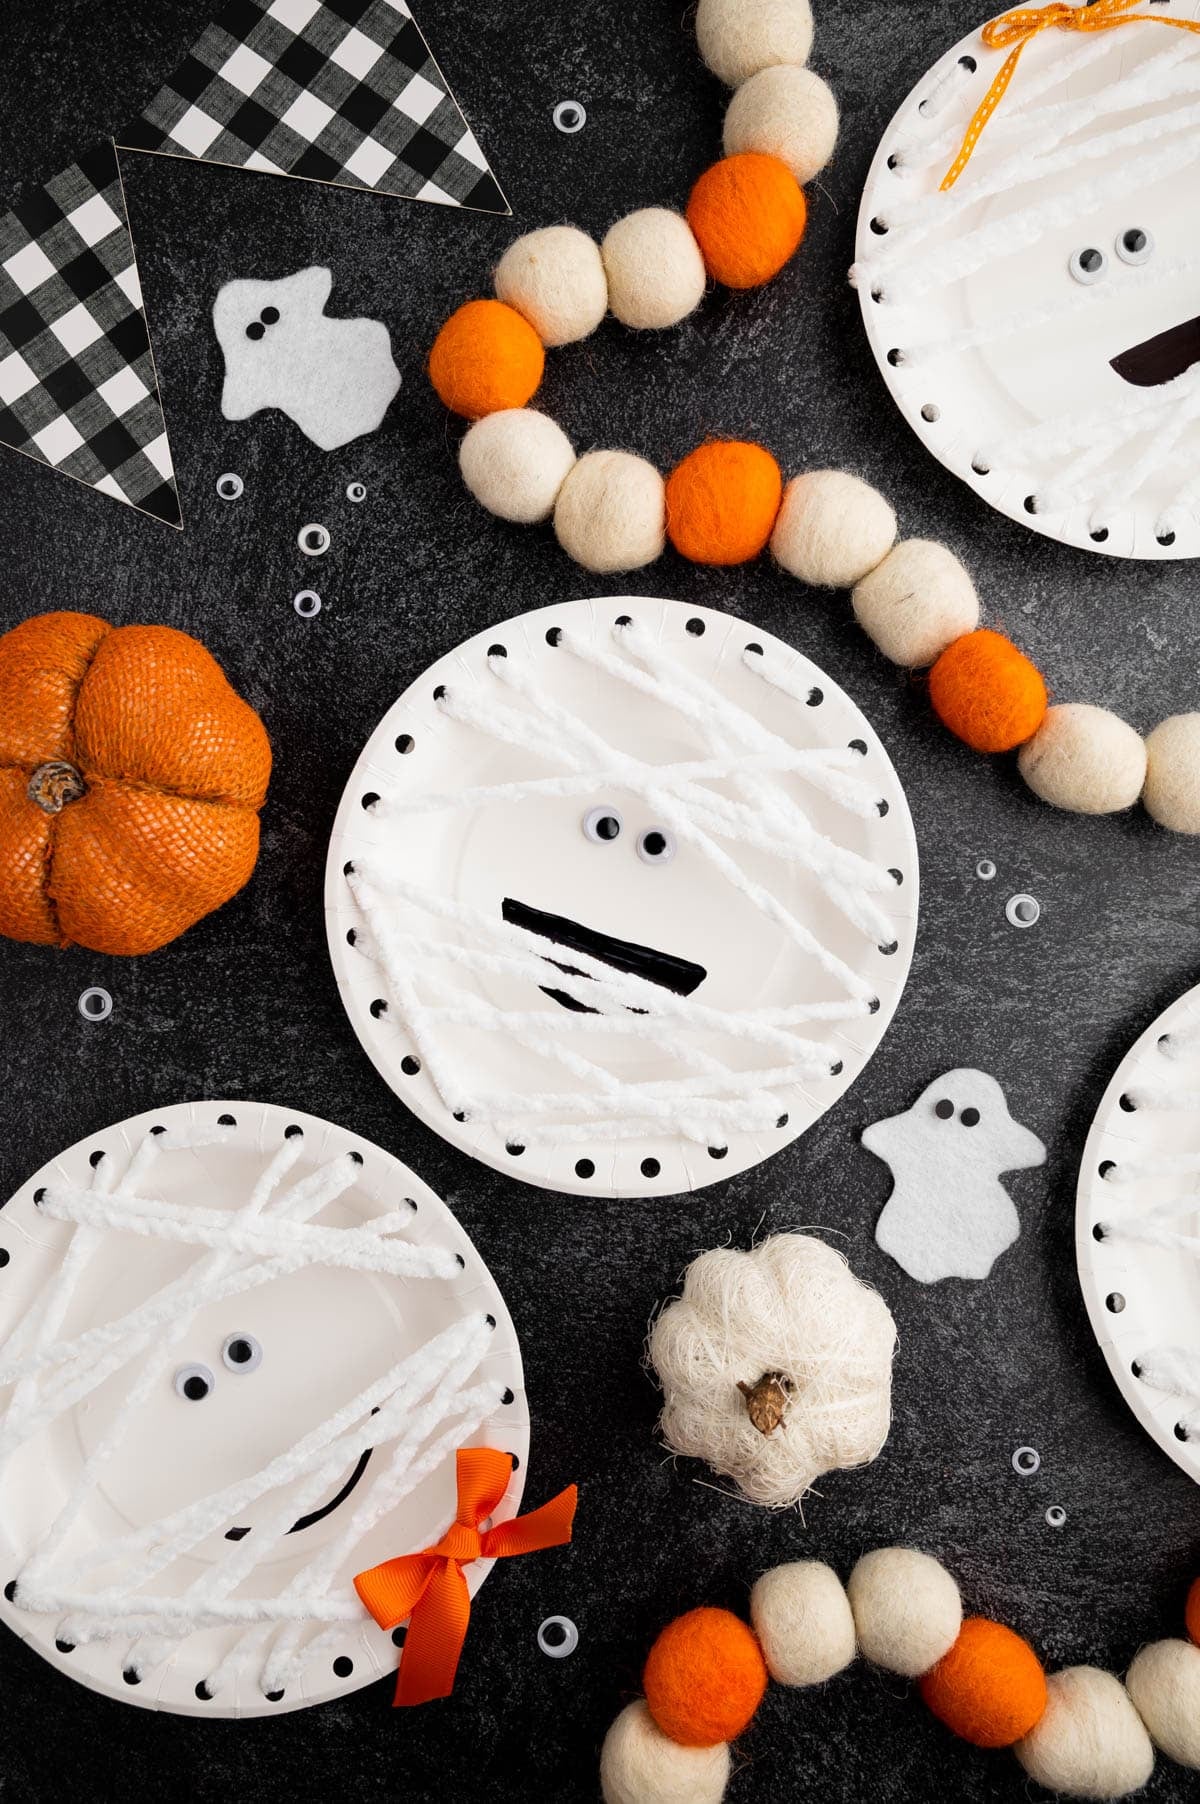
Happiness Is Homemade’s yarn-laced mummy paper plate craft wraps white yarn around a drawn mouth and glued googly eyes. An optional ribbon can finish the plate while the eyes remain visible between the strands. The source estimates 15 minutes, but I’m most taken with how every crossing changes the mummy’s expression. Scissors and a hole punch need supervision, and younger kids should use school or tacky craft glue instead of hot glue. Follow Happiness Is Homemade’s complete mummy tutorial, then explore more of the site’s Halloween craft ideas.
18. Geo Mesh Eyeball Halloween Wreath
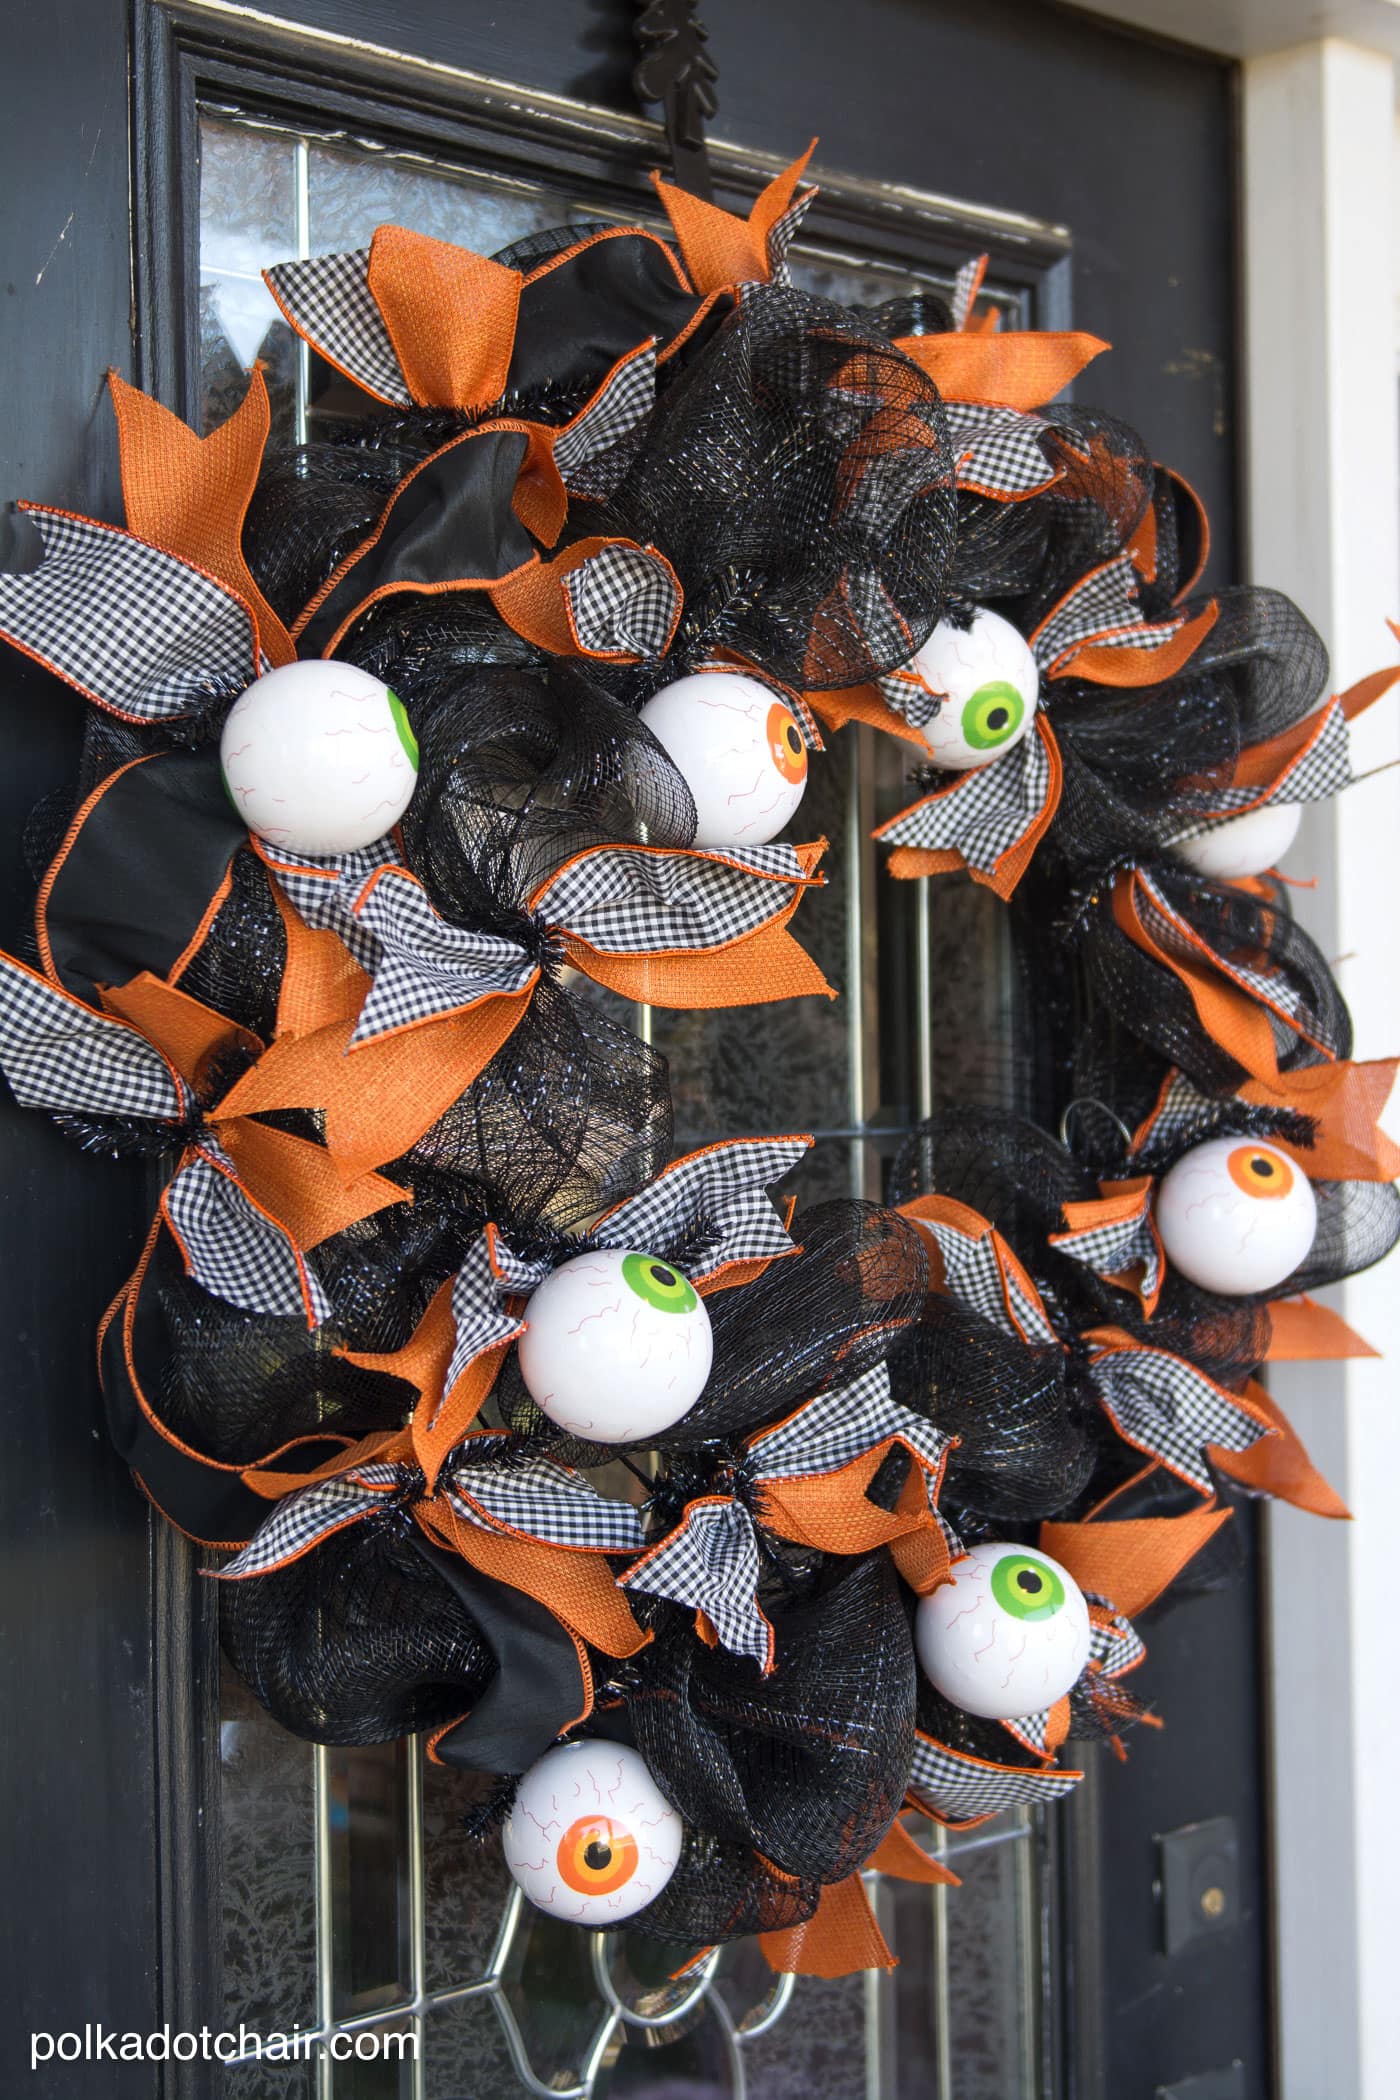
No hot-glue gun for this wreath! Melissa Mortenson uses a twist-tie frame for her geo mesh eyeball wreath at Polka Dot Chair, layering black mesh with wired ribbon and hanging eyeball ornaments. Orange and gingham show up in six-inch ribbon strips against the dark mesh. Those oversized eyes do the staring for you. Take care with the scissors, then turn to Melissa’s complete wreath tutorial and more of her Halloween projects at Polka Dot Chair.
19. Halloween Rocking Paper Monster
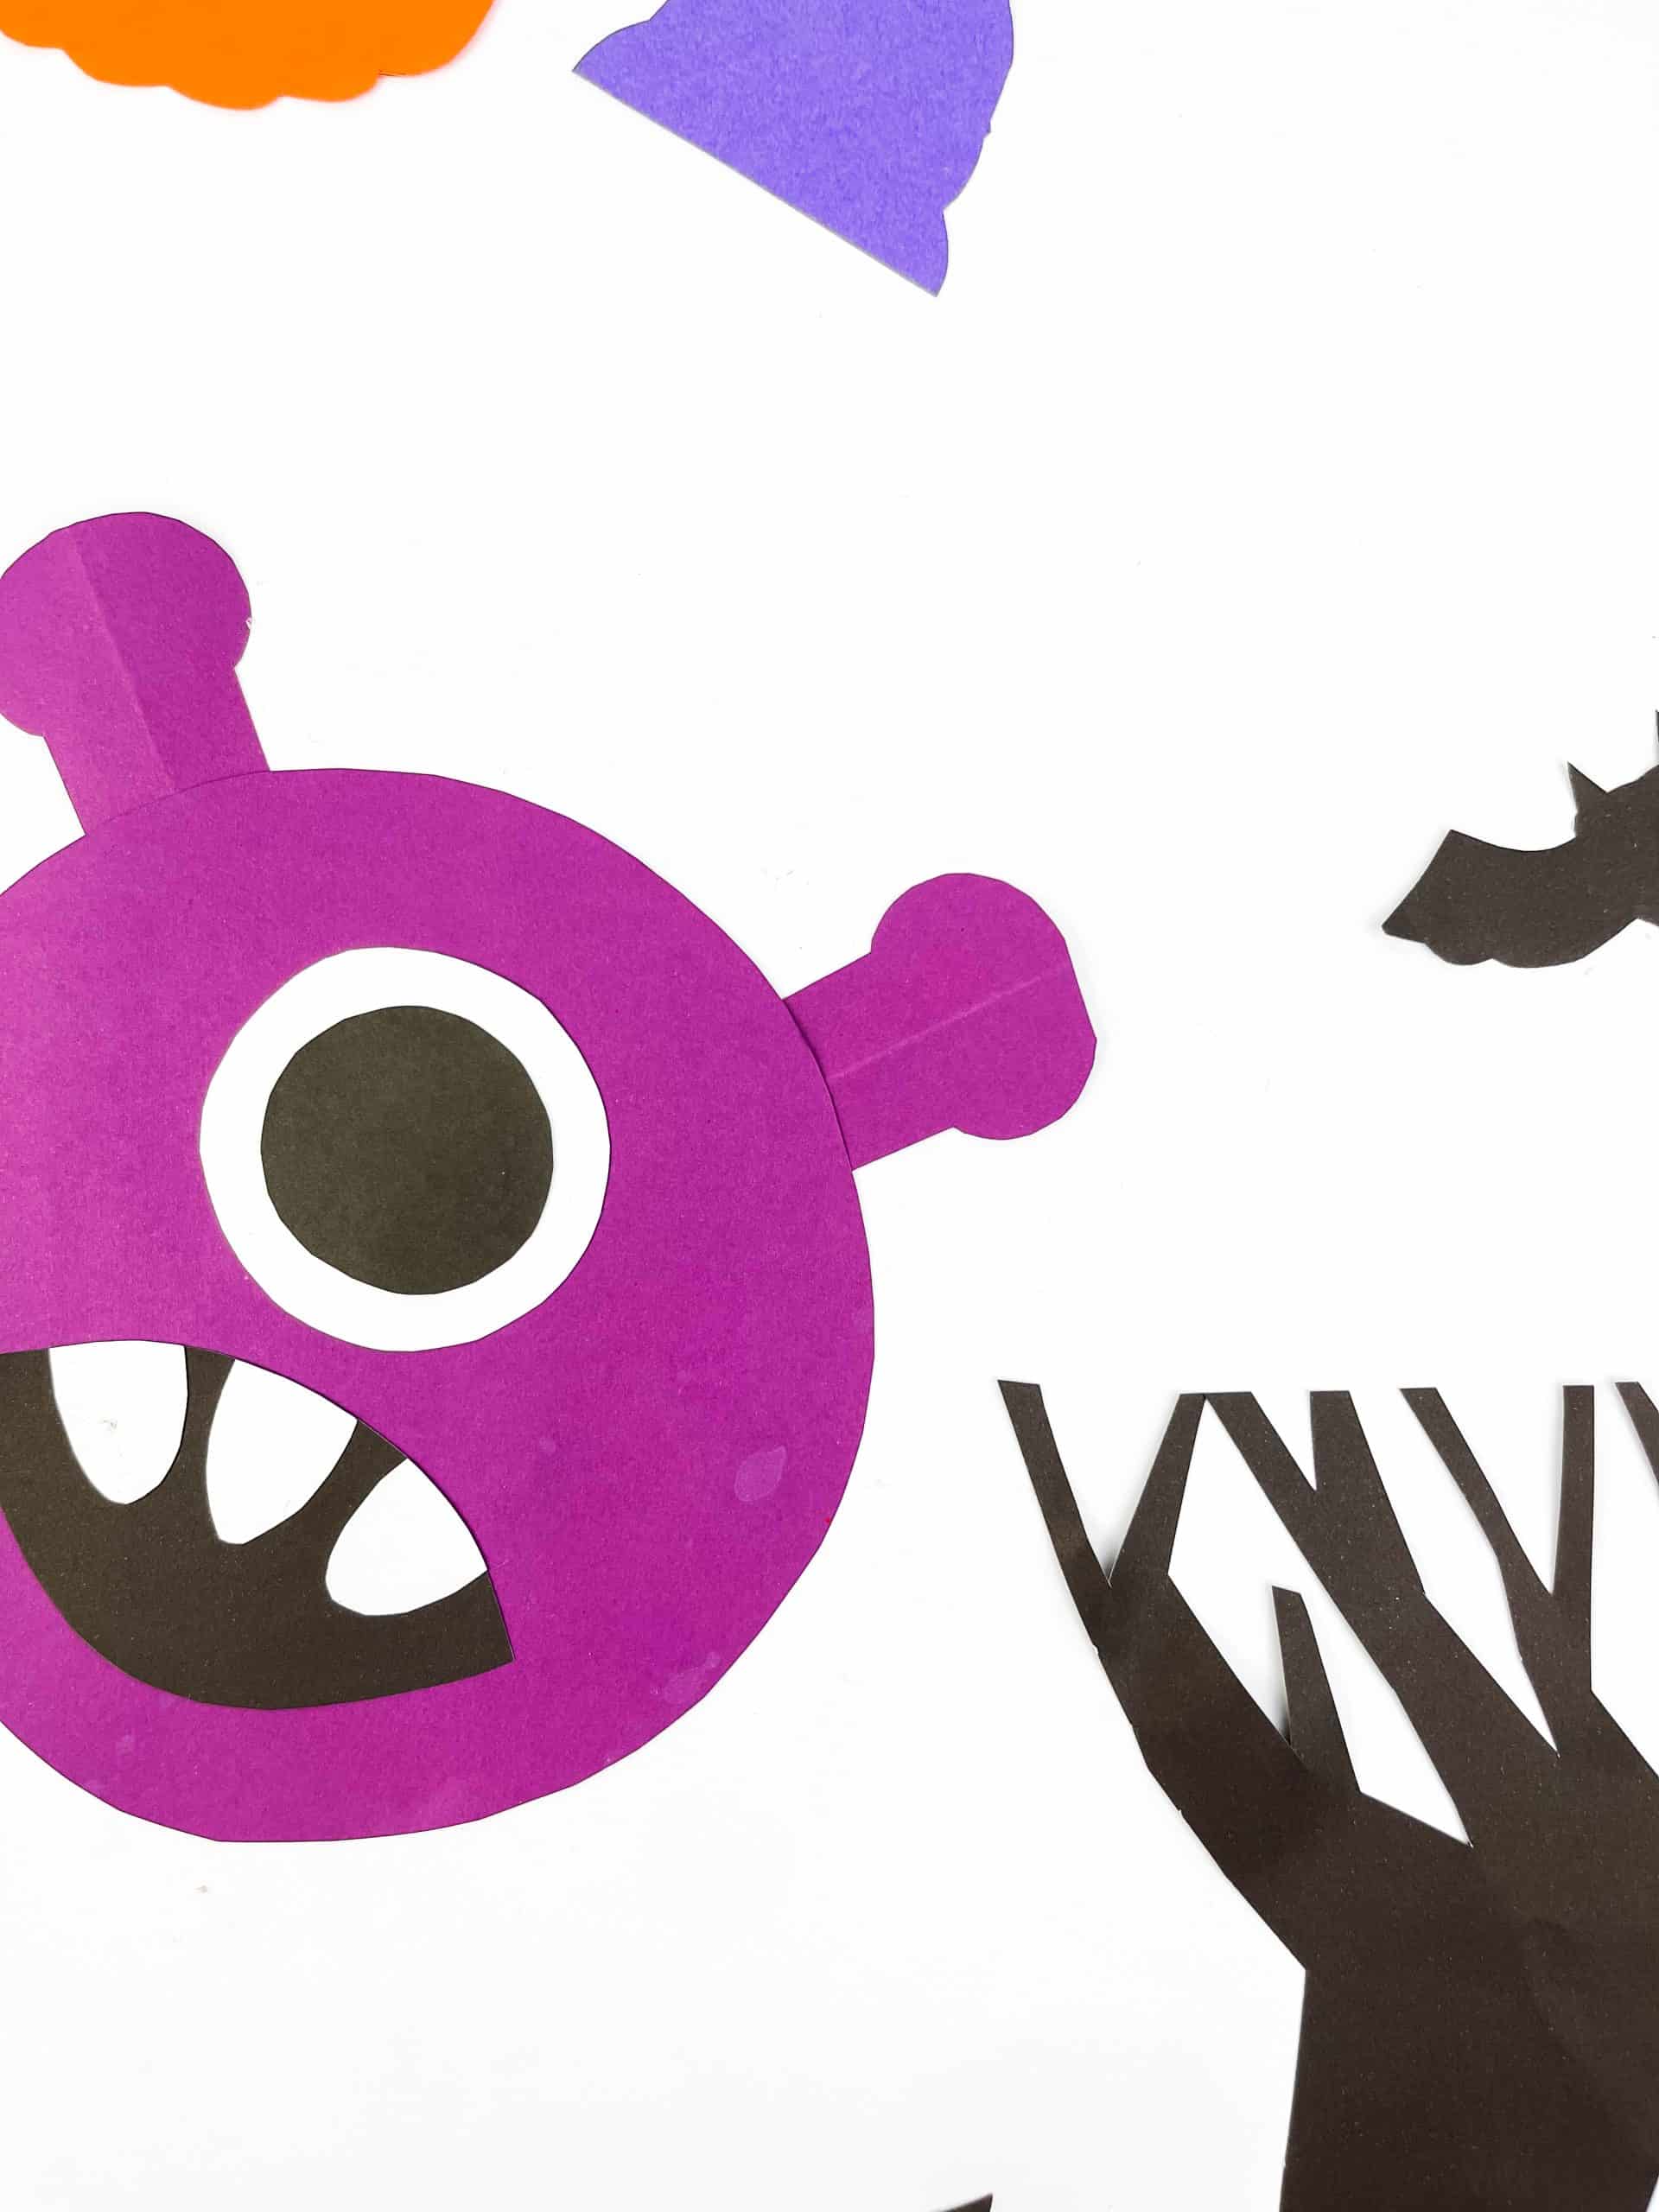
In The Playroom’s Halloween rocking paper monster folds a large construction-paper circle into a curved base, then builds its one-eyed face with a second circle, horns, mouth and teeth. I love how the purple character seems ready to wobble right off the table; an adult should supervise the cutting, and googly eyes or foam shapes can stay optional. Find the complete rocking-monster tutorial at In The Playroom, then browse more of the site’s colorful paper-craft ideas.
20. Recycled Milk-Jug Ghost Luminaries
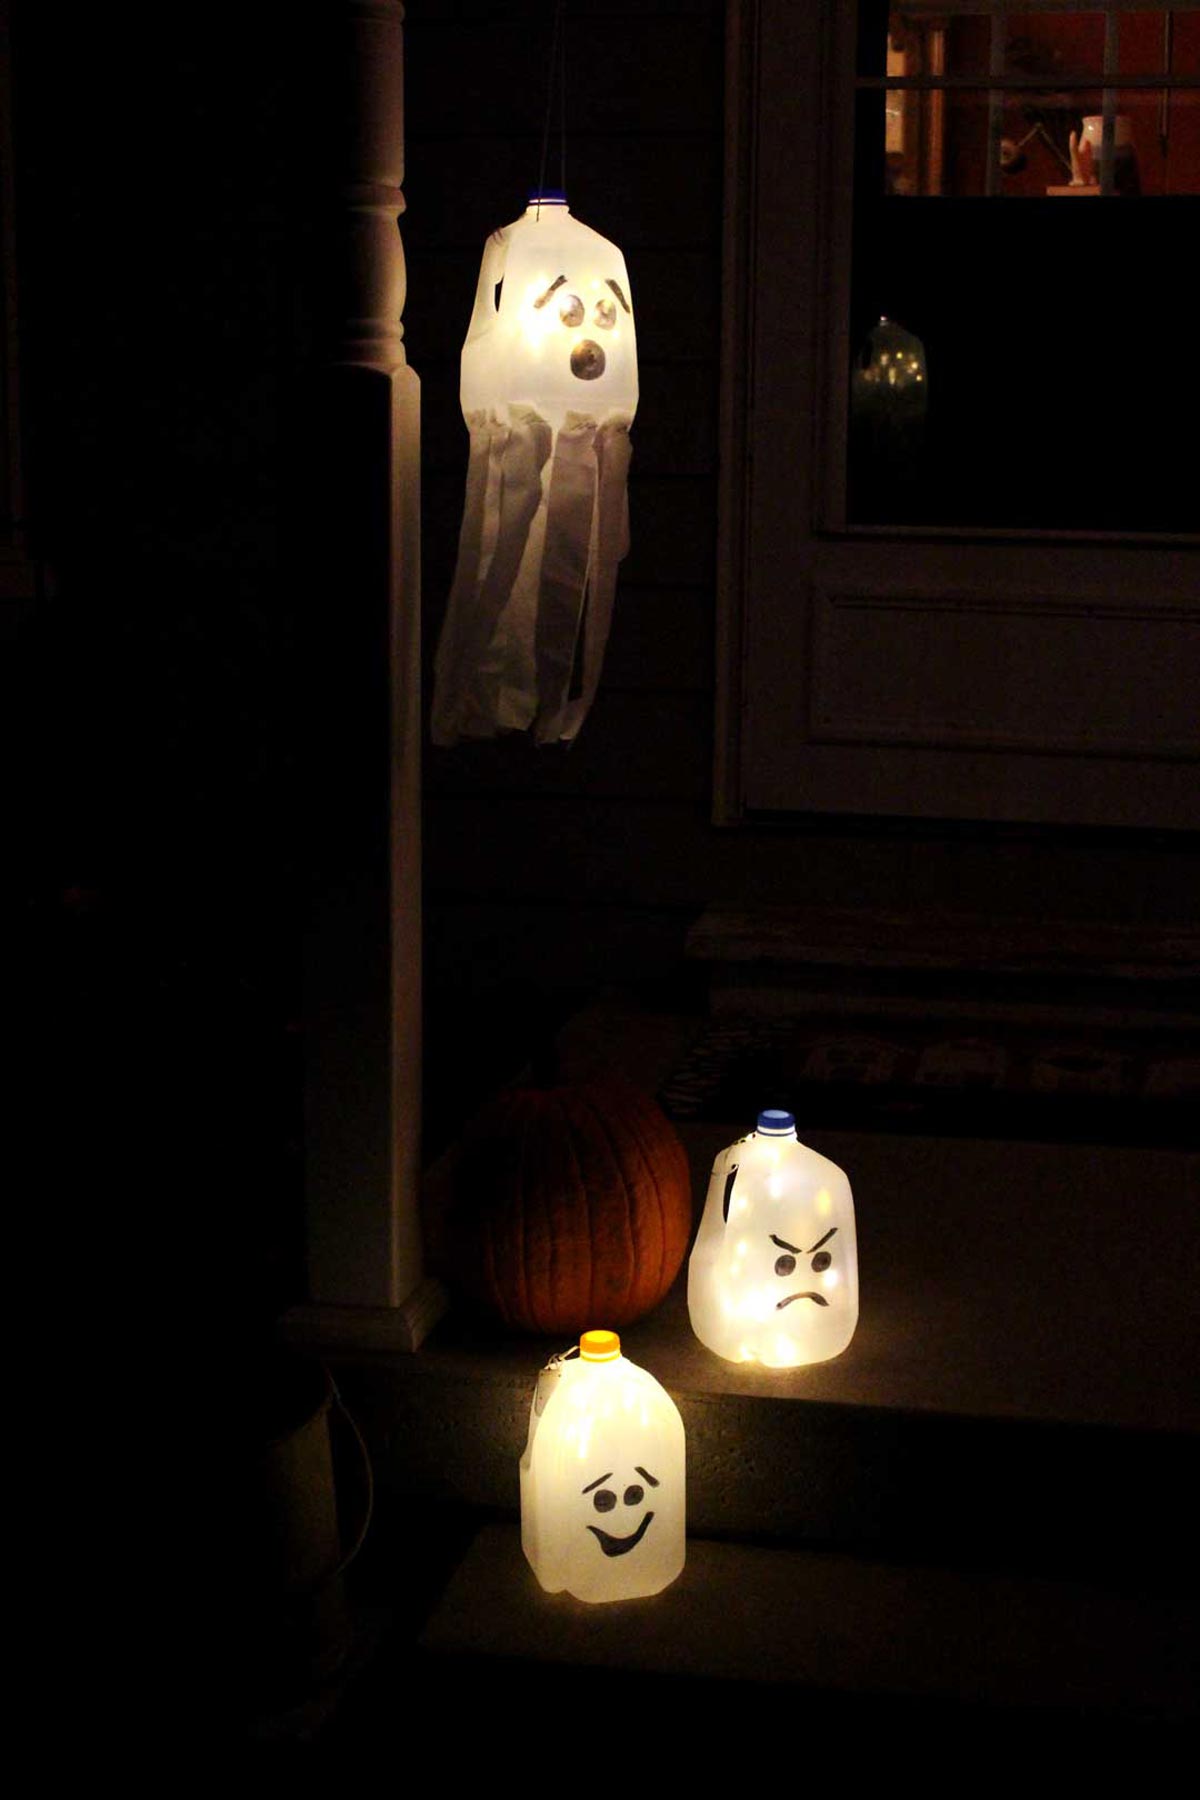
Battery lights only for these ghosts, never a real candle. Shelly’s sitting milk-jug luminaries at Welcome to Nana’s use clean, dry recycled jugs with marker-drawn faces and battery-powered fairy lights or LEDs inside. Keep each switch within reach at the handle so you can turn that soft glow on and off. A friendly pair rather than a frightening one! Shelly’s complete sitting-luminary tutorial has the project details, and you can explore more of her seasonal craft ideas at Welcome to Nana’s.