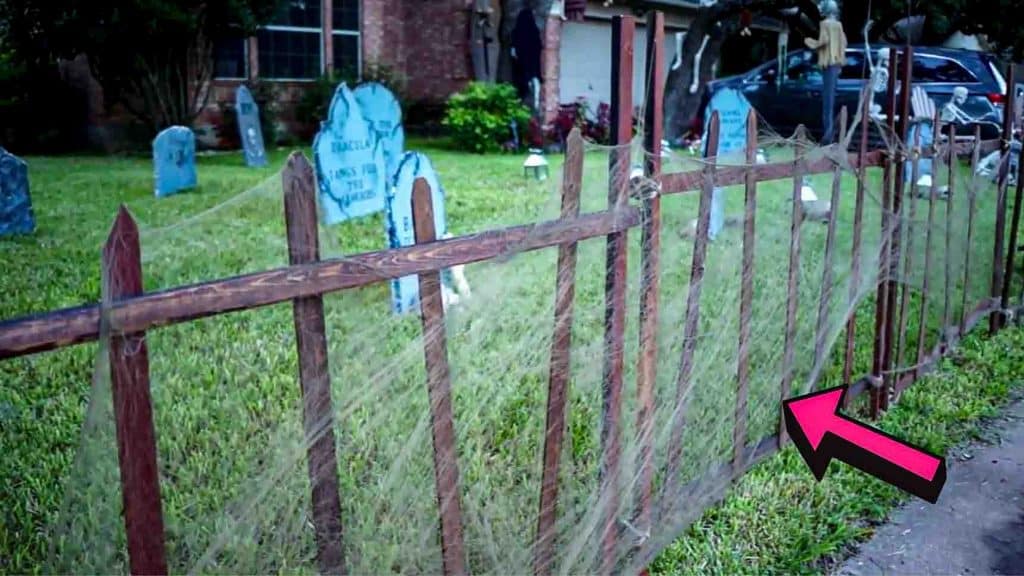
October means Halloween is almost upon us! Are your spooky decorations ready yet? If not, add this super easy cemetery fence from Wicked Makers on Youtube. It’s a super easy project you can make that will totally elevate your Halloween decor, especially if your theme is a haunted cemetery. Check out the step-by-step instructions in the video below.
Materials:
- 1″ x 2″ pine strips
- 0.25″ x 2″ pine lattice strips (optional)
- brown twine
- outdoor wood glue
- brown/redwood stain or paint
- stretchy Halloween spider webbing
Tools:
- saw
- hammer & nails (or brad nailer, etc.)
- scissors
- measuring tape
- pencil
- hot glue gun (optional)
Directions:
Step 1
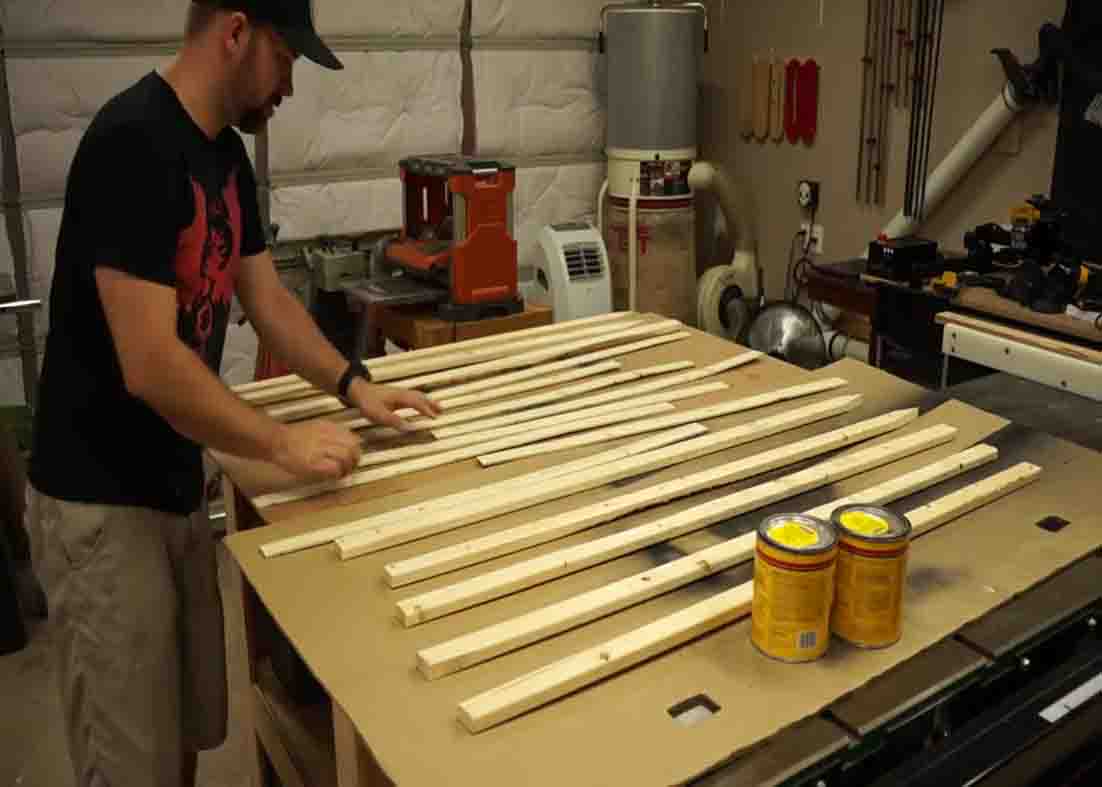
Roughly cut your pine strips in half. It would take four of these pieces to make a section of fence so what you’ll gonna do is take the two that are going to be the vertical pieces and you’re going to make the bottoms of them pointed so that you can hammer it into the ground. Next are the fence slats that go across the middle. (You can use the same wood for these fence slats but you can actually use a smaller piece of pine.) Lay down some big pieces of cardboard and then organize all of your pieces. To give it some color, stain it with some oil-based wood stain or you can also use some old paint. Everything gets one full coat, then let them all dry. Once it dries out, take some reddish stain and just kind of spread it out all over the place to make it more realistic.
[social_warfare]
Step 2
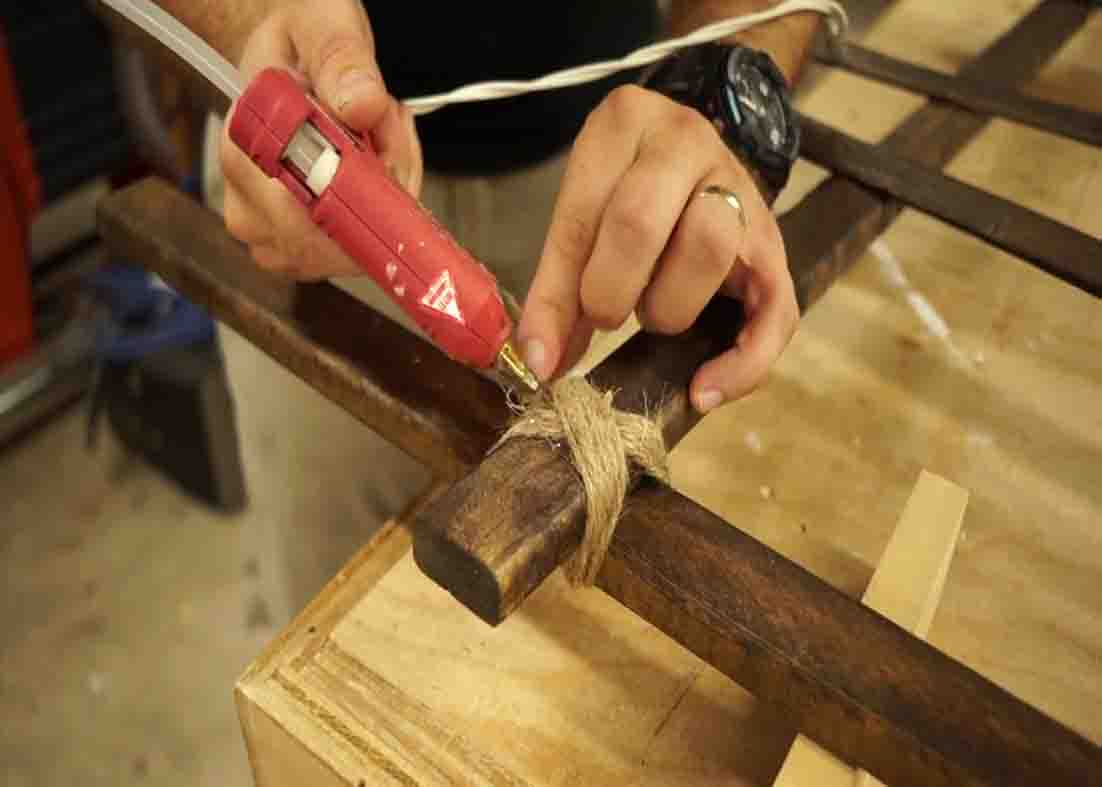
Once everything is totally dry, you can now put it together. The top should measure 12″ and the bottom at 8″ where it gets hammered into the ground. Take some glue and put a little bit of it on each spot to hold it, then use a brad nailer to nail it in place. Next, attach the slat in the middle. You don’t have to measure anything, just randomly put them in place and space them out and give each one a different angle. To make sure the nails didn’t stick through the opposite side, tilt the brad nailer a little bit so that they didn’t pop through the other end. To secure each corner, use a brown twine and tie it with a basic knot. Now, bring it outside and hammer it into the ground. To finish it, put your stretchy spider web on the fences.
Super Easy Cemetery Fence For Halloween


