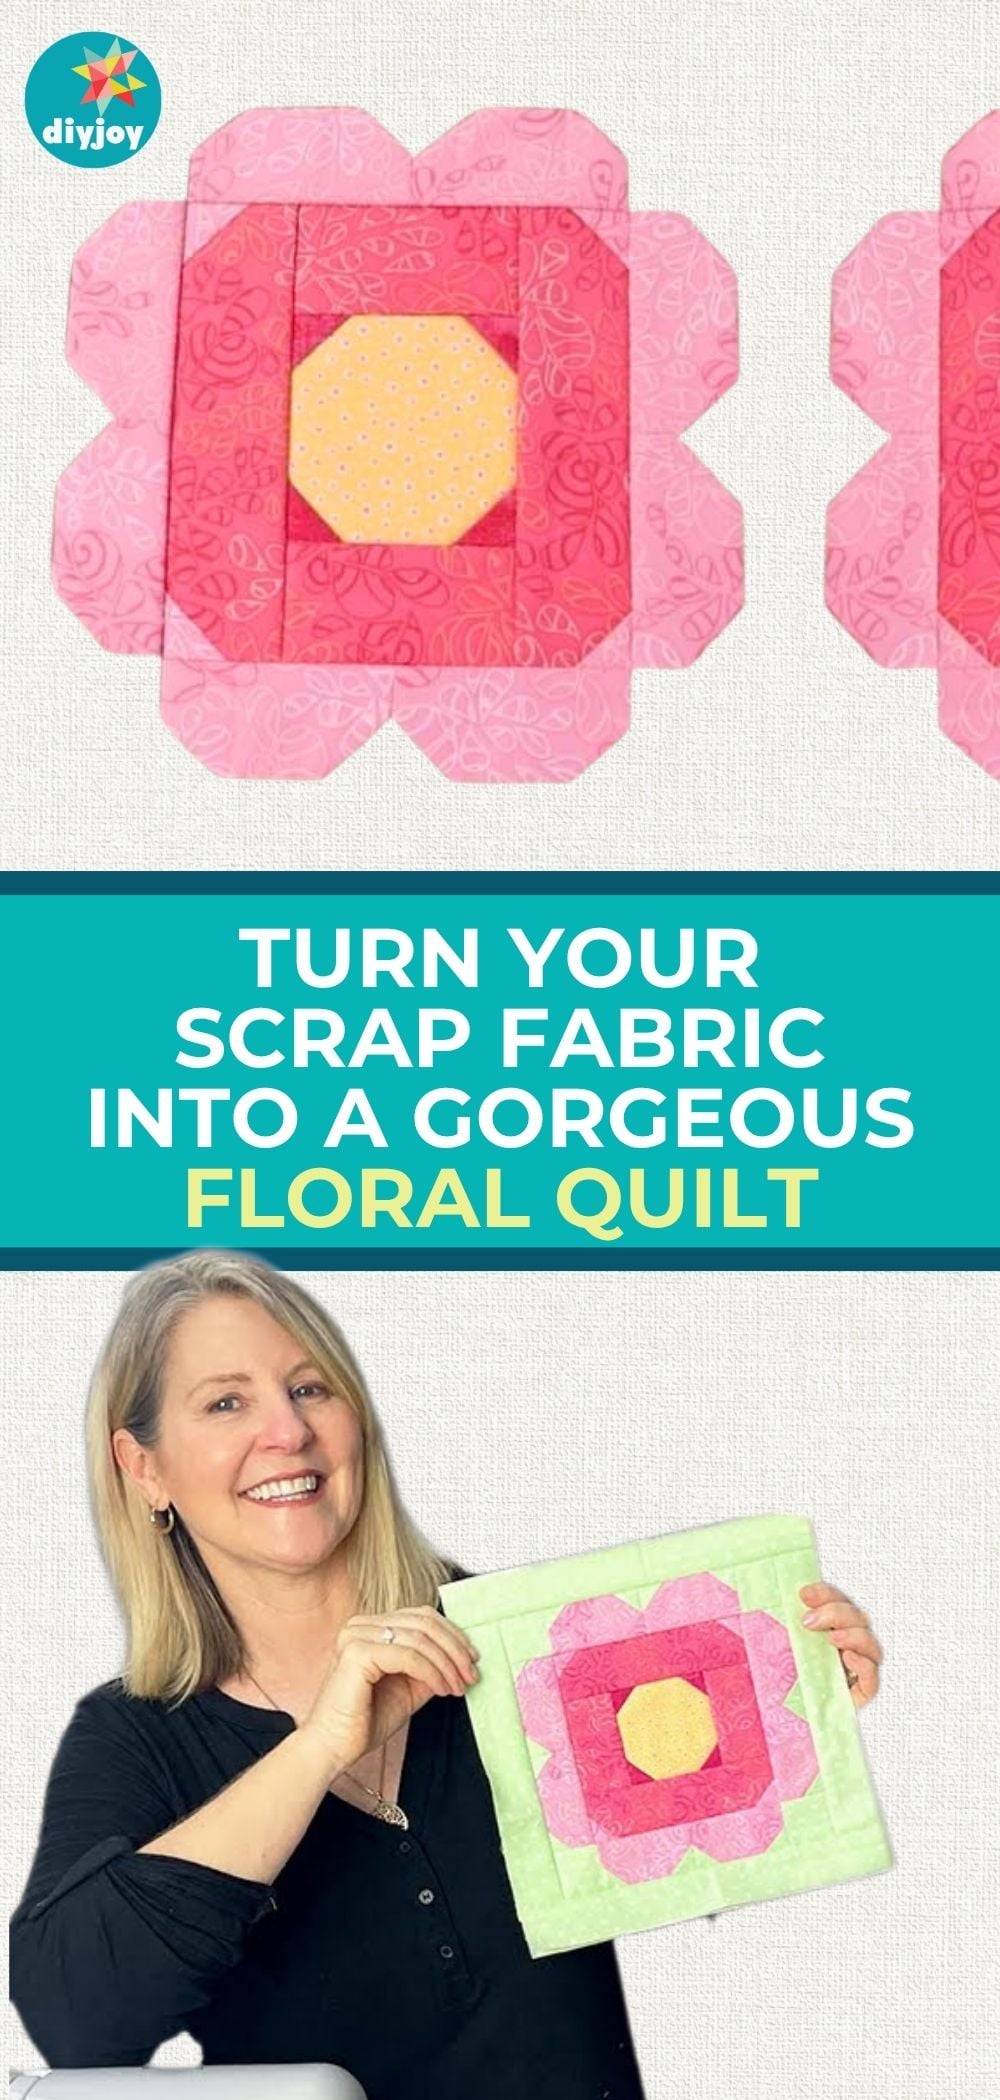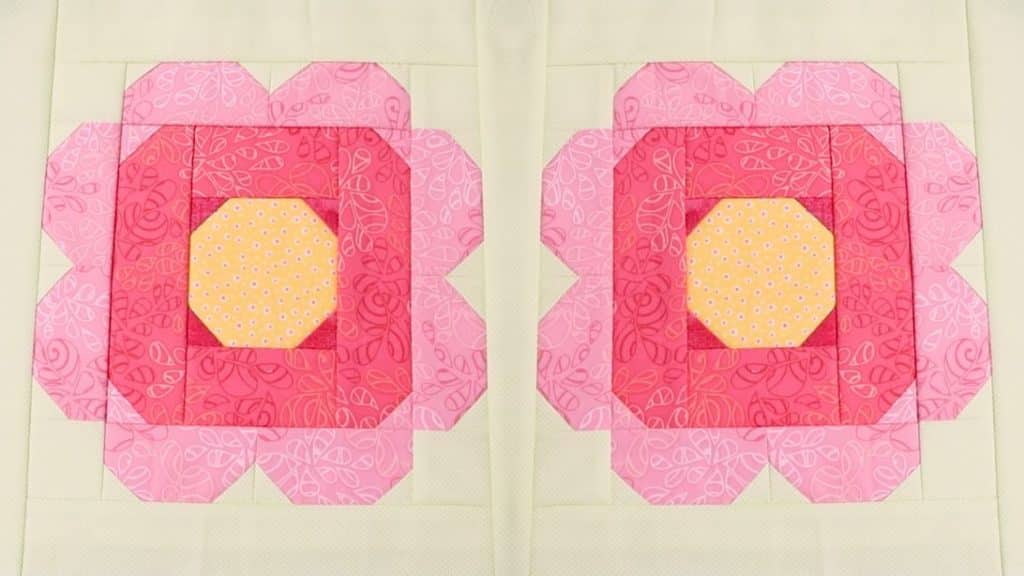
This quilt-as-you-go retro flower block by Pattern Poole TV was so fun to make! I super love the different shades of pink used in this project and the shape of the petals. I am sure this will look good on pot holders or blankets. Watch the video below for step-by-step instructions.
Materials:
- 3-inch square for the center
- 4 pieces of 1 1/8 inch dark pink squares
- 2 pieces of 1 3/4 by 3 inch medium pink rectangles
- 2 pieces of 1 3/4 by 5 1/2 inch medium pink rectangles
- 8 pieces of 1 3/4 by 3 inch light pink rectangles
- 4 pieces of 1 1/8 inch light pink squares
- 10-inch square backing
- 9-inch square batting
For background fabric:
- 4 pieces 1 3/4 inch squares
- 2 pieces of 1 3/4 by 8 inch rectangles
- 2 pieces of 1 3/4 by 10 1/4 inch rectangles
- 16 pieces of 1 1/8 inch squares
[social_warfare buttons=”facebook,pinterest,twitter,whatsapp”]
Instructions:
Step 1:
Center the batting on the wrong side of the backing leaving a half-inch gap around the edges. Hold them together with a light application of quilt basting spray.
Step 2:
Mark the center of the backing by drawing horizontal and vertical lines. Next, mark a line 3 1/2 inches away from the edge of the backing fabric. Do this on all four sides. Mark a line that is 2 1/4 inches away from the backing fabric. Repeat on all four sides.
Step 3:
Take the center square and place it in the center of the block with the right side facing up. Hold it in place with a pin and set it aside.
Step 4:
Take the 1 1/8 inch squares and mark a diagonal line from corner to corner on the wrong side. Set them aside.
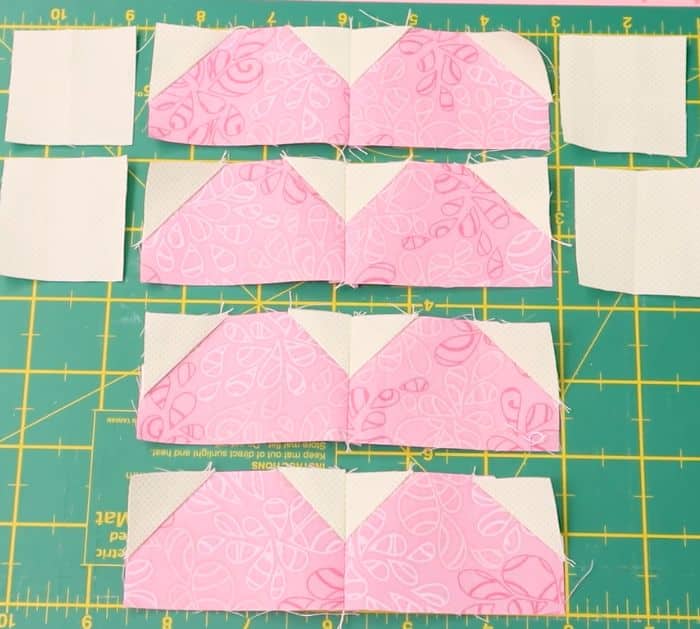
Step 5:
Take your light pink 1 3/4 inch by 3 inch rectangles and place them on the cutting mat with the right side facing up. Apply glue on the 2 corners and place 2 white triangles. Do the same on the remaining pieces. Make sure the diagonal lines are pointing to the center of the rectangle. Once done, sew on the diagonal lines. Trim off the excess fabric.
Step 6:
Sew the rectangles together in pairs with the right sides together. Take the 1 3/4 inch background squares, place them on opposite side edges of two of the petal pieces and sew them with a quarter-inch seam. Press the seams toward the petals.
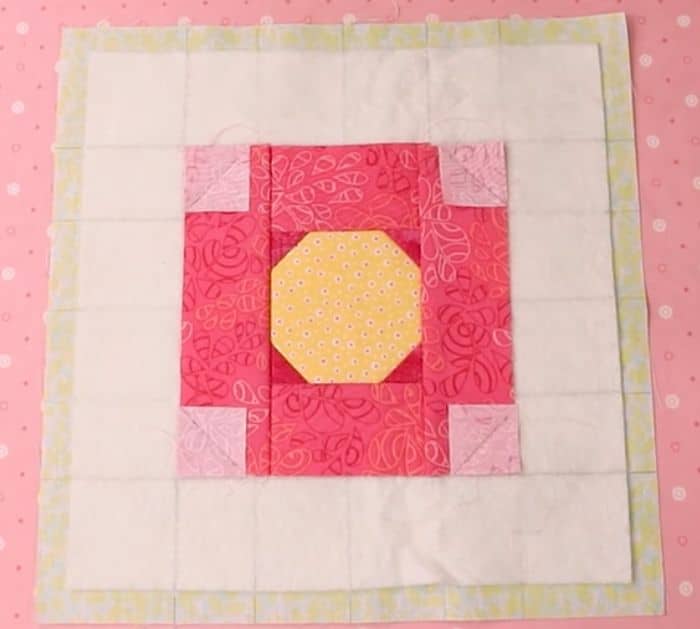
Step 7:
Take a dark pink square and place it in the corner of the yellow of the center square with the diagonal line running across the corner. Mark dots a quarter inch away from the underneath fabric. Sew from dot to dot and repeat this process for all four sides of the center square. Cut away the excess a quarter inch away from the stitching line, then press.
Step 8:
Take the medium pink 3-inch long rectangles. Place one right side together with the side of the edge of the center square. Use the marked lines as a guide and make the edges of the rectangle level with the lines. Mark quarter-inch dots and sew from dot to dot. Repeat this process for the other side. Press with an iron.
Step 9:
Rotate the block and sew the 5 1/2-long pink rectangles on the sides. Press with an iron.
Step 10:
Take the light pink 1 1/8 inch squares and sew them onto the corners in the same way you did with the dark pink squares. Open, press, and trim off the excess.
Step 11:
Take the two shorter petal sections and place them right sides together with the side edge of the flower. Mark your quarter-inch dots and sew from dot to dot. Do the same to the other side.
Step 12:
Sew the two longer petal pieces on the top and bottom. Mark quarter-inch dots and sew from dot to dot.
Quilt As You Go Retro Flower Block