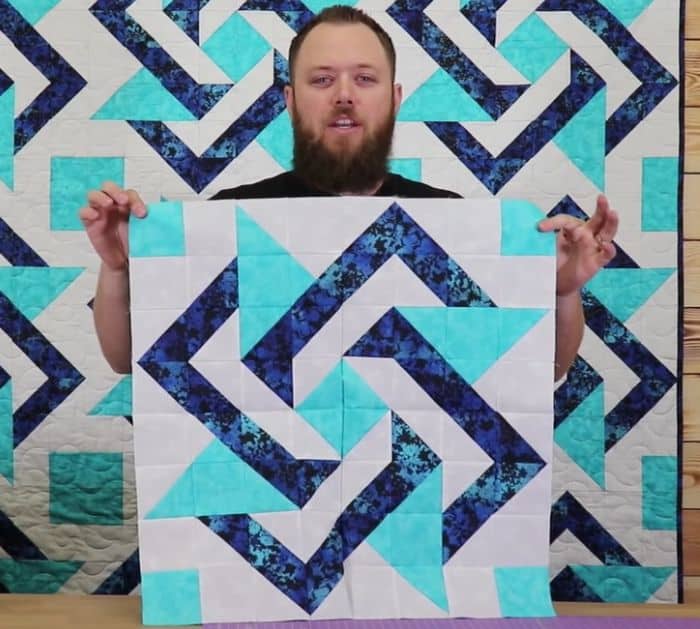
Are you ready to put your sewing skills to the test? If you are up for a challenge, try making this mystic star quilt pattern by Sew Yeah. This intricate design is made up of several squares and triangles – the triangles are then sewn together to make half-square triangles. By combining these HSTs with squares, you make this beautiful star pattern.
RELATED: Perfect Woven Star Quilt Block Tutorial
However please note that this may not be a beginner-friendly pattern, as it involves a lot of small pieces. The steps are relatively easy to follow but require a lot of time and effort. When assembling the block, it’s crucial to nest the seams to ensure that it will look nice and neat when pressed. For a detailed tutorial, please watch the video below.
Easy Mystic Star Quilt Block Materials
- 4 yards of white fabric
- 2 1/2 yards of dark blue fabric
- 2 yards of light blue fabric
- 3/4 yards of binding
- 6 yards of backing
[social_warfare buttons=”facebook,pinterest,twitter,whatsapp”]
How to Make Mystic Star Quilt Block
Step 1:
White fabric
- Cut 12 pieces of 3 1/2″ x WOF strips, then subcut to 144 pieces of 3 1/2″ squares
- Cut 2 pieces of 4 1/2″ x WOF strips, then sub-cut 1 strip to 8 pieces of 4 1/2″ squares
- only cut 4 pieces of 4 1/2″ squares from the 2nd strip and save the rest for step four. For a total of 12 pieces of 4 1/2″ squares.
- Take your 12 pieces of 4 1/2″ squares from step 2 and cut each twice diagonally from corner to corner to make four triangles. You will make 48 triangles.
- Cut 21 pieces of 4″ x WOF strips, then sub-cut to 210 pieces of 4″ squares.
- Use the 24″ left from the step above, cut it into a 4″ x 24″ rectangle, and cut the last 6 pieces of 4″ squares needed, making a total of 216 pieces of 4″ squares.
Dark blue
- Cut 22 pieces of 4″ x WOF strips, then sub-cut to 216 pieces of 4″ squares. Subcut 24 pieces of the 4″ squares into 48 triangles by cutting diagonally.
Light blue
- Cut 8 pieces of 3 1/2″ x WOF strips, then subcut to 96 pieces of 3 1/2″ squares
- Cut 2 pieces of 4 1/2″ x WOF strips, then subcut in the same manner as the white 4 1/2″ strips. Subcut 1 strip to 8 pieces of 4 1/2″ squares and only cut 4 pieces of 4 1/2″ squares from the 2nd strip.
- Save the rest for step 4, for a total of 12 pieces of 4 1/2″ squares.
- Take your 12 pieces of 4 1/2″ squares from step 2 and cut each twice, diagonally from corner to corner to make four triangles for a total of 48 triangles.
- Cut 7 pieces of 4″ x WOF strips, then sub-cut to 70 pieces of 4″ squares
- Use the strip from above and trim it into a 4″ x 24″ rectangle. You will need 2 pieces of 4″ squares for a total of 72 pieces of 4″ squares.
Step 2:
Get the 48 white and 48 light blue triangles. Take one from each and place the white on top with the right sides together and the top pointing to the right. Sew 1/4″ seam along the top edge. Press to the darker side.
Step 3:
Get the new triangles and the 48 dark blue triangles, and sew them, right sides together. The triangle with two colors will be a bit bigger than the dark blue one. Be sure that the long edges align and that the top point of the dark blue is aligned with the seam. Press to the dark side and trim into 3 1/2″ squares.
Step 4:
Get 24 of your light blue and 24 of your dark blue squares and place them right sides together. Draw a diagonal line from corner to corner on the lighter fabric and sew 1/4″ away on both sides of the line. Cut directly on the line and press to the dark side.
Step 5:
Get 168 dark blue-white squares and place them right sides together. Draw a diagonal line from corner to corner on the white and sew 1/4″ away on both sides of the line. Cut directly on the line and press to the dark.
Step 6:
Repeat the same process with the 48 pieces of white squares and 48 light blue squares.
Step 7:
Square all half-square triangles from steps 3, 4, and 5 to 3 1/2″ squares.
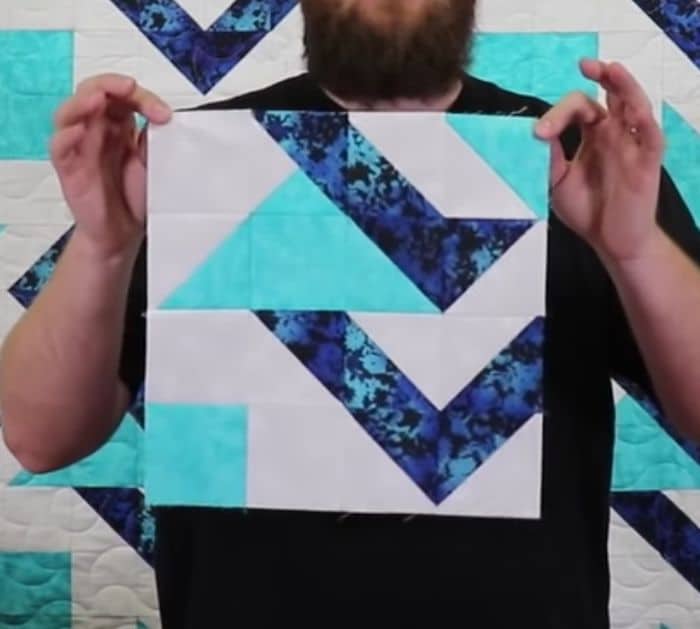
Step 8:
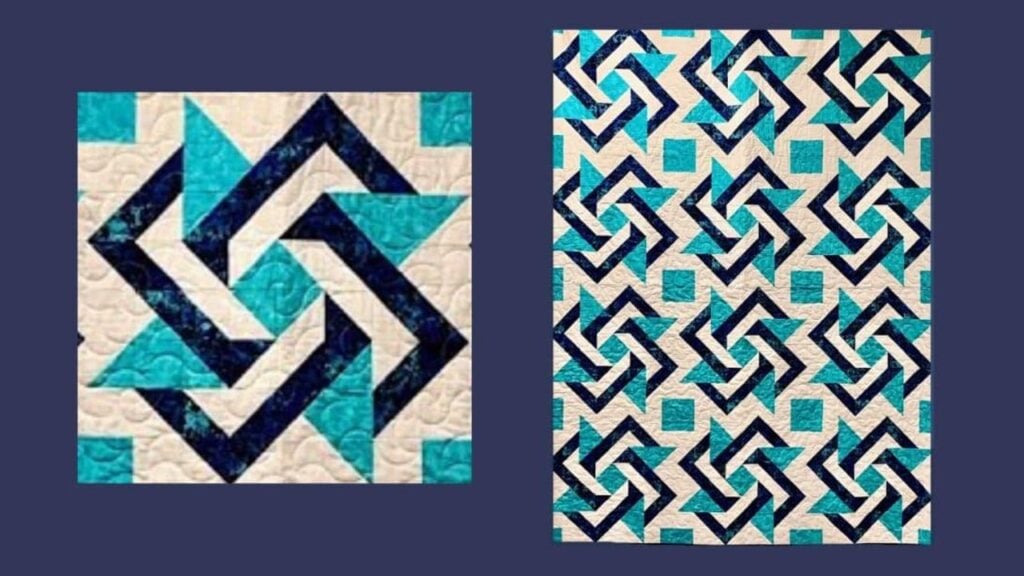
Arrange the squares just like in the photo below.
Step 9:
To make the large star block, you need 4 of the block from step 7. You will make 12 stars. Sew four rows with three stars each.