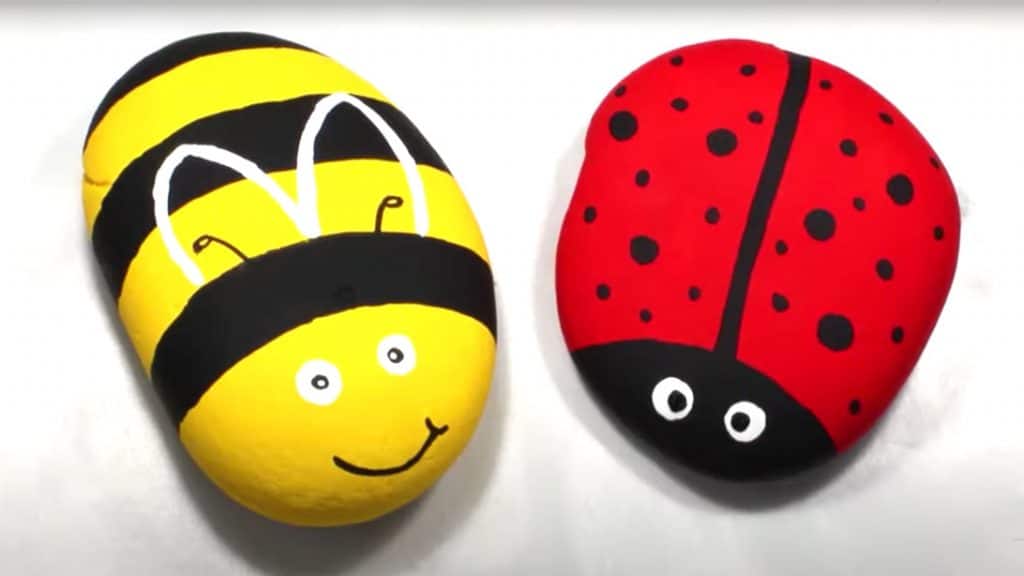
It’s easy to get into the hobby of painting rocks. Because you’re painting on a different surface and a different form than you would on a flat canvas, it allows you to be more imaginative. Working with rocks is a great experience. If you’re a fan of incorporating natural elements into your decor, you may consider painting insects like ants and bees on a rock. Kristyona on YouTube shows us how to paint ladybugs and bumblebees on spherical pebbles in an easy-to-follow lesson. This is a great lesson for people who are just getting started.
Materials:
- Rocks
- painters’ acrylics (various colors)
- Brushes
Directions:
White paint should be brushed over the rock surface. Make sure you’ve covered it. After the white paint has dried, paint the rock red to hide the white. Use a bright red paint to cover the white surface. Allow the paint to dry for a few seconds before moving on.
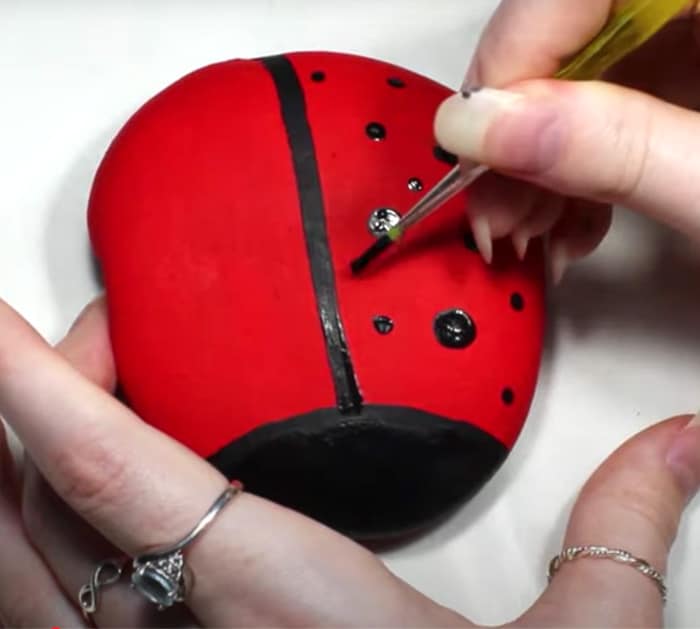
Then, with a finer brush, draw black lines on the red surface to represent the beetle. Make some splotches on the bug’s body as well. The bug’s eyes are made by placing two white circles on the bug’s border. Fill in the white circles with little black circles. A few minutes of drying time is all it takes. You’ve got a ladybug now.
The bumblebee is next on the list.
White priming paint can be applied on another round rock with a smooth surface. Make sure everything is completely covered. Allow to air-dry. Then, using a yellow paint, cover the white surface completely. Allow it to air dry for a few minutes.
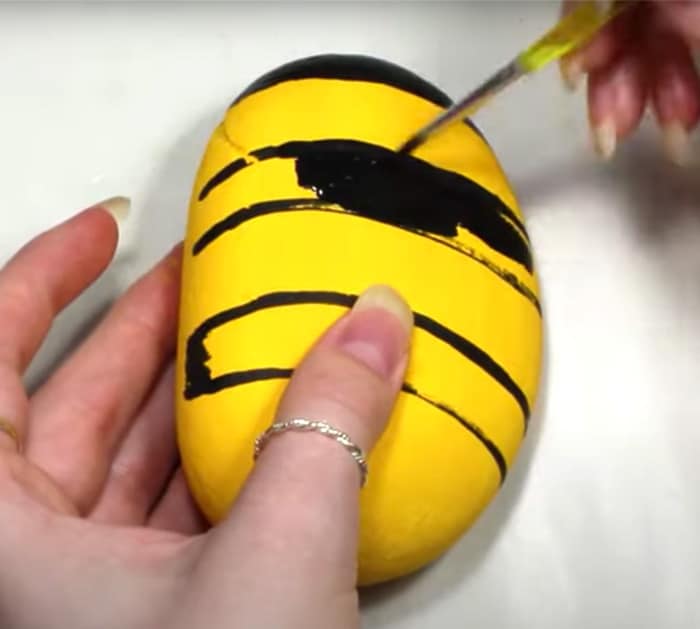
A small brush and some black paint are all that’s needed to create your bumblebee. Add a grin and an antena to the mix. Then, apply white and black paint to the eyes. Draw the bee’s wings in white with a white paintbrush. Wait for it to dry out. The result is a bumblebee with a big grin.
That’s all there is to it. Insects constructed of painted rocks are now available to you. These things may be hung on a wall or placed on a shelf in your room or workplace. They are sure to get people talking.

