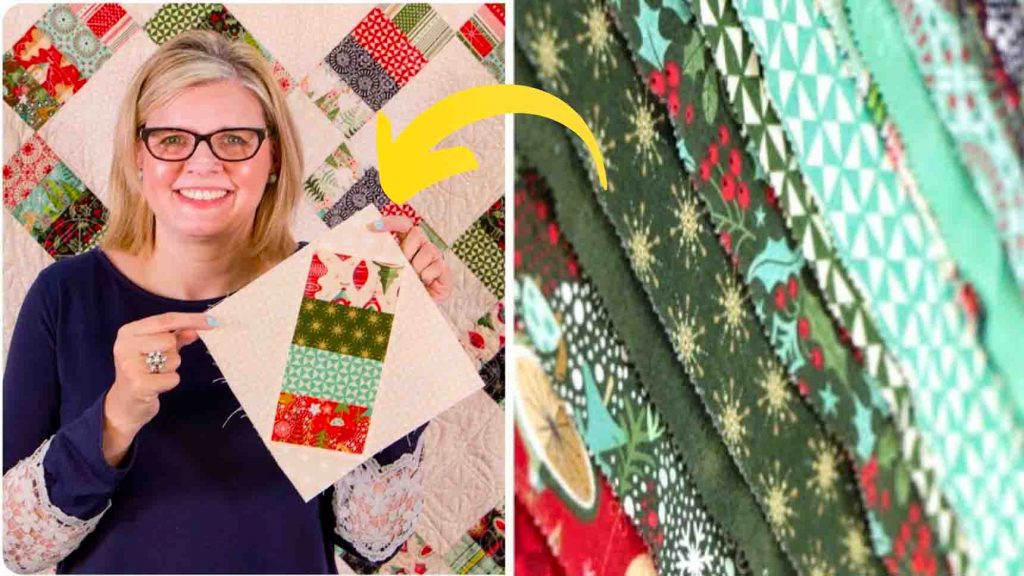
If you love jelly rolls and looking for a fun quilt to make, this jelly railway shortcut quilt from Fat Quarter Shop on Youtube is perfect for you. This project is not just a gorgeous pattern but is also beginner-friendly. Plus, this tutorial has some tips and tricks for you! Watch the video below to learn these and the step-by-step instructions.
Materials:
- 1 jelly roll or twenty-four pcs. 2 & 1/2″ x WOF strips (Fabric A)
- 1 & 1/2 yards of background fabric
- 1 & 7/8 yard accent and border fabric
- 3/4 yard binding
- 5 yards backing
Cutting:
- cut background fabric into 48 – 6 & 5/8″ squares (Fabric B)
- cut accent and border fabric into 48 – 3 & 3/4″ squares (Fabric C) and 7 – 5 & 1/2″ x WOF strips (Fabric D)
- cut binding fabric into 8 & 1/2″ x WOF strips (Fabric E)
Directions:
Step 1
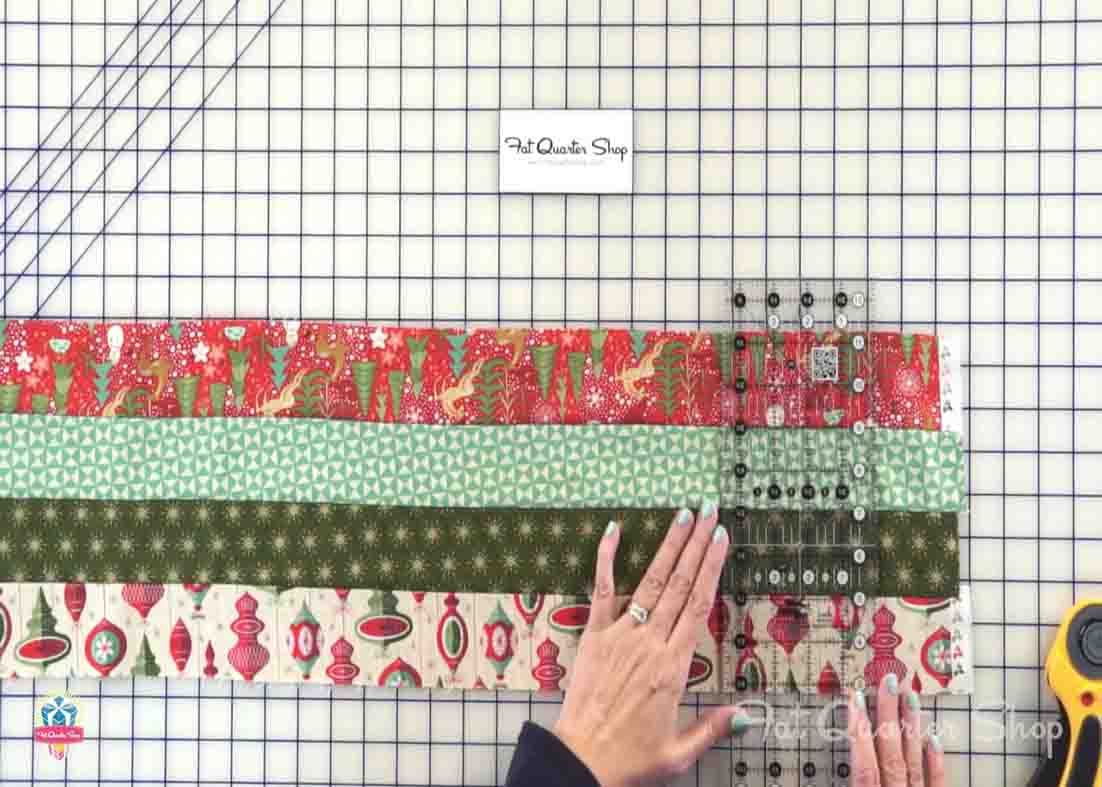
First, go through your jelly roll and take 24 strips for your quilt. Now, take four different jelly roll strips, sew them together with the 1/4″ seam, and press to one side. Make six of these. Next, cut eight 4 & 1/2″ wide rectangles. You’re going to cut eight from each strip set to make a total of 48. After this, take your fabric B squares and your fabric C squares and cut them on the diagonal. Make 96 pcs. B triangles and 96 pcs. C triangles. Now, take these strips and you’re going to finger-press the center on the top of the bottom and take your fabric C triangles and do the same thing. Then, you’re going to line up your finger presses, pin both sides, and press open. Cut the dog ears off after this.
[social_warfare]
Step 2
Then, add your fabric B triangles, find your center, then put your finger-pressed triangle right on the center seam. Pin it three times and sew with a 1/4″ seam on both sides, then press open. After you stitch, everything should be pressed open on the outer seams, then trim it down to 9″. After this, it’s time to put all your blocks together. You’re going to have six blocks per row and you’re going to press all toward the right, you’re going to have eight rows. Then, when you lay them out, you’re going to alternate. Now, add your side borders, press, add your top and bottom borders, and press.

Jelly Roll Railway Shortcut Quilt Tutorial


