
If you’re planning to try and sew your own pincushion, then this adorable owl version by The Masquerade on YouTube is a must-try! You can easily sew this lovely pincushion with her easy-to-follow instructions, plus, you can also use fabric scraps for this project. So, even if you’re a beginner in sewing, no doubt that you can perfect this on the first try.
Materials:
- Main fabric
- Contrasting fabric
- Small piece of cardboard
- Marking pen, chalk, or pencil
- Scissors or rotary cutter and a cutting mat
- Needle and thread
- Crushed walnut shells or any filling you want to use
- Fabric pins
- Sewing machine
- Pattern (Click here to download and print the pattern)
Directions:
Step 1
Trace the pattern on the fabric pieces that you will use, then cut them out, and cut out the cardboard piece for the base as well. Start with the body of the owl, lay the main fabric on the surface with its right side facing up, then place the contrasting or lining fabric above one side of the main fabric facing down, and make sure that their edges are matching and the right sides are facing. Sew them together along the sides with a ¼-inch seam allowance and then press the seams open.
[social_warfare]
Step 2
Fold it over to the other side making sure that their right sides are facing, then match the sides nicely to make a smaller triangle shape, and sew following the center stitching. Trim off the excess fabric at the side, then cut off the point as close to the stitching as possible, and flip it right side out poking the corner nicely. Pull the fabric piece sideways so that the contrasting fabric is at the center, then fold the tip about an inch down for the nose, and pin it in place.

Step 3
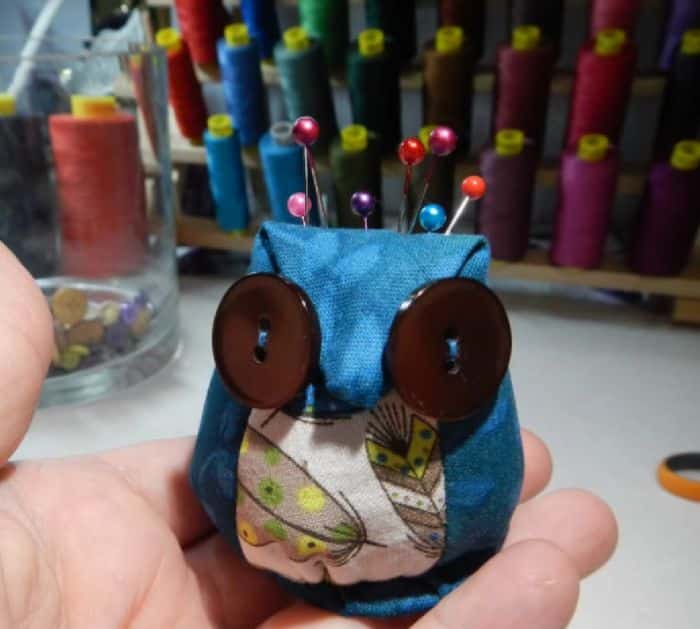
Sew the nose in place by hand, then stitch around the edges of the base to gather but don’t pull yet, and then fill it with ground walnut shells. Once filled nicely, pull the thread tightly to close the bottom, then stitch it to secure it, and set it aside. Gather the edges of the fabric for the base, then insert the small cardboard piece at the center, and pull the thread tightly to close. Stitch and lock the fabric in place, then sew two buttons for the eyes of the owl, and you’re all done!
*All image credit belongs to The Masquerade via YouTube. Follow and subscribe to her channel for more!
Simple Owl Pincushion Sewing Tutorial


