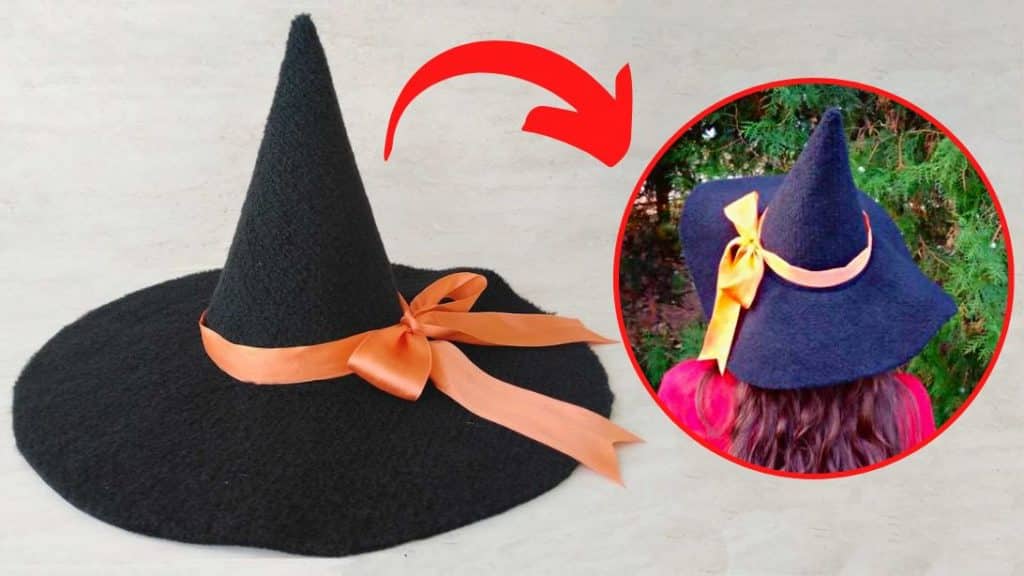
Since Halloween is just around the corner, it also means that it’s almost time for trick or treat! If you’re planning to dress up for that day, then you should consider using handmade costumes rather than store-bought, not only are they more inexpensive but you can also personalize them and use the materials that you want making them more sturdy so that you can use them again for the next years. All thanks to Hello Sewing on YouTube for this amazing video tutorial!
Materials:
- ½ yard of premium felt fabric or similar that is equally stiff
- Needle and matching thread
- Scissors or rotary cutter and a cutting mat
- Ruler or measuring tape
- Marking pen or chalk
- Iron, for pressing
- Fabric pins and clips
- Sewing machine
- Pattern (Click here to download and print the free pattern)
Directions:
Step 1
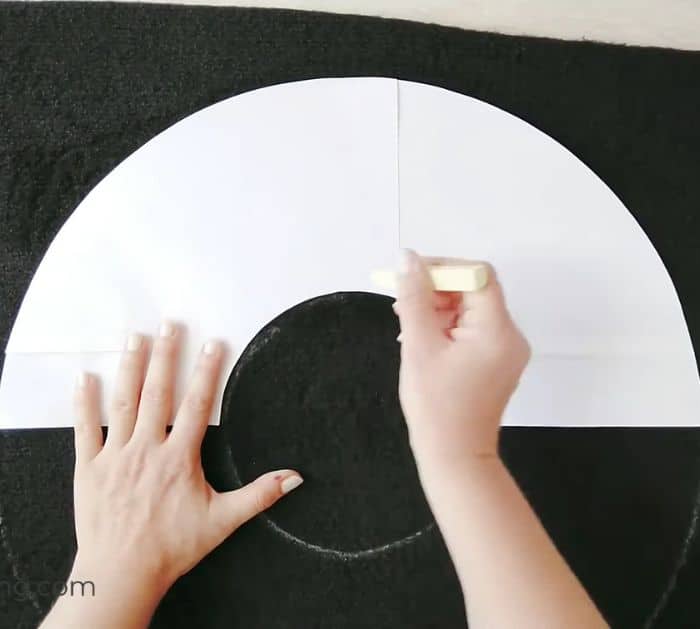
Download, then print the pattern, and cut the pieces out. Trace the cone pattern on the fabric, then cut it out, and fold the fabric in half right sides facing and straight edges matching. Pin the edges together in place and set them aside. Next, cut out the brim pattern, then fold the brim in half, cut out a small piece of a circle in the center, and open the fabric.
[social_warfare]
Step 2
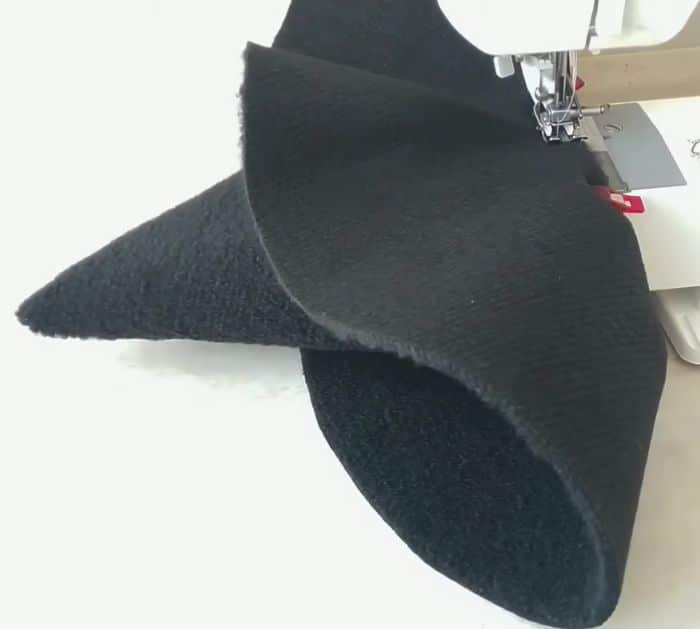
Now, get the cone piece, then sew along their edges together with a ¼-inch seam allowance, and notch the tip of the cone. Turn it right side out, then poke the pointed corner nicely, and pin the bottom of the cone to the inner circle of the brim with their wrong sides facing. Sew the cone and brim together and you’re done!
*Thanks to Hello Sewing via YouTube for all images used here. If you loved this sewing project, then you’ll surely love her other videos too, so give her channel a visit and subscribe!
How To Sew A DIY Witch Hat In Any Size


