I always wanted to paint, but I have zero talent when it comes to art, so when I stumbled upon this DIY cherry blossom painting from Cleverly on Youtube, my dreams of painting had come true. Who would have thought you could use a plastic bottle for painting? This is so clever and would really help someone like me who has zero talent in art. So if you’re like me and would also want to experience painting an image, try this method! Watch the video tutorial below to learn the step-by-step instructions.
Materials:
- acrylic paint (pink and brown)
- paper plate
- paintbrush
- water
- paper
- plastic bottle
Directions:
Step 1
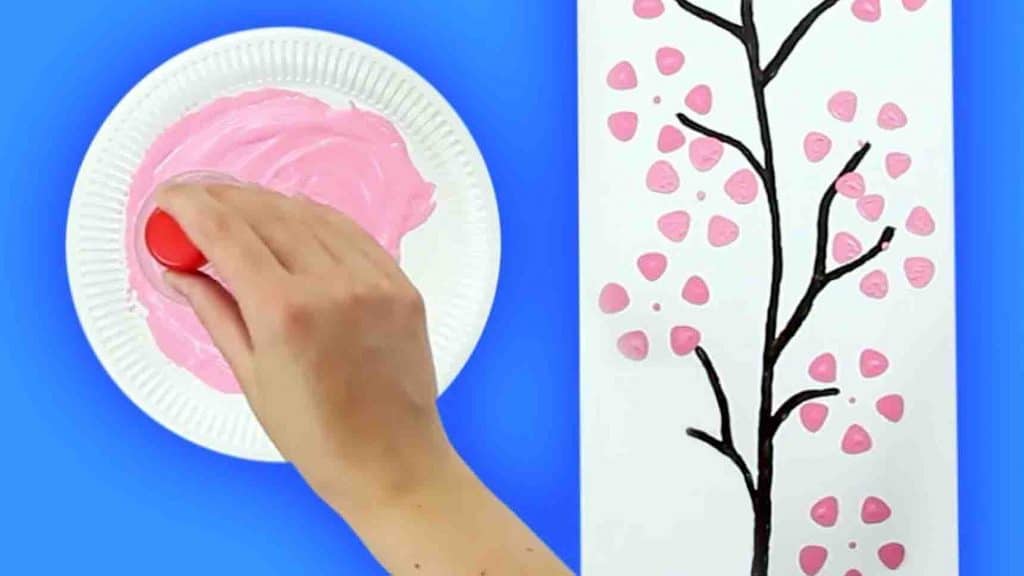
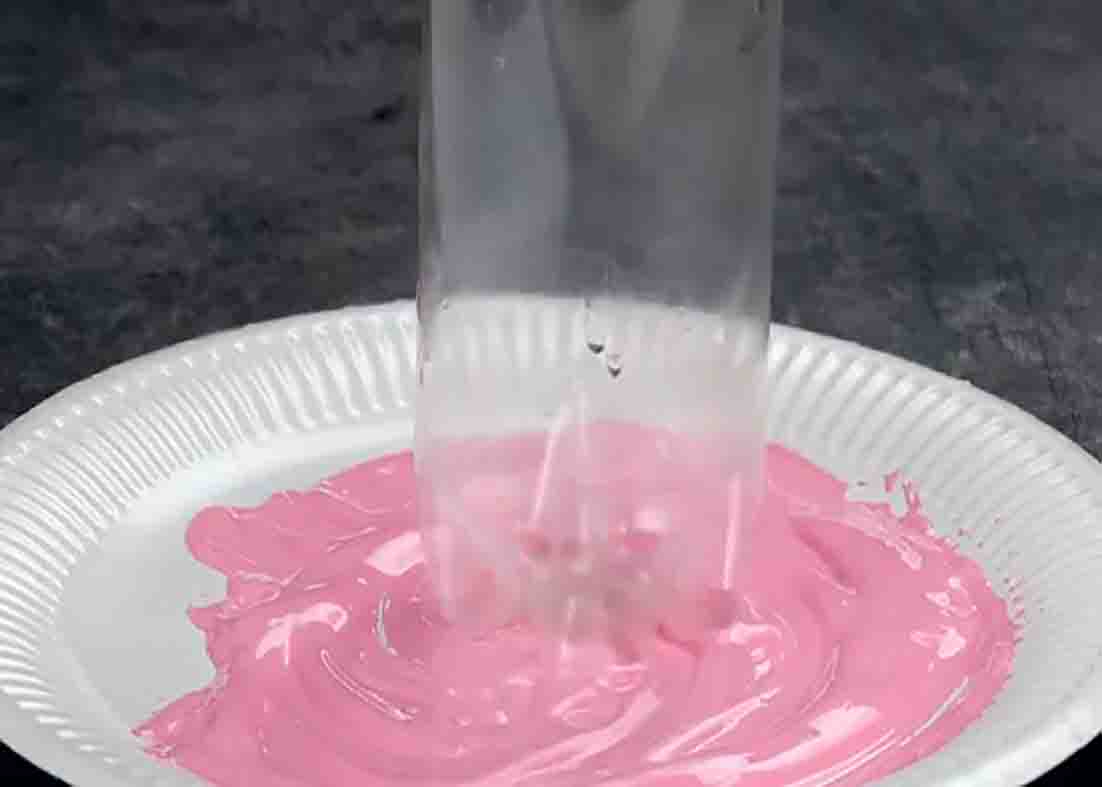
To start, put a generous amount of pink acrylic paint on a paper plate and dilute it with some water. Mix it using a paintbrush. Now, grab your paper and plastic bottle. To start painting the cherry blossoms, dip the bottom of the plastic bottle in the diluted paint and press it anywhere on the paper. Paint as many cherry blossoms as you like.
[social_warfare]
Step 2
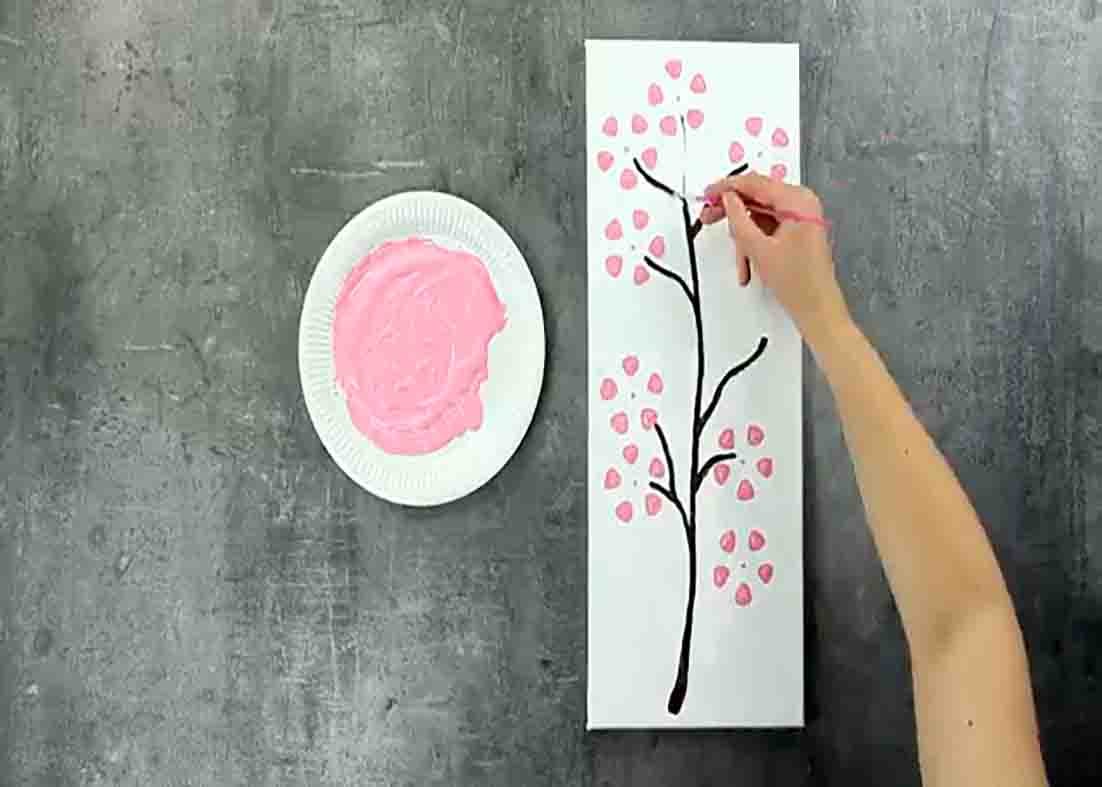
Next, when you’re done painting the cherry blossoms, paint the branches with brown acrylic paint and a paintbrush. (Add more cherry blossoms if needed.) Your DIY cherry blossom painting is now finished! Display it anywhere you like.
How To Paint a Cherry Blossom Tree Using a Plastic Bottle


