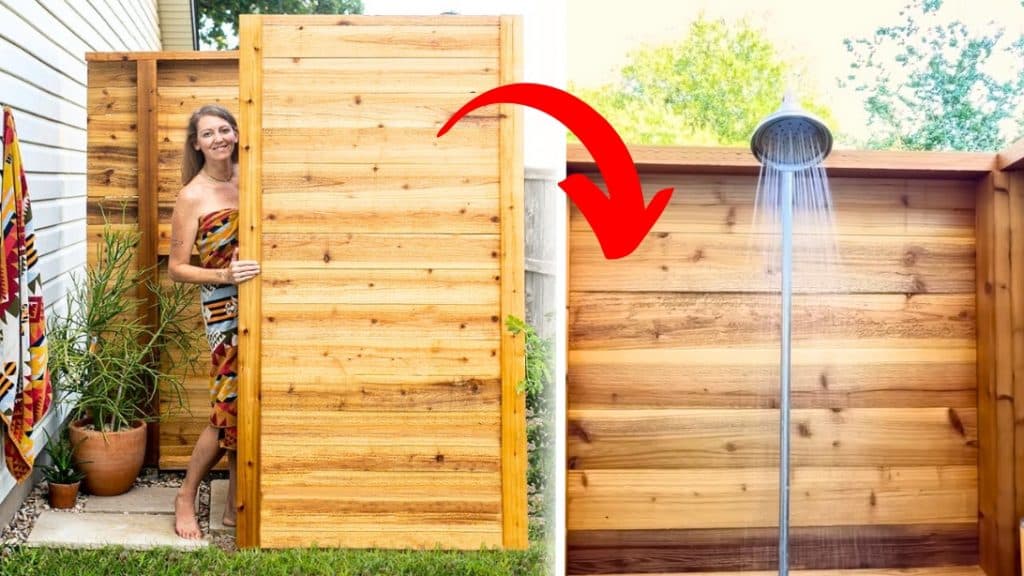
Do you have a pool at home? Building this outdoor shower will surely make the experience better. Fully enjoy the summer sun with this new feature in your backyard. You can make it all by yourself with the help of this tutorial by Maker Gray. Watch the video below for full instructions.
Materials:
- pea gravel
- post saver sleeves
- 4 posts
- 2x4s
- fast-setting concrete mix
- metal edging
- tamper tool
- weed barrier cloth
- metal landscape staples
- sand
- pavers
- rocks
- 1×4 trim boards
- wood sealer varnish primer
- finish coat
- horizontal cedar slats
For the plumbing:
- metal Y connector
- hose
- galvanized steel pipes
- galvanized coupling
- 90-degree elbow fitting
- shower head
- water valve
- galvanized pipe straps
[social_warfare buttons=”facebook,pinterest,twitter,whatsapp”]
Instructions:
Step 1:
Check with your service providers if you don’t have any water or power lines underneath your dig site. Dig holes about 12 inches wide and 24 inches down for the four posts that will hold up the walls of the shower.
Step 2:
Add a couple of inches of pea gravel to the bottom of the holes to help with the drainage and keep the bottoms of the posts out of moisture.
Step 3:
Set each post in its holes and mark 2 inches above the ground line to mark the correct placement of the sleeve. Add the sleeves to each post and heat with a heat gun.
Step 4:
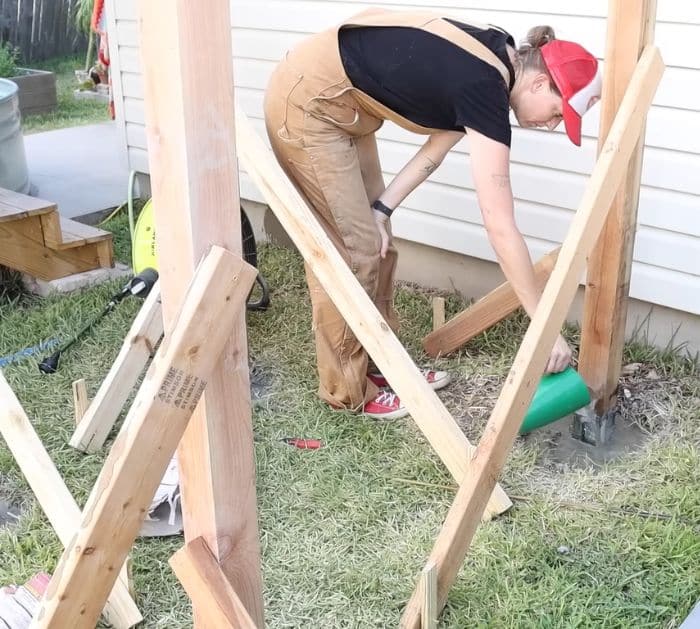
Cut 2 pieces of 2x4s for the bracing. Screw them to adjacent sides of the post then hammer the wooden stake into the ground at the bottom end. Move each brace until the post is perfectly vertical. Lock it down by screwing the brace to the stake.
Step 5:
Pour the dry mix into the post holes and add water. It should set in 20 to 40 minutes.
Step 6:
Repeat steps 4 and 5 for the other 3.
Step 7:
Dig out the grass and a few inches into the dirt, making sure to keep a gradual downward slope away from the house for good drainage.
Step 8:
Install metal edging around. Once down, tamp the dirt, then place the weed barrier cloth. Secure it with metal landscape staples.
Step 9:
Fill it with sand. Make sure that it’s level.
Step 10:
Place the paver in place and fill the surrounding areas and cracks with rocks. Spray them with water to remove dirt.
Step 11:
Measure the length between your posts. Cut 2 pieces of 2x4s with that measurement and add pocket holes to each end. These boards will tie the posts together. Make sure that it is leveled and secure to the posts with screws.
Step 12:
Cut several cedar slats the same size between the distance of your posts, end to end. Screw them to the posts. Repeat with the other sides.

Step 13:
Add another row of 2x4s around the top as a cap board with a 45-degree cut on each end where the boards will meet at the corners. Screw the board right down to the posts.
Step 14:
Cut the 1×4 trim boards to length. Attach them to the edges of the cedar slats using a brad nailer.
Step 15:
Add a spray of varnish to the cedar wood. Once dry, spray the finishing coat.
Step 16:
Attach the metal y connector to your faucet. Connect a new water hose to the other side.
Step 17:
Place galvanized steel on the bottom of your shower wall that will connect to the outside house. Once it’s in place, put the galvanized coupling and attach the hose. Add a 90-degree fitting to the end of the galvanized steel and start building all the way up.
How to Make an Outdoor Shower