It’s such a hassle carrying hot casserole dishes around, so why not make your life easier whit this quilted casserole carrier from TheCraftyGemini on Youtube? It’s a simple quilt project, perfect even if you’re new to quilting. You can also carry circle/round dishes with this carrier. Make this today by watching the video tutorial below.
Materials:
- 2 pcs. 22″ x 22″ of fabric
- 2 pcs. 23″ x 23″ 100% cotton batting or Insul-Brite
- 1 strip 5″ x 22″ of fabric
- 2 pcs. 4.5″ x 7″ of fabric
- rotary cutter
- cutting mat
- rulers
- pins
- marking device
- thread
- iron & ironing board
Directions:
Step 1
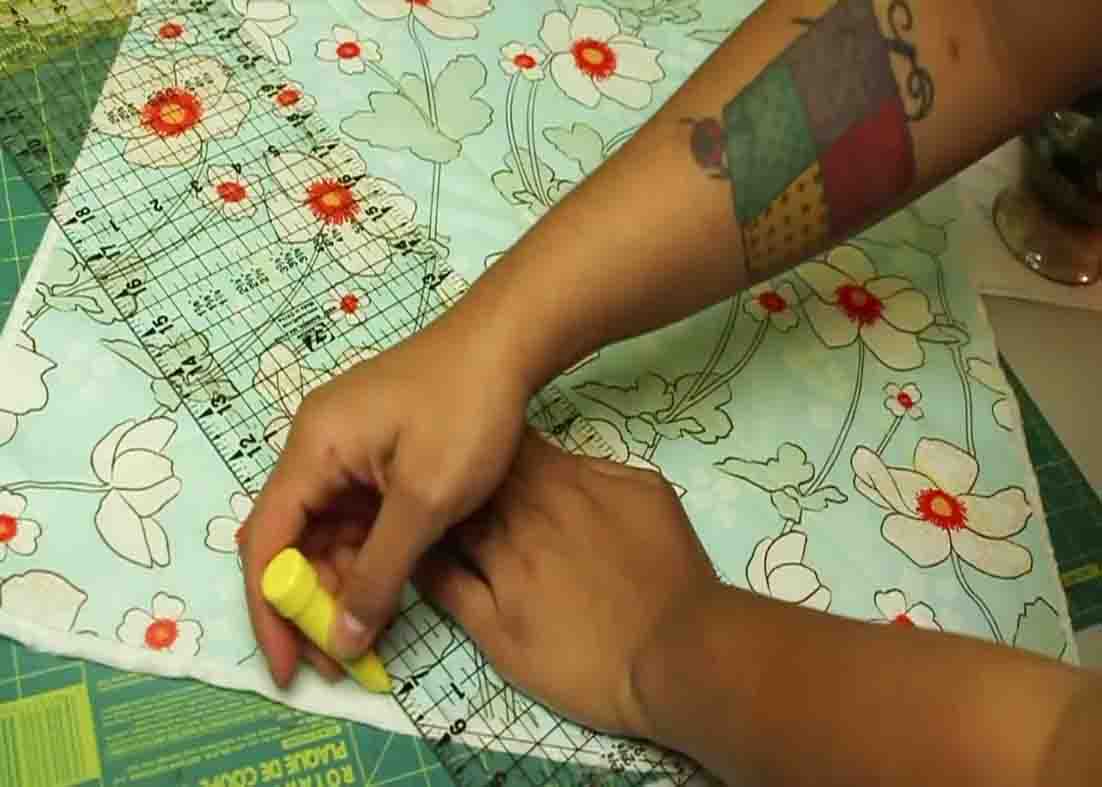
Take one of your cotton fabric pieces and lay it over one of the pieces of the batting, then pin it to secure. Next, draw a line on the diagonal from one corner to the other, then turn your piece around and do the same thing (basically doing a big “X” across the entire square.) Take this to the sewing machine and sew along the line. After this, do some cross-hatching for the quilting (which is drawing lines on the diagonal every 2 to 3″ or so.) Once it’s done, flip it over and make sure you didn’t miss any lines. Repeat this to your other cotton batting piece and the fabric piece. (You can do whatever quilting you like.) After you’re done quilting those two pieces, take your rotary cutter and trim up all the excess batting that you have around your fabric. Once you’re done with both your pieces, you can start putting everything together. Take one and lay it over the other both with the right side touching each other, pin all the way around, then mark an opening of about 10″ or so (you’re gonna start on one end, back stitch go all the way around, stop on the other end, then your space there is going to be open.) After you’ve sewn that around using a 1/4″ seam allowance, trim all the corners, then flip the entire piece inside out through there. Give it a press with your iron to make everything lay nice and flat and then on the opening you just want to tug on the ends and have both of the fabrics there flip under. Top stitch the entire piece in the sewing machine with a 1/4″ seam allowance.
[social_warfare]
Step 2
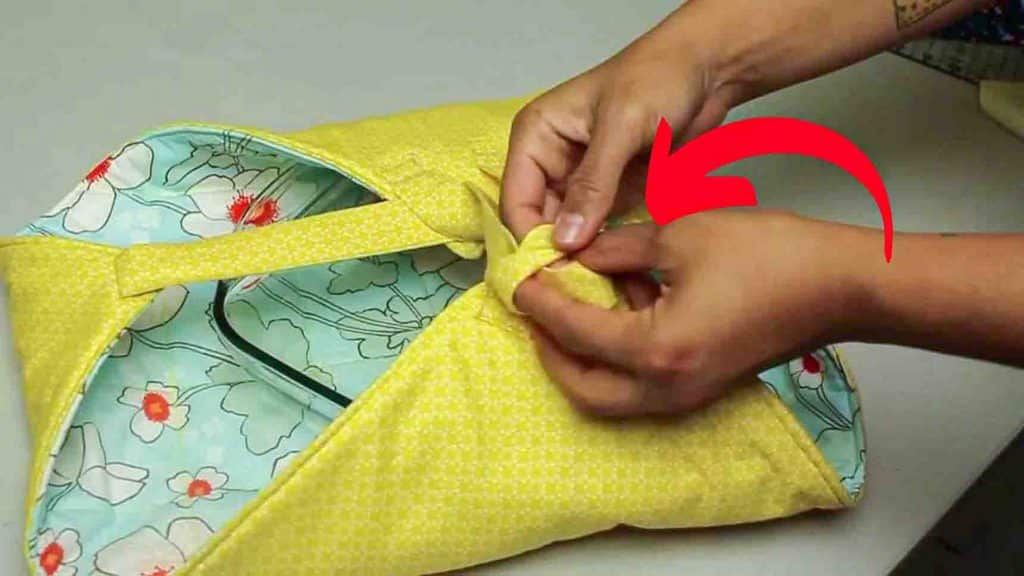
For the straps, take the longest strip. fold it in half lengthwise, then grab the shorter ends and reach them towards the center (make sure that you’re pressing this with your iron so it stays nice and crisp), re-fold the entire strip down the center. Tuck in the ends about 1/4″ and then re-fold it again (both ends), then close the little strip back down on the lengthwise half. Pin everything together and sew it. To attach the shorter strips, go to one corner and bend it into a loop, then pin it down and sew it. Repeat the same thing on the opposite corner. Next, lay the long strip right up in the corner (without the short handle), pin it, then go to the opposite corner and do the same thing. Stitch in a rectangle to both corners/ends, twice or three times over. (The strip should be lifting a little.)
Step 3
To use this casserole carrier, put the plate in the middle, slip that long strap through both of those short loop handles, and then it turns into your handle. This casserole carrier is also reversible and can also carry round plates.

How To Make A Quilted Casserole Carrier


