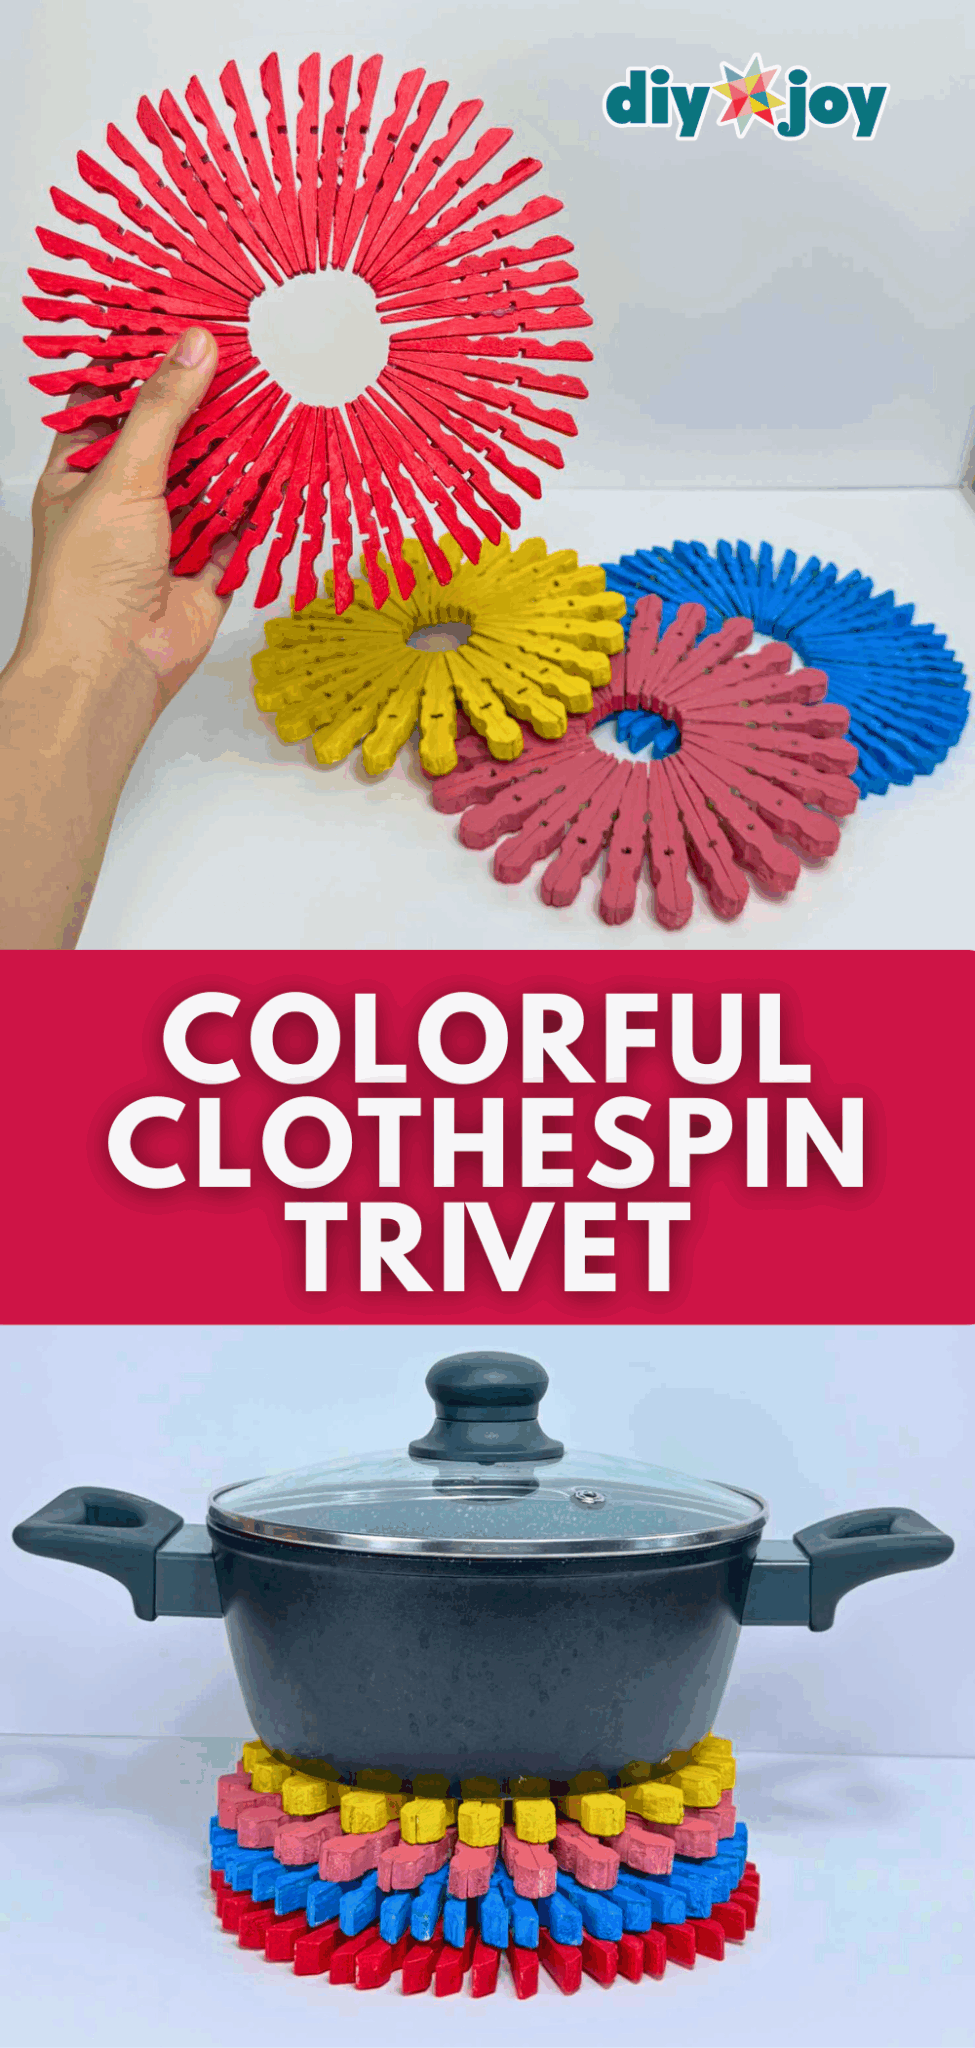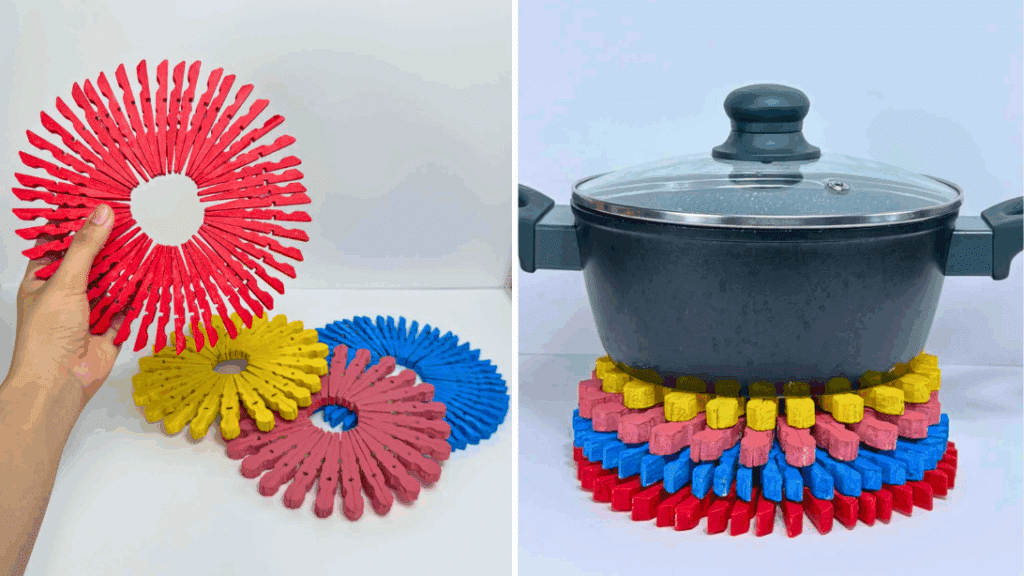
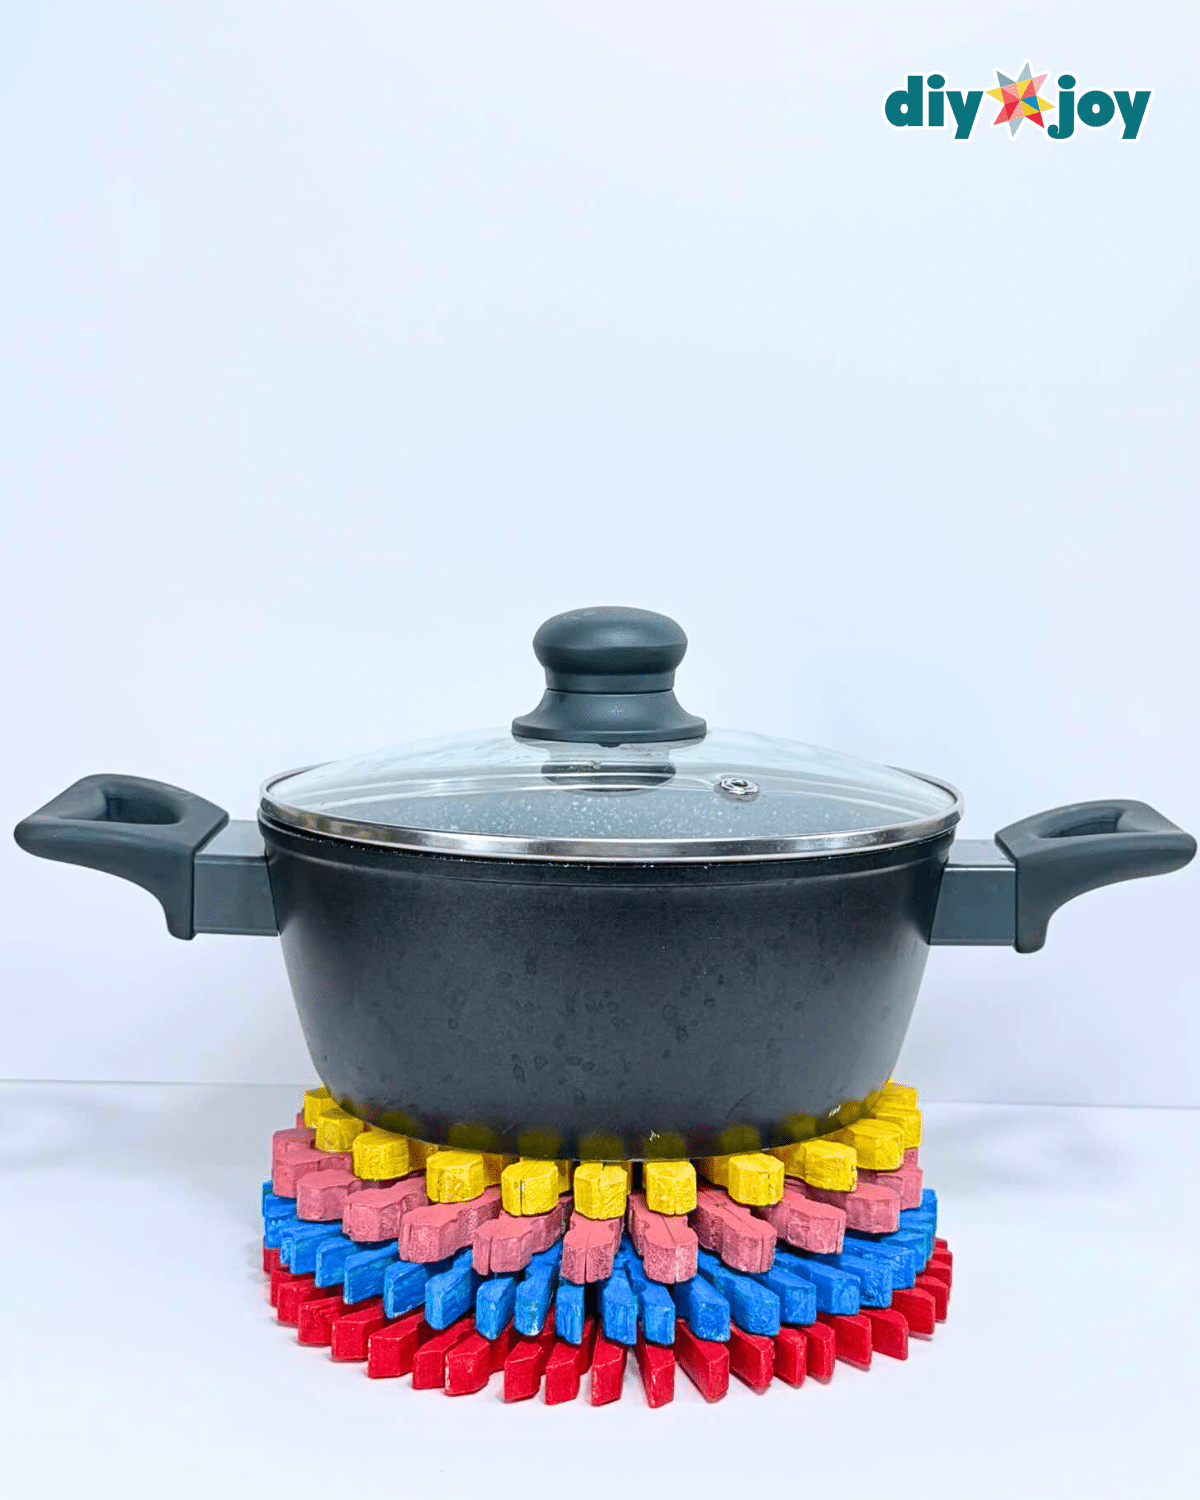
If you’re into crafts that are both fun and functional, this colorful clothespin trivet is a perfect weekend project for you to try. Using just a few simple materials—wooden clothespins, paint, and hot glue—you can create a vibrant trivet that adds a handmade touch to your kitchen.
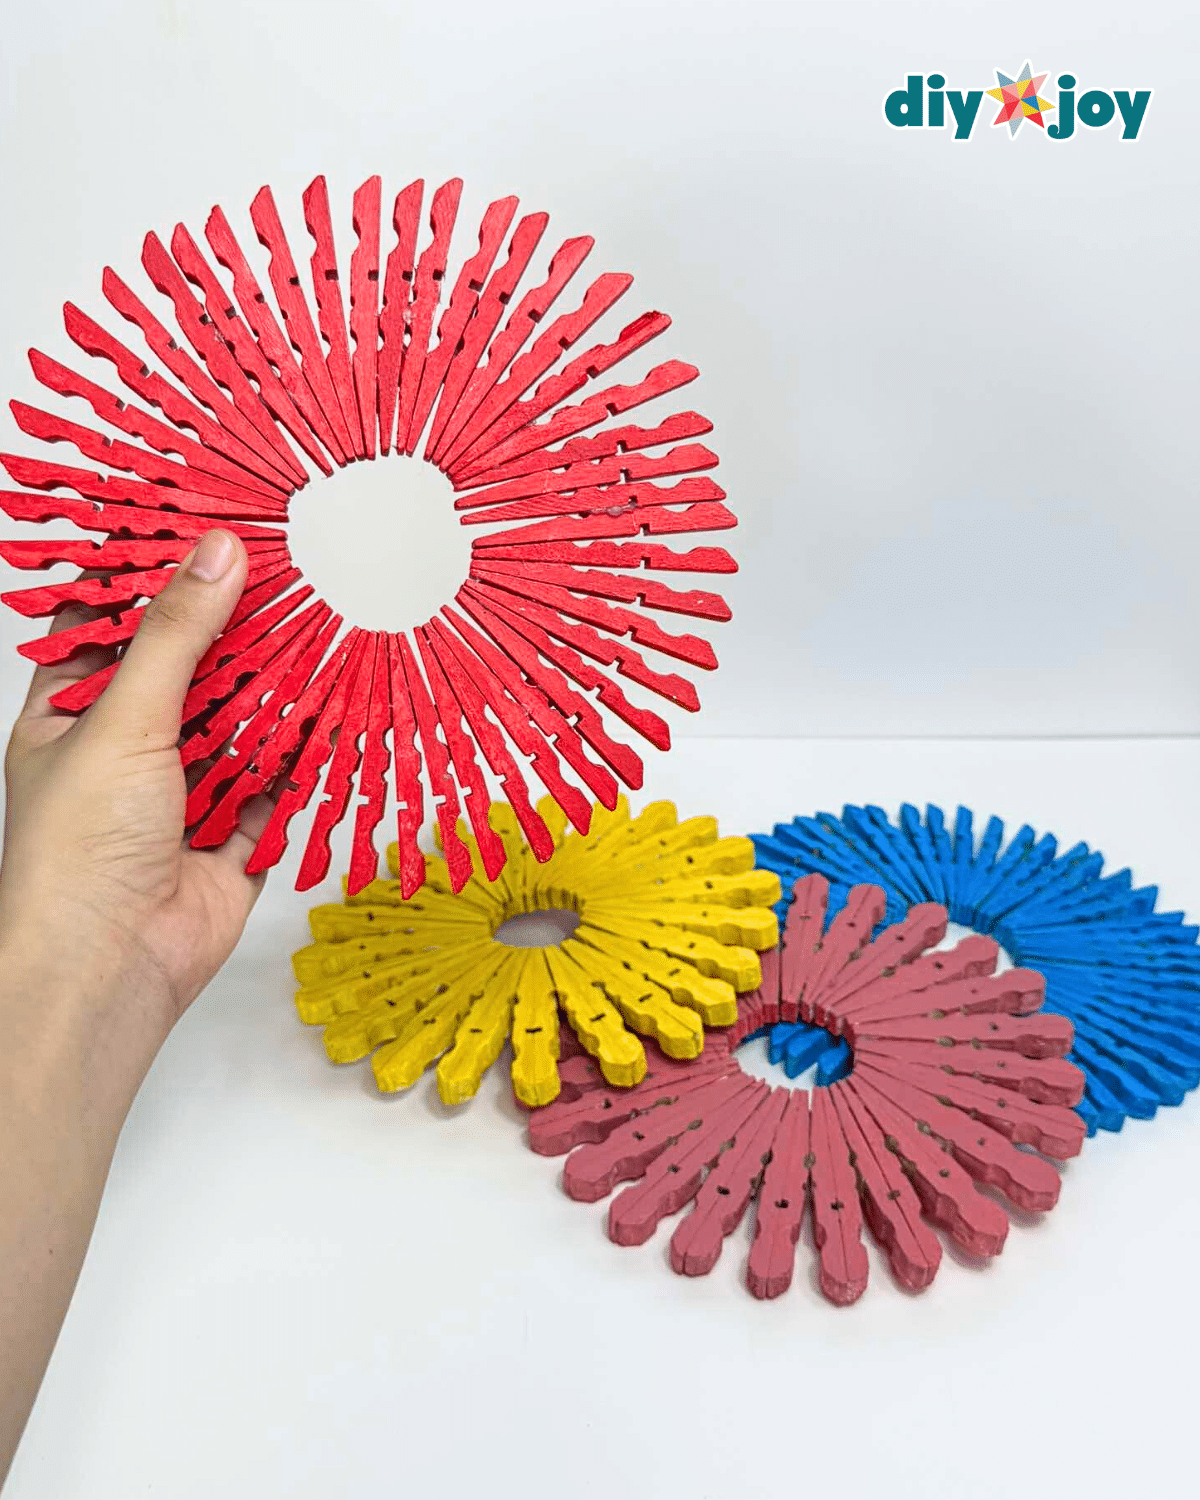
What’s great about this DIY is how easy it is to personalize. You can choose colors that match your style, go bold with a rainbow palette, or keep it subtle with neutrals—the possibilities are endless. This DIY clothespin trivet is beginner-friendly, budget-conscious, and a creative way to upcycle everyday items into something useful.
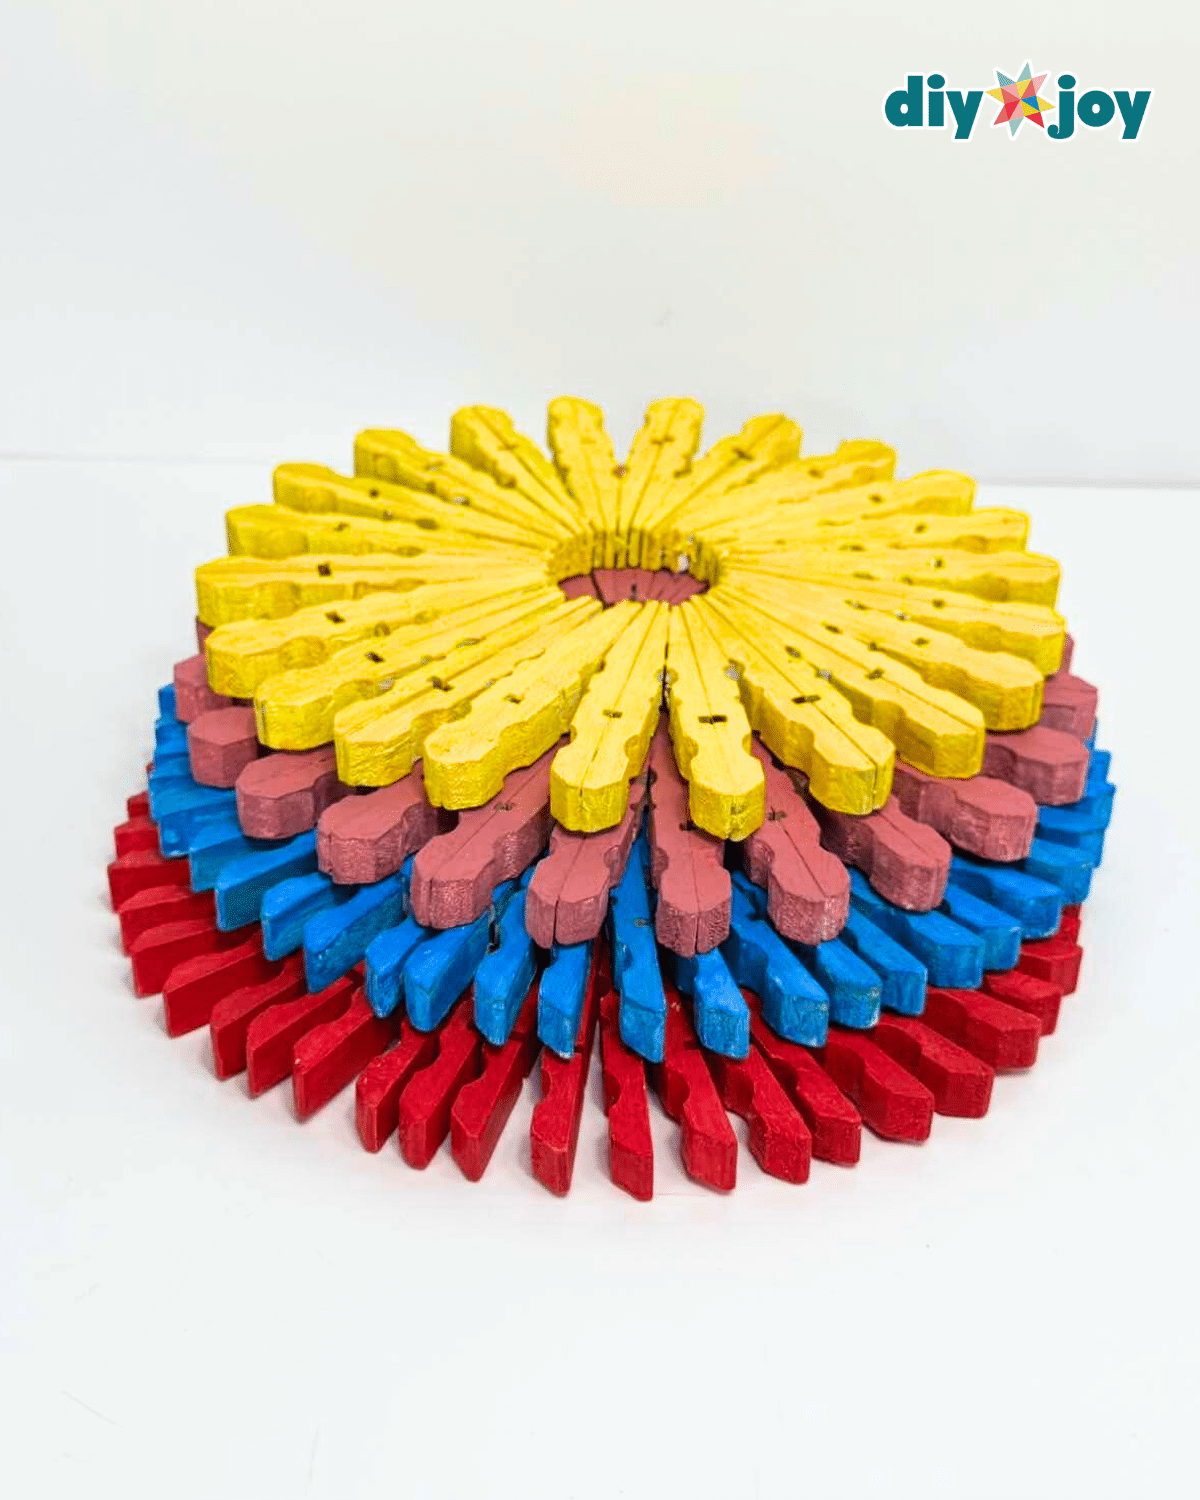
Whether you’re crafting for fun, making gifts, or just want a practical pop of color for your table, this DIY wooden trivet delivers. Ready to give it a try? This project is simple and the perfect way to add a splash of creativity to your space. Just follow the step-by-step instructions below to learn how to make your own colorful clothespin trivet from scratch—no crafting experience needed!
You May Like: How to Make a Photo Resin Coaster
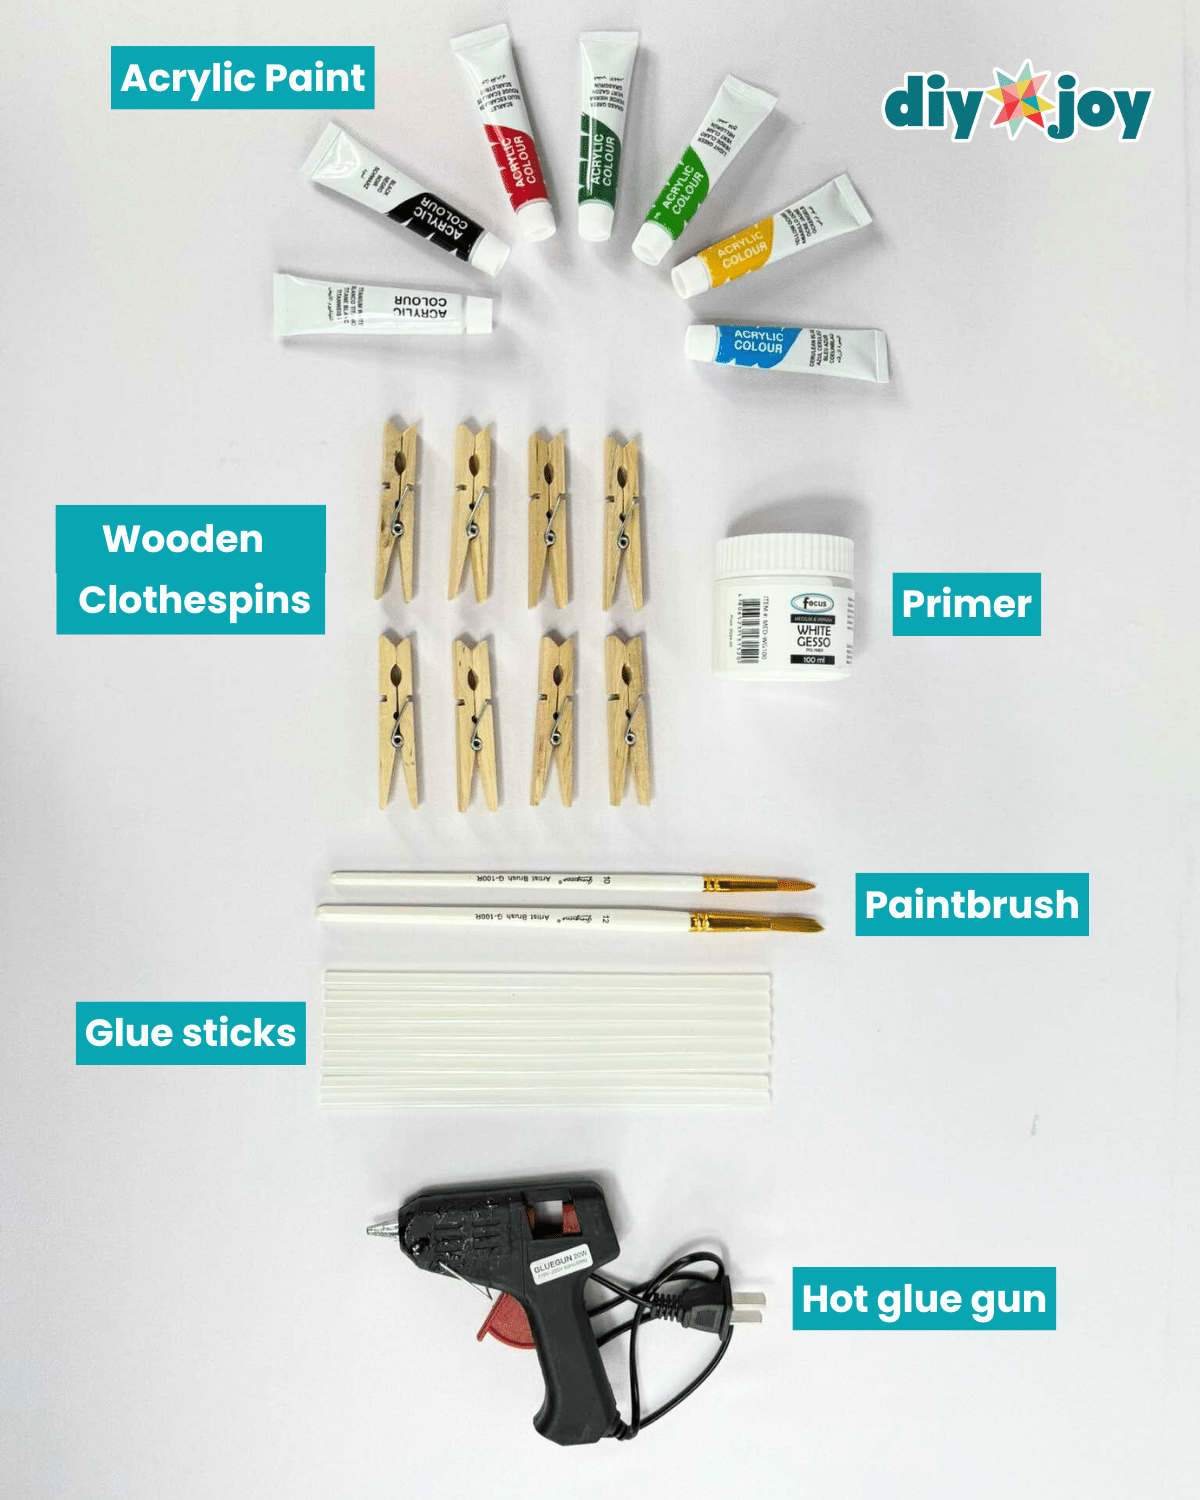
What You’ll Need for Colorful Clothespin Trivet
How to Make Colorful Clothespin Trivet
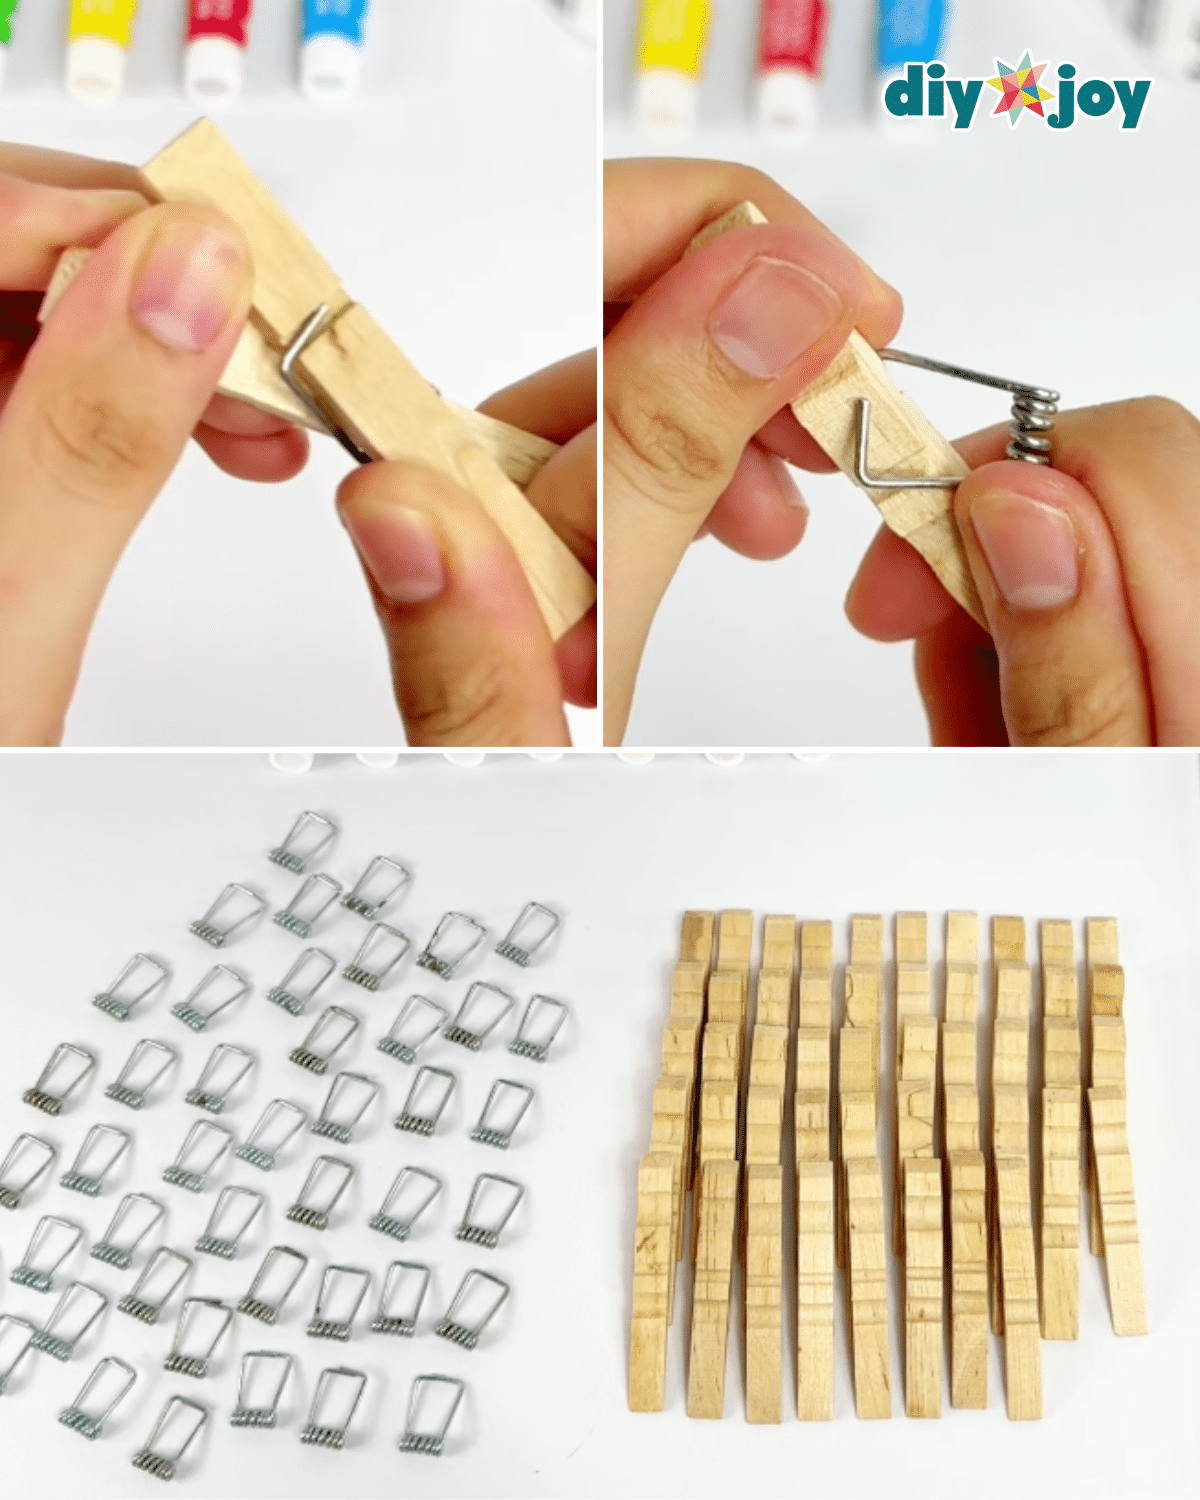
Step 1: Take apart the clothespins

Carefully separate the clothespins, then remove the metal spring. Repeat it with the rest until you have a couple of pieces.Step 2: Applying the primer
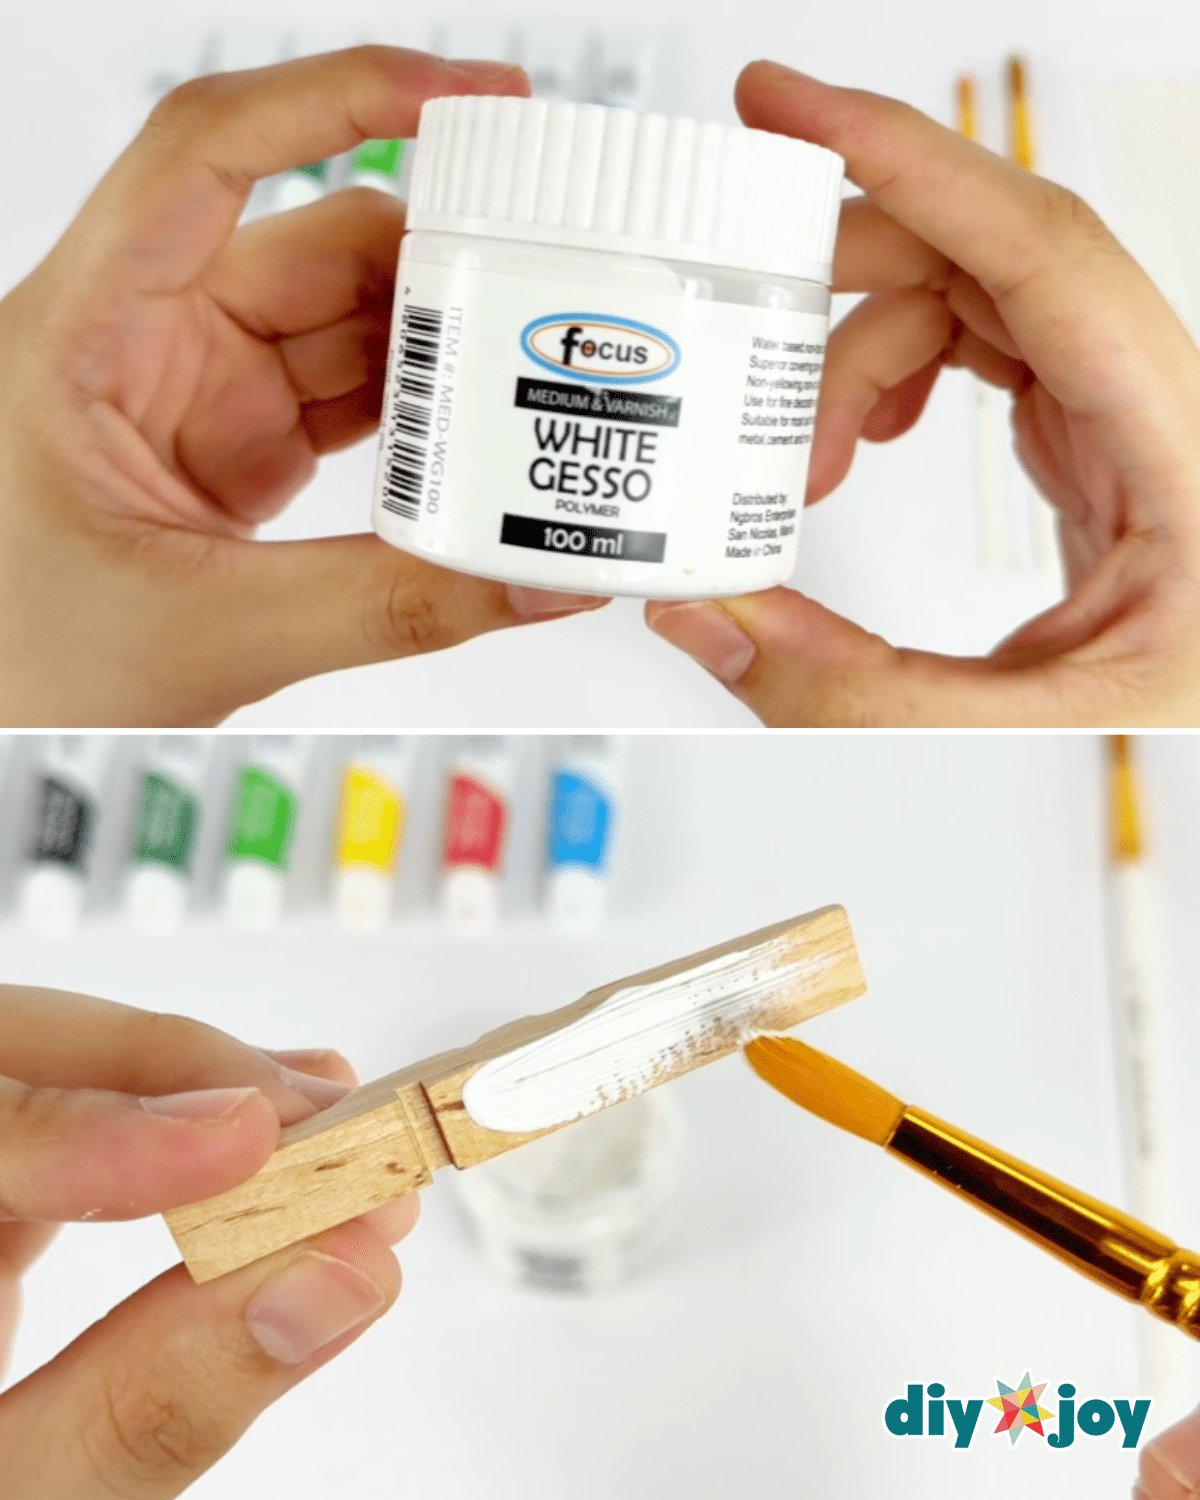
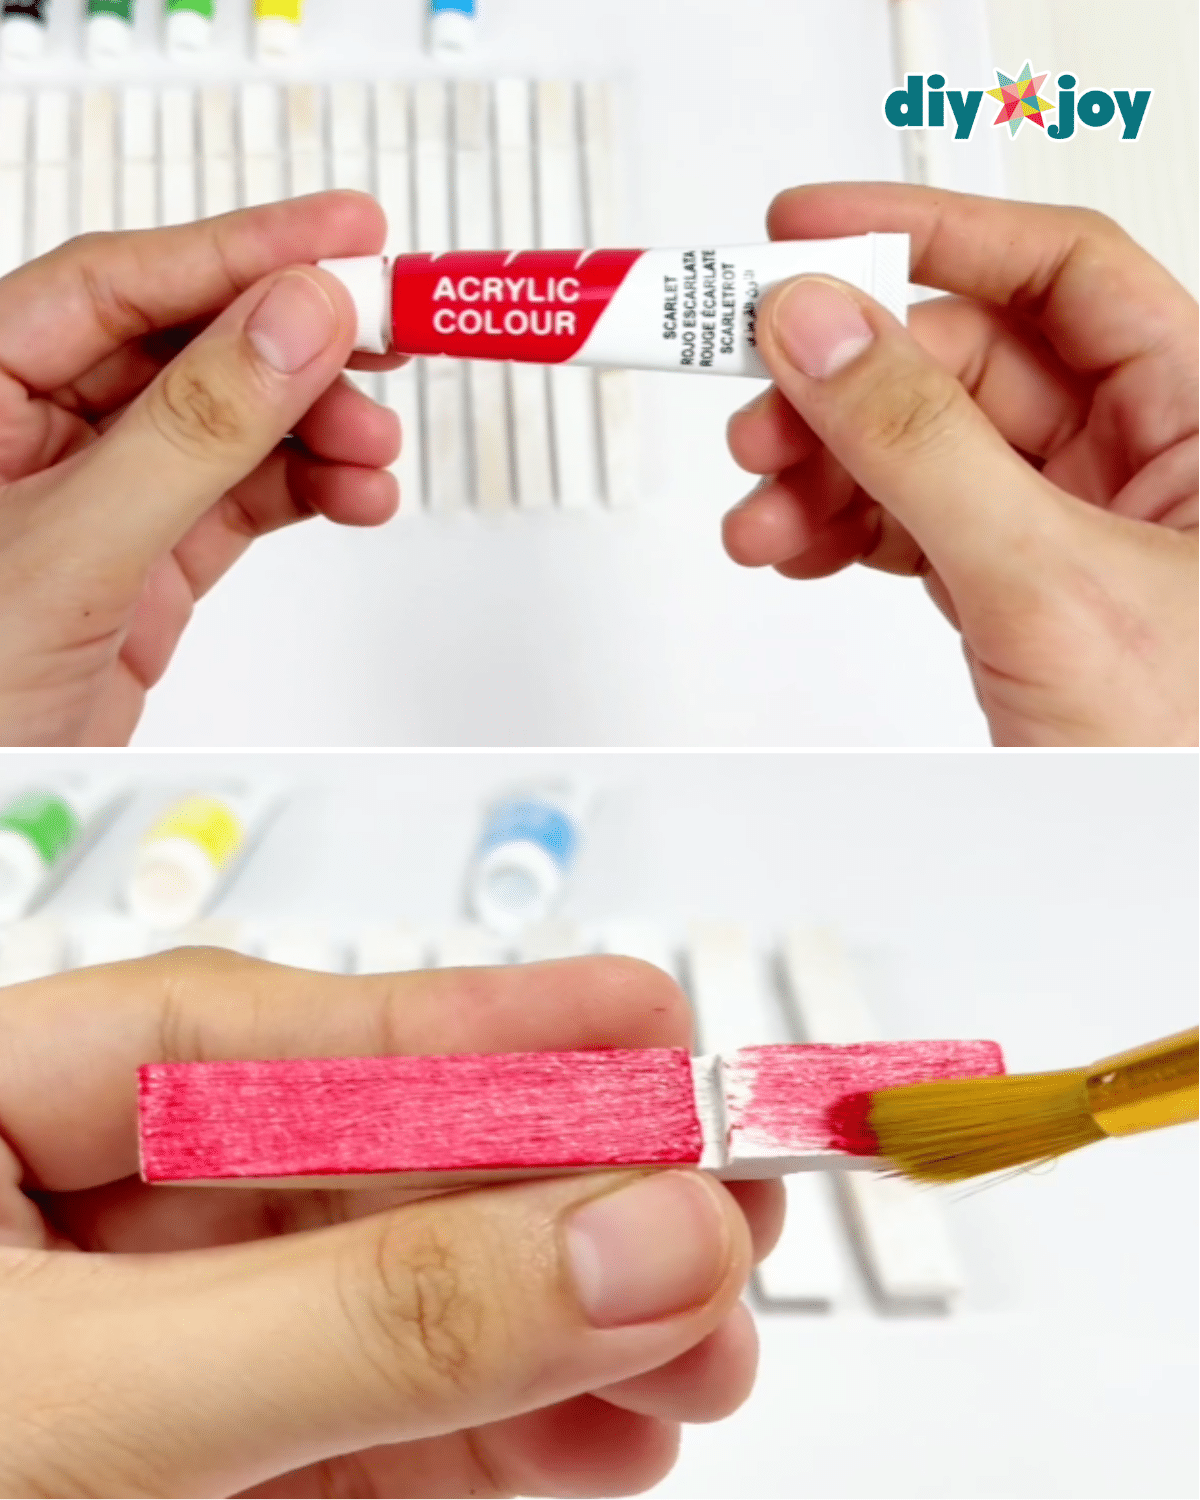
Apply a coat of primer, then let it dry completely.Step 3: Painting the pieces
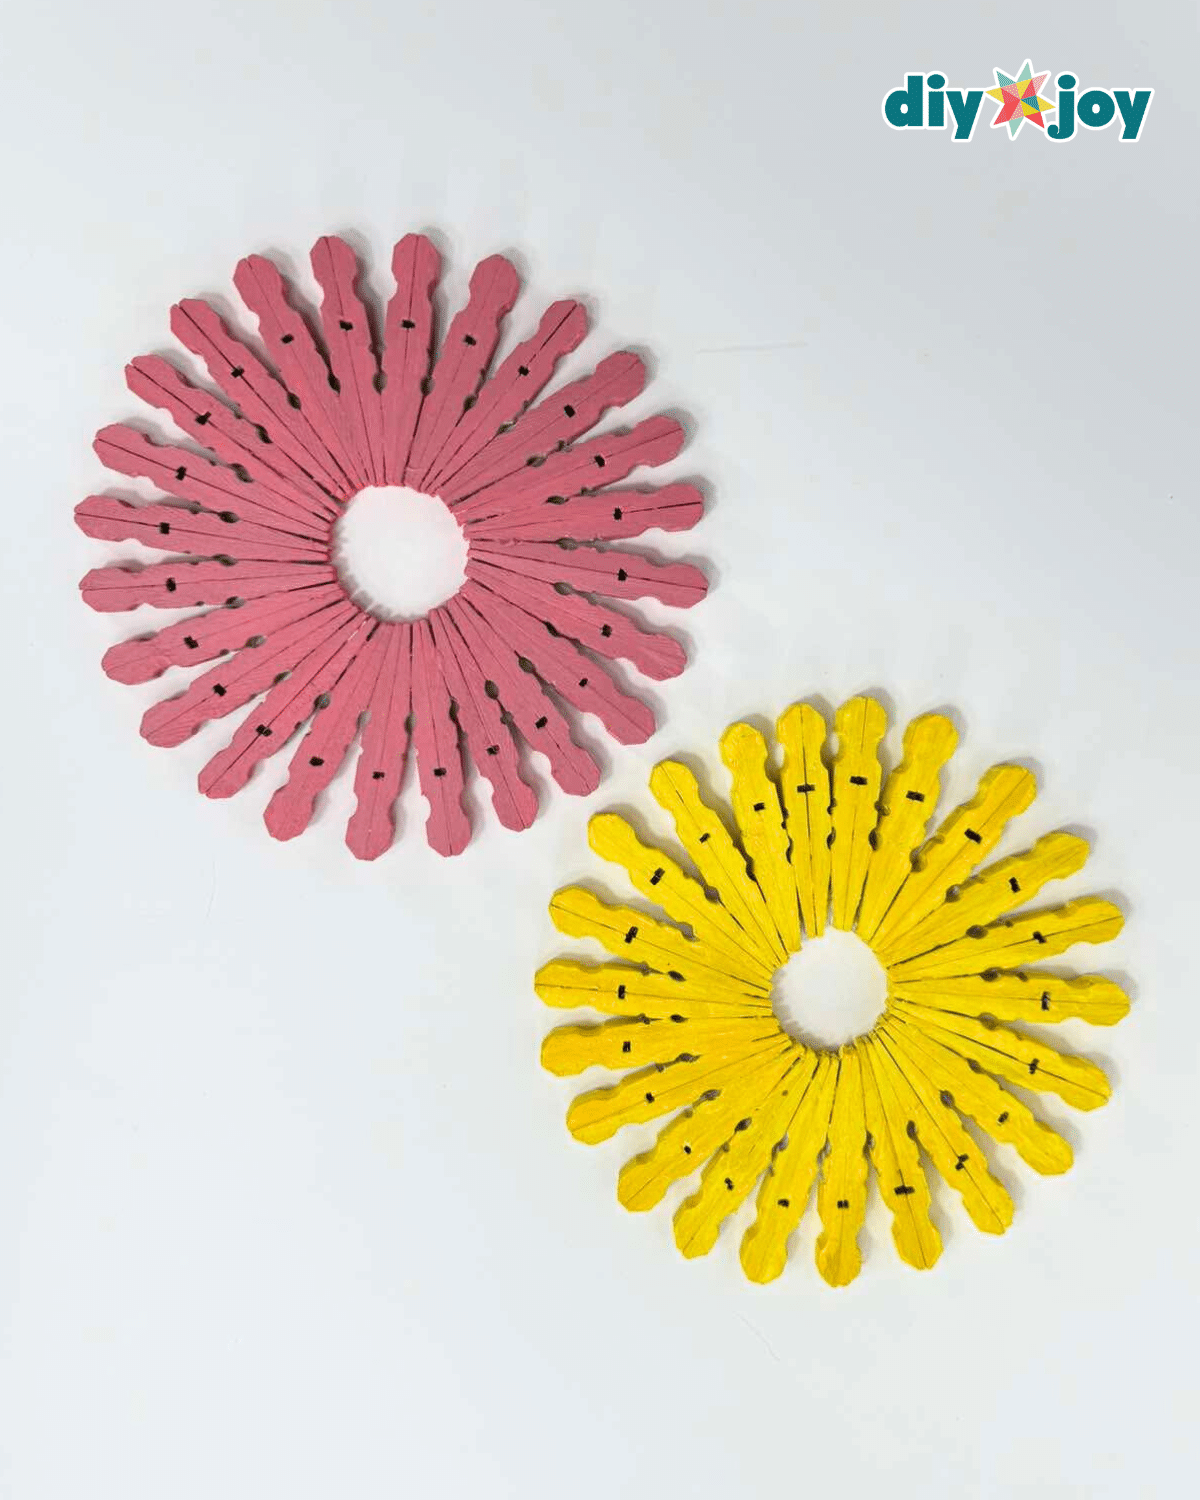
Once the primer has dried, paint it with whatever color you want, then let it dry. Feel free to apply another coat if desired. Repeat with the rest.Step 4: Assemble the trivet
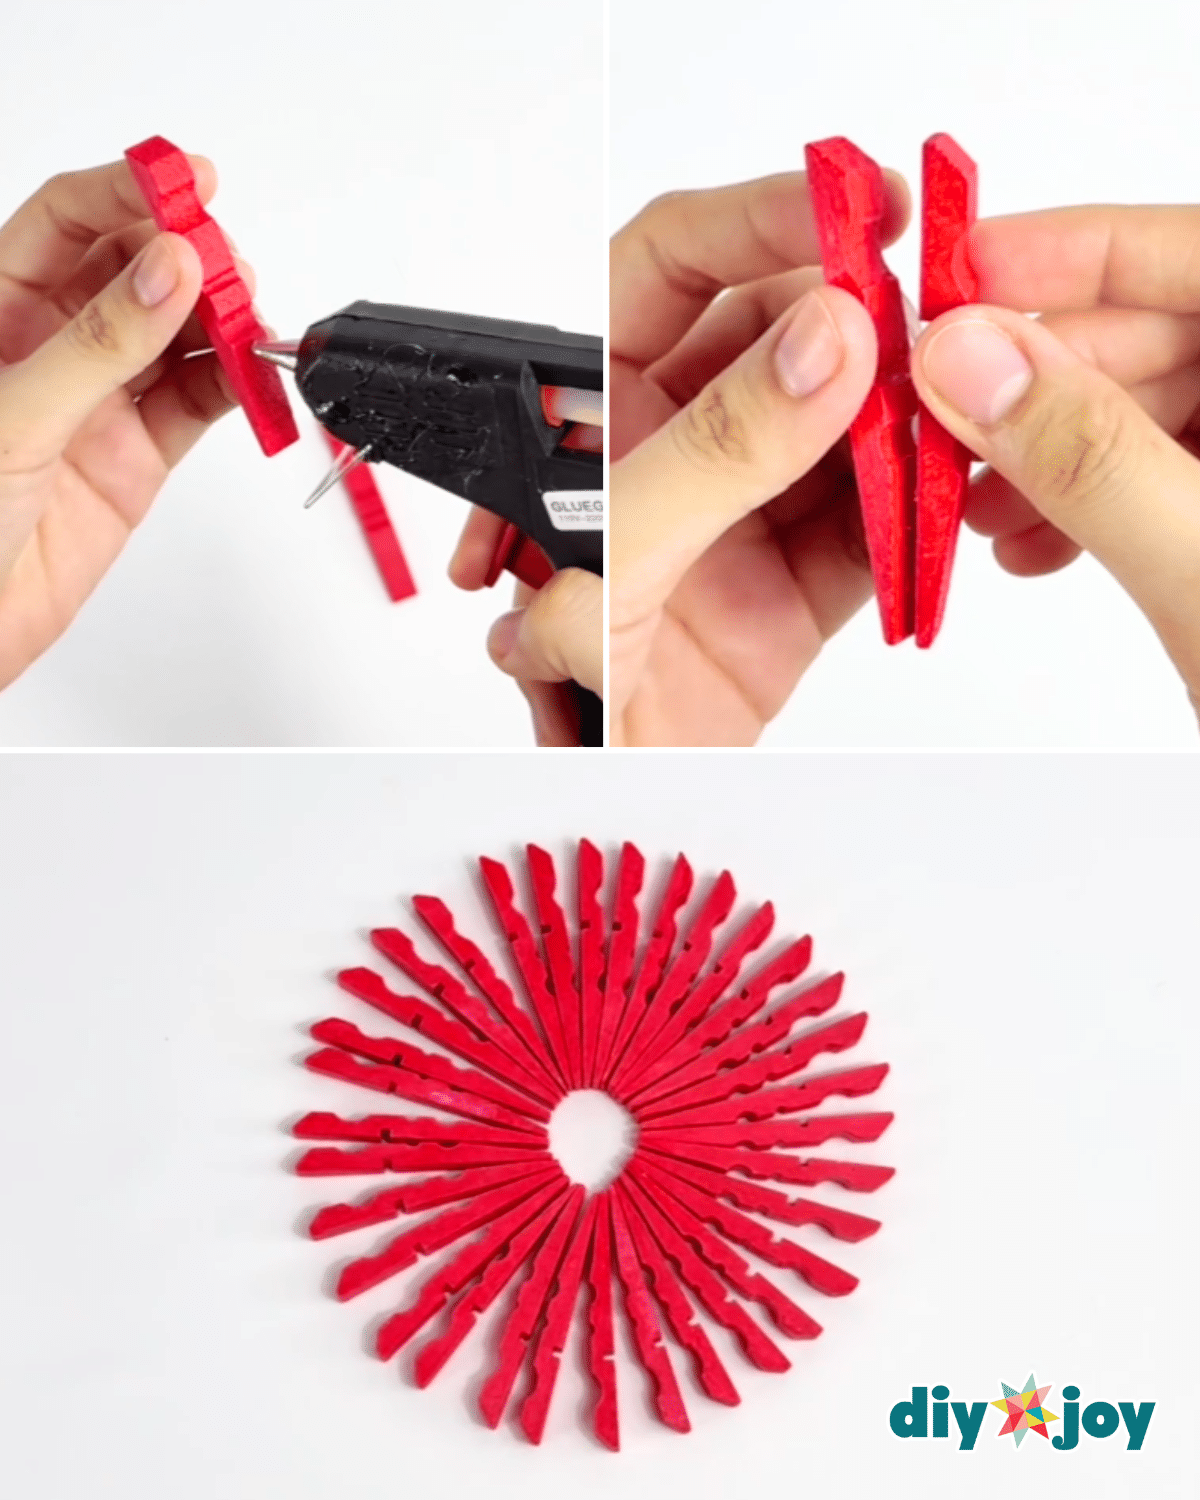
Apply hot glue to the slanted bottom of the clothespin, then stick it to the back of another clothespin, and press them together to secure. Keep adding more clothespins until you’ve completed the whole trivet.
Materials
- Acrylic Paint
- Paintbrush
- Primer
- Glue sticks
- Hot glue gun
- Clothespins
![]()
Pro Tips
- Stick to heat-resistant glue – If you plan to use the trivet for hot pots or pans, go for wood glue or a heat-resistant adhesive instead of regular craft glue.
- Add felt pads underneath – Stick small felt pads or cork circles to the bottom of the trivet to prevent scratching tabletops and to keep it from sliding.
![]()
Why You’ll Love This
- Beginner-Friendly & No Special Tools Needed – Whether you’re a seasoned crafter or just getting started, this project is super approachable and requires only basic materials.
- Customizable – You get to choose the colors, patterns, and layout—make it match your kitchen, your mood, or your gift recipient’s style!
- Practical & Pretty – It’s not just decor—it protects your countertops from heat while adding a pop of handmade color to your kitchen.
- Makes a Thoughtful Handmade Gift – Perfect for birthdays, housewarmings, or just-because surprises—handmade gifts like this always add a personal touch.
Our Viral Projects

Paper Flowers

Crafts

Paper Flowers

Crafts
*If you love this craft, then visit our official website, follow our Facebook page, and subscribe to our YouTube channel for more!
Easy Colorful Clothespin Trivet