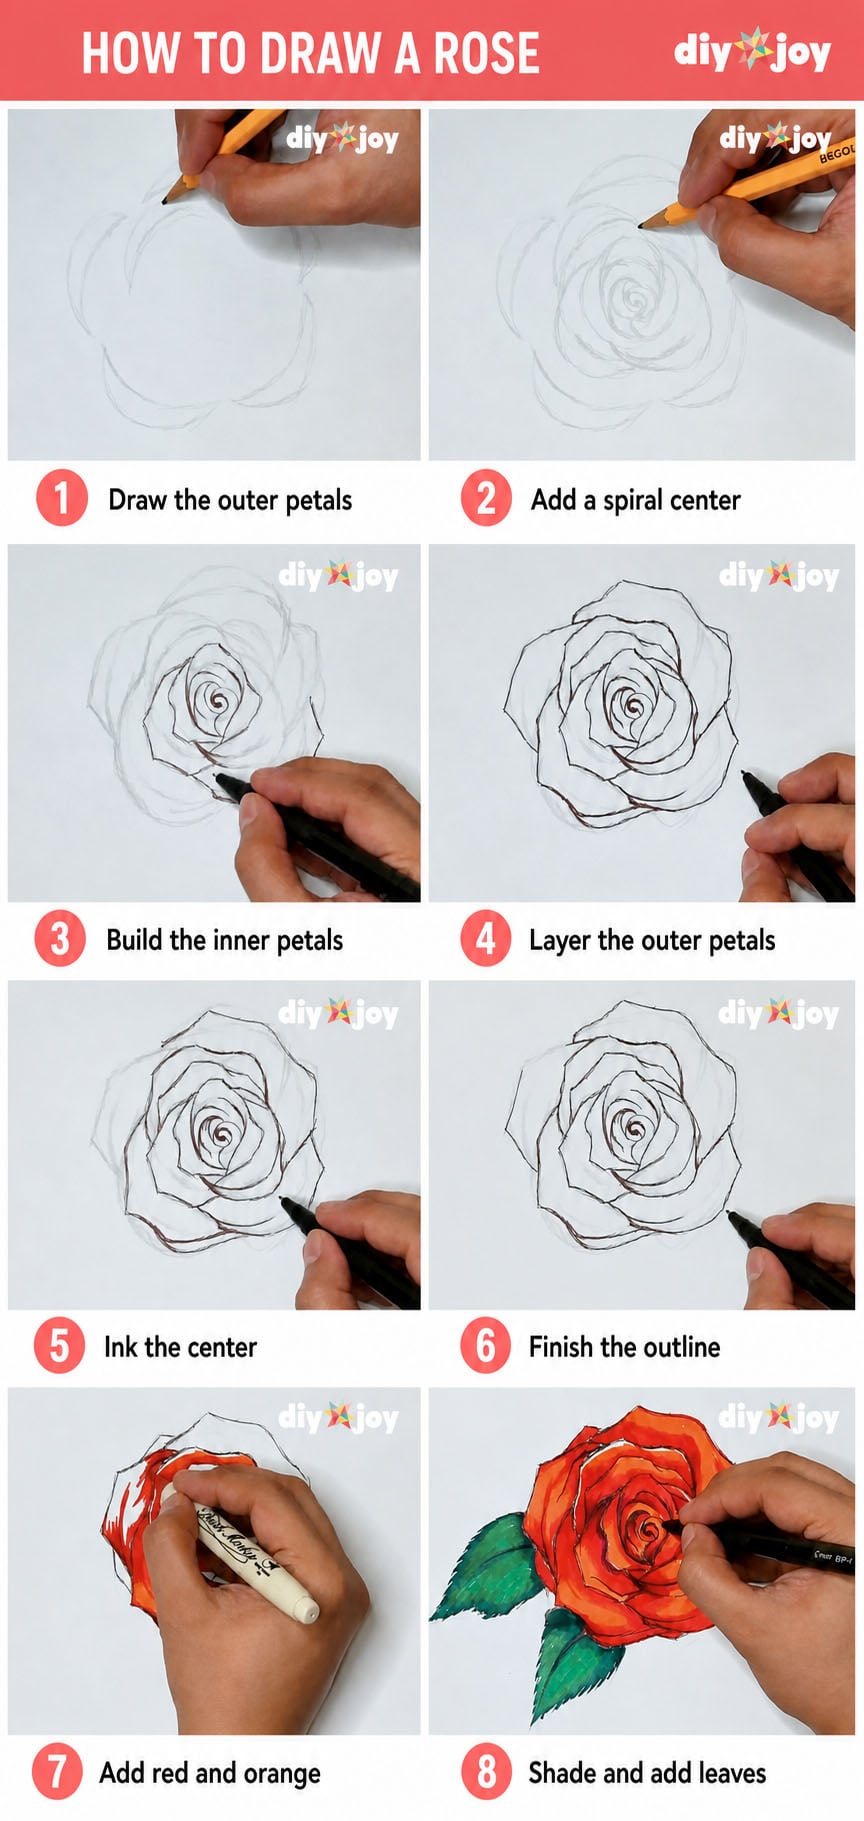
Ever wanted to learn how to draw a rose, or for that matter anything? Some of us were born knowing how to draw and others of us, well, not so much. Just because you were not born with amazing artistic talent does not mean you can’t practice and actually become pretty good at drawing. Practicing and understanding a few basic drawing techniques have helped me tremendously, and I thought it would be nice to share some of my latest basic drawing tutorials with you. Here is my first, a step by step tutorial for learning to draw a rose, complete with a YouTube video.
This easy rose drawing breaks the flower down into simple shapes, so it works whether you are a total beginner or just want a quick, fun art project. I will show you how to make a rose one pencil line at a time, then ink it and add color, so you end up with a pretty flower you can use in cards, journals, and other crafts. It is an inexpensive, budget friendly project, and all you really need to get started is paper and a pencil.
Table of Contents
Rose Drawing Video Tutorial
All you need before you start is some paper, preferably a reasonably heavy weight, but copy paper can also work. If you want to ink or color your drawing, I would hunt down some card stock before you start. Grab your pencils or your iPad and an app like Procreate, then start learning how to draw easy roses like mine.
What You Will Need:
- Paper or a sketchbook (use heavier paper or card stock if you plan to ink or color)
- Pencil
- Eraser
- Black ink pen (permanent if you plan to add color)
- Colored pencils or Copic style markers
- Optional: an iPad with a drawing app like Procreate
How to Draw A Rose
Step One
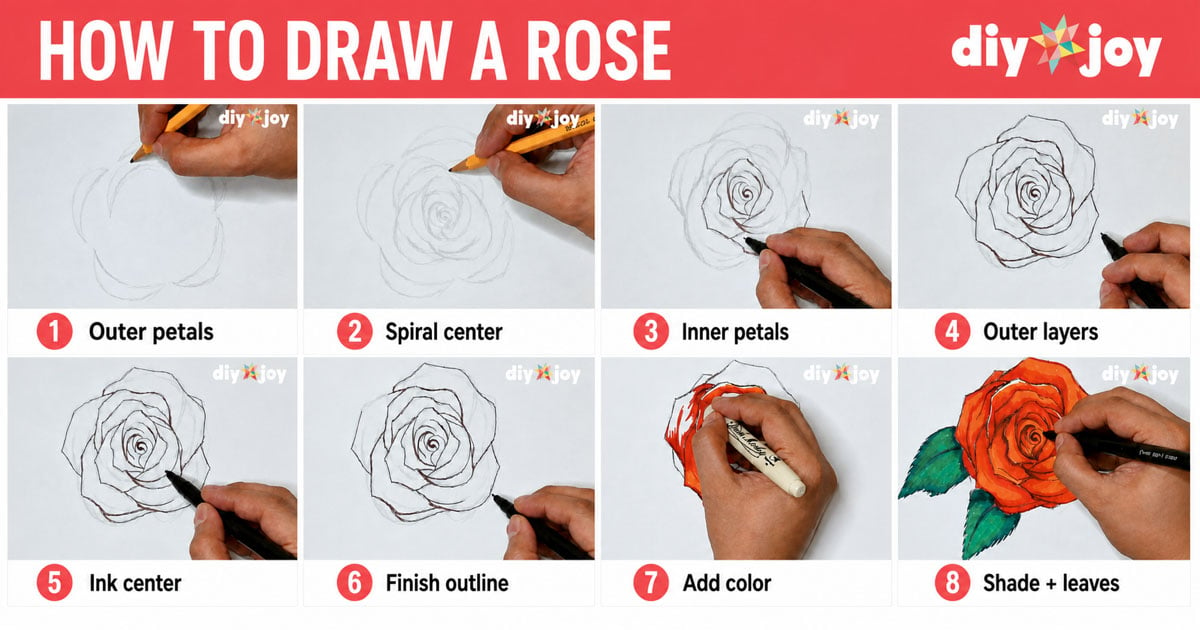
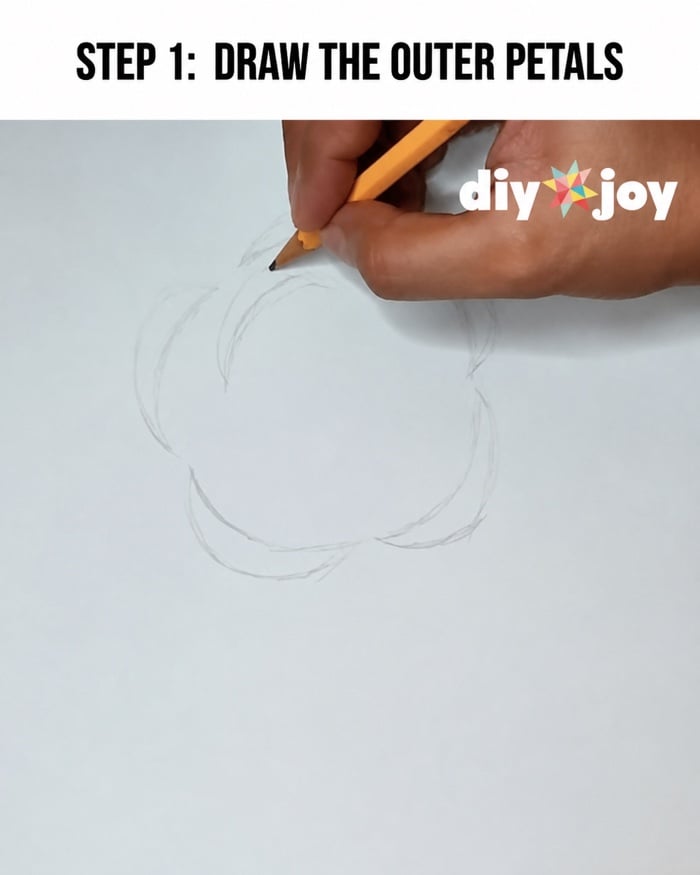
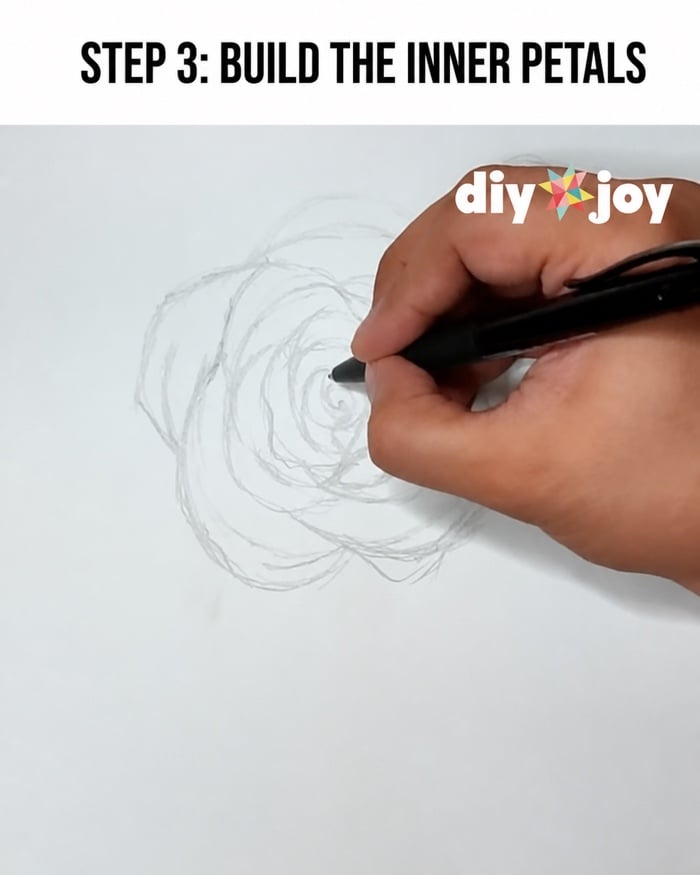
Starting from the center, draw little moon shapes that circle around one another like this. If you look at the photo or video, the center of the rose starts with two, the next has three drawn in, then four moon shapes, and then five for the outer layer of the rose. I like to vary the sizes of the moon shapes a little bit so that my flower is not perfectly symmetrical, since no roses ever really are that way with their petals.
Step Two
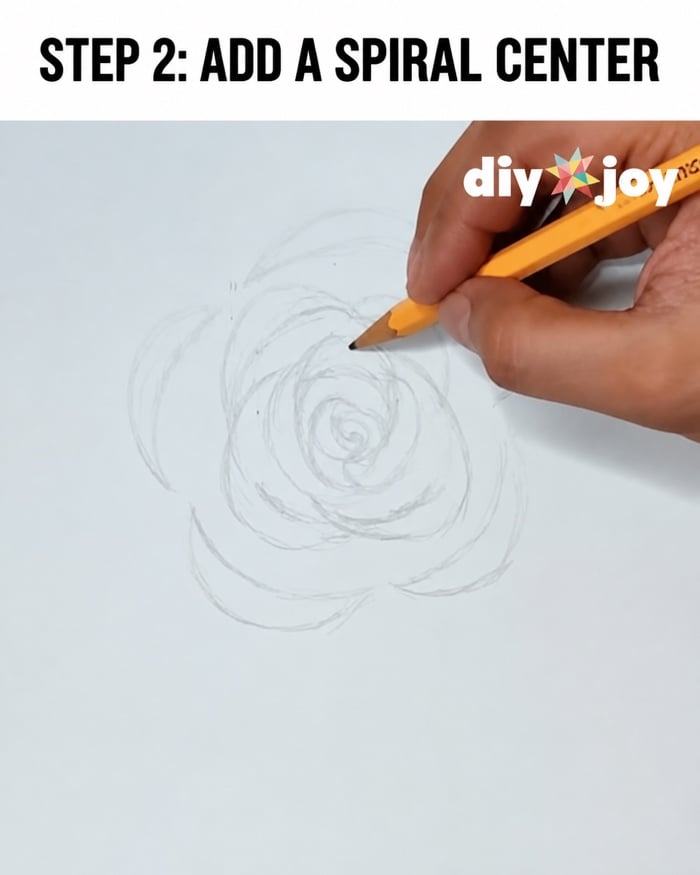
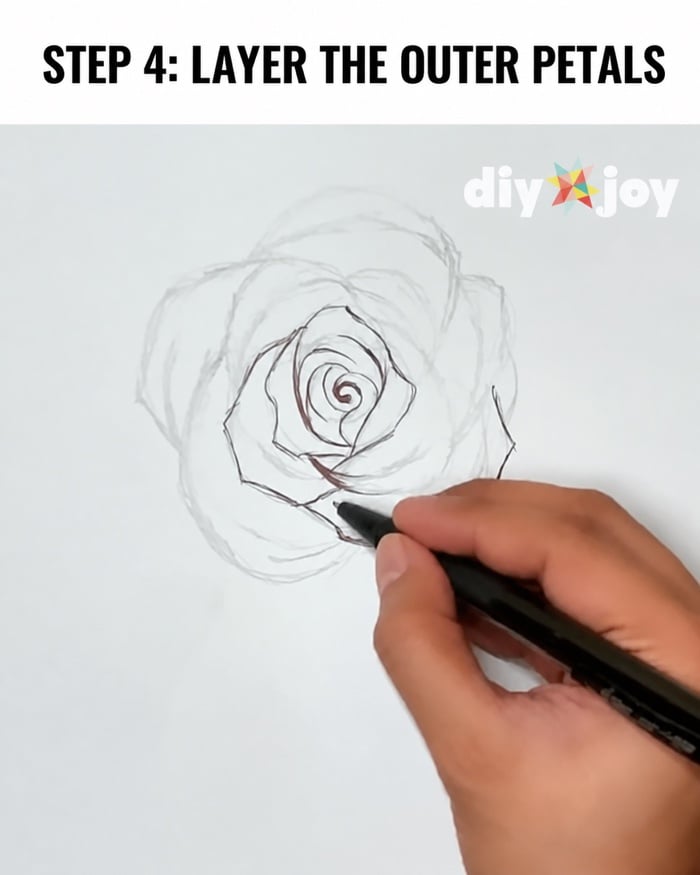
Now start drawing more sketch like lines to connect the moon shapes, making them look more like petals. You can use your eraser here if you need it.
Step Three
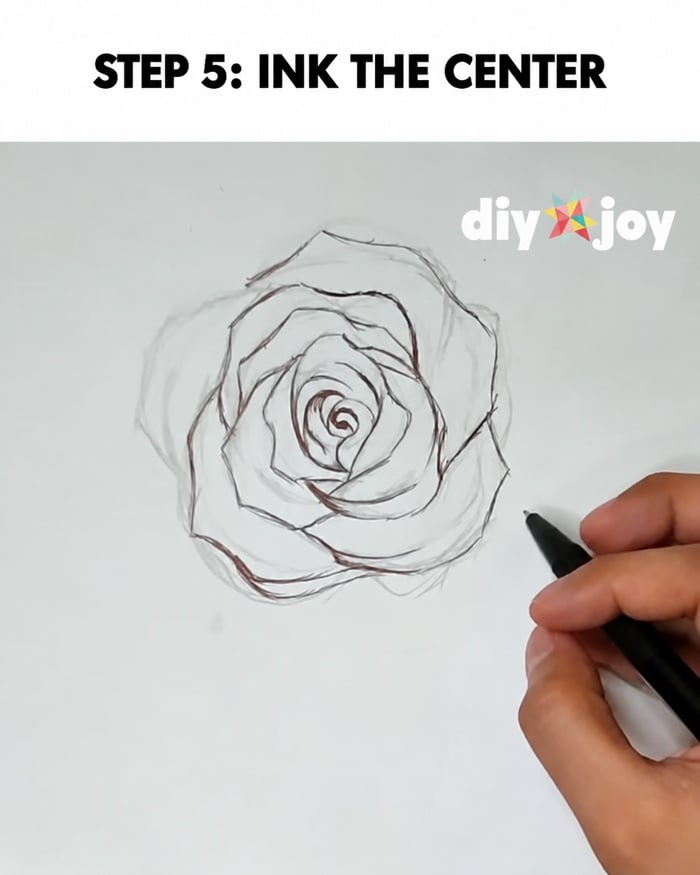
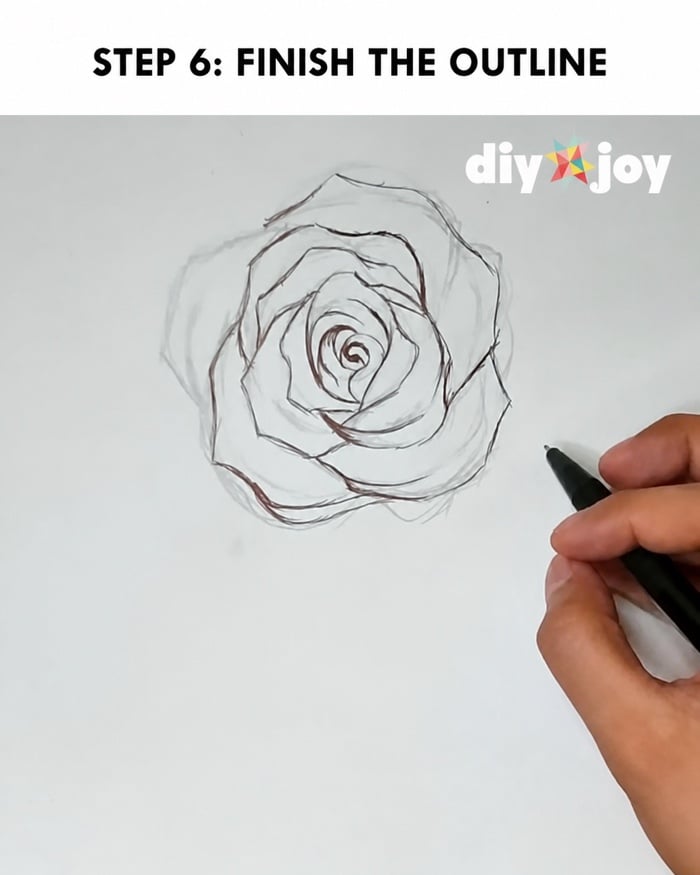
Once you have finished the pencil part, you can ink in your rose drawing. This is how to use a pen to outline the rose drawing. You may erase your pencil lines if you like. Sometimes I like to leave mine. If you are going to ink the rose, though, you probably want to erase the pencil marks. If you are going to color your rose with watercolor or markers, be sure to use a permanent ink pen here, or you are likely to have a big mess on your hands.
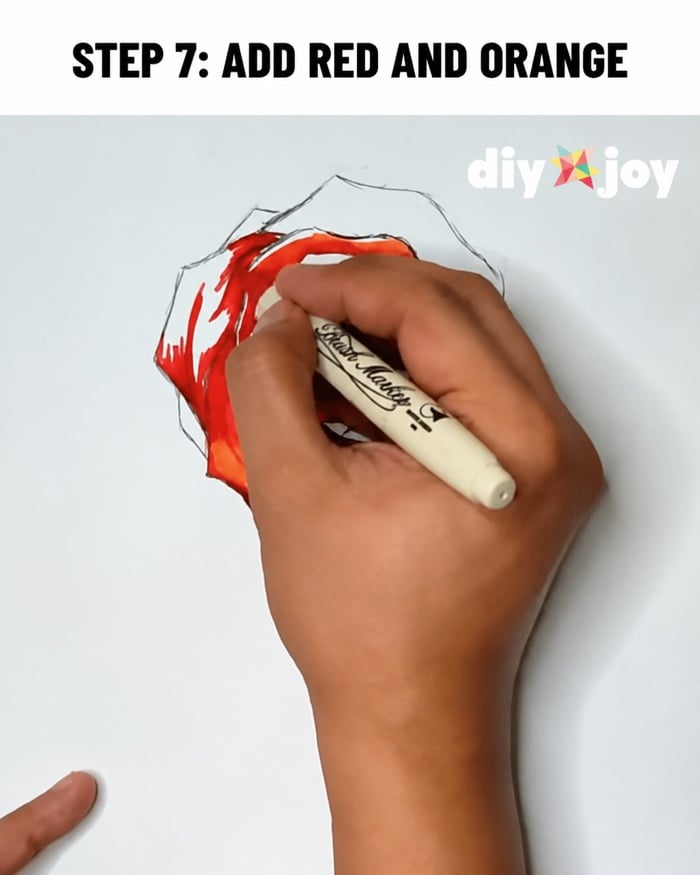
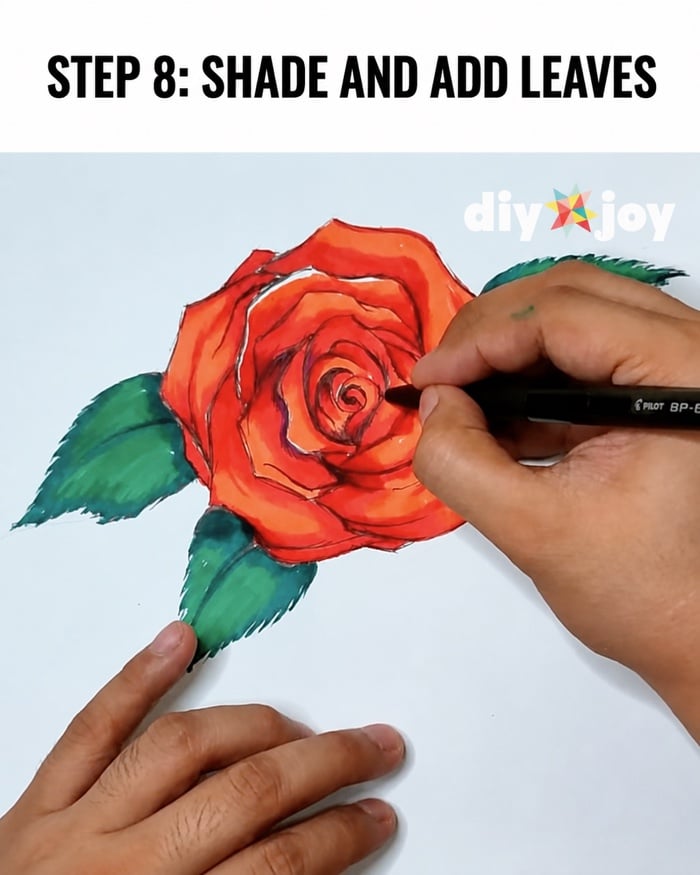
To color a rose, you may use colored pencils or Copic style markers. If you are using markers, then you will end up with a drawing of a rose that looks like this, but you can make the flower any color you choose. Definitely a cool project to try when bored. The YouTube video for drawing a rose shows the whole process in more detail, so be sure to check that out, then grab some art supplies and follow along with me as you practice these techniques.
Ways to Change Up Your Rose Drawing
Once you are comfortable with this easy rose drawing, try making the flower any color you choose, or draw a whole bouquet of roses at different stages of bloom. You can add a stem with thorns and leaves, sketch the rose in a vase, or turn your finished drawing into greeting cards, journal art, or other fun crafts. Roses come in a huge range of shapes and colors, and studying photos of real roses is a quick way to understand how the petals layer, so your drawings look more natural. If you enjoy flower art, you can also paint flowers on rocks or try an easy flower painting idea, or browse more rose projects for inspiration.
Start at the center and draw a few small moon shapes that curl around each other, then add larger petals as you work outward. This easy rose drawing method keeps the flower simple, so it is a great step by step tutorial for beginners. Practice the basic shapes a few times and it gets easier fast.
All you really need is paper and a pencil to sketch the rose. If you want to ink and color your drawing, grab a permanent black pen and some colored pencils or Copic style markers, and use heavier paper or card stock so the color does not bleed through.
Sketch the moon shapes in the center, connect them into petals with light pencil lines, then ink over your final outline. Once the ink is dry, erase the pencil marks and add color to finish this easy rose drawing. The YouTube video walks through the whole how to draw a rose process in more detail.
Colored pencils and alcohol markers both work well for a rose drawing. If you use markers, outline with a permanent ink pen first so the lines do not smear, then build the petals from light to dark for a more realistic flower. You can make your rose any color you like.