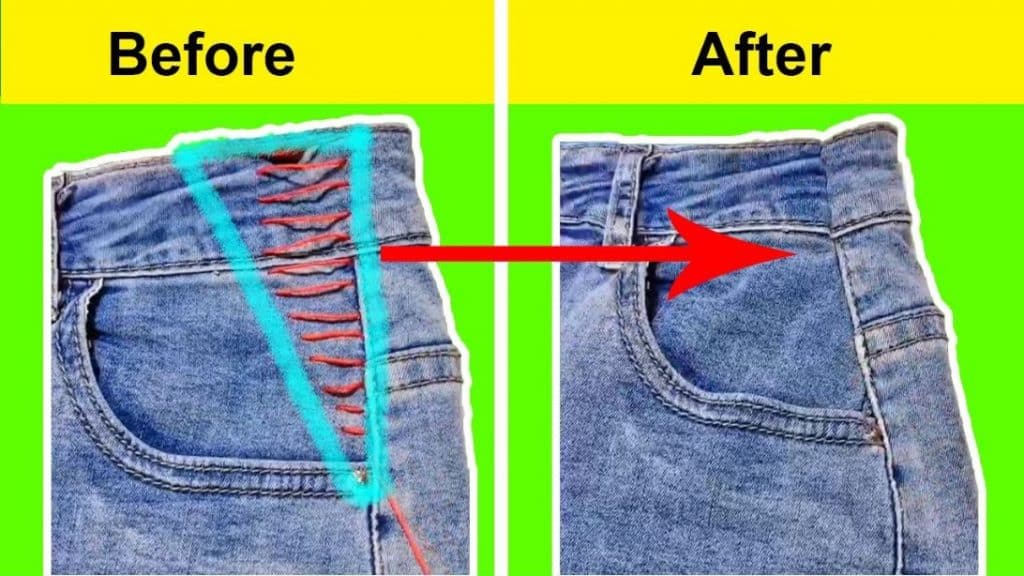
I found a good pair of jeans while shopping – it has a unique design, the color is beautiful and it has a high-quality fabric. The problem is its size. It is inches bigger than my normal size, but I still purchased it because I know I can easily repair it with the help of this tutorial by Craft ideas on Youtube. These methods are game changers. Read on or watch the video below to learn how to downsize the waist of jeans.
Materials:
- thread
- needle
- scissors
- pair of jeans that needs to be altered
- pencil or chalk
[social_warfare buttons=”facebook,pinterest,twitter,whatsapp”]
Instructions:
First, measure how much you want to downsize e the waist of your jeans. Fold one of the sides, so it will form a triangle. Mark that end, then trace the diagonal with chalk or anything that can be easily erased. Also, make a straight vertical line following the side seams of the jeans.
Insert your needle into your thread and tie the ends together into a knot. Make sure to make it long, so you need to use another thread.
Method 1:
Insert the needle into the mark from the fabric. After that, to the side seam. Make sure it is straight. With the needle on the back, insert it just 1/4 inch below still on the side seams line. After that, insert it across the diagonal. Keep doing this until you reach the bottom. Once done, pull the thread gently until it closes. Make a knot to secure the stitches.

Method 2:
It’s the same process as the first one but instead of starting from the top, you start at the bottom. If you need to downsize it more, do the same on the other side.
Method 3:
The third method is almost the same process as the first one but instead of doing it on the side seams, you’ll do it on the back rise. Also, instead of making one right triangle (with a 90-degree angle), you’ll draw two. The right triangles will be mirroring each other. Make sure to use a color-matching thread.
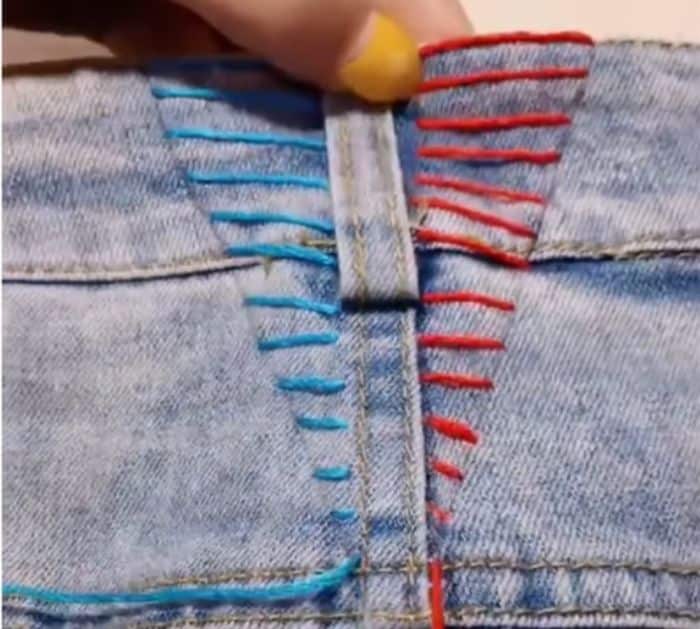
Method 4:
This no-sewing method is probably the easiest. There are 2 options (1) Insert the button on the first belt loop on the side, then fasten the button (2) Use a handkerchief – insert it on 2 belt loops, tighten then make a knot.

