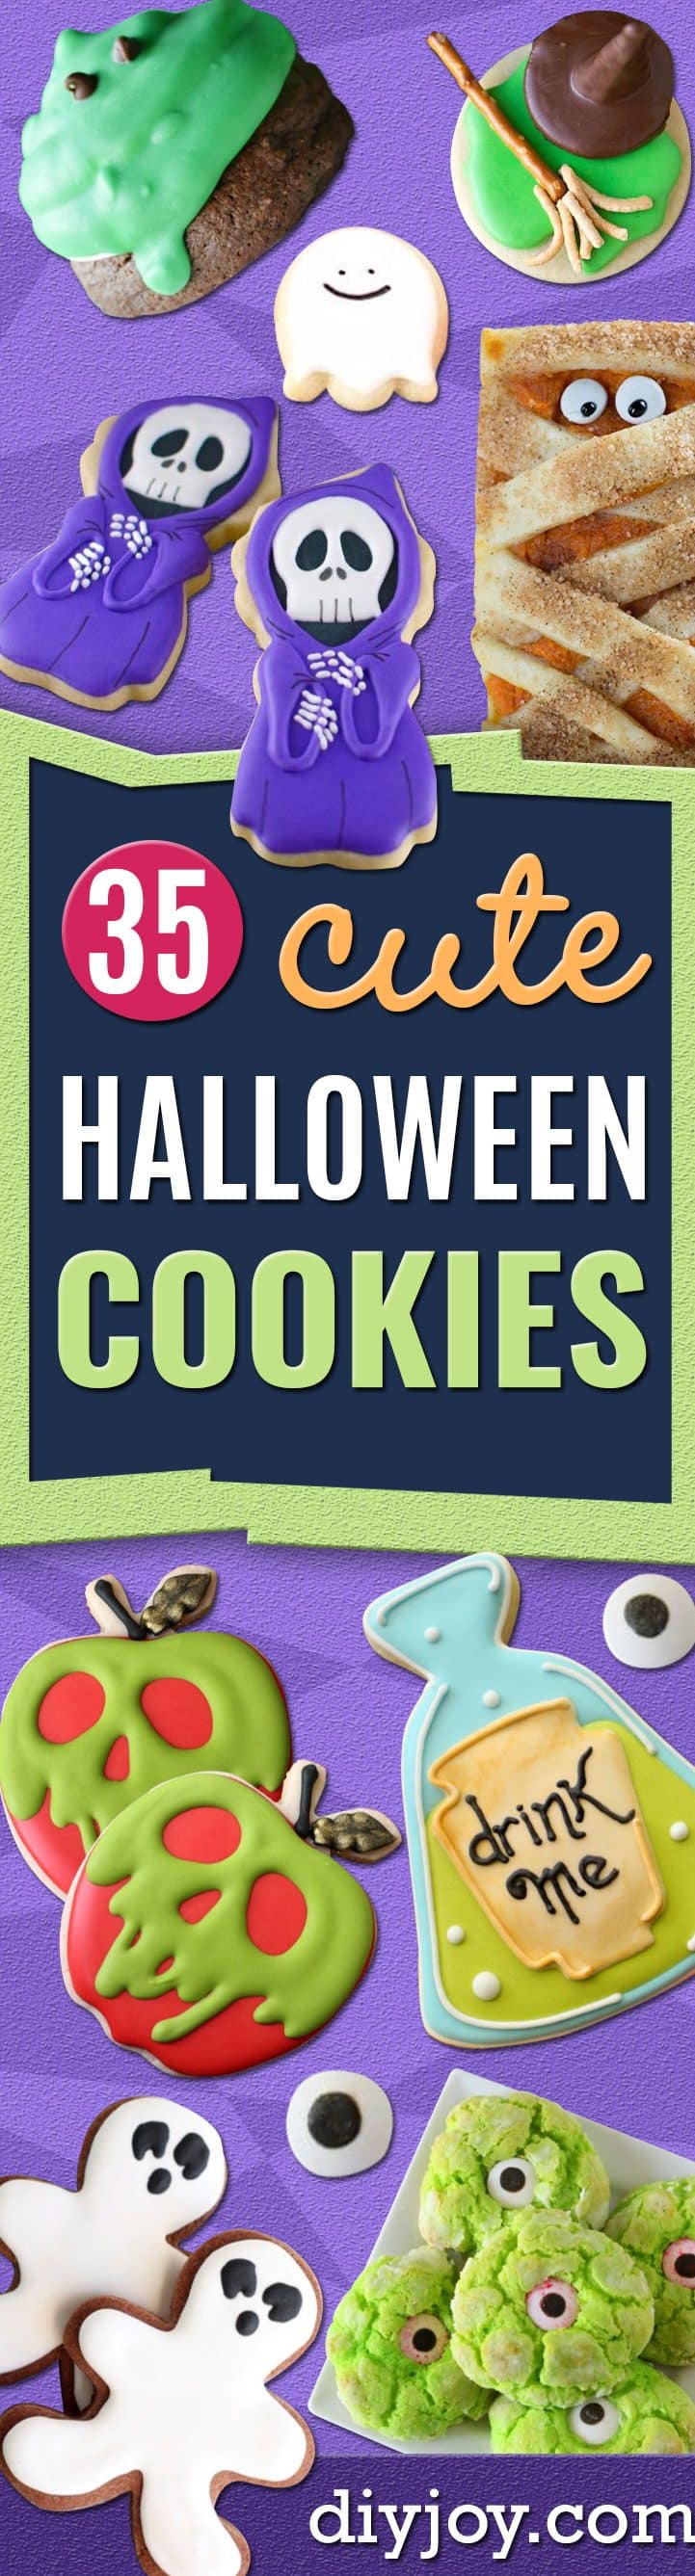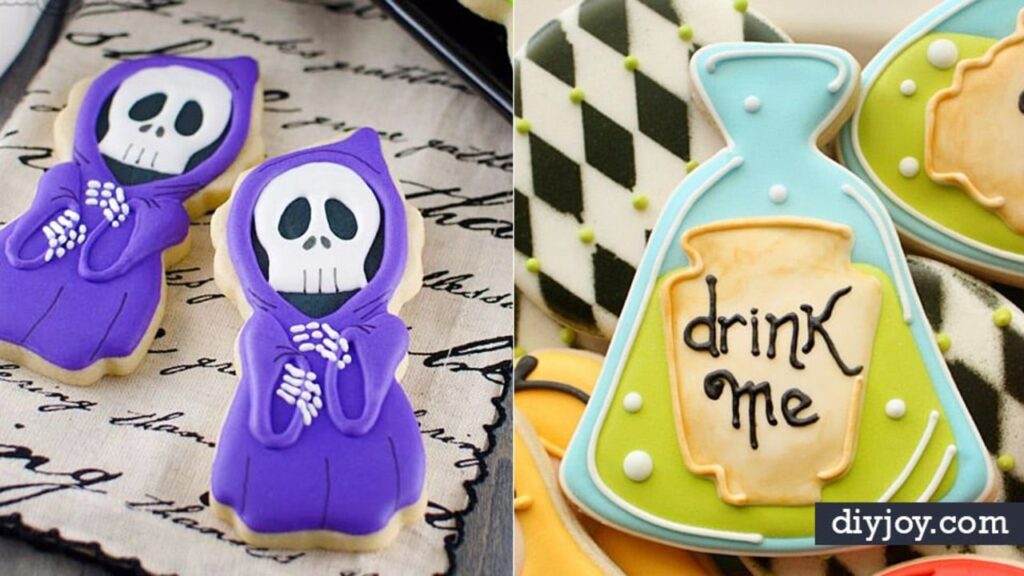
The best Halloween cookie ideas are easy to recognize, fun to decorate and good enough to eat after the party photos are done. This list gives you 35 ways to make that happen, including monster eyes, mummies, spiderwebs, pumpkins and a few clever no-bake shortcuts.
You’ll find simple cookies for kids beside from-scratch recipes that let you settle in with a piping bag. There are chocolate cookies, pumpkin cookies, candy-filled designs and quick projects made with sandwich cookies too. Pick one design for a class party or mix several shapes for a dessert table that looks planned without feeling fussy.
Table of Contents
- 1. Monster Eye Cookies
- 2. Chocolate Chip Spider Cookies
- 3. Haunted House Cookies
- 4. Halloween Cookies for Kids
- 5. Chocolate Halloween Cookies with Royal Icing
- 6. Vampire Nutter Butter Cookies
- 7. Monster Slime Meringue Cookies
- 8. Spiderweb Sugar Cookies
- 9. Halloween Sprinkle Sugar Cookies
- 10. Nutter Butter Ghost Cookies
- 11. Witch Finger Cookies
- 12. Chocolate Halloween Sprinkle Cookies
- 13. Mini Halloween Mummy Cookies
- 14. Monster Cookies
- 15. Mummy Cookies
- 16. Spooky Witch Halloween Piñata Cookies
- 17. Blood Spatter Cookies
- 18. Halloween Spiderweb Cookies
- 19. Halloween Cookies
- 20. OREO Bats
- 21. Pumpkin Spice Meringue Cookies
- 22. Jack Skellington OREO Cookies
- 23. Candy Bar Cookies
- 24. Easy Monster Cookies
- 25. Skeleton Gingerbread Cookies
- 26. Monster Cookie Bar
- 27. Soft Pumpkin Chocolate Chip Cookies
- 28. Pumpkin Cookies with Cream Cheese Frosting
- 29. Easy Halloween Cookies
- 30. Halloween M&M Cookies
- 31. Halloween Pumpkin Cookie Cake
- 32. Dracula’s Dentures
- 33. Halloween Oreo Cookie Cats
- 34. Toffee Crunch Pumpkin Cookies
- 35. Pumpkin S’mores Cookies
1. Monster Eye Cookies
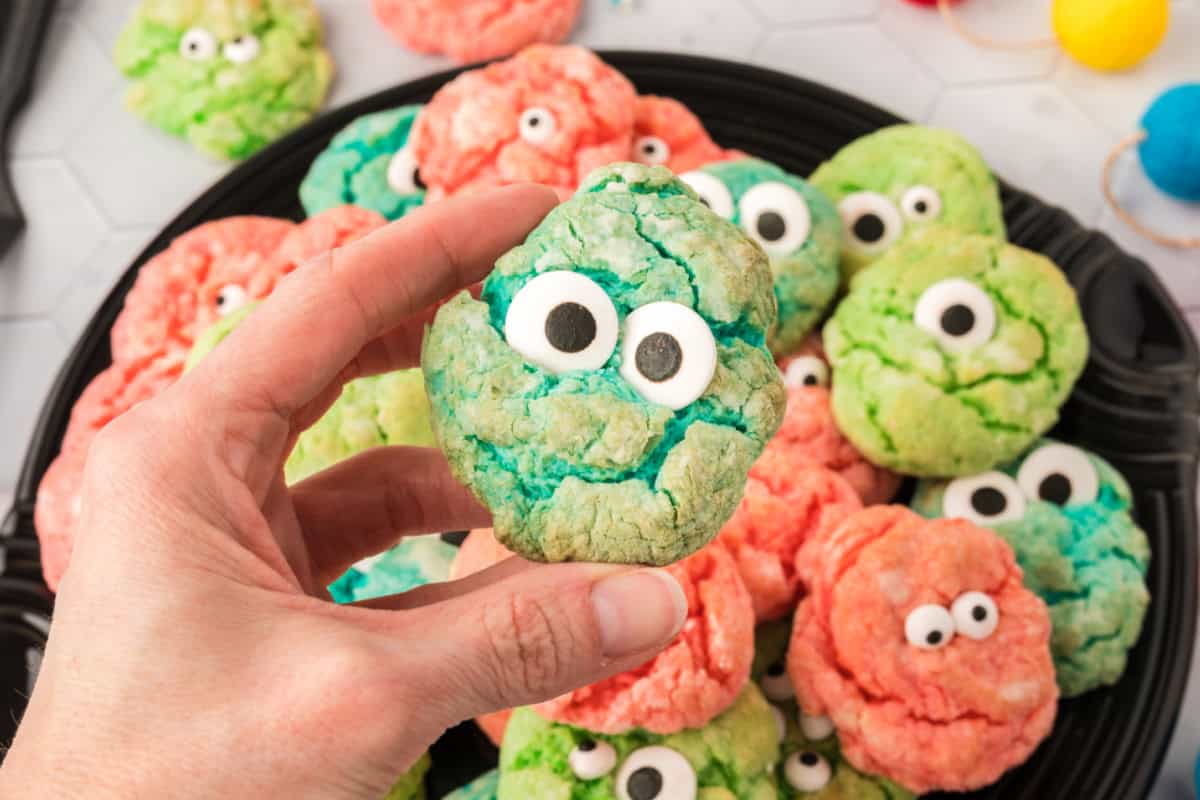
These colorful monster cookies start with cake mix, so you can have fun giving each one its own goofy expression. There’s one important detail: press the candy eyes into the warm cookies after baking, since putting them in the oven can make them melt. Get the full recipe at Love Bakes Good Cakes, then have a look at the other Halloween treats while you’re there.
2. Chocolate Chip Spider Cookies
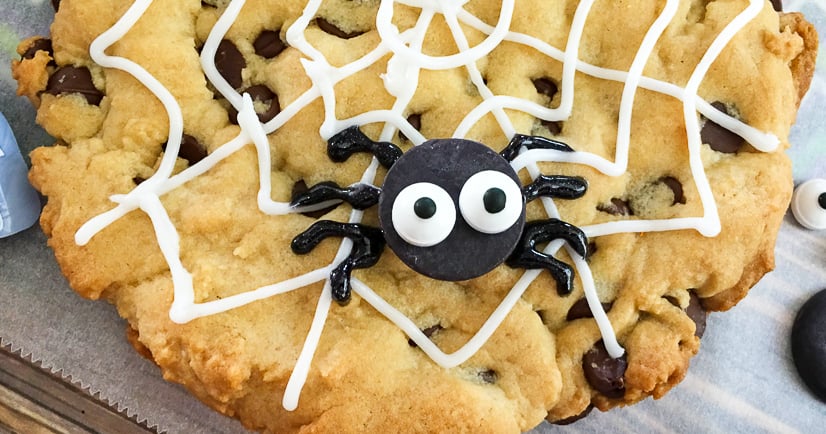
Want a cookie big enough to share? The Gracious Wife divides chocolate chip dough among cake pans to make four jumbo cookies, each with room for a piped web and a candy spider. You’ll decorate them after they cool, which makes this a fun choice when you’d rather work on a few big designs than dozens of small ones. Follow her full recipe and decorating directions, and browse her other Halloween ideas for the rest of your party table.
3. Haunted House Cookies
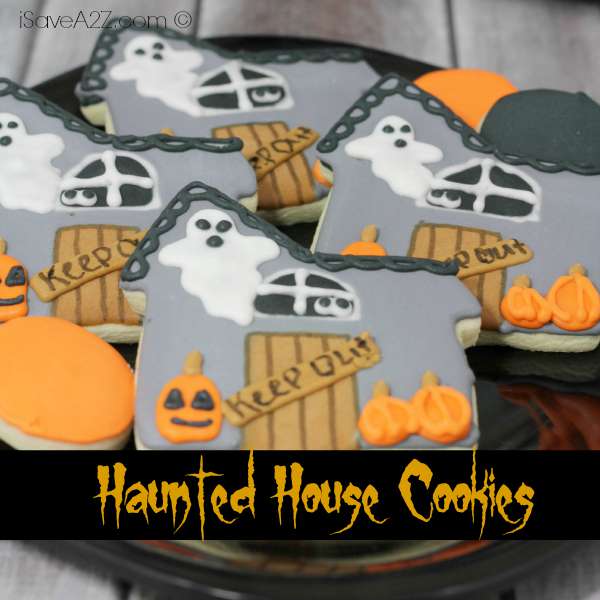
A house-shaped cookie cutter gives these haunted houses their outline, then the icing adds the ghosts, windows and little pumpkins. This is a project to choose when you want to spend time decorating: the dough needs chilling and the house details are added in stages. Follow the full recipe and icing design at iSaveA2Z, then explore more recipes once your haunted neighborhood is planned.
4. Halloween Cookies for Kids
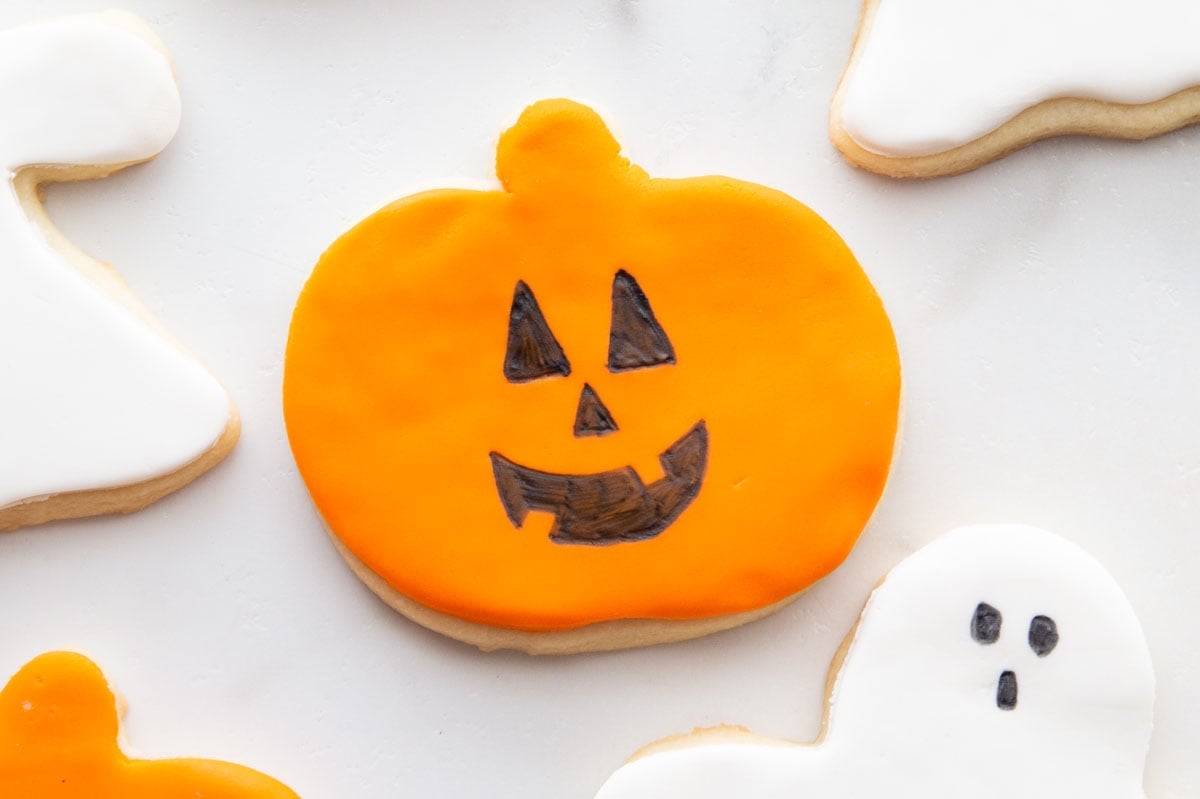
No need to pipe all those little faces: these pumpkin and ghost cookies use cut fondant shapes and an edible marker, so kids can draw a different expression on each one. For the complete decorating recipe, head to The Best Ideas for Kids and look through the other Halloween activities to turn cookie decorating into a whole afternoon of fun.
5. Chocolate Halloween Cookies with Royal Icing
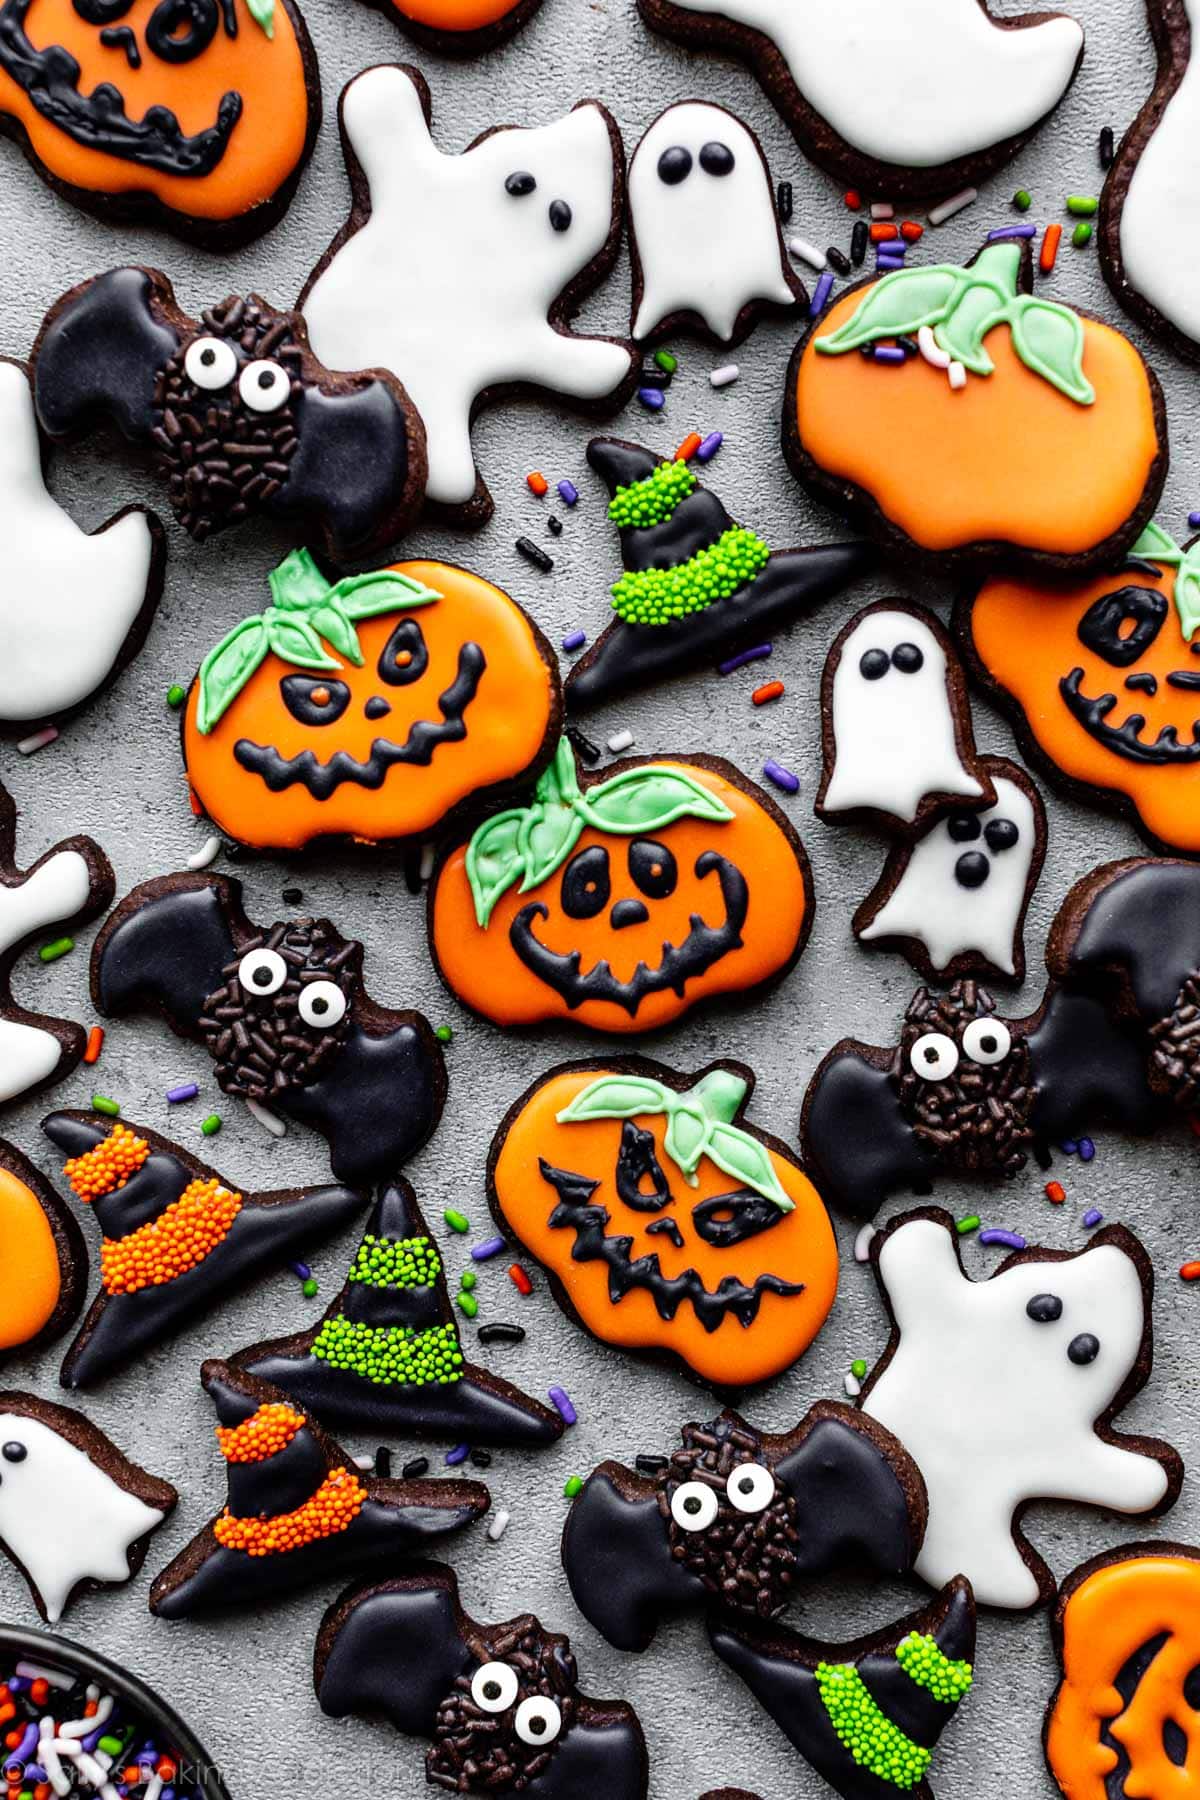
Chocolate sugar cookies give you something good underneath all that royal icing! Sally’s Baking Addiction has a helpful trick for the dough: roll it out before chilling, while it’s still easy to work with. The chilled sheets are then ready for your Halloween cutters. Read her complete recipe and icing guide, and keep browsing for more baking ideas suited to your decorating skills.
6. Vampire Nutter Butter Cookies
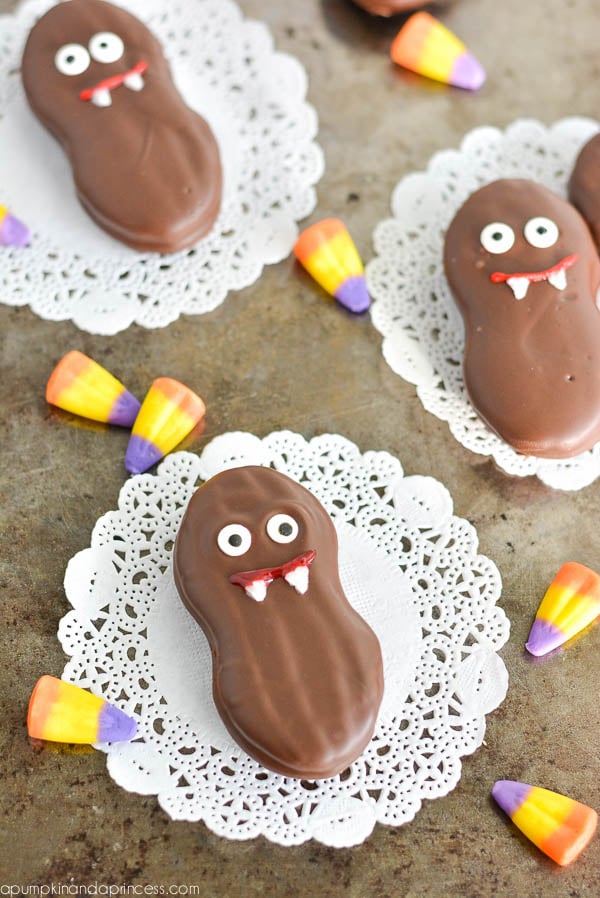
Nutter Butters already have the shape for these little vampires, so there’s no dough to mix or cut out. Chocolate coating, candy eyes and gel mouths with white teeth do the decorating. This tutorial was created for a sponsored Coca-Cola and Nabisco conversation. Visit A Pumpkin & A Princess for the complete no-bake recipe and more Halloween party ideas.
7. Monster Slime Meringue Cookies
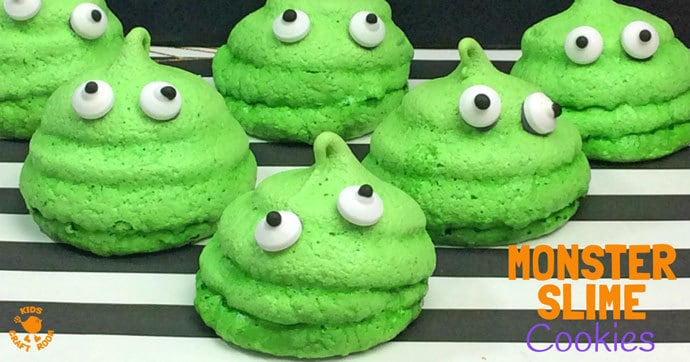
Those funny green shapes are piped meringue, not ordinary drop-cookie dough, and the uneven little piles are part of the fun. Let the baked monsters cool before attaching their candy eyes with melted chocolate. You’ll find the complete recipe at Kids Craft Room, along with more playful Halloween treats and crafts to try with your kids.
8. Spiderweb Sugar Cookies
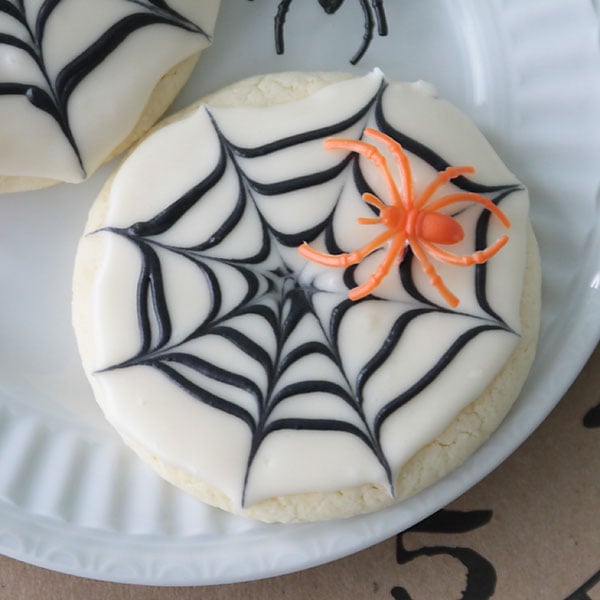
The spiderweb trick at It’s Always Autumn is such a good one for beginners. A toothpick dragged outward through a black icing spiral creates the web, so you don’t have to pipe every connecting line. Start with round sugar cookies and let that simple pattern do the decorating. Follow the full recipe and web-making directions, then take a look at Autumn’s other Halloween ideas.
9. Halloween Sprinkle Sugar Cookies
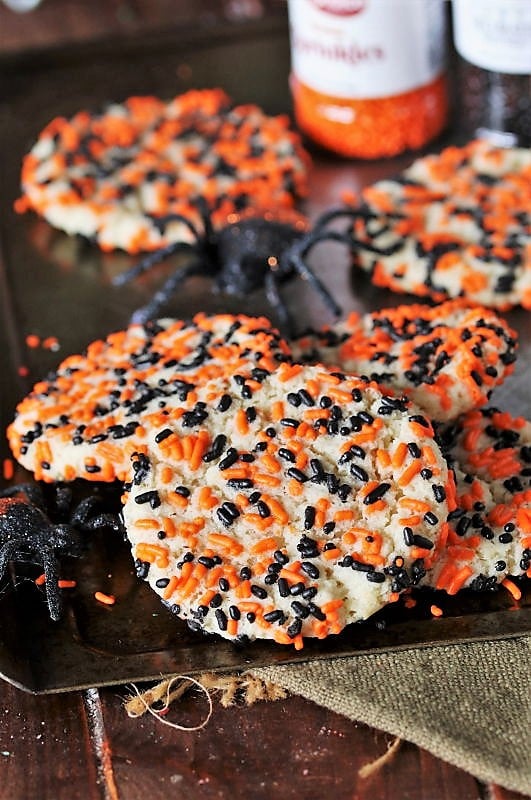
Not every Halloween cookie needs a face. These soft sugar cookies get their whole costume from sprinkles rolled around the dough before baking, leaving you with plenty of color and no icing to pipe. For the complete from-scratch recipe and more sweet Halloween ideas, stop by The Kitchen Is My Playground.
10. Nutter Butter Ghost Cookies
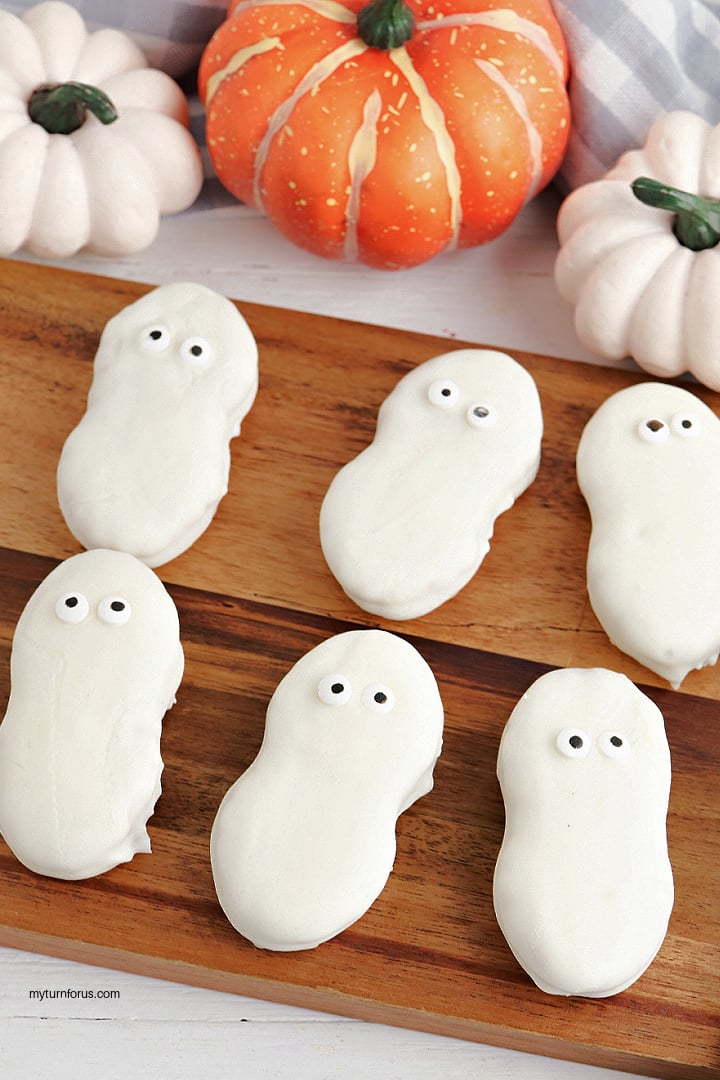
Three ingredients turn Nutter Butters into a whole tray of ghosts: the cookies are dipped in white chocolate and given candy eyes before the coating sets. If a no-bake decorating project sounds like your kind of Halloween prep, get the complete recipe from My Turn for Us and explore more of Evelyn’s holiday treats.
11. Witch Finger Cookies
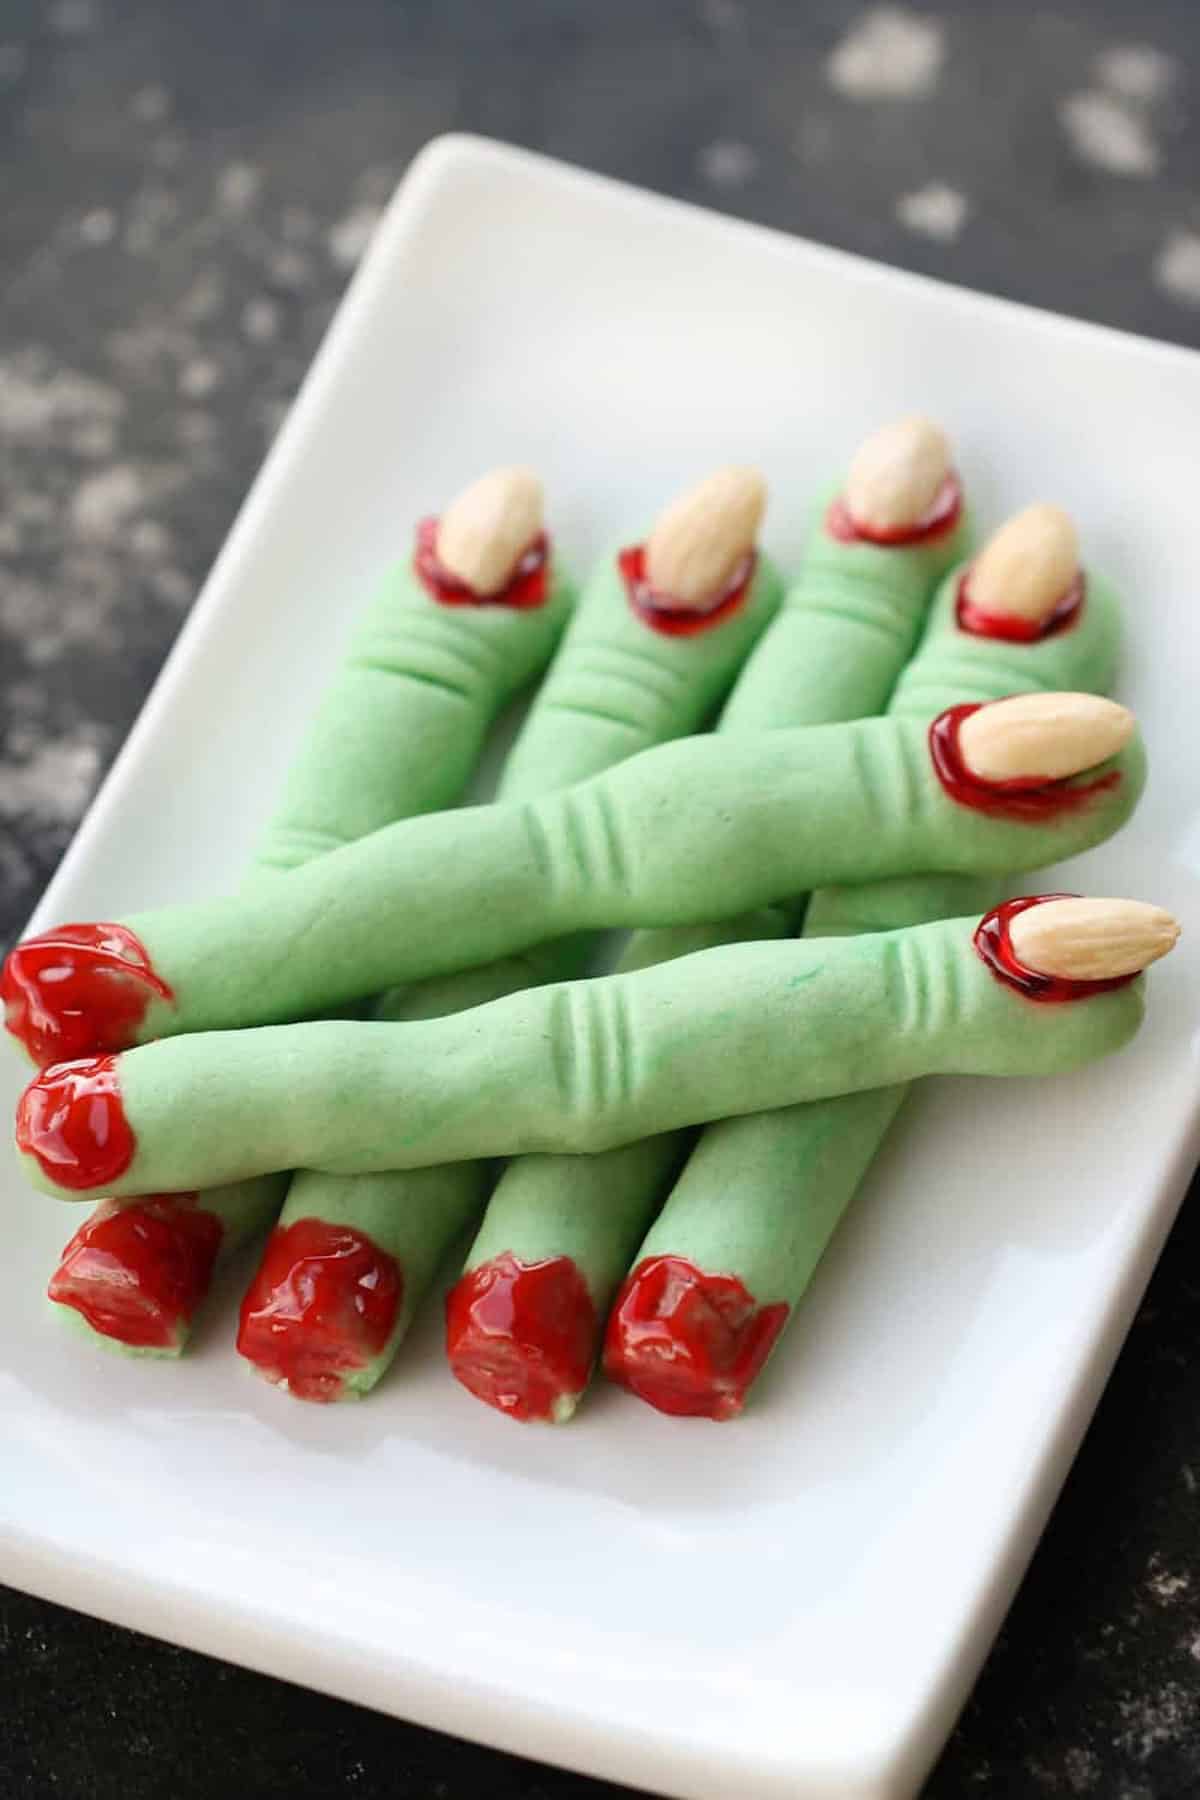
An almond fingernail and a few toothpick lines make these green cookies wonderfully creepy. You roll the dough into fingers, so you won’t need a special cutter. I’d choose these for a platter that’s more spooky than cute. Head to Six Sisters’ Stuff for the full recipe and shaping directions, and find more Halloween desserts to help you fill that platter.
12. Chocolate Halloween Sprinkle Cookies
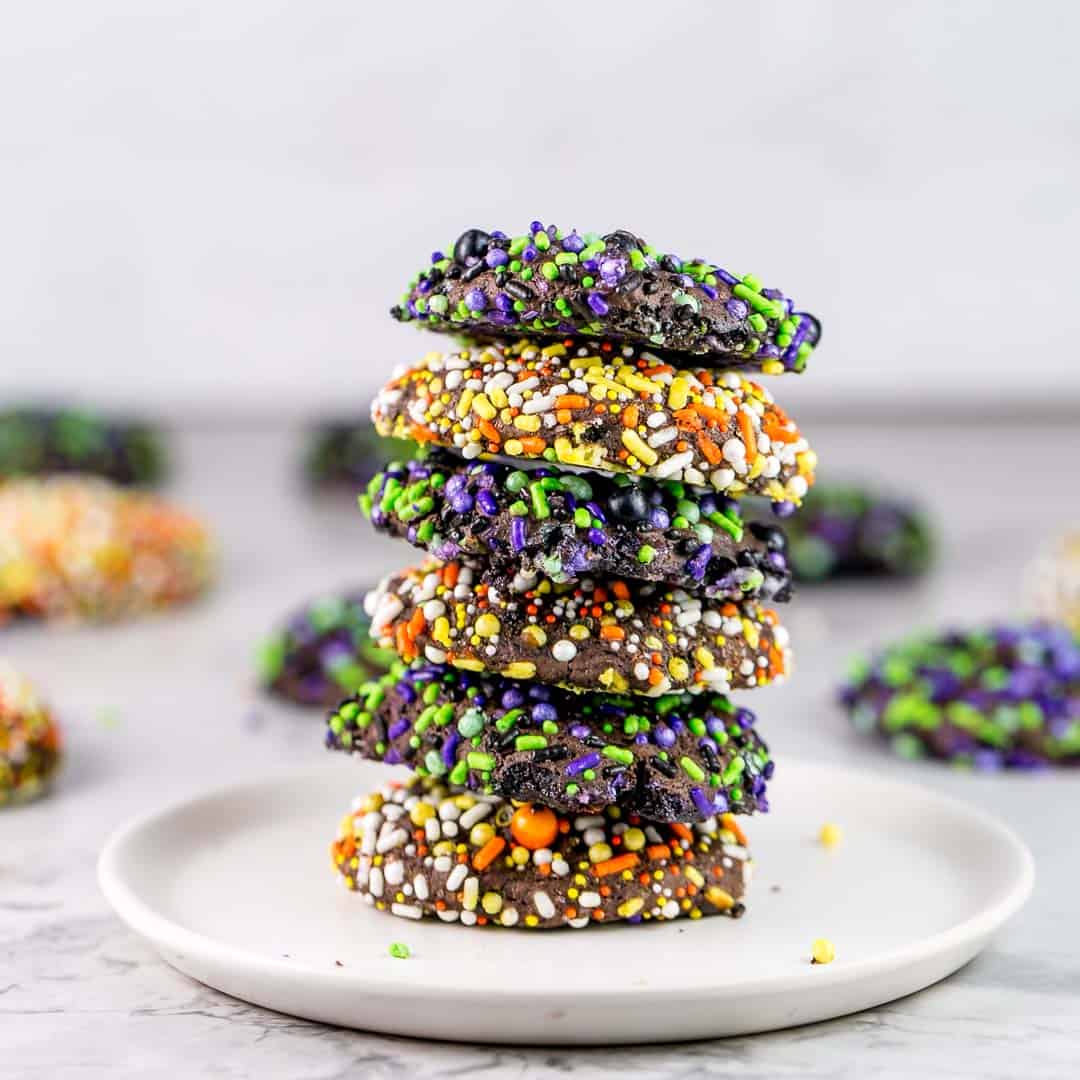
For the chocolate lovers, here’s a sprinkle cookie with a fudgy base and miniature chocolate chips mixed right in. You’ll get a generous batch of 30, but allow time to chill the dough before rolling it in Halloween sprinkles. Find the complete recipe at Bunsen Burner Bakery, then browse more baking ideas for your next batch.
13. Mini Halloween Mummy Cookies
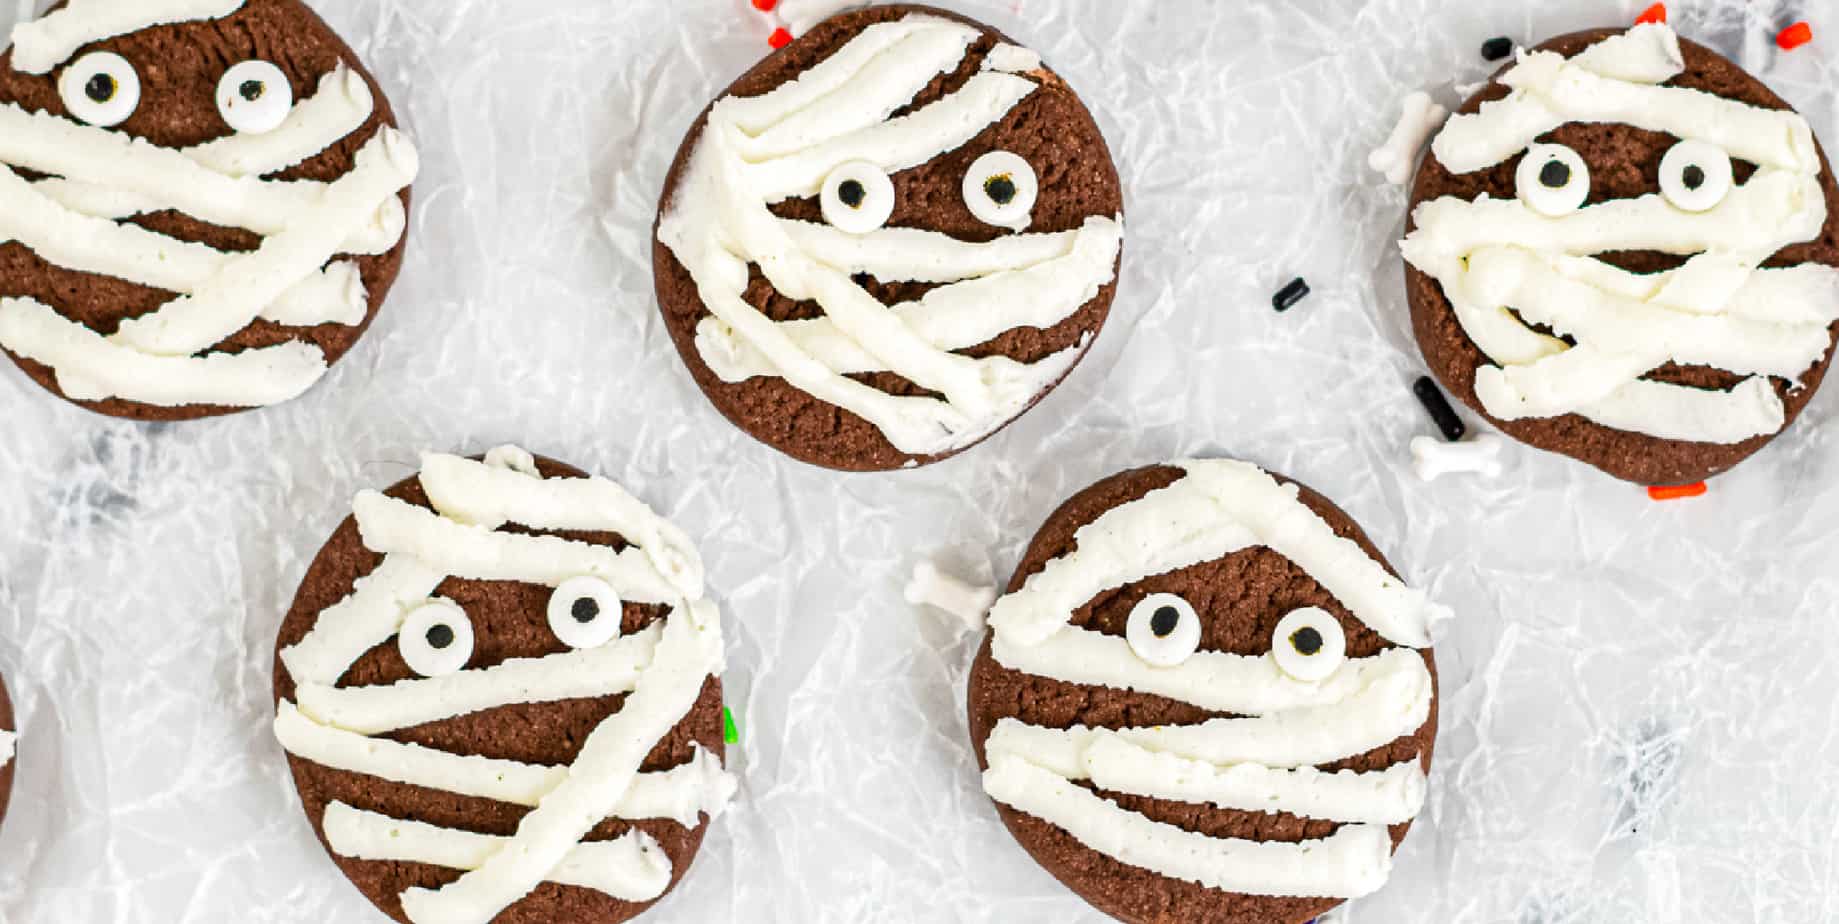
Mini mummies are a sweet choice when you need plenty to share, and this recipe makes a generous batch of little chocolate cookies. The dough is chilled in a log and sliced, which keeps all that shaping simple. A few white frosting bandages and candy eyes finish them off. Go to On My Kids Plate for the full recipe and more kid-friendly Halloween treats.
14. Monster Cookies
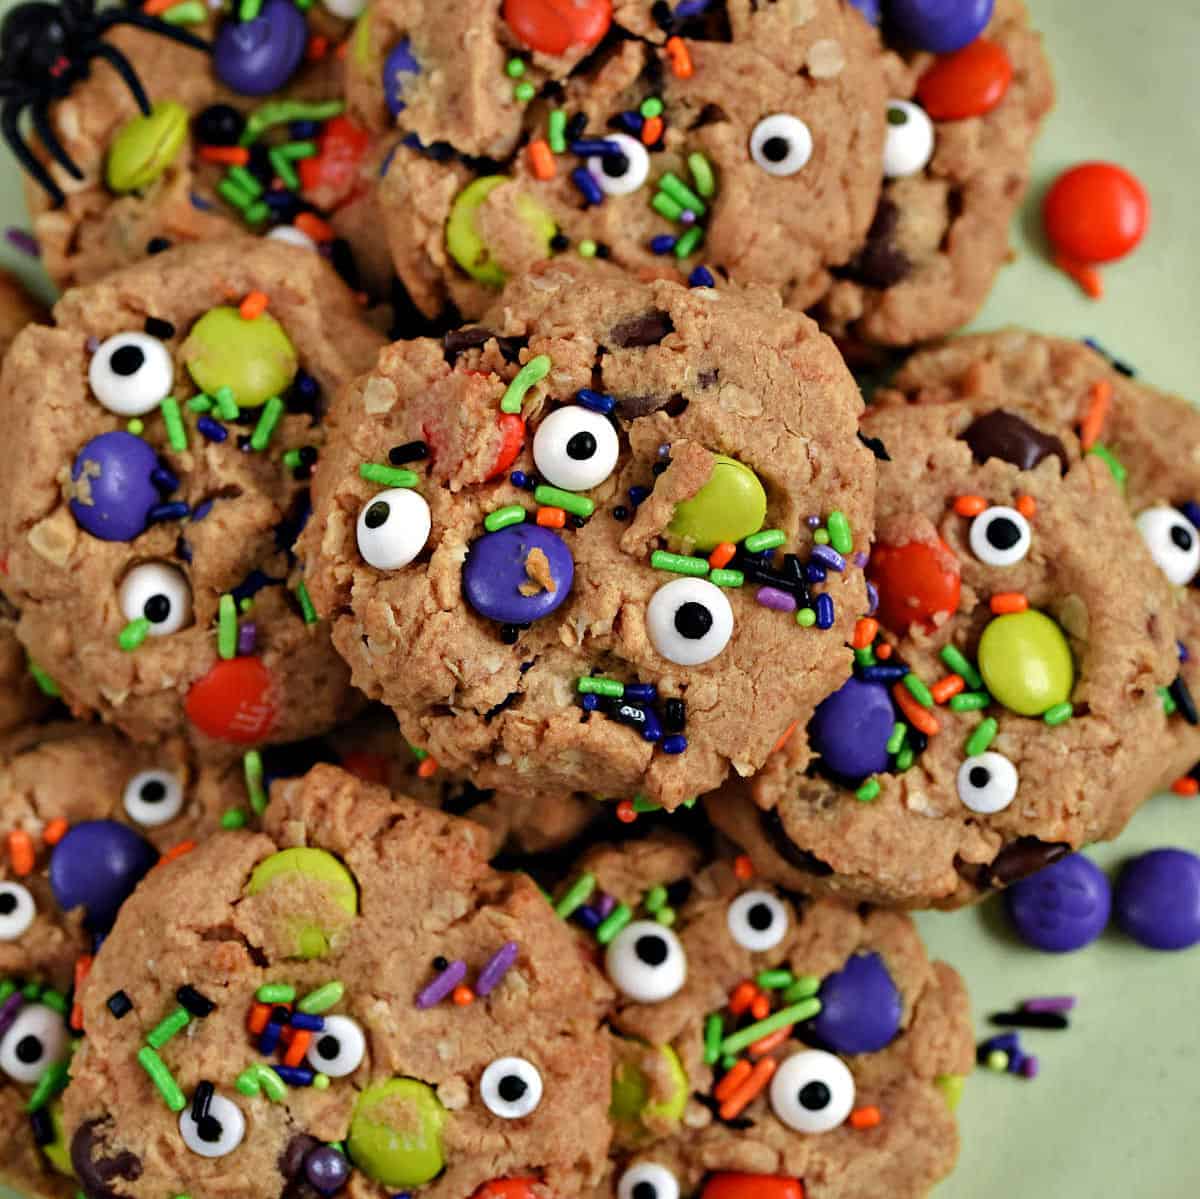
Cooking with Curls gives peanut butter and oatmeal monster cookies a Halloween makeover with candy eyes and colorful sprinkles. There are chocolate chips and M&M’s in the dough too, so these have plenty going on even without a carefully piped face. See Lisa’s complete recipe for her decorating and baking order, and stay for more cookie ideas with lots of mix-ins.
15. Mummy Cookies
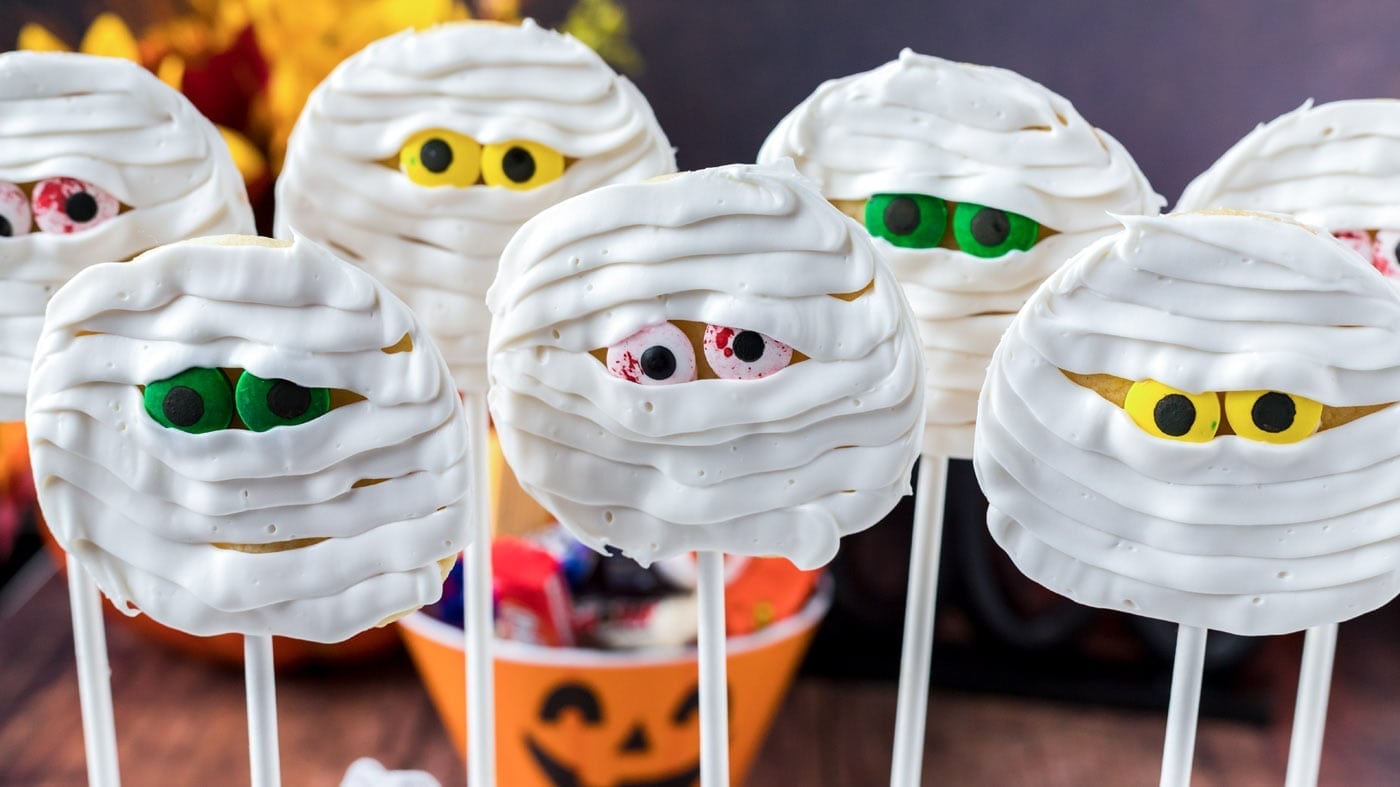
Refrigerated sugar-cookie dough and canned frosting make these mummy pops a handy shortcut. Powdered sugar thickens the frosting for those overlapping bandages, while candy eyes peek out underneath. The sticks go in before baking, and the cookies need to cool before you handle and decorate them. For the complete recipe and more Halloween ideas built around familiar ingredients, visit Amanda’s Cookin’.
16. Spooky Witch Halloween Piñata Cookies
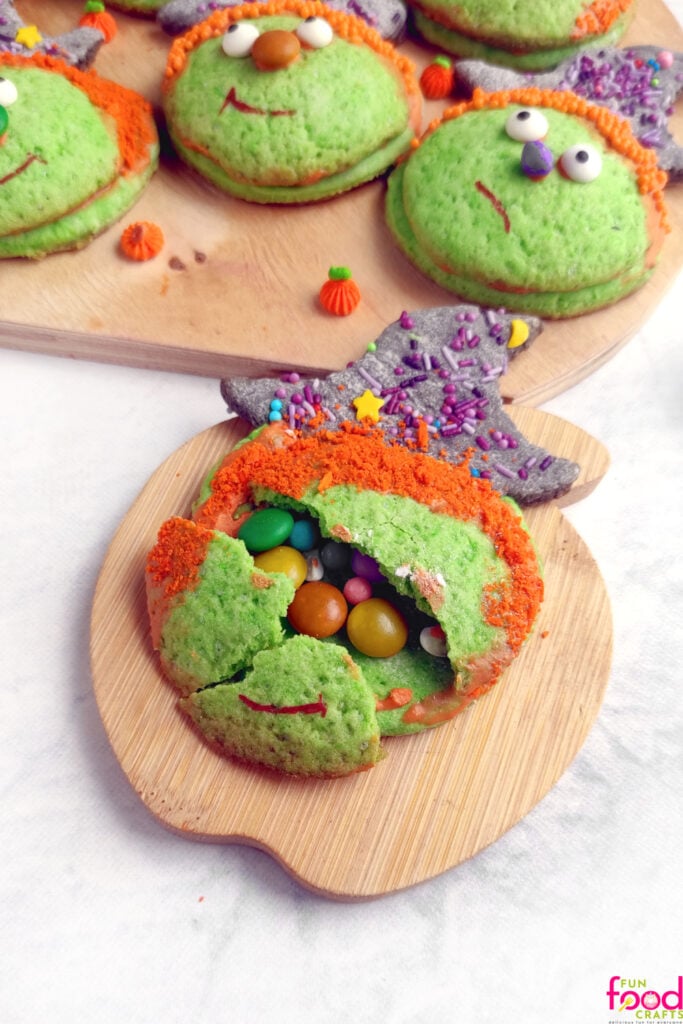
The surprise is inside! These little witches have domed cookie faces filled with candy and sealed to flat cookie backs, giving you a piñata treat without a stick. They take more assembly than a basic cutout, but they’re a fun choice when you want the cookies to be the main attraction. Follow the complete recipe and assembly directions at Fun Food Crafts, then explore the other Halloween food ideas while you’re planning your party.
17. Blood Spatter Cookies
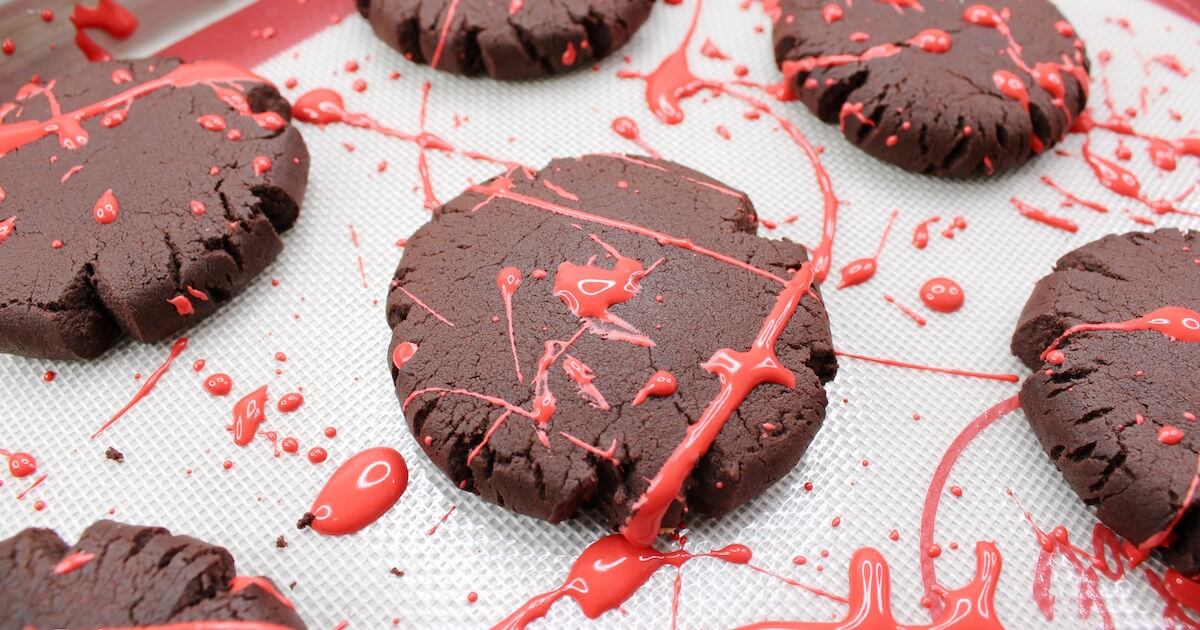
If neat piping isn’t your thing, these blood-spatter cookies put uneven decorating to good use. Red icing flicked over dark chocolate cookies creates the creepy pattern, so irregular splashes are just what you want. Head to The Soccer Mom Blog for the full cookie and icing recipe, and check out the other Halloween treats for more spooky inspiration.
18. Halloween Spiderweb Cookies
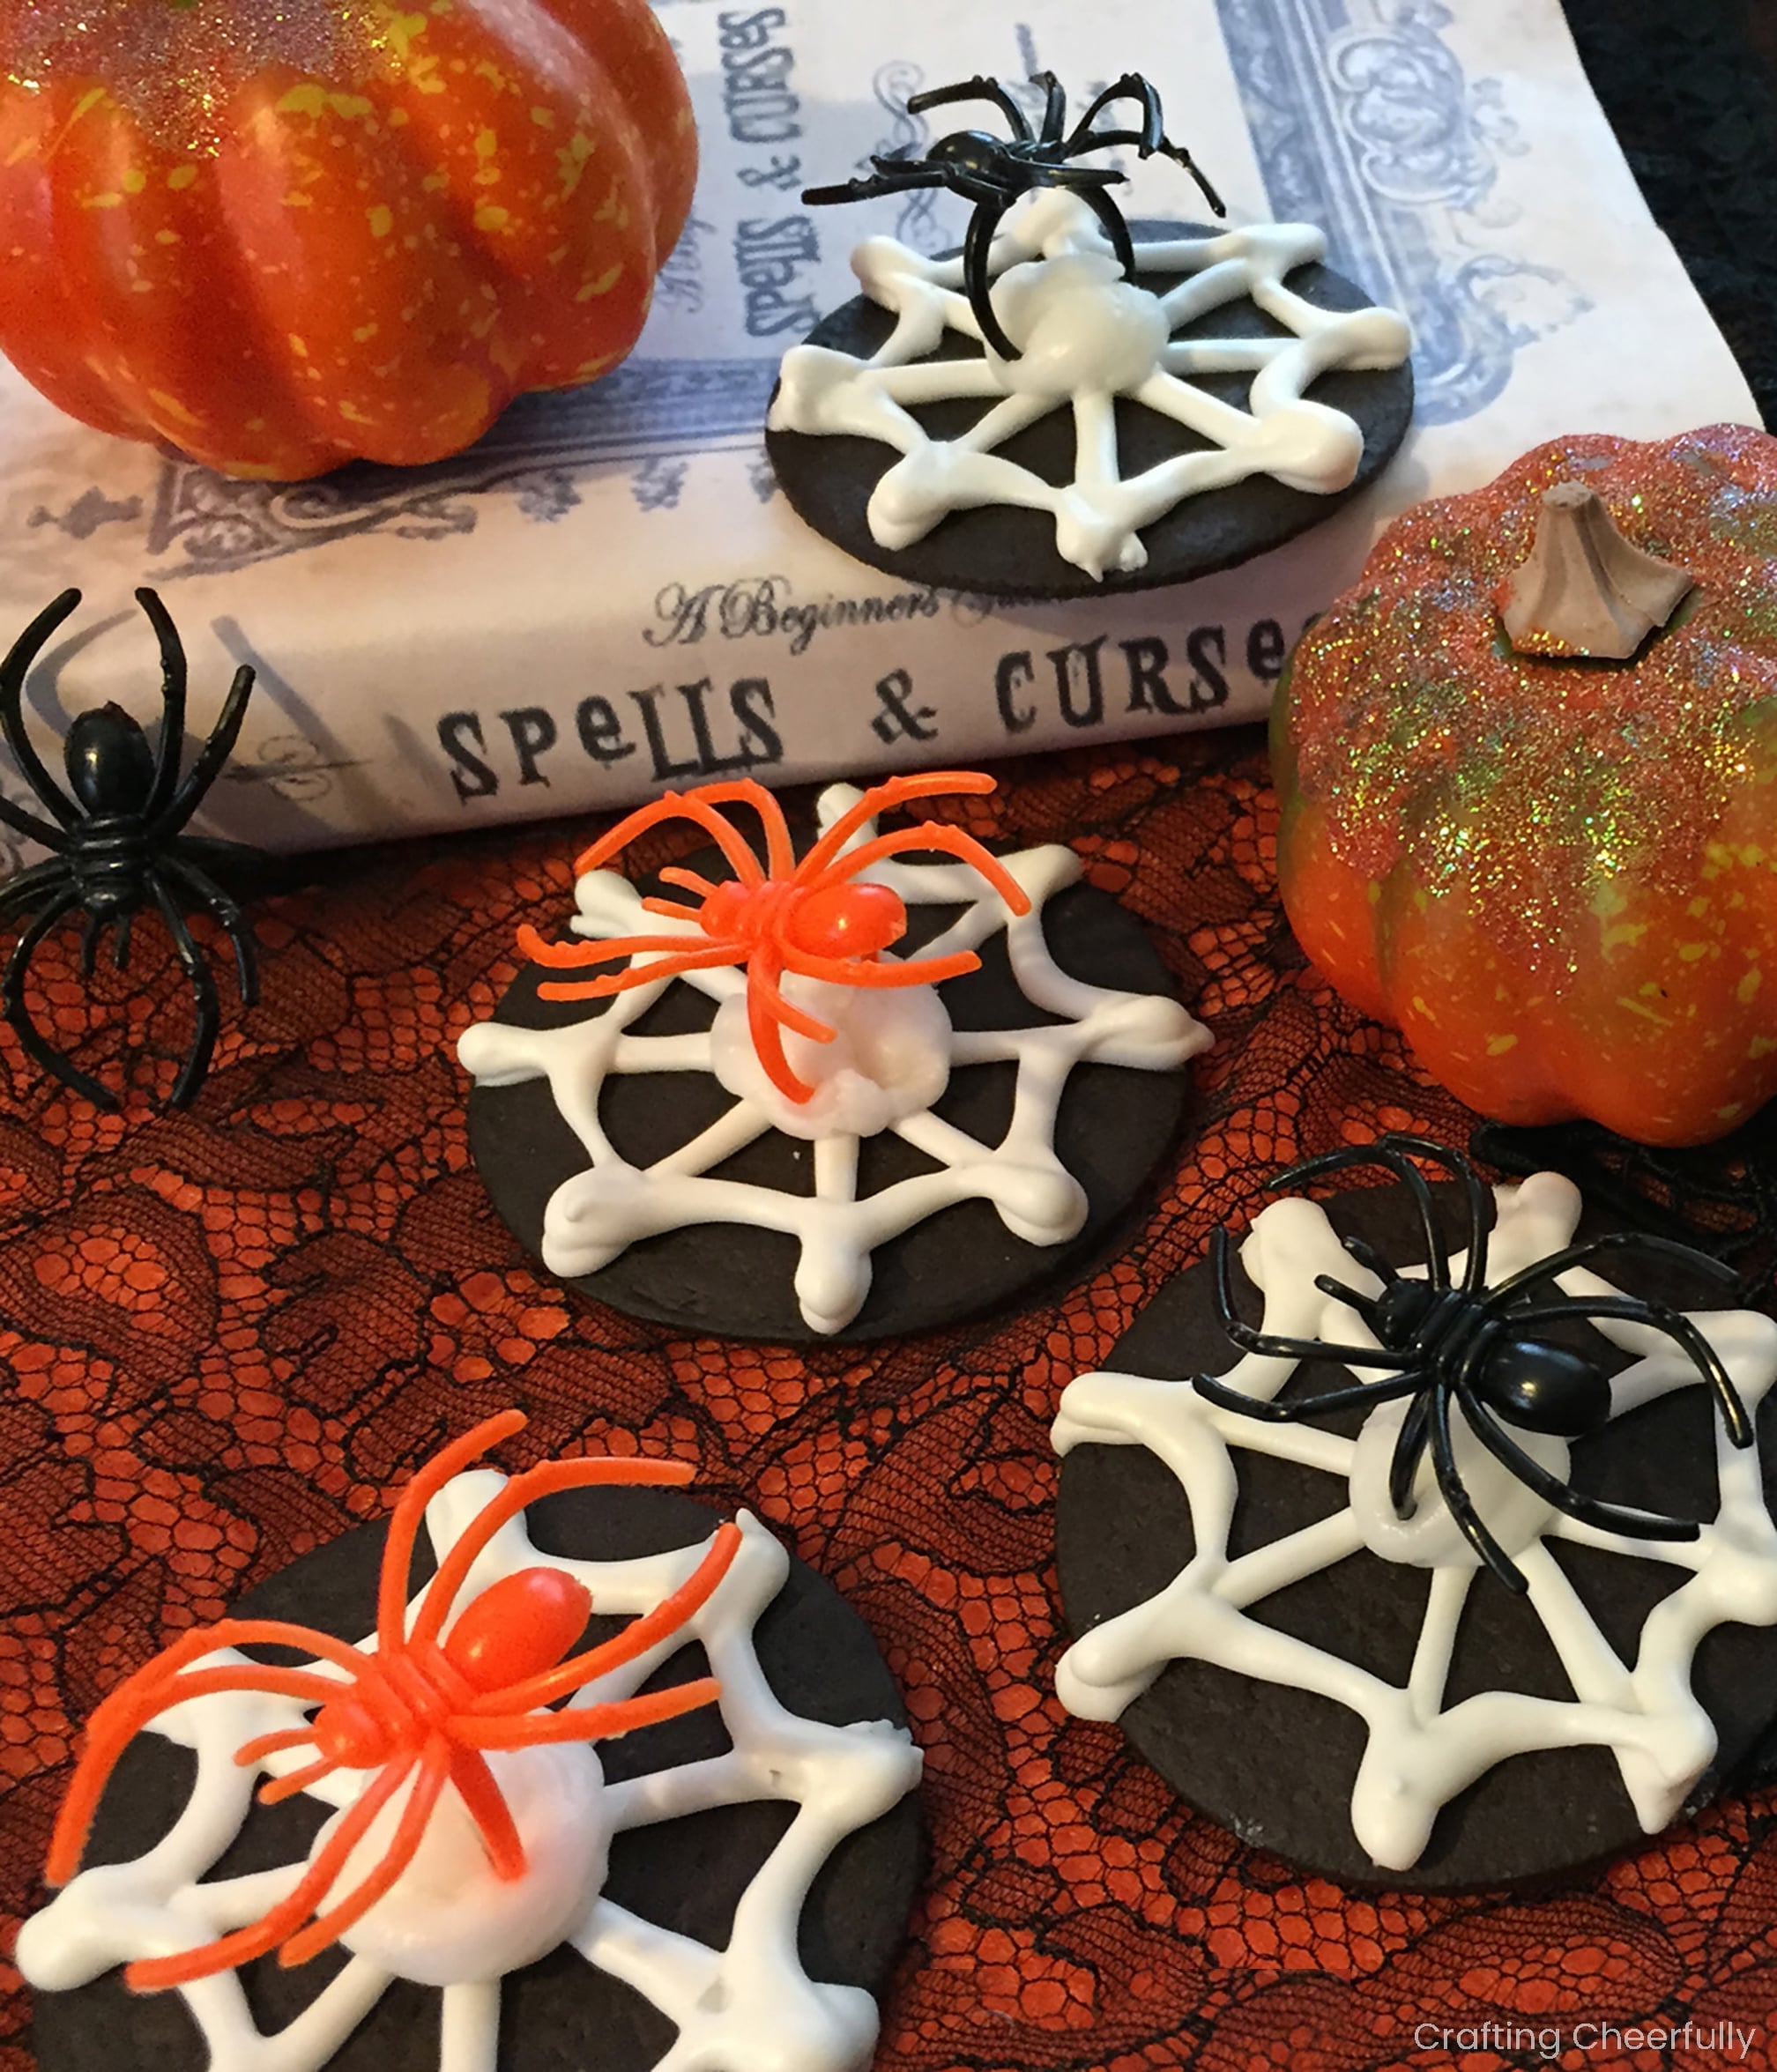
Chocolate wafer cookies give these white icing webs their dark background, with no black frosting to mix. The spider on top is a plastic ring, so remove it before eating the cookie. That little decoration adds a party favor as well as a creepy finishing touch. For the complete recipe and web-piping directions, visit Crafting Cheerfully and browse Kim’s other Halloween ideas too.
19. Halloween Cookies
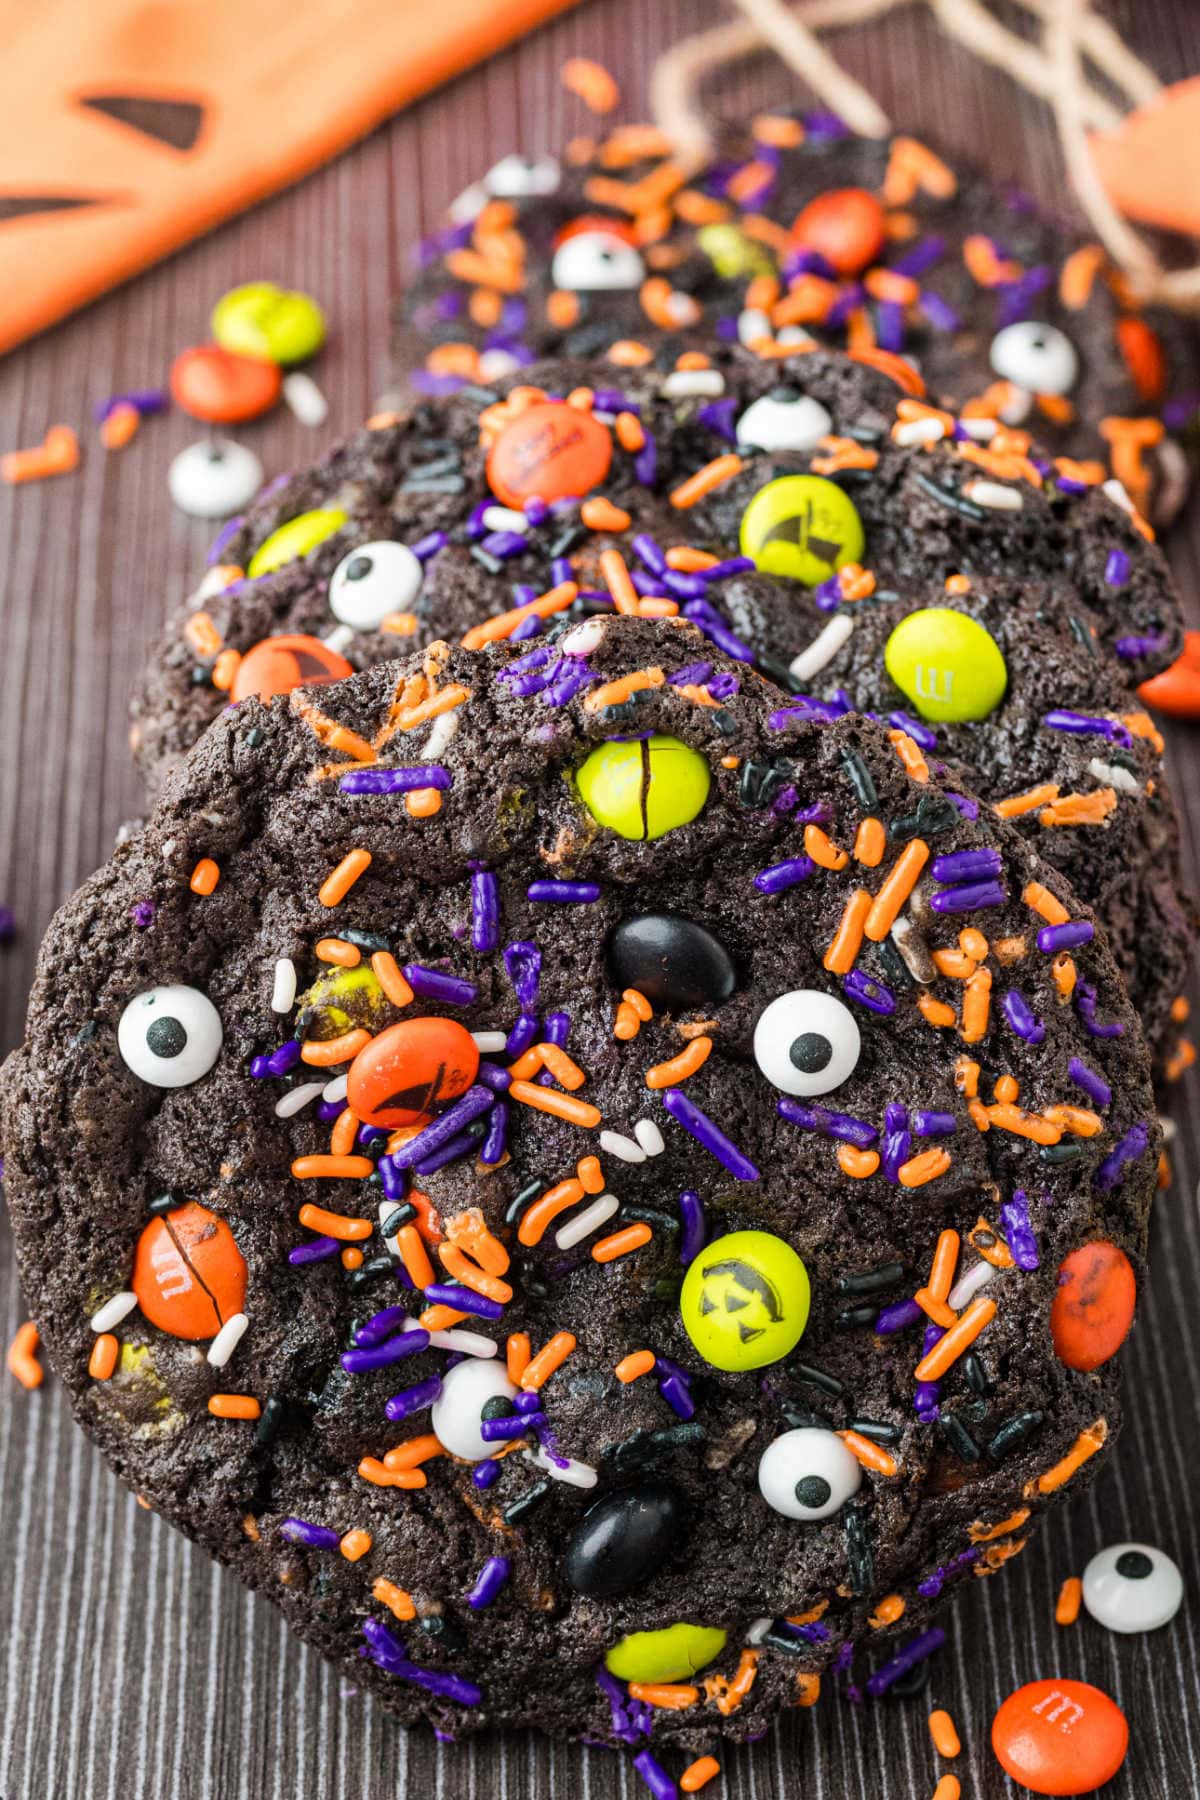
Only need a smaller batch for your Halloween tray? These chocolate cookies make about 14 to 16 regular-sized treats, with colorful candies and sprinkles mixed into the dough. Simply Stacie shares the complete recipe and the option for larger cookies, so take a look and explore her other Halloween desserts while you’re there.
20. OREO Bats
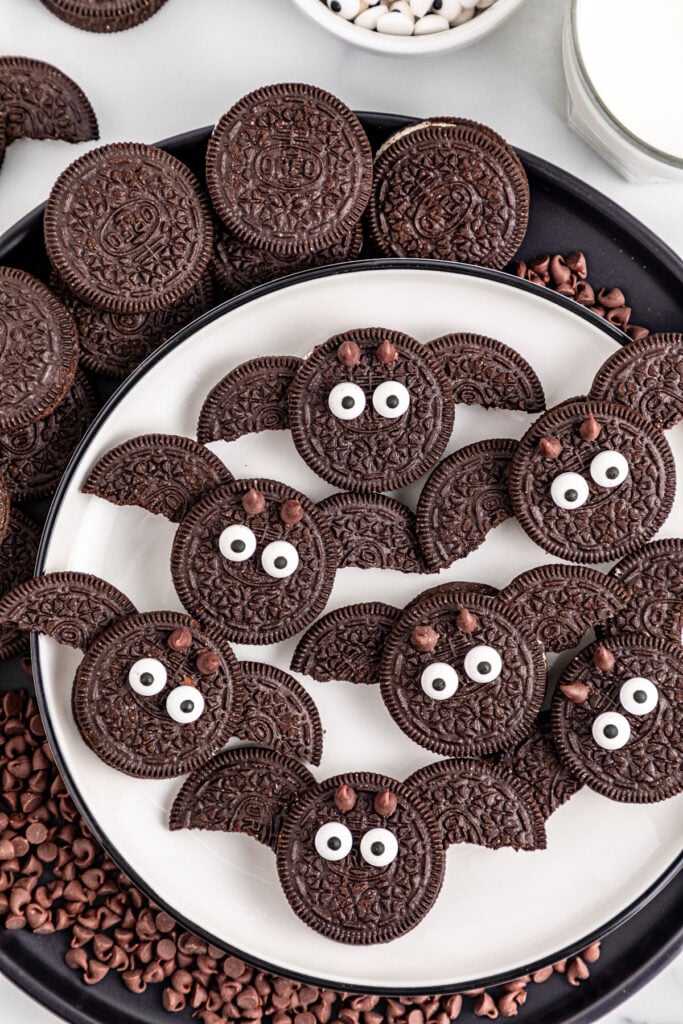
A few extra Oreos become the wings for these no-bake bats. Melted chocolate helps hold the pieces together, and candy eyes make each one look ready to fly. Just three ingredients! Follow the complete recipe at The Happier Homemaker, then browse more of Melissa’s easy treats for the rest of your Halloween spread.
21. Pumpkin Spice Meringue Cookies
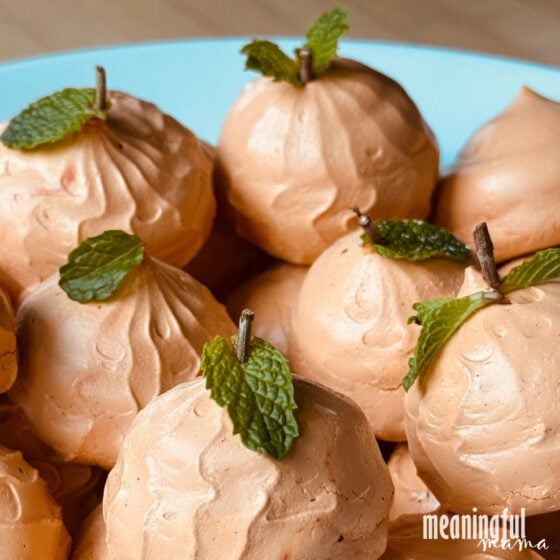
Meaningful Mama turns orange meringue into little pumpkins with rosemary stems and mint leaves on top. Pumpkin spice gives them fall flavor, and the crisp shell has a softer center underneath. If you’d like a pumpkin-shaped treat without rolling cookie dough, follow Jodi’s full recipe and piping guidance, then explore her other pumpkin dessert ideas.
22. Jack Skellington OREO Cookies
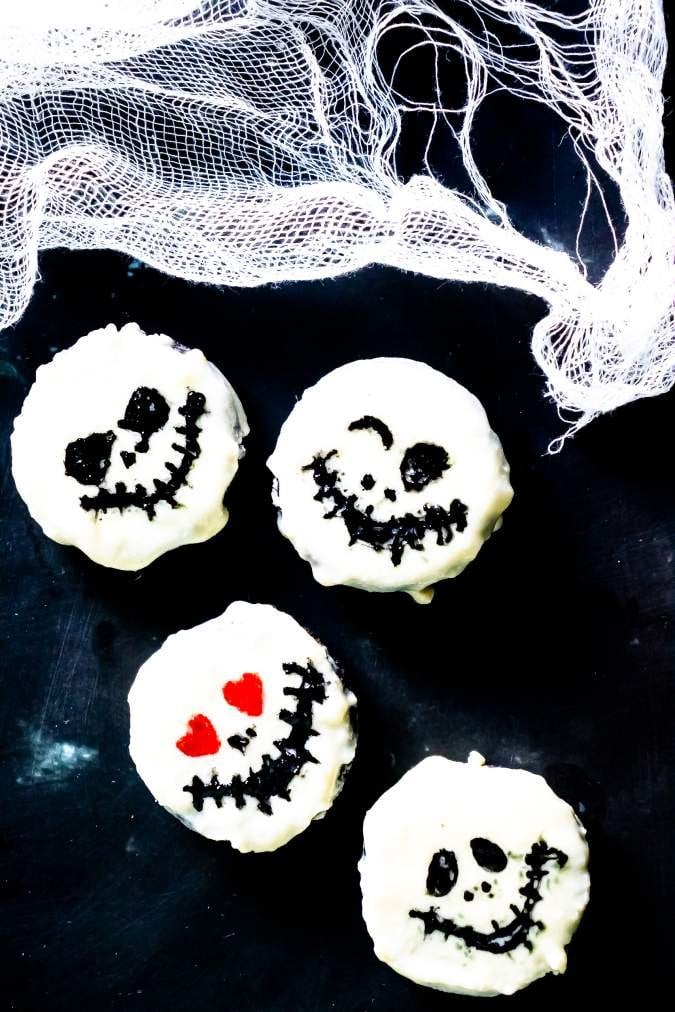
The face goes on last for these Jack Skellington Oreos. Tapping off excess coating after dipping helps give you a smooth white surface, and you’ll let it set before drawing with an edible marker. No piped faces needed. Find the complete recipe and decorating directions at RecipeMagik, and explore more Halloween treats made with familiar cookies.
23. Candy Bar Cookies
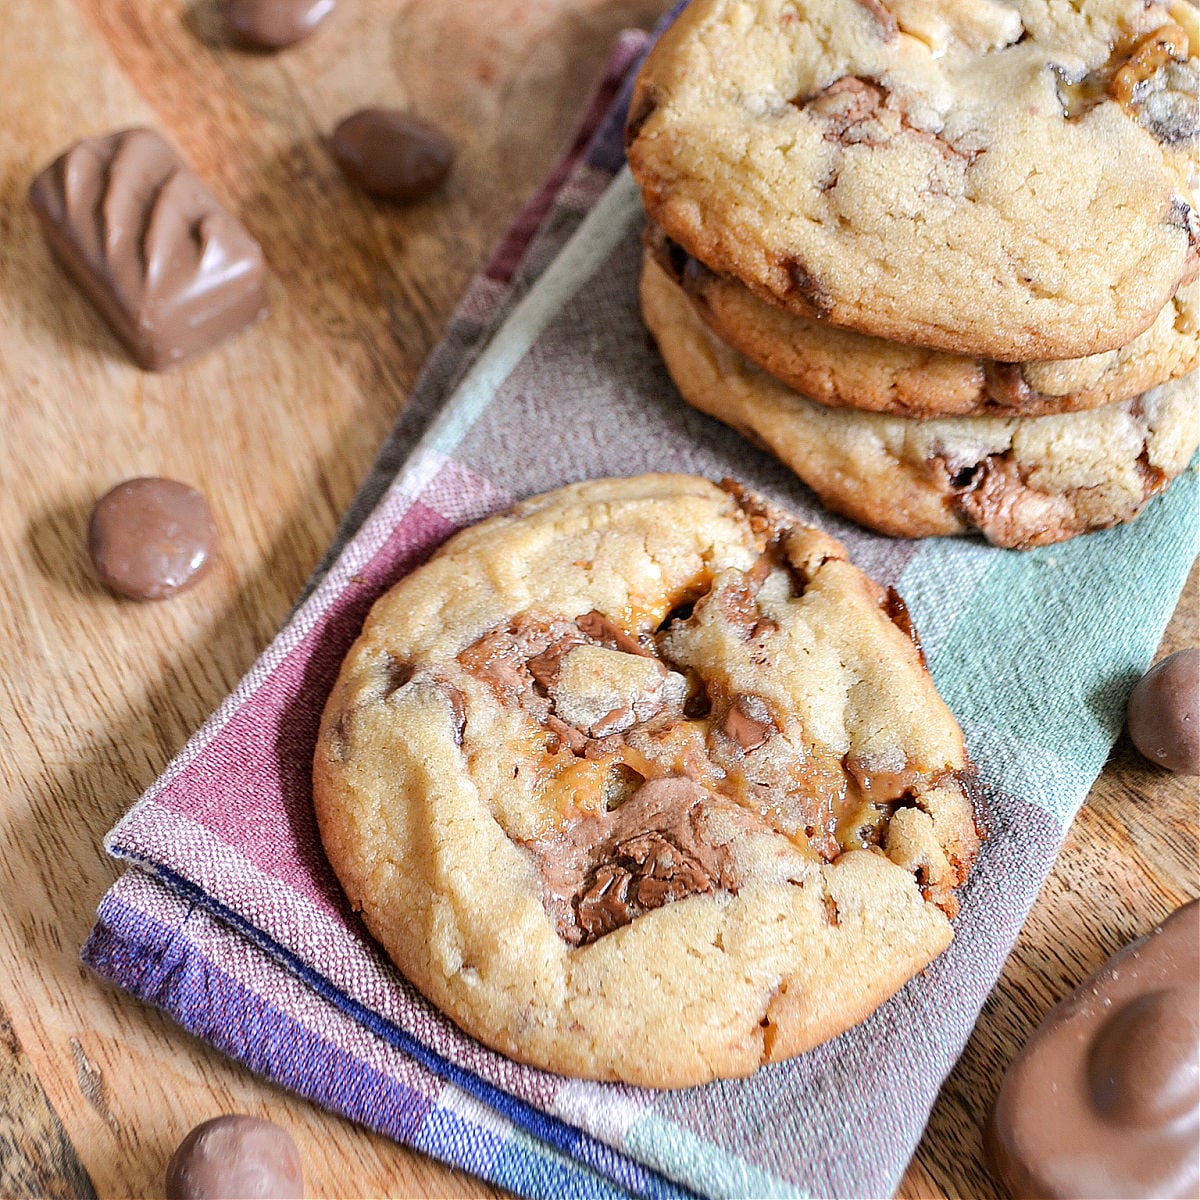
Keep this one in mind when the trick-or-treat bowl is still full in November. Chopped candy bars bring a different mix of chocolate, caramel and crunch to each batch of thick cookies. Plan ahead for the overnight dough chill. You can get the full recipe from Hello Little Home and find more of Ginnie’s cookie ideas for whatever you feel like baking next.
24. Easy Monster Cookies
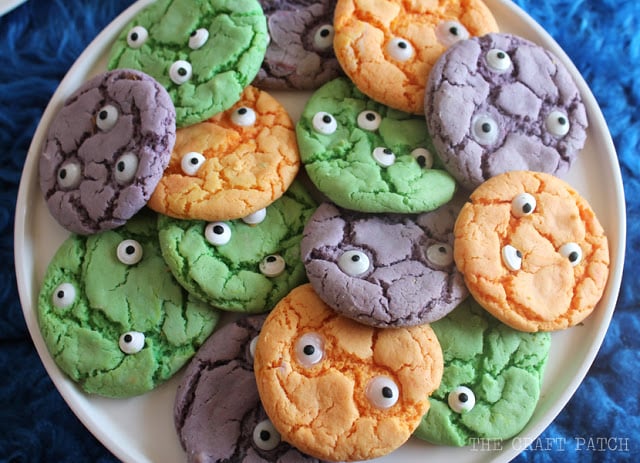
Orange, green and purple cake-mix cookies become monsters as soon as their candy eyes go on. The short ingredient list makes these a fun baking project with kids, but save the eyes for the warm cookies after they come out of the oven. Find the complete recipe in The Craft Patch’s Monster Mash party, along with more playful ideas for a not-too-scary Halloween.
25. Skeleton Gingerbread Cookies
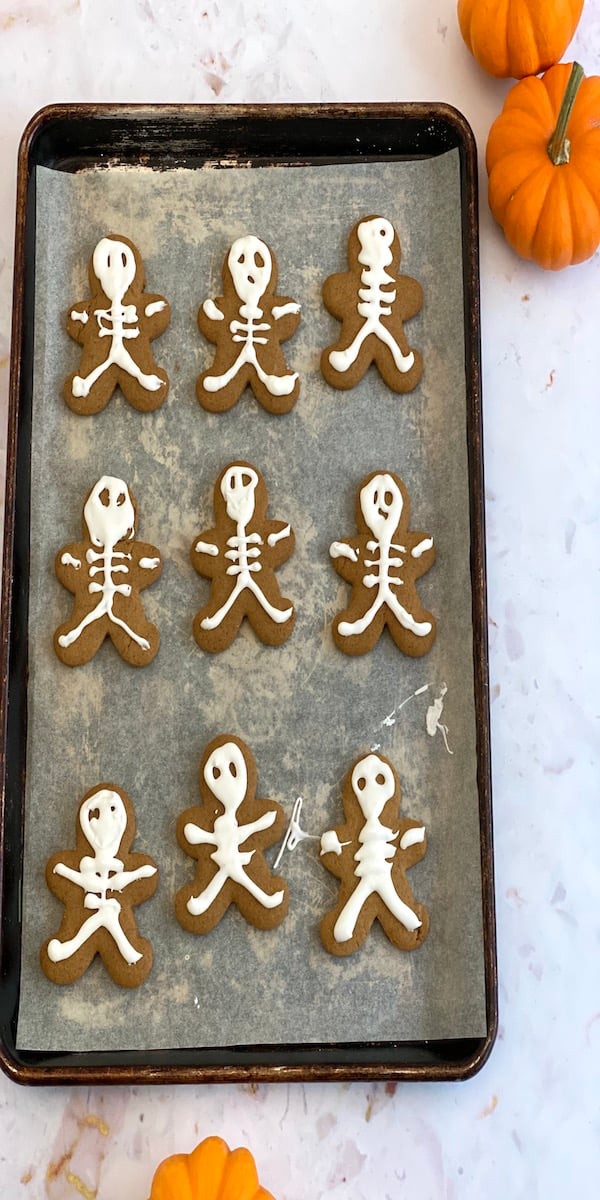
Bring out the gingerbread-person cutter a little early this year. White icing bones turn those familiar shapes into skeletons, and the spiced dough makes them more than a decorating project. I like this idea for anyone who already has the cutter tucked away with the Christmas supplies. Follow the full gingerbread and icing recipe at Rae Gun Ramblings, then have a look at Marissa’s other holiday recipes and projects.
26. Monster Cookie Bar
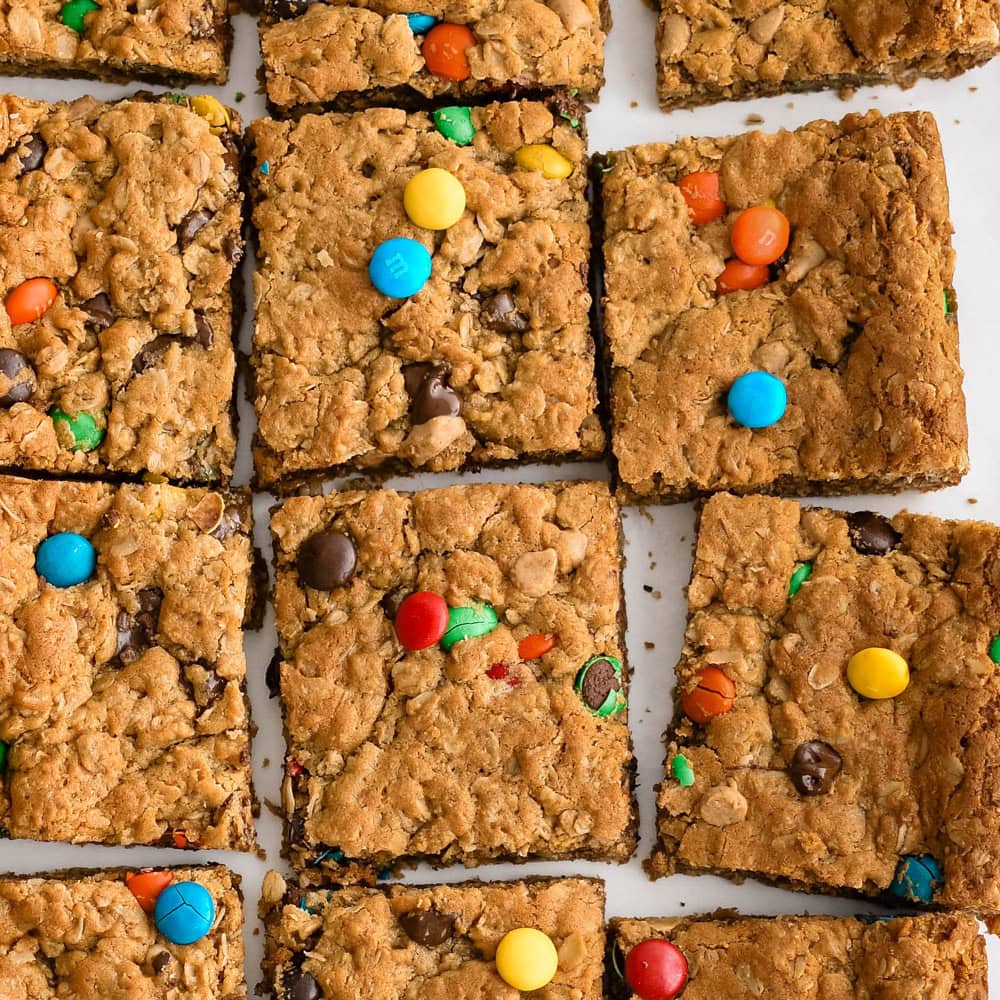
Yellow Bliss Road puts peanut butter, oats and plenty of candy into one big pan, saving you from scooping individual cookies. Chocolate chips and peanut butter chips join the M&M’s, and you can choose Halloween candy colors for a seasonal batch. Get Kristin’s complete recipe for the pan size and baking details, then explore more of her cookie-bar ideas.
27. Soft Pumpkin Chocolate Chip Cookies
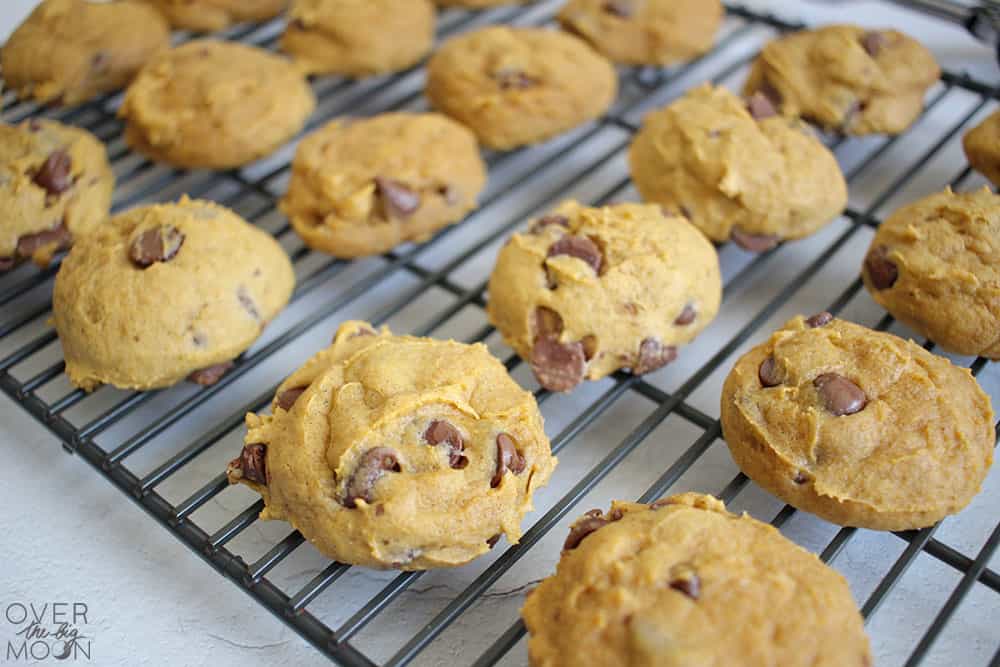
With their soft, cake-like texture and plenty of chocolate chips, these pumpkin cookies are a nice companion to the iced ghosts and monsters on your tray, especially when you don’t want another decorating project. Stop by Over the Big Moon for the full recipe and freezing tips, and browse more seasonal recipes while you’re there.
28. Pumpkin Cookies with Cream Cheese Frosting
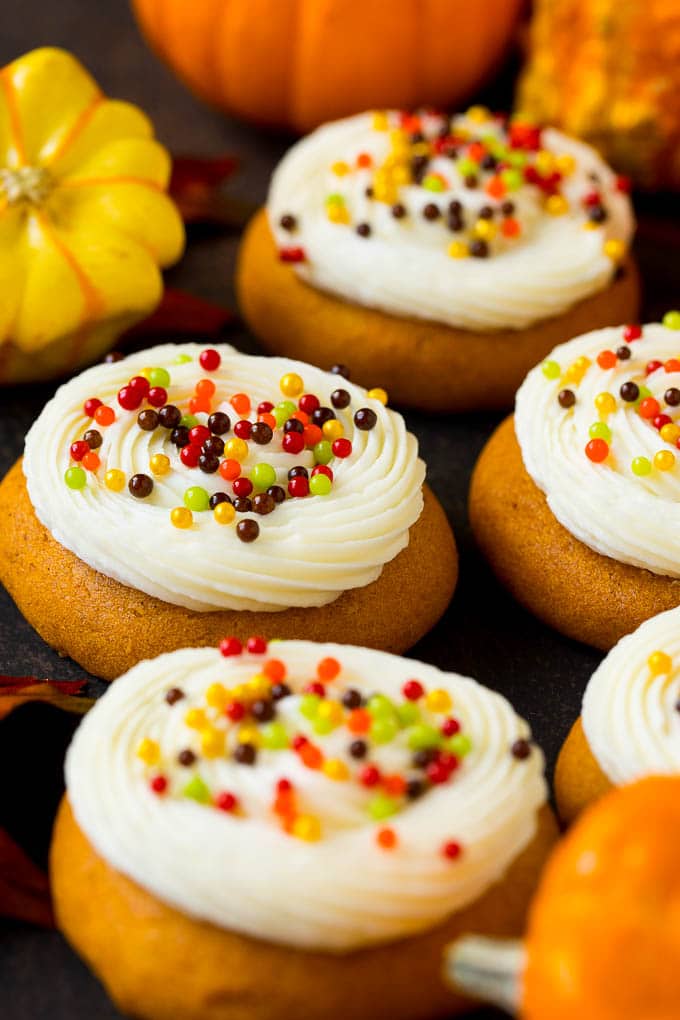
Cream cheese frosting and seasonal sprinkles dress up these soft pumpkin cookies without a single face to pipe. You can spread the frosting or use a piping bag for a swirl. Either way, let the cookies cool completely first. See Dinner at the Zoo for the complete cookie and frosting recipe, and explore Sara’s other pumpkin desserts for more fall baking inspiration.
29. Easy Halloween Cookies
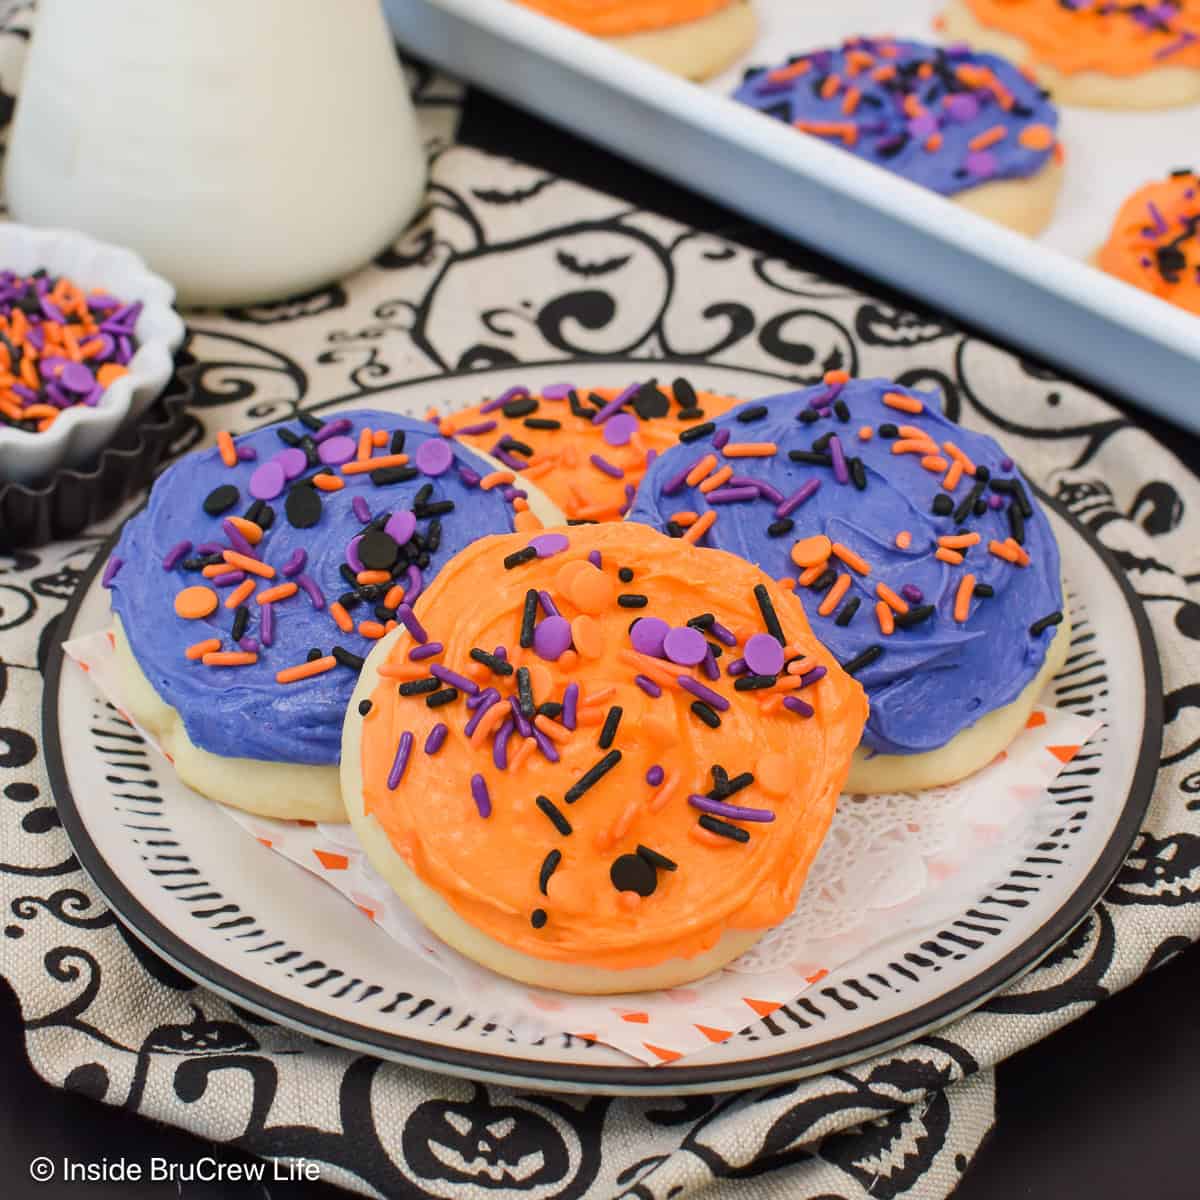
For bakery-style sugar cookies with plenty of frosting, try this idea from Inside BruCrew Life. The soft round cookies leave room for orange and purple buttercream and a scattering of sprinkles, without any cutout shapes to fuss with. Jocelyn includes both spread and piped frosting options in her full recipe; take a look and browse her other colorful Halloween treats.
30. Halloween M&M Cookies
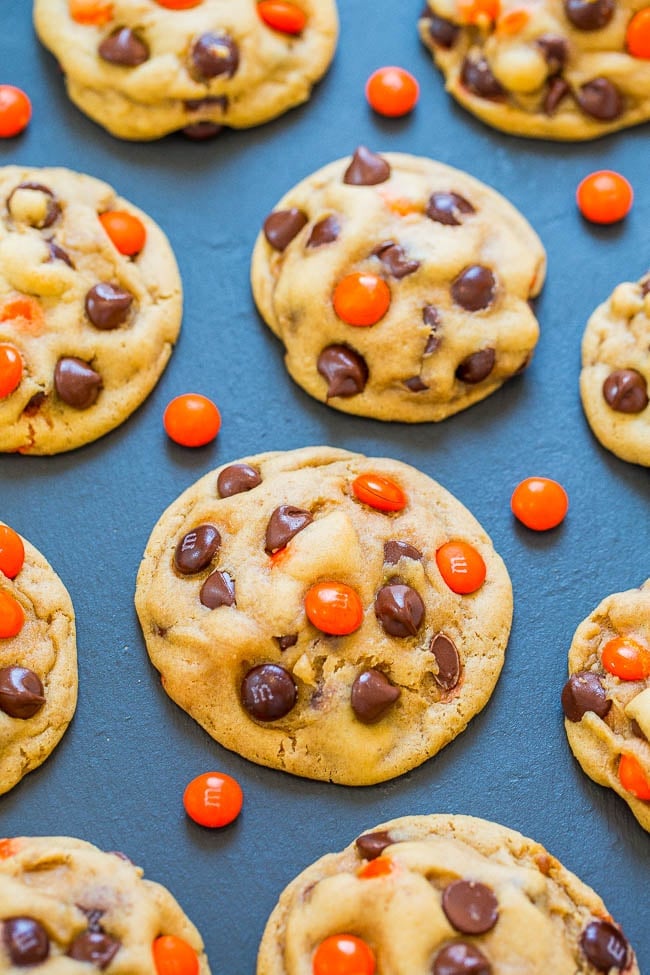
Browned butter gives these chocolate chip cookies a nutty flavor before the orange and black candy goes in. A little cornstarch helps keep the centers soft, and the dough needs a good chill before baking. That makes this a useful batch to plan ahead for. Read the complete recipe at Averie Cooks, then explore more of her cookie recipes for your next baking day.
31. Halloween Pumpkin Cookie Cake
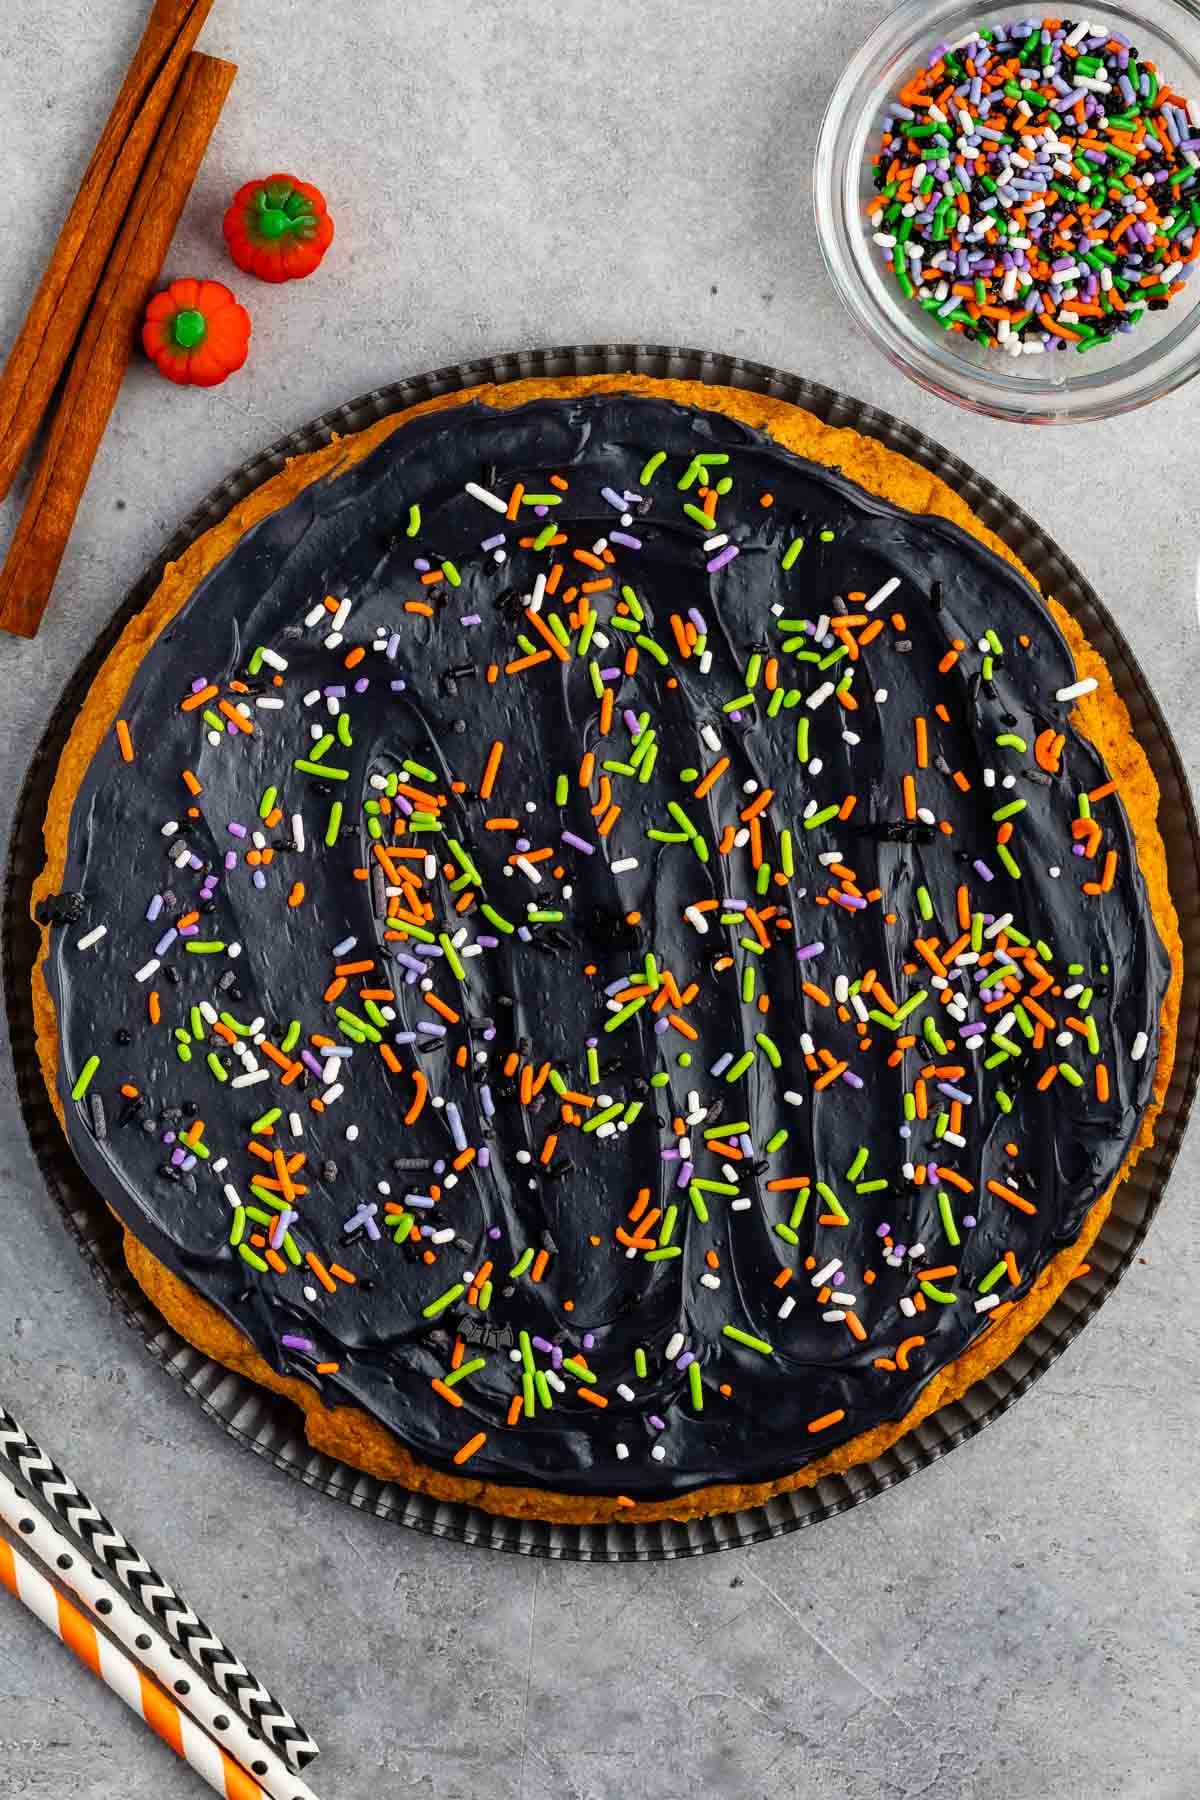
One giant cookie means one big surface to decorate. This pumpkin cookie cake starts with a mix, then gets black frosting and a generous helping of Halloween sprinkles for a dessert you can slice and share. Crazy for Crust has the complete recipe, with from-scratch alternatives linked too, so head over and find more Halloween baking ideas from Dorothy.
32. Dracula’s Dentures
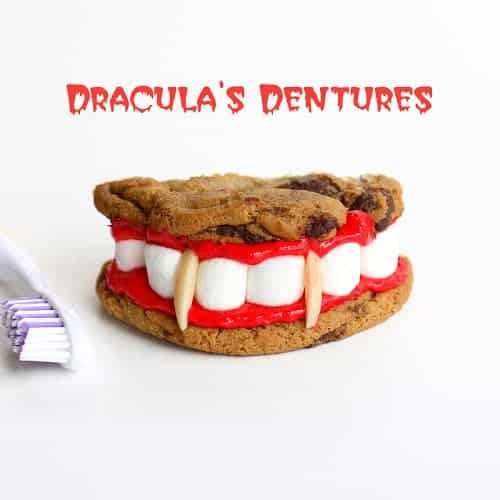
Chocolate chip cookie halves make the top and bottom of Dracula’s grin, with red frosting holding the marshmallow teeth in place. The almond-sliver fangs are the detail that makes it work. You can use homemade or refrigerated cookie dough for this one. Visit The Girl Who Ate Everything for the full recipe and assembly directions, then look through the other Halloween treats for more party ideas.
33. Halloween Oreo Cookie Cats
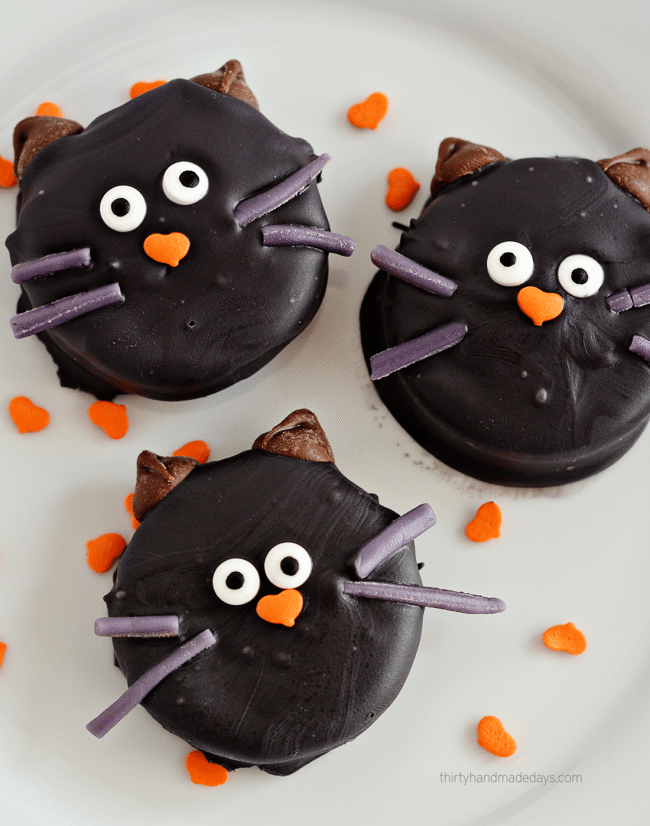
The black cats at Thirty Handmade Days are built around dipped Oreos, with chocolate-chip ears and candy details doing the rest. The whiskers are little pieces of licorice, so you don’t need a steady hand with a piping bag to give them their faces. Follow Mique’s complete recipe and have a look at her other Halloween ideas if you’d like more easy treats to decorate.
34. Toffee Crunch Pumpkin Cookies
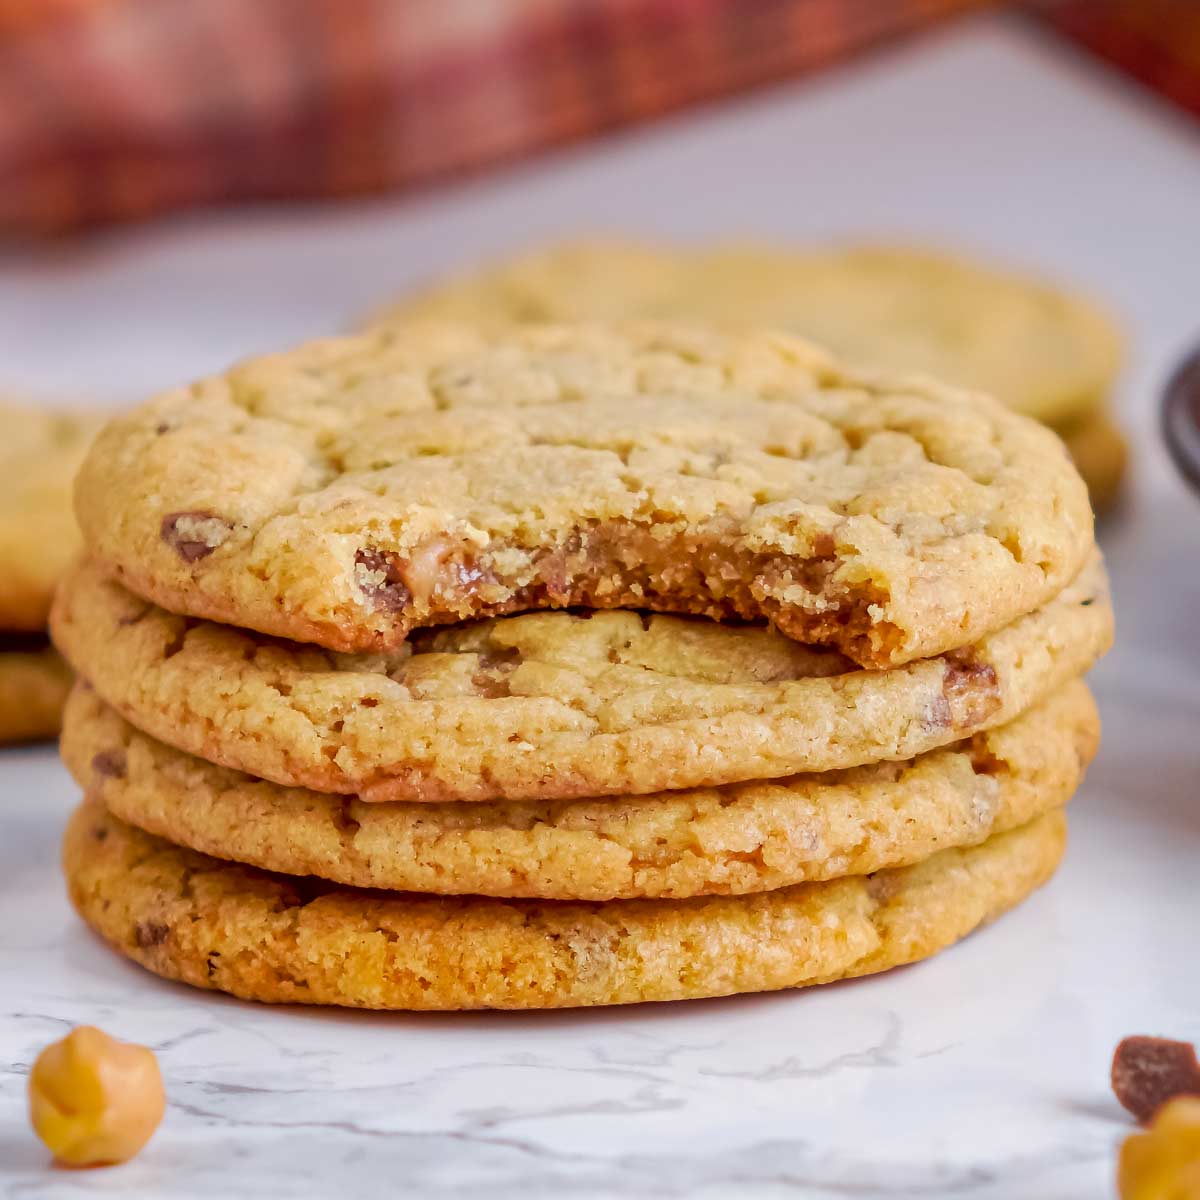
Pumpkin dough, toffee pieces and caramel give these cookies plenty of fall flavor without frosting or a cookie cutter, and you can freeze the dough in individual portions for smaller batches later. Head to The Chunky Chef for the full recipe and more fall baking ideas.
35. Pumpkin S’mores Cookies
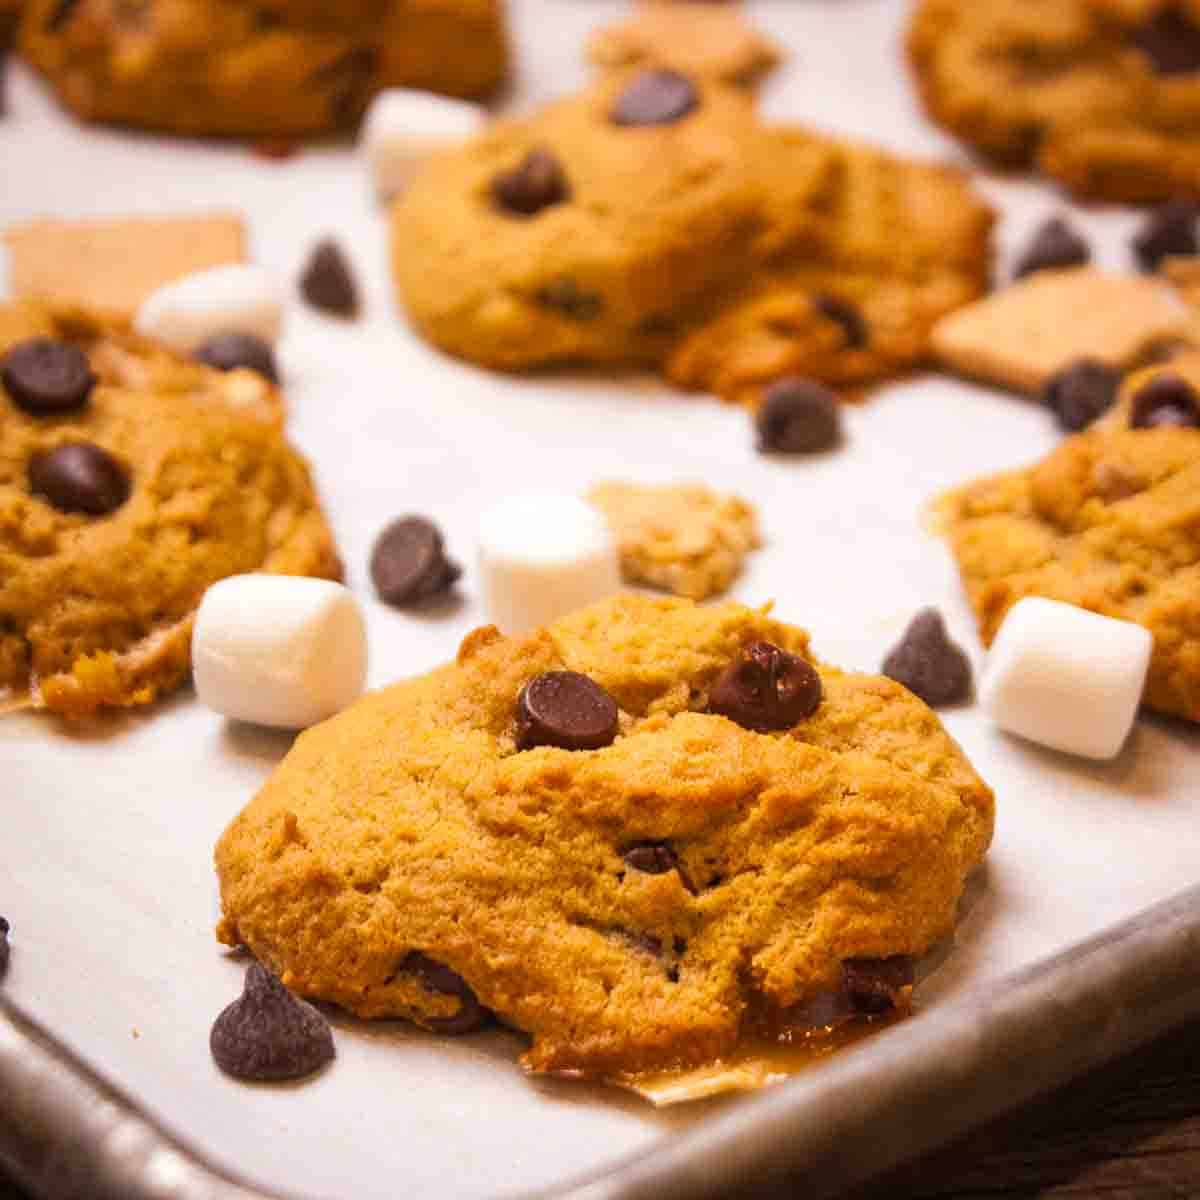
Pumpkin gives these s’mores cookies a fall twist, with chocolate chips, marshmallows and pieces of graham cracker mixed into the dough. No pumpkin-shaped cutter needed. They’re scoop-and-bake cookies, so this is a good choice when you’re more interested in the mix-ins than the decorating. Get the complete recipe from Winding Creek Ranch, then explore Jeri’s other pumpkin desserts for more ways to use that can of purée.