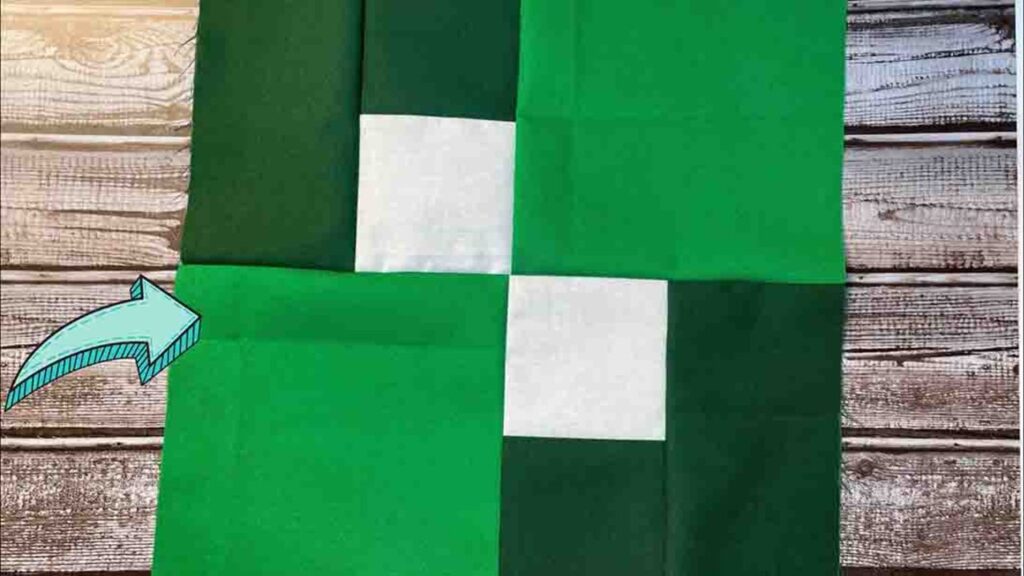
Are you looking for a beginner-friendly quilt pattern? Look no more; Cut and Create on YouTube has an easy project just for you. This four-patch variation quilt block may look complex, but it’s one of the easiest patterns you’ll ever do as a beginner. This is one of my favorite block patterns to do even now, as it looks so pretty! I’ve done a ton of this, and I recommend making the little four-patch part scrappy, as it will look unique. Try doing this quilt today and see for yourself. Watch the video below to learn the step by step instructions. Thanks to Cut and Create for this stunning quilt tutorial.
Materials:
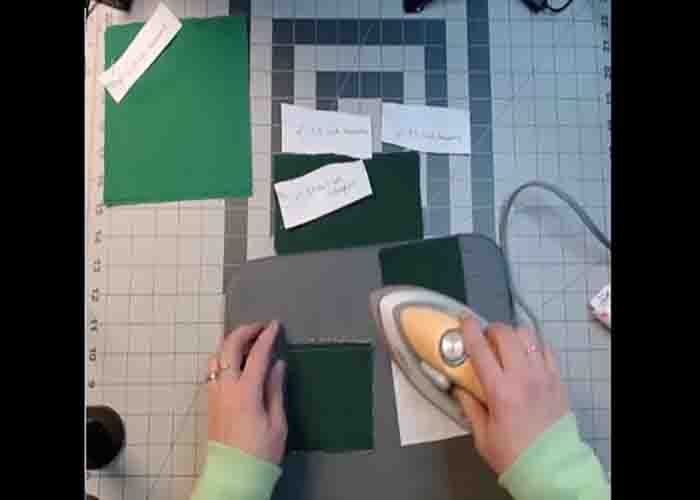
fabric A:
- 2 – 3 1/2″ x 3 1/2″ squares
- 2 – 3 1/2″ x 6 1/2″ rectangles
fabric B:
- 2 – 6 1/2″ x 6 1/2″ squares
fabric C:
- 2 – 3 1/2″ x 3 1/2″ squares
Directions:
Step 1
To start, cut the fabric requirements and label them accordingly (use three different colors of fabric). Now, make two pairs by putting together two 3 1/2″ x 3 1/2″ squares in different colors, pin them to secure, and sew one edge with a 1/4″ seam allowance. Press open afterward. Next, take the rectangles, and sew them on either side of the sewn block. Press open afterward.
[social_warfare]
Step 2
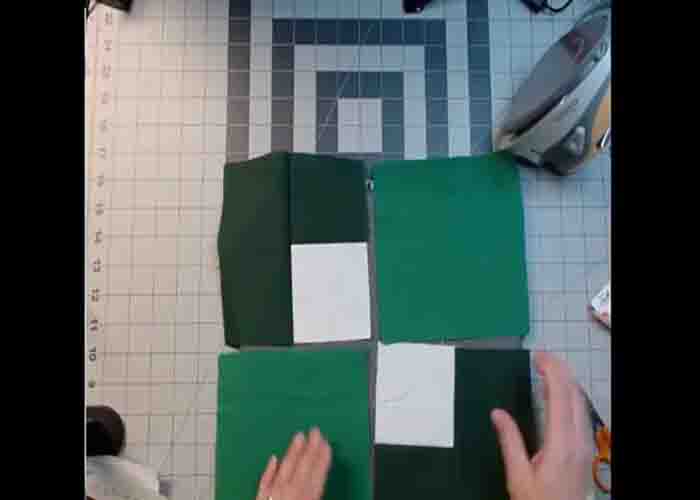
Now, lay them out with the white squares in the middle, then put the 6 1/2″ x 6 1/2″ squares on two corners to complete the block. Sew the two sides together, then sew both together to create the block. Press it nicely once done sewing. Repeat these steps to create more blocks for your desired quilt size.
Four-Patch Variation Quilt Block Tutorial


