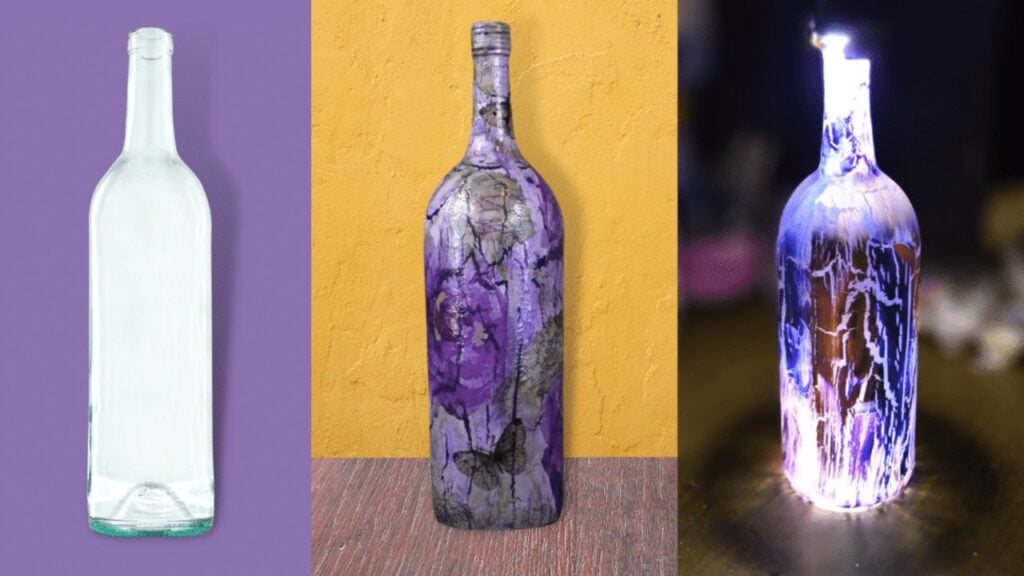
Do you love wine and have lots of bottle stock at home? Revamp them and turn them into one of the most beautiful rustic or vintage decors you can create for your house. This beautiful DIY craft idea is from DIYNoNeedToCry on youtube. Who would’ve thought that these are made from old wine bottles and decorated with some napkins? It’s a great way to upcycle jars! Have fun creating this beautiful decor using different paint colors and designs. And yes, you can make it as a lamp if you leave it clear underneath – perfect to set up a mood at night! Start making your own now and let Ivelisse give you the step-by-step instructions in the video below.
Materials:
- empty wine bottle
- acrylic paint (matte white, purple pansy, lilac mist & clover fields)
- sealer polyacrylic spray
- mod podge
- elmer’s glue (or any white school glue not mod podge)
- pouncer brushes (or regular paint brushes)
- paint brushes
- fan or hair dryer
- paper napkin
- scissors
[social_warfare buttons=”Pinterest,Facebook,Twitter,WhatsApp”]
Instructions:
Step 1:
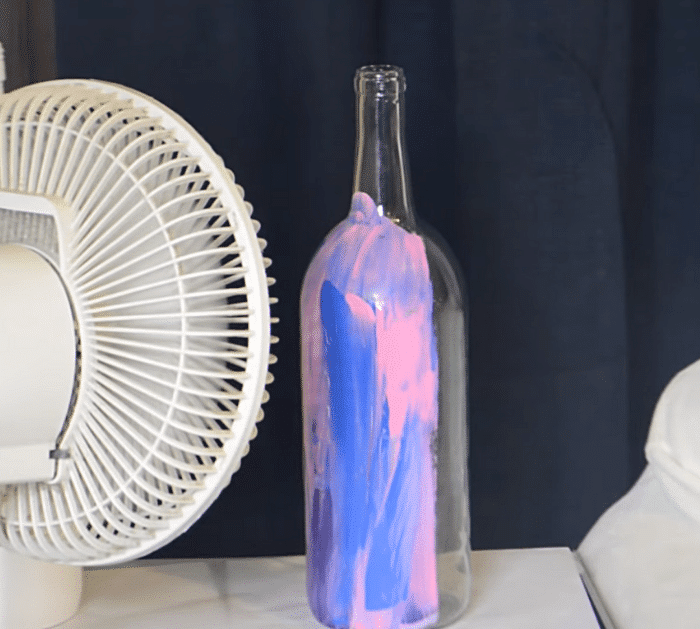
Clean the empty wine bottle and make sure it is dry. Coat the whole bottle with matte white acrylic paint using a pouncer brush(or regular paint brush) and let it dry. To make the drying faster, set it in front of a fan. The white matte paint acts as a primer. Next, add a coat of dark color that will show through the cracks, then let it dry.
If you want it clear underneath, skip the two coats of paint and proceed to step 3.
Step 2:
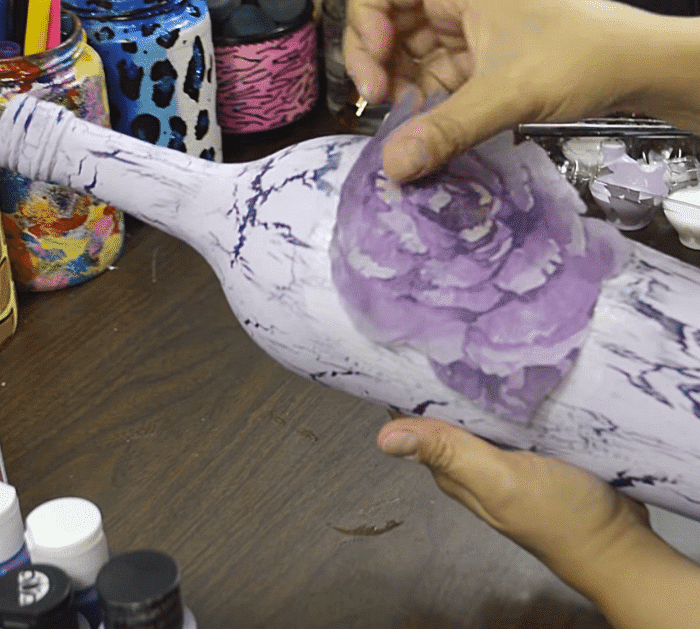
While the dark paint is drying, prepare the paper napkins. Cut out all the designs you want to use from the napkins. If it has detailed design use scissors, but for the rest, you can use a thin paintbrush and water to get the rest of the designs so that they won’t have a solid cutout shape. This method will make it look more rustic. Then lightly wet your fingertips and press the napkin in-between to remove the plies of paper.
Step 3:
Next, crackle the bottle. Use soft and stiff bristle brushes for this step. Using the stiff brush, coat a section of the bottle as fast as you can. You don’t want the glue to dry before putting the paint over it. Don’t put too much and too thin just the right amount of glue. Now take the soft brush and load it with paint. Lightly brush the paint on top of the glue. When it’s no longer gliding, dip the brush into the paint. Immediately place the wine bottle in front of a fan or use a hair dryer in a cool setting.
Note that faster drying time results in more cracks, and air drying doesn’t work.
Finish the rest of the sections.
Step 4:
Decoupage the paper napkin designs onto the bottle. Using a brush and a mod podge, place glue onto the part where you’ll put the designs. Then using a crumbled piece of plastic wrap, lightly smooth out the wrinkles. Cover it again with mod podge and go from the center to an outward direction. Repeat the method for all the designs but let each one dry before putting another one.
Next, use three paint colors that match the colors of the designs and randomly smudged them all over the bottle for an old and vintage look. Let it dry and seal after.
Easy Wine Bottle Decoupage Project


