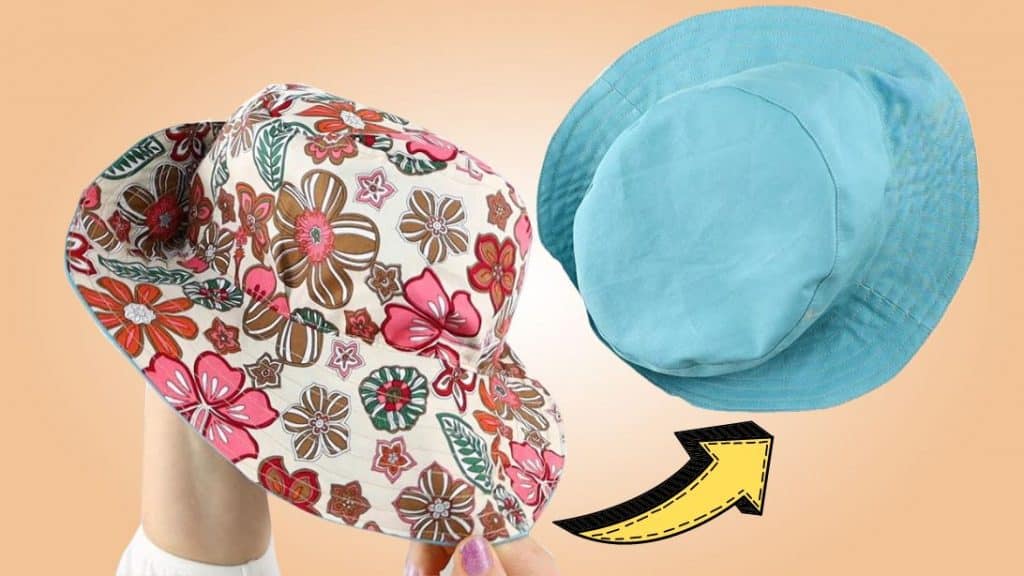
If you love going outside whether for a walk, running some errands, or going to your favorite restaurants, it’s always nice to keep a hat with you to protect you from the sun. Just like this super cute and reversible bucket hat by Hello Sewing on YouTube.
Materials:
- 2 coordinating cotton fabrics
- Matching thread
- Scissors or rotary cutter
- Ruler or measuring tape
- Iron, for pressing
- Clips and pins
- Marking pen
- Sewing machine
- Pattern (click the link to download the pattern)
Directions:
Step 1
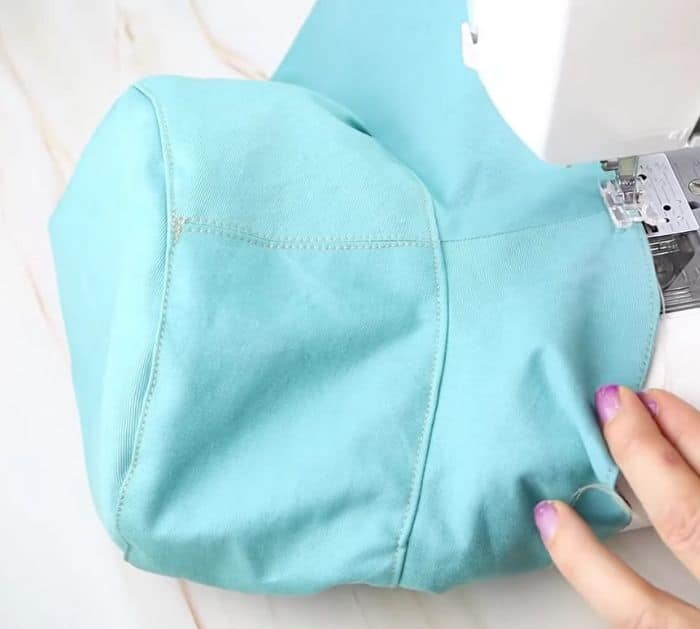
Download, print, and cut the bucket hat pattern. When printing, make sure to select the “no scaling” or print at 100% option for the right size pattern pieces. Place all of the patterns on the fold of the fabric, then cut 2 pieces for the crown side, 2 pieces for the brim, and cut the oval crown piece. Repeat the process with the outer fabric. Lay the semicircles together with their right sides facing, then sew them on their side with a 3/8″ seam allowance. Next, open the circle you created and press the seams open. Take the 2 crown pieces and lay them together with their right sides facing, then stitch along each of their sides with a 3/8″ seam allowance. Open the crown piece and place it into your head to check the fit. Adjust if needed, and once contented with the fit, give it a good press, then topstitch on either side of each seam. Place the oval crown piece vertically, then fold it in half, and mark the side creases. Unfold, then fold to the other side, and press to create the creases, mark them as well.
[social_warfare]
Step 2
Take the crown piece, then find the center on each side, mark it, then line it up with the hat front which will be the top of the oval. Pin the other center to the bottom side of the oval and the seams to either side. Now, pin the rest of the pieces together nicely. Sew them around as you remove the pins with a 3/8″ seam allowance, then press the seam down to the crown, and topstitch all around the hat. Fit the brim to the other part of the hat, fold it seam to seam, then crease, and mark the centers of each side. Line up the brim seams with the crown and pin them together on the wrong side of the fabric. Pin the middle to the middle of each side and pin it around the bucket. Sew along with the pinned areas with a 3/8″ seam allowance, then turn the seams upward toward the crown, and topstitch along the outside.
Step 3
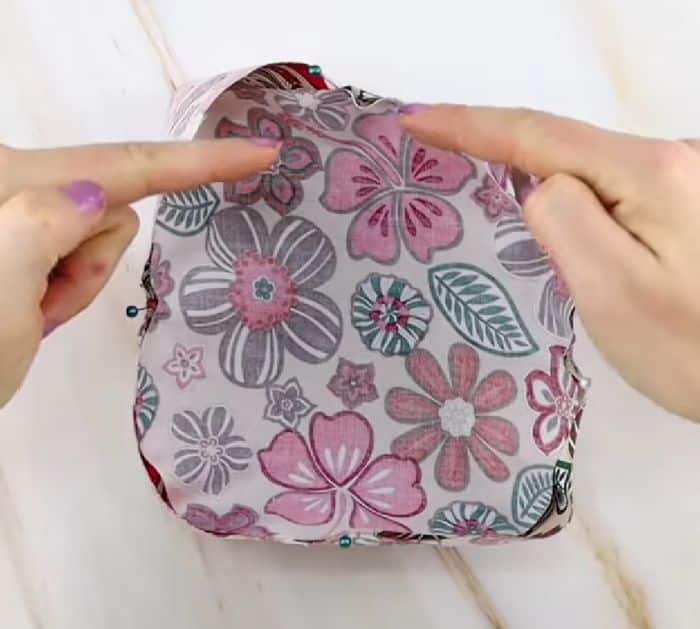
Create another hat shape using the first few instructions. Place the two hats together with their right sides facing and the lining seams matching with the outer fabric, and pin them around in place. Stitch around the brim with a 3/8″ seam allowance leaving a 3-inch gap for turning. Fit the lining into the crown, line up the brim, then pin them together in place, and press the seams of the brim flat. Topstitch the outer brim catching the lining underneath so it stays in place, then top-stitch concentric circles around the brim. Before you start this, measure the width of the brim and work out how many circles you will need spaced around 1⁄2 inch apart, and mark them with a fabric pen. You may want to space them a little closer (3/8″ or 1 cm) – just so you can work in the circles without leaving a big gap nearest the crown. These stitch lines help to stabilize the hat and you will most probably need 5 or 6 of them.
*All these images are credited to Hello Sewing via YouTube. Give her channel a visit and subscribe for more!
Easy To Sew Reversible Bucket Hat For Beginners