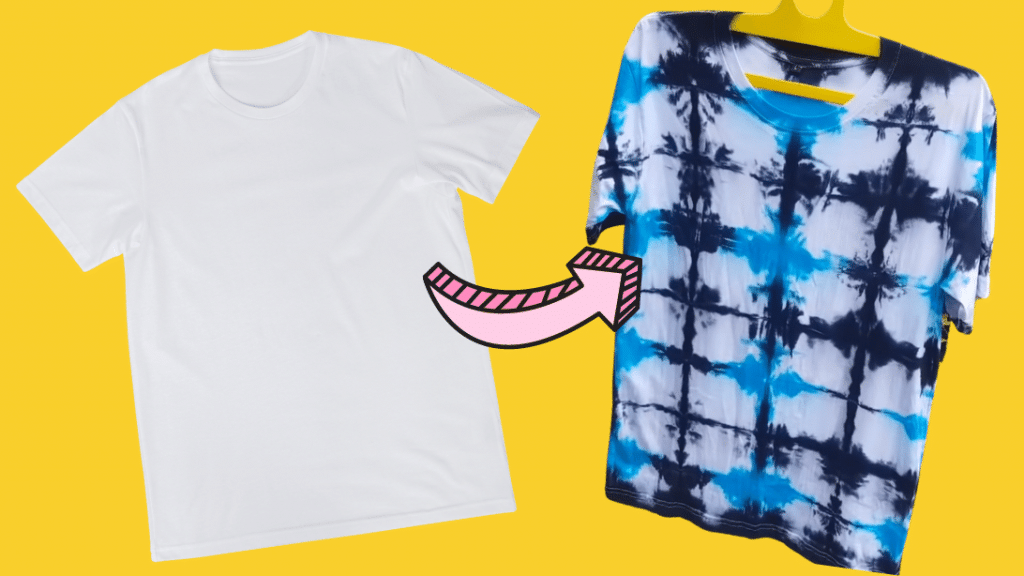
We have seen how tie-dye gained popularity in these recent years. From t-shirts, hoodies, and hats to bags – you can see these designs everywhere! Tie-dying cloth is one of the best summer activities you can try at home as it’s simple and fun to create. Now is the perfect time for you to make your own piece with this easy tie dye t-shirt tutorial by Erpart! Get your old plain white shirts from your closet and give them a new life using this shibori technique! Be creative and try other methods and colors. You’ll be surprised how it will turn out. Watch the full tutorial below.
Materials:
- 100% cotton white t-shirt
- reactive dyes (black and blue dyes for this tutorial)
- waterglass (sodium silicate) or soda ash
- natural rubber bands
- gloves
- mask
- water
- containers
[social_warfare buttons=”Pinterest,Facebook,Twitter,WhatsApp”]
Directions:
Step 1:
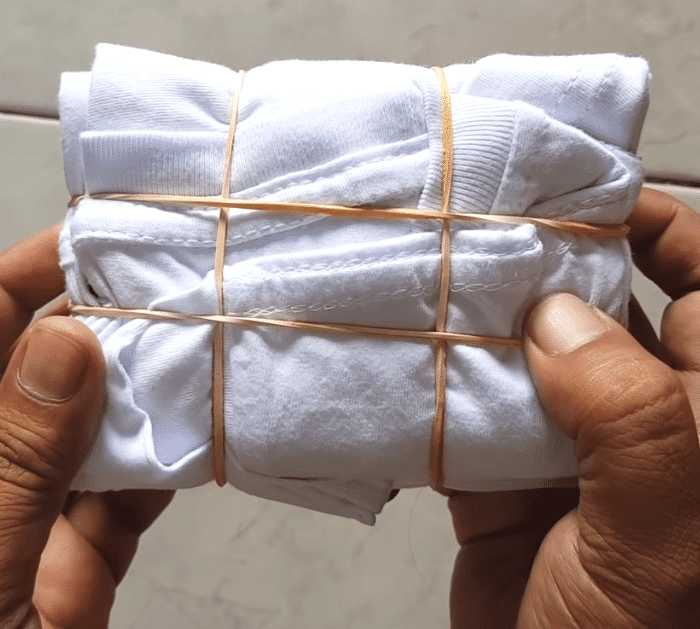
Fold your t-shirt in accordion-style lengthwise. Make sure to fold the sleeves properly. Then fold the rectangle accordion-style into a smaller rectangle.
Step 2:
After folding it neatly, get your rubber bands. Secure your shirt with the bands by putting two (2) lengthwise and two (2) crosswise.
Step 3:
Prepare your water glass or soda ash and pour it into a container where you can fully soak the t-shirt. Wear your gloves and dip your t-shirt into the water glass for a few seconds – make sure it is completely wet. Press it a little to remove some of the drops.
Step 4:
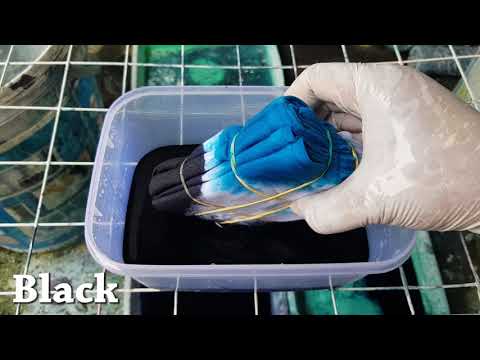
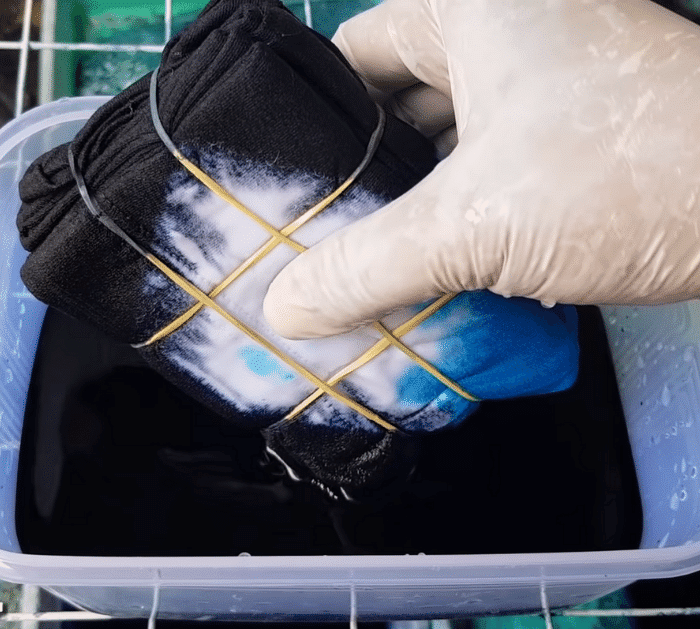
Prepare your dyes. Put the black and blue dyes in two separate wide containers. Next, hold the t-shirt in one corner and dip the opposite corner into the blue color for a few seconds. Shake it a little bit to remove some of the drops.
Step 5:
For the remaining corners, do the same process but use the black dye. After you finish dipping the corners, place it where there is enough ventilation and the air can pass at the bottom. Leave it for a few hours.
Step 6:
After a few hours, soak the t-shirt in the water. Next, remove the bands and rinse the shirt properly. After rinsing, hang it and let it dry.
Now you have an awesome tie-dyed shirt!
Easy Tie Dye T-Shirt