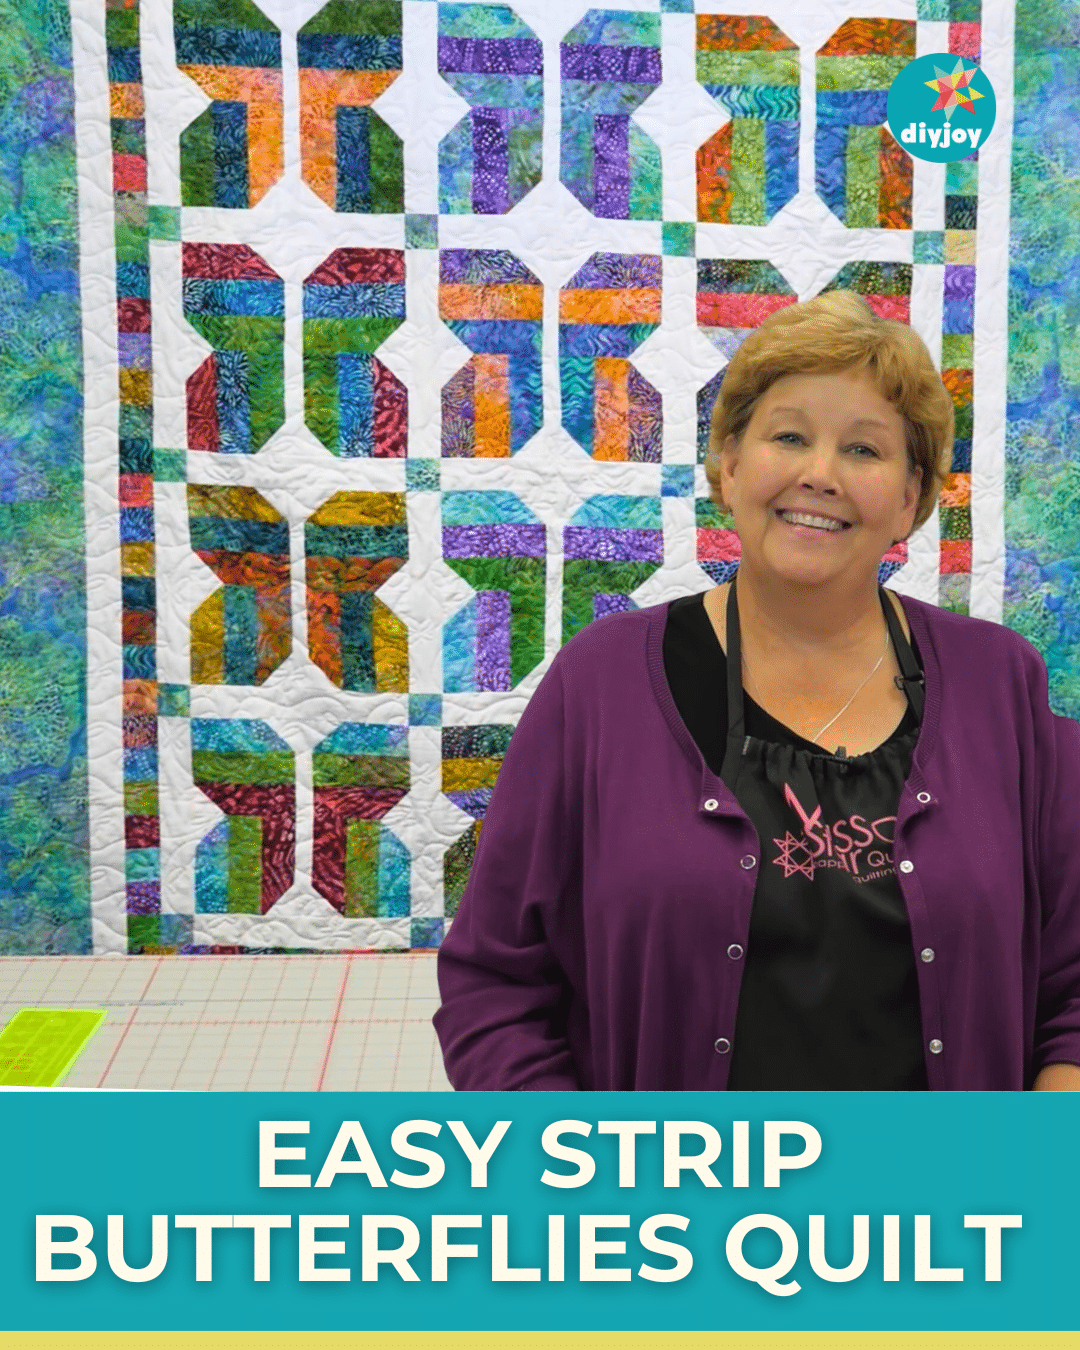
As the weather becomes warmer, butterflies start to emerge. It’s so beautiful to see them wander around in my garden. That’s why I wanted to try a butterfly pattern. I decided to make this easy strip butterflies quilt by Missouri Star because it’s so cute and simple. Watch the video below for full instructions.
Materials:
- 1 roll of 2 1/2″ strips (this includes pieces of border and cornerstones)
- 2 yards of background fabric (this includes sashing strips and #2 border)
- 1 1/2 yards for the outer border
- 5 yards for backing
[social_warfare buttons=”facebok,pinterest,twitter,whatsapp”]
Instructions:
Step 1:
Take 3 pieces of 2 1/2″ strips and sew them together.
Step 2:
Cut off the selvage from the sewn strips and cut them however wide it is to make squares. For each butterfly, you need 4 squares. The remaining pieces will be used for the first border and cornerstones.
Step 3:
Cut 17 pieces of 2 1/2″ strips from your background fabric and cut them into 2 1/2″ squares. You’ll need 8 pieces of 2 1/2″ squares for each block. Fold them in half diagonally to make a crease. Get 2 pieces of the background squares and place them on opposite corners of a block. Sew on the creased lines. Repeat to make another one – be sure that it’s exactly the same as the first one. Next, sew another 2 pieces of background squares on opposite corners of another block – you’ll be putting them in corners different from the first 2 blocks. Repeat to the last block.
Step 4:
Trim about a quarter of an inch from the seam line of each corner of the block, then press them open.
Step 5:
Sew two wing sections with a quarter of an inch seam allowance. Press them open.
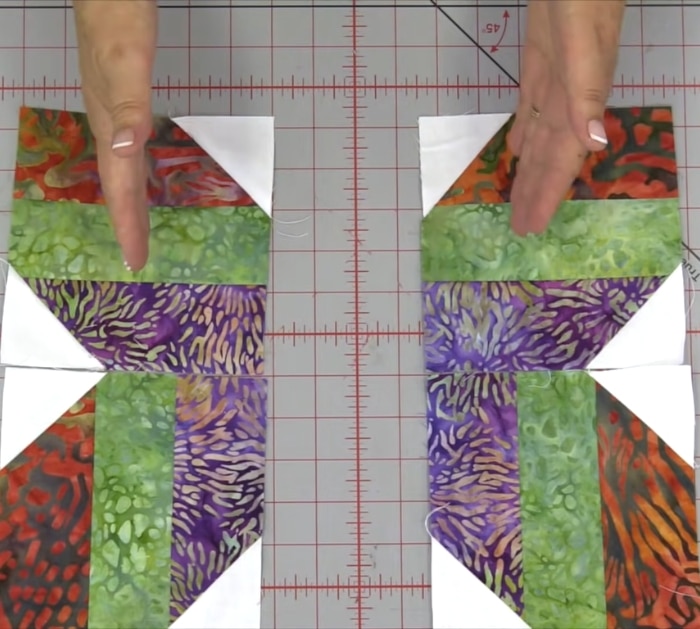
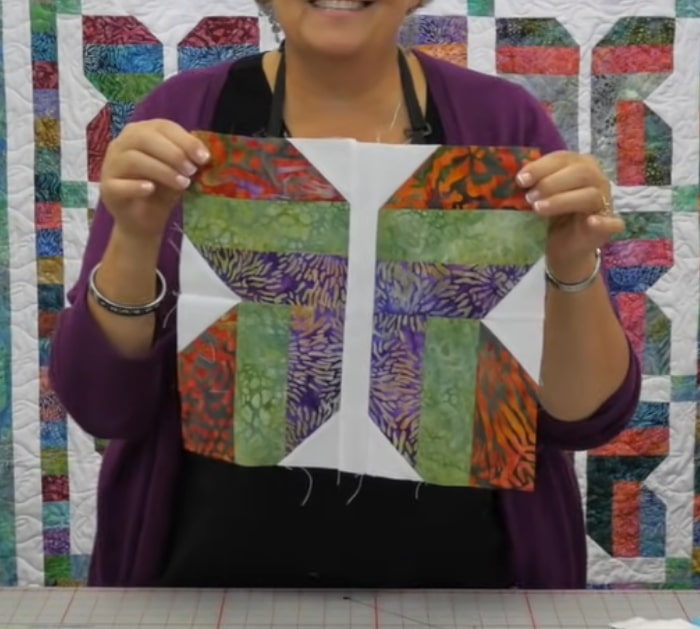
Step 6:
Cut 1 1/2″ strips and sub-cut into 12 inches. Get one piece and place it on the center of the wings. Sew on both sides, then press it open. You need 3 blocks across and 4 down for a total of 12.
Step 7:
For the sashing strips, sub-cut the 2 1/2″ strips into 12 inches. Place them on the center and sides of each block. From the remaining fabric you set aside earlier, stack them and cut them into 2 1/2″ inches. Sew them to make the border. Cut the excess from the border into 2 1/2″ squares for the cornerstones.
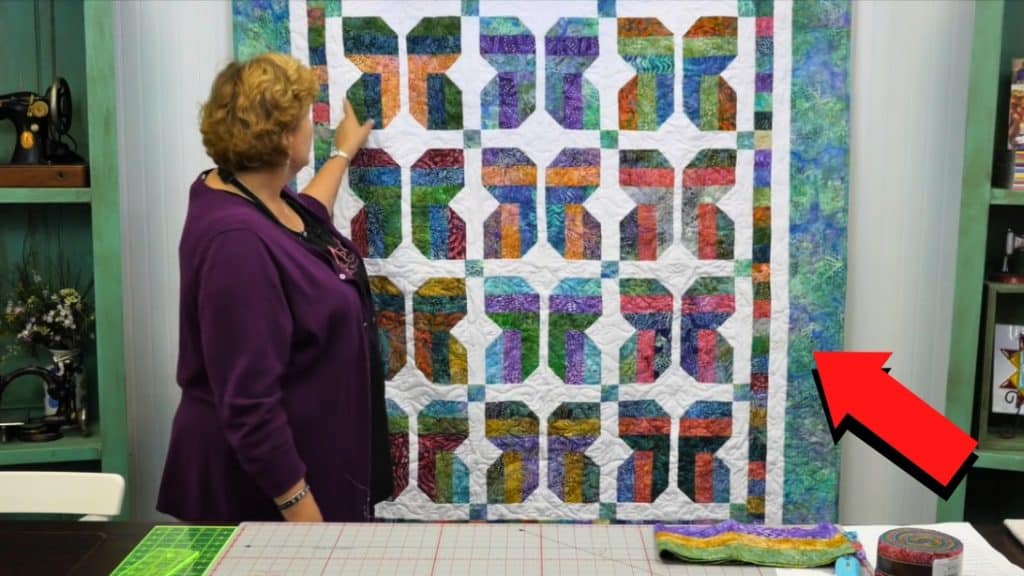
Make an Easy Strip Butterflies Quilt