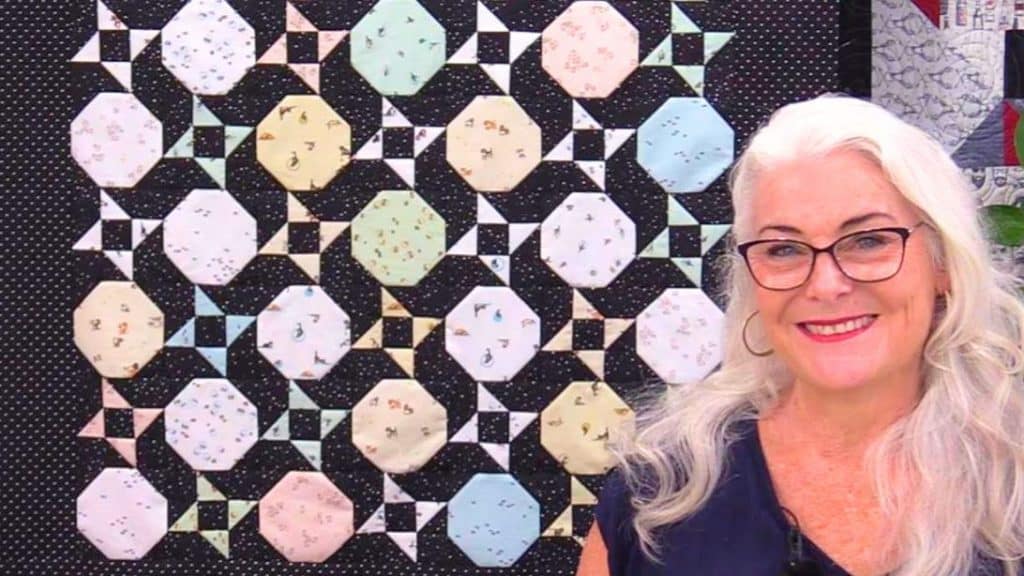
This beautiful quilt idea by SewVeryEasy on YouTube is probably one of my most-favorite projects of all-time! It is super easy to put together and the result looks very pretty and perfect for the approaching holiday season, too. Watch this video tutorial and learn how now.
Materials:
- Charm pack or 5-inch squares
- Background fabric
- Marking pen, pencil, or chalk
- Ruler
- Scissors or rotary cutter and a cutting mat
- Needle and thread
- Iron, for pressing
- Sewing machine
Directions:
Step 1
Cut the background fabric to 14 pieces of 5¼ inches square (the allowance is because charm squares often have a bit of excess around the sides), then you’ll also need 252 pieces of squares at 2 inches and 14 charm squares of different patterns and colors. Get 1 charm square and 1 background square, then lay them together with their right sides facing and the charm square centered. Draw a line on the back of the charm square diagonally from corner to corner, then repeat on the other side, and sew on both sides of each line with ¼ inch seam allowance.
[social_warfare]
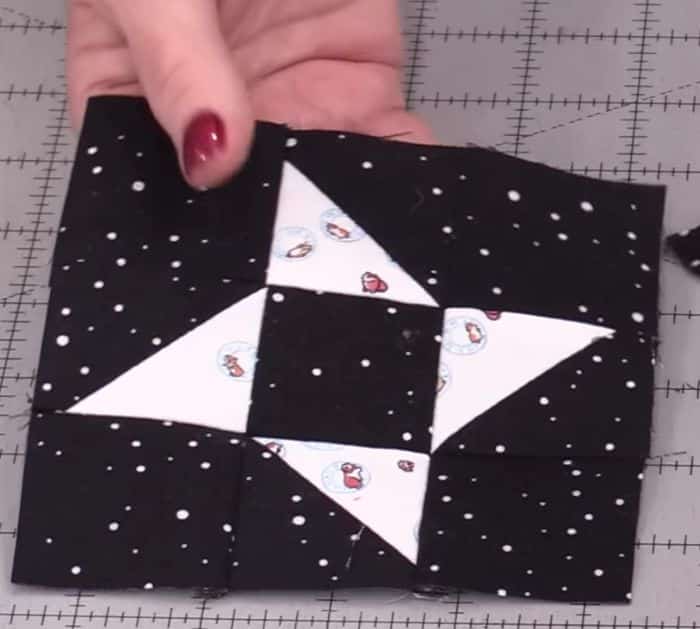
Step 2
Cut them apart right down the line at the center and you’ll have a total of 8 half-square triangles, then press the seams to the darker side, and trim the squares down so that they are all 2 inches. Place 4 background squares on each corner and 1 in the center, then fill the spaces with the half-square triangles to form a friendship star as shown in the video, and start stitching them together making sure to press the seams open every now and then.
Step 3
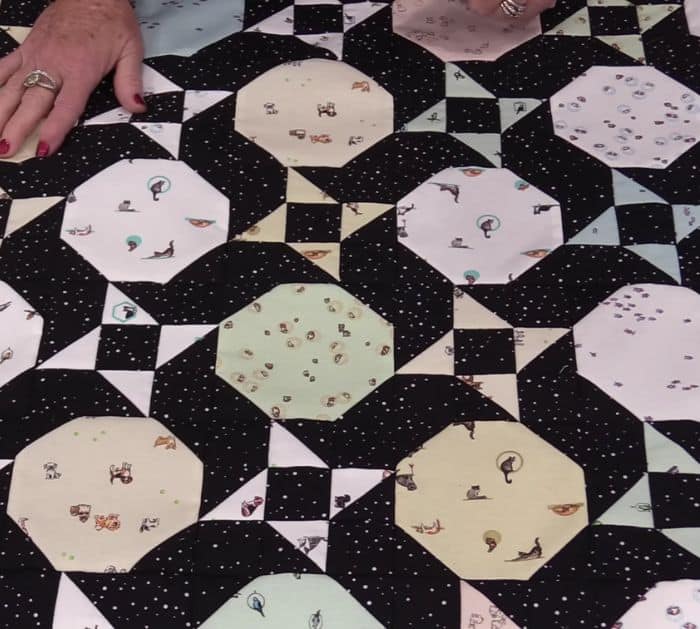
To make a snowball block, simply place 2-inch background squares on 4 corners of a charm square trimmed down to 5 inches, then sew them each diagonally with ¼-inch seam allowance, press the seams open, and cut off the excess layers at the back. Sew the star and snowball block together, then press the seams open, and proceed to make more blocks using different colors and prints of charm squares each time. Continue to piece together all of the blocks that you’ve made, then stitch them into rows, and finish your quilt by adding the border, backing, and binding of your choice.
*All image credit belongs to SewVeryEasy via YouTube. Follow and subscribe to her channel for more!
Easy Snowball & Stars Quilt Using 5″ Squares


