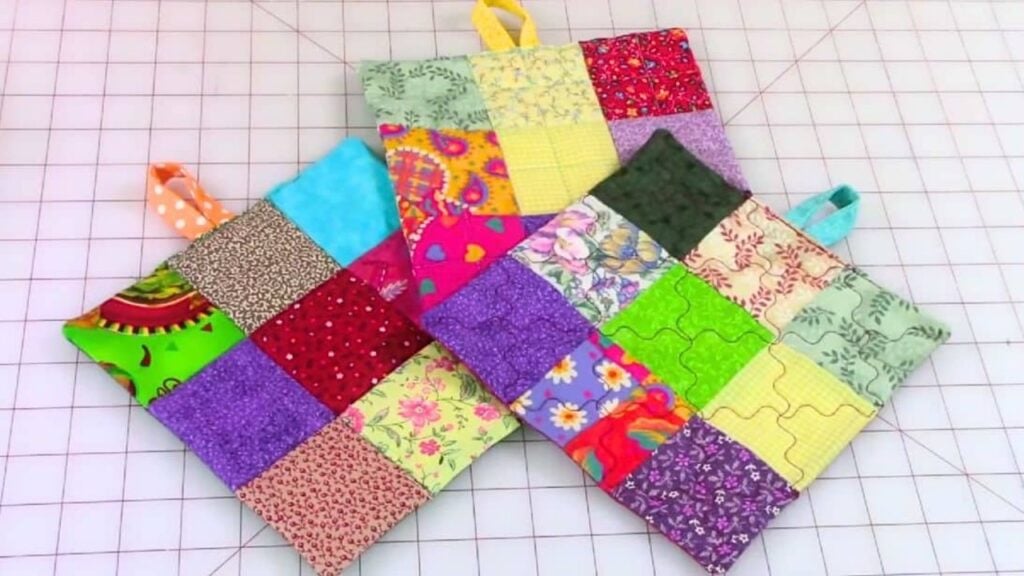
This sewing project by The Sewing Room Channel on YouTube is super easy and quick to make which makes it a great starter project for beginners! You can make this using your leftover fabrics and make it as scrappy as you want, guaranteed it will still look beautiful. Read the written instructions down below now and watch the video tutorial as well to learn how.
Materials:
- 9 fabric squares @ 3 inches, different colors, and prints
- 1 fabric square @ 8½ inches
- 1 cotton batting @ 8½ inches
- 1 insul bright or another cotton batting @ 8½ inches
- Ruler
- Marking pen, pencil, or chalk
- Fabric pins
- Scissors or rotary cutter and a cutting mat
- Needle and thread
- Iron, for pressing
- Sewing machine
Directions:
Step 1
Cut the fabrics to size, then lay the small squares into 3 rows with 3 squares each, and arrange them however you want. Stitch them per row with ¼ inch seam allowance, then press the seams toward the same direction, lay the 3 stitched rows together, and rotate the center row so that its seams are going toward the opposite direction. Stitch the rows to each other, then press the seams in one direction, flip the patchwork over, and press the top flatly.
[social_warfare]
Step 2
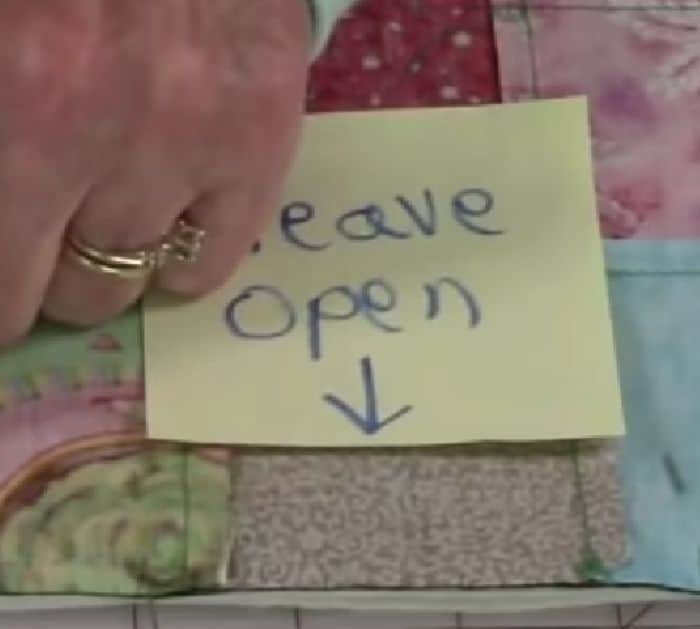
Layer the cotton batting and insul bright together, lining them up nicely, then place the solid square on top with its right side facing up, and place the 9-patch block over it with its right side facing down, making sure to center it. Trim the edges so that they are all of the same size, then stitch around the edges with ¼ inch seam allowance, and leave an opening on one side making sure to backstitch on each side of the opening.
Step 3
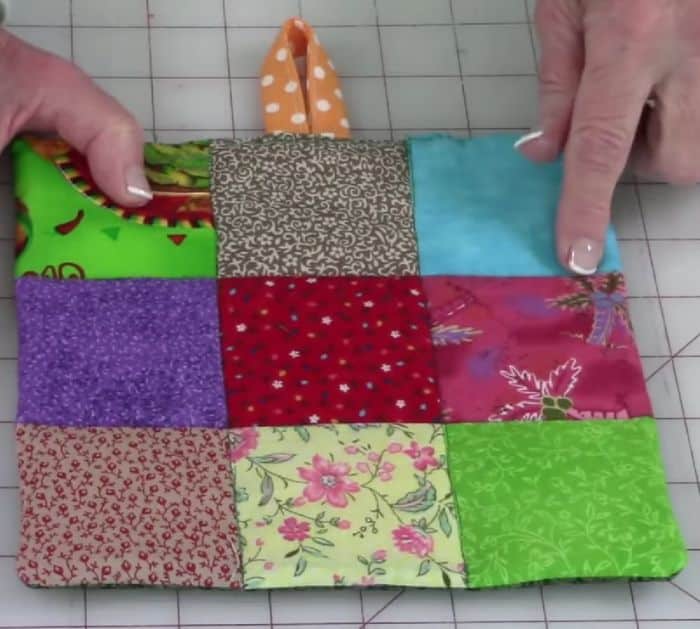
Trim the corners diagonally about 1/8 inch, then cut a small slanted piece off of the lower side of each corner, and repeat this step with all of the other corners. Press the fabric of the opening back, then turn the piece right side out, and poke the corners nicely. Prepare the hanging loop piece as shown in the video, then place it in between the opening, and pin it in place. Topstitch all around the piece, then quilt it however you want, and you’re done!
*All these images are credited to The Sewing Room Channel via YouTube. Give her channel a visit and subscribe for more!
Easy 10-Minute Scrappy Pot Holder Sewing Tutorial


