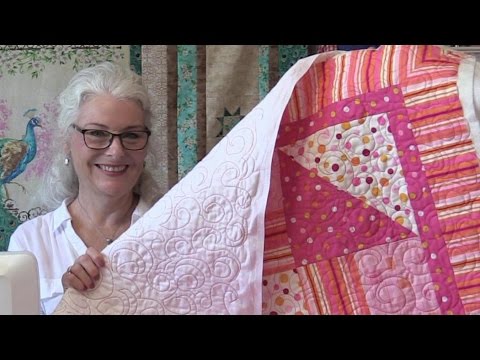
There’s all kinds of ways to stitch your quilt layers together, but I found this particular way to be very pleasing to the eye and wanted to share this with you today.
This stitch is just the start to the many stitches you can do. Once you learn this basic stitch well, you can do many many different variations of this stitch.
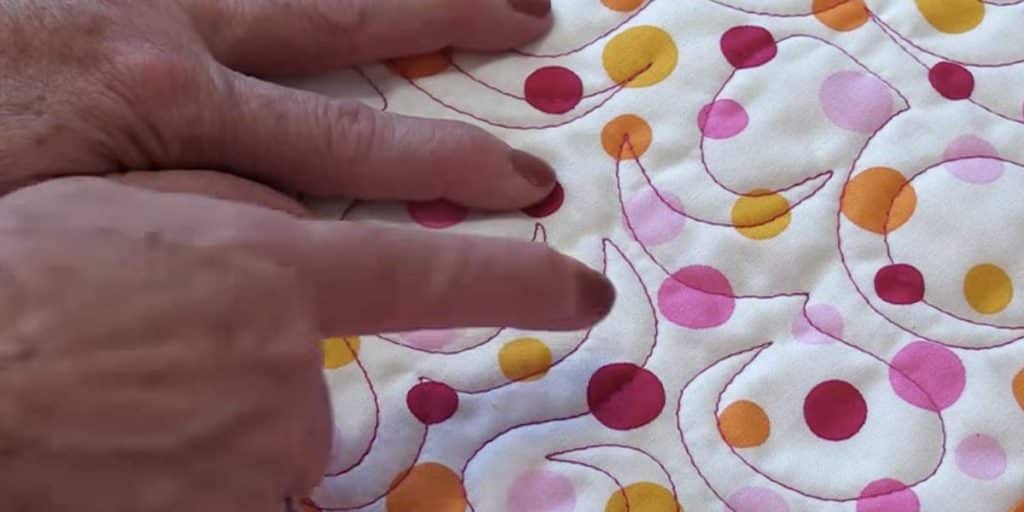
The first thing she does is make a sample of the quilt that you have done and with that sample you use the same batting that you’re going to use on your quilt so you can make sure that your machine is set exactly how it will be when you stitch on your quilt. She also uses a fusible quilt batting, which makes it easier.
She uses her Bernina, but you can use any machine and any quilt foot because this is a very basic stitch and easy stitch. The stitch she does in this tutorial, she calls the letter “C’s”. And, the first thing she does is draw it out on a pad of paper with a sharpie. When you stitch this design, you want to do it in quarters so you’re not having to twist the quilt around and you’re working in that one area.
Watch how Laura Ann Coia does this in her great step by step tutorial so you can see how she actually does this.