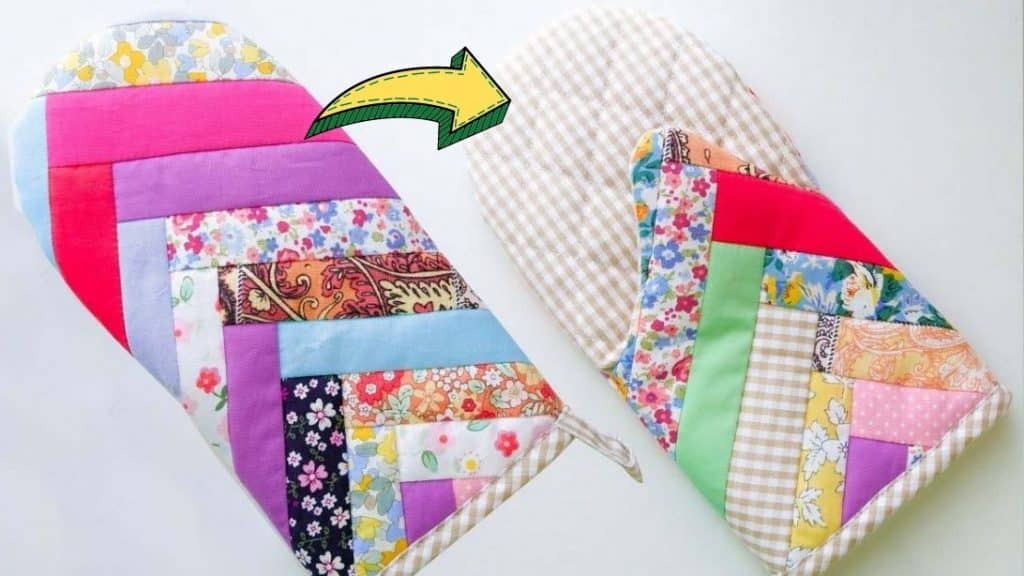
Don’t know what to do with those colorful scrap fabrics? Try this fun DIY sewing project by Thuy craft on YouTube! It only requires simple sewing tools, plus a few simple and easy steps to sew this adorable oven mitt. Try it out today and show us your attempt at one.
Materials:
- Lining fabric
- Bias tape (could be the same fabric as your lining)
- 1-inch scrap fabric strips
- Fusible batting
- Interfacing fusible fabric
- Paper
- Marking pen
- Pins
- Scissors
Directions:
Step 1
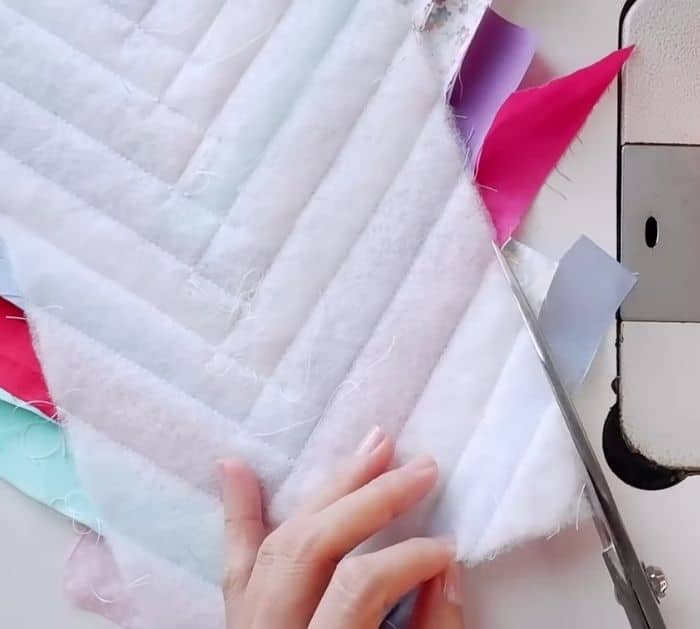
Place your hand on top of a paper and mark with a 2cm (0.8 inches) allowance around the sides, 1cm (0.4 inches) on top of your fingers and thumb, and a 5cm (2 inches) gap between your 4 fingers and thumb, the length of the paper at the bottom should be depending on how long you want the mitt to be. Curve it out accordingly, then cut the curve out, and fold it down right where the curve ends, this will be piece “C”. For piece “A”, cut a simple curved pattern for the hand on a separate paper, the length of the bottom should be the same length as piece “C”. To make piece “B”, trace piece “C” on another piece of paper, then draw a line in half, fold it down, trace the curves, and cut the whole piece out. Assemble the 3 pieces together according to their lines, and see if they fit. Stack 2 lining fabrics, 1 fusible batting, and 1 interfacing fusible fabric, then place a pattern on top, add up to 1 inch around the pattern, then cut it squared, and set aside. Repeat process with other 2 patterns. Cut the fabric scraps into 1-inch strips, grab pieces A and C’s fusible batting, and sew the scrap fabrics on them. Trim off the excess around the edges, then set them aside.
[social_warfare]
Step 2
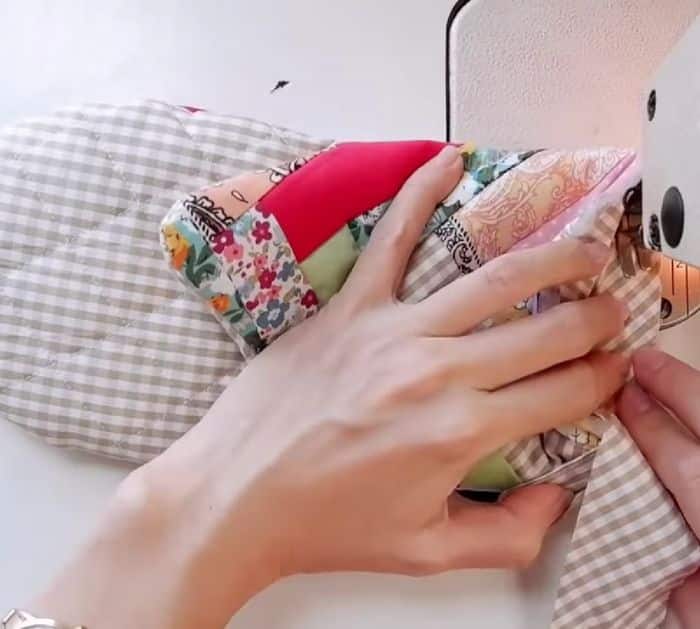
Pair piece B’s fusible batting and lining fabric, then sew over them with a criss-cross pattern. Pair pieces A, B, and C’s interfacing fusible fabrics with their lining fabrics, then sew over them with a criss-cross pattern as well. Place the piece B’s crisscrossed batting and fabric on top of piece A sewn with scrap fabrics, make sure their right sides are facing each other, then place the B pattern on top, and pin them around in place. Sew around the outer curve on the top and side edges of the pattern, leaving the bottom and thumb area unsewn. Open the fabric at the bottom and place the scrap fabric piece C down so their rights sides are facing, pin them in place, then place the piece C pattern on top. Sew right outside the edges of the pattern, leaving the bottom and thumb area unsewn. Fold it properly so that you can sew the thumb area, trim around the edges leaving only about ¼ inch seam allowance, make notches on the curves and corners, fold it right side out, and poke the corners nicely. Repeat the process on the A, B, and C pieces of crisscrossed interfacing and lining pairing, cut around and notch, insert into the mitt, then tuck it in nicely. Trim the excess edge at the bottom evenly, then make a little loop to hang it with, and sew it at the bottom edge of the mitt. Sew a bias tape around the edges to hide the raw seams.
*All these images are credited to Thuy craft via YouTube. Give her channel a visit and subscribe for more!
Easy Oven Mitt Using Scrap Fabrics Sewing Tutorial


