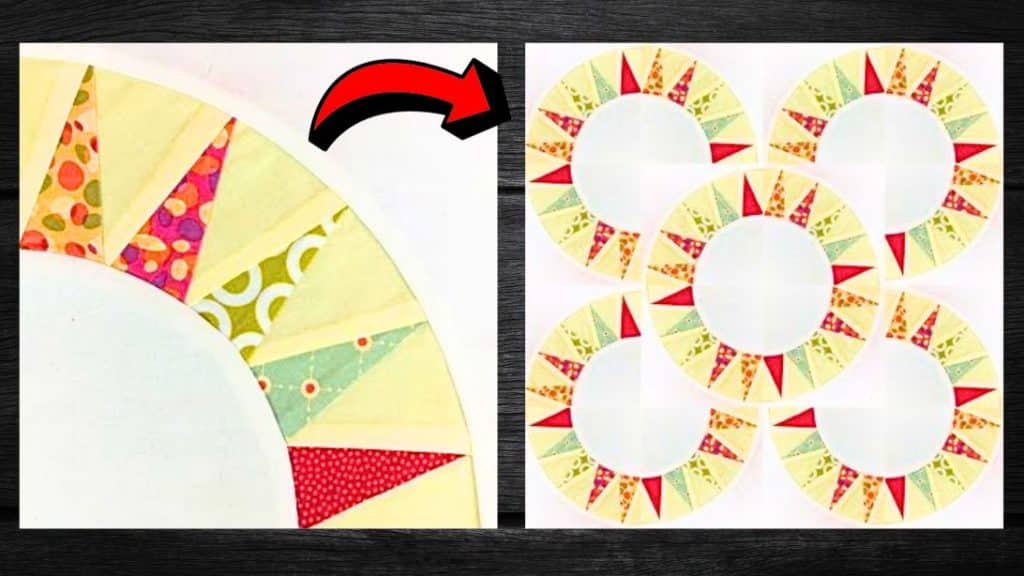
The first time I saw this pattern by Teresa DownUnder on YouTube, I immediately knew that I had to give it a try. Ever since I learned how to quilt I’ve always been interested in curved or round patterns as opposed to squares and straight ones. Among the many projects I have tried before, this New York beauty quilt block is one of my favorites.
RELATED: Unicorn Applique Quilt Tutorial
It’s super simple and easy to piece together and there are a lot of ways you can assemble this block, the possibilities are endless. But what’s best about this quilt block is that you can use leftover fabrics and make this look as scrappy as you want. This project is highly recommended and a must-try. Learn how now and follow the written instructions down below.
Materials for New York Beauty Quilt Block:
- Main fabric, assorted
- Accent fabric
- Background fabric
- Fabric pins
- Scissors or rotary cutter and a cutting mat
- Needle and thread
- Iron, for pressing
- Sewing machine
- Template (Click here to download the template)
How to Make New York Beauty Quilt Block:
Step 1
Cut the curved template pieces and set them aside, then roughly cut the triangle pieces, and fold along each line as shown in the video. Cut the fabric for each triangle at least 1″ larger than the surface it will cover including the seam allowances, then turn the paper over, place the fabric on the back of A1, and pin it securely. Fold the paper back along the line between A1 and A2, then align the ¼” line on your ruler with the paper fold, and cut it.
[social_warfare]
Step 2
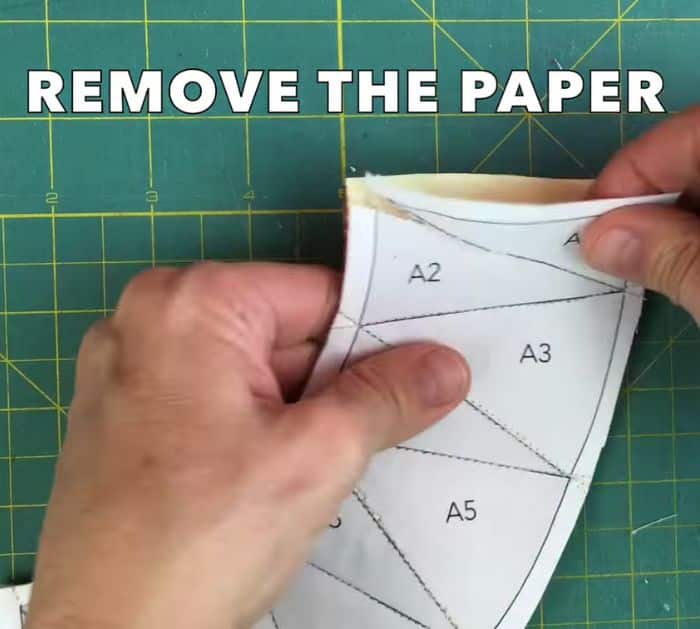
Turn it over and add the next piece, then turn the paper over again, and stitch along the line between A1 and A2. Turn it over and press the fabric open, turn the paper over and fold the paper back along the next line between A2 and A3, then place the ¼” line on your ruler aligned with the paper fold and cut the excess fabric. Repeat the same steps for the next pieces, then trim off the excess paper and fabric together, and tear off the paper at the back completely.
Step 3
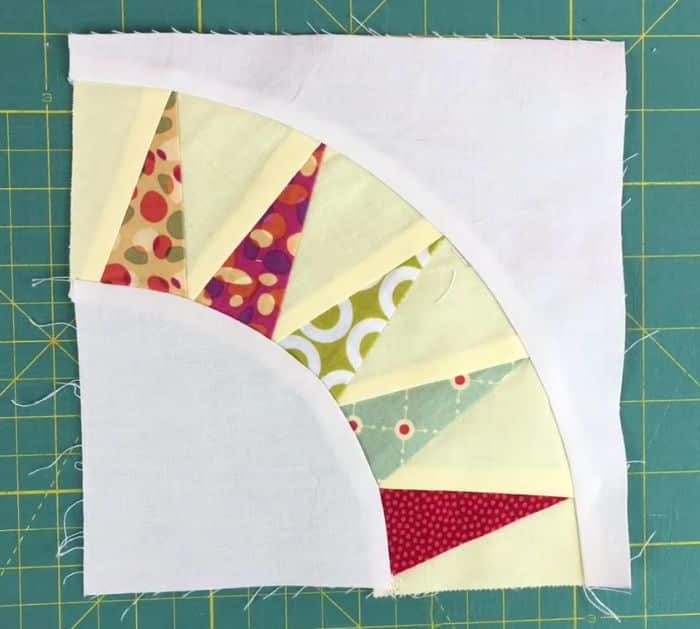
Cut pieces B and C using the template, then find the midpoint of pieces C and A, mark them, and then align their marks pinning them in place. Continue to pin the edges together very closely, then stitch along the edges with ¼” seam allowance, and repeat it with piece B. Give the block a nice press, then keep making more blocks, and assemble them however you want.
*All image credit belongs to Teresa DownUnder via YouTube. Follow and subscribe to her channel for more!
Easy New York Beauty Quilt Block Tutorial


