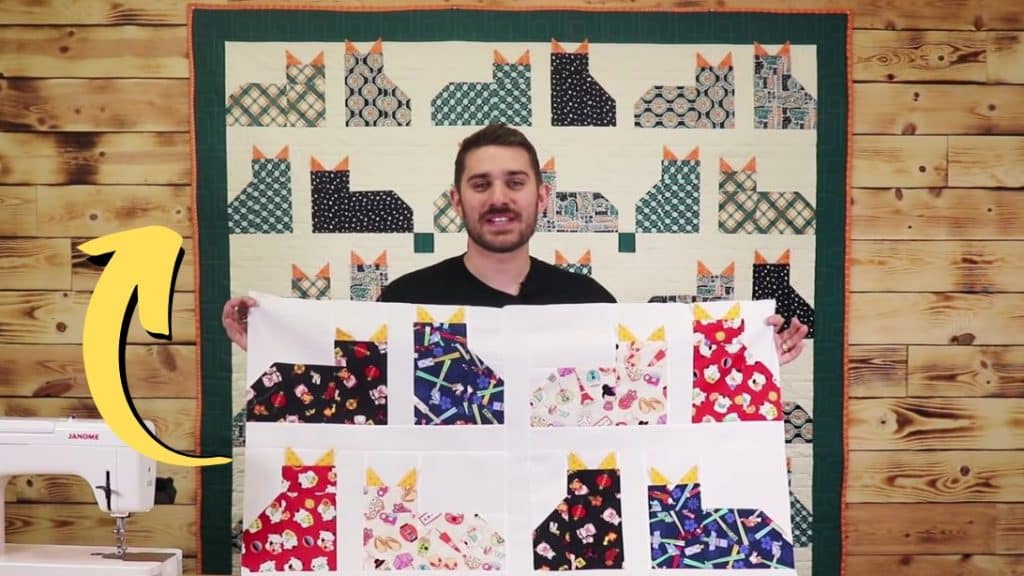
This cat quilt tutorial by Sew Yeah on YouTube will be added to my list of favorite tutorials! They just made every step easy to understand and kept the instructions simple which I’m sure even beginners will think so too. The finished product looks so adorable and I could already think of a lot of ways to add more designs to the quilt, better start with a new project now.
Materials:
- White fabric
- Printed fabric for the body
- Printed fabric for the ears
- Needle and thread
- Scissors
- Rotary cutter and mat
- Iron
- Sewing machine
- Turning tool
- Ruler
- Pattern and guide (click here to see their pattern and guide for free)
Directions:
Step 1: Standing cat
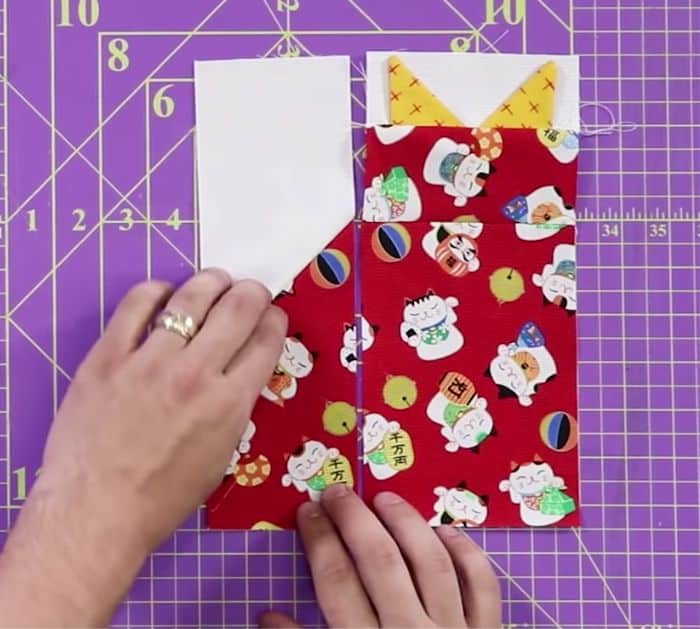
The first thing that you have to do is to precut your fabric according to the pattern here. Take 1 of the little square pieces, then fold it in half diagonally, and sew it on one side with a quarter-inch seam allowance. Turn the piece right side out poking the corners nicely, then do this to the other piece, and set them aside. To build the back side of the cat, place the white strip on top of the printed strip horizontally, then sew it diagonally from corner to corner, open it up, cut a quarter-inch away from the stitch, then press the fabric open. If you want to reverse the cut, change the direction of your strip as well as the way you sew it. Now, for the main body of the cat, place the smaller printed piece on top of the larger piece with their right sides facing and edges matching. Sew them at the top with a quarter-inch seam allowance, then press open. Sew the ears on the small white fabric making sure to leave a space of half an inch on both sides, then sew the rest of the pieces together to complete the cat, and give it a good press.
[social_warfare]
Step 2: Laying down cat
The first thing that you have to do is to precut your fabric according to the pattern here. Take 1 of the little square pieces, then fold it in half diagonally, and sew it on one side with a quarter-inch seam allowance. Turn the piece right side out poking the corners nicely, then do this to the other piece, and set them aside. Now for the main body of the cat, place the small white square on the top left corner of the large printed piece, then sew it from the bottom left to the top right edge. To make the cat face the other side, simply put the white square on the other top edge of the fabric, then sew it from the bottom right corner to the top left edge. Cut the fabric a quarter-inch away from the stitch, then press it open. Next, place the large white fabric piece on top of the body piece with their right sides facing, then sew them straight on the top, and press the piece open. Place the small rectangle piece on top of the larger piece with their right sides together, then sew, and press open. Sew the ears on the small white fabric making sure to leave a space of half an inch on both sides, then sew the rest of the pieces together to complete the cat, and give it a good press.

*All image credit belongs to Sew Yeah via YouTube. Follow and subscribe to their channel for more!
Easy Floppy Ear Cat Quilt Tutorial


