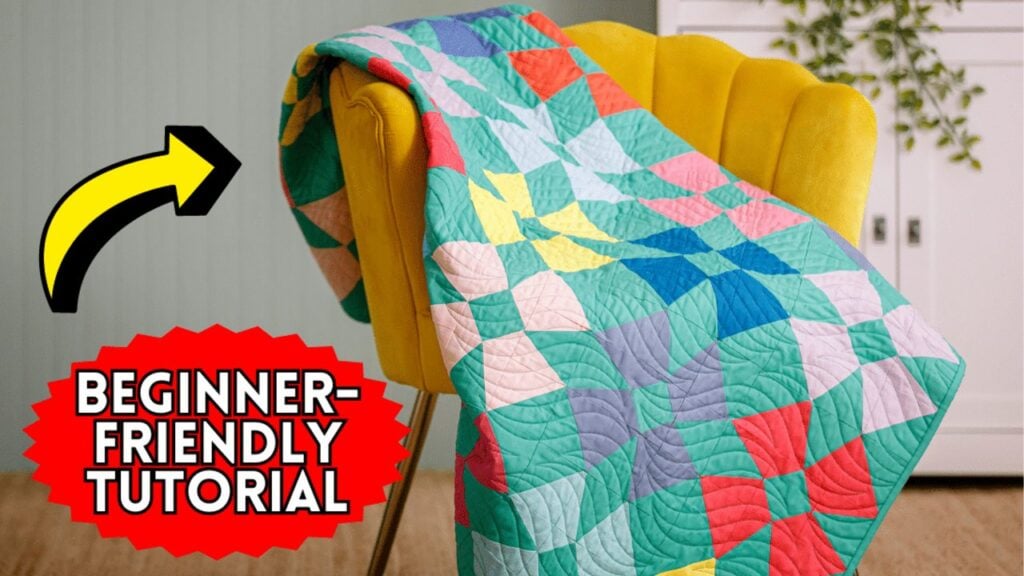
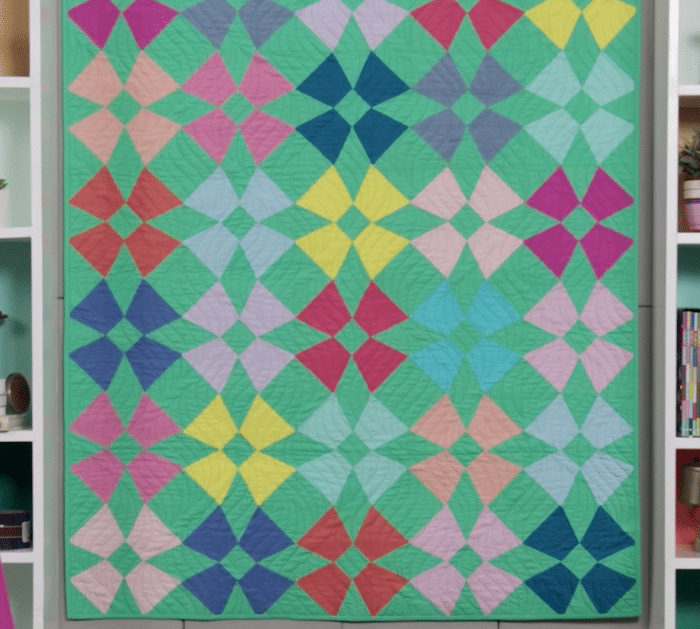
I have seen and tried so many quilts before, and I even have a few on my favorites list, I often choose quilts that are either colorful or minimalist, neat or playful, and of course, easy to make. When I see a certain quilt, I almost immediately know that it’s the next project I’m going to try, and this dogwood blossoms quilt by Missouri Star on YouTube is one of those.
RELATED: Easy Peaks Quilt Tutorial For Beginners (With Free Pattern)
I am simply drawn to this project because of its pattern and all the possibilities that I can make by playing with the fabric colors and prints. I also love how it looks wobbly and curved unlike some of the usual quilts that are composed of straight lines. It was so fun to make and I bet that even beginners can pull this off perfectly on their first try. Watch the video tutorial now to learn how.
Materials for Dogwood Blossoms Quilt:
- 1 package of 10″ squares
- 2 yards of background fabric
- 3 yards of backing fabric
- Marking pen, pencil, or chalk
- Ruler
- Scissors or rotary cutter and a cutting mat
- Needle and thread
- Iron, for pressing
- Sewing machine
- Pattern (Click here to get the pattern)
How to Make Dogwood Blossoms Quilt:
Step 1
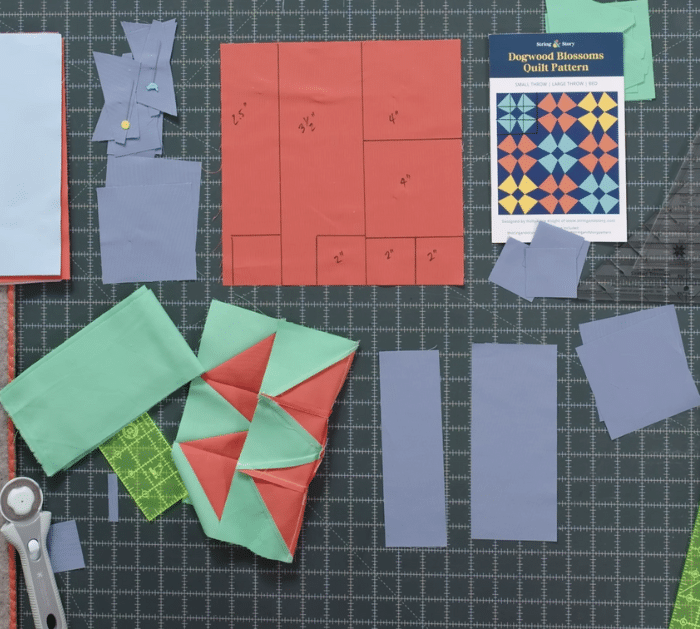
Cut the fabrics to size as instructed in the video, then start making the tri-recs units, simply place the large triangle in the center and the slimmer triangles on each side, and sew them together. Press them open, then do the same for the rest so you’ll have a total of 4 units, and then set them aside.
Step 2
Next, work on the half-square triangle units, draw a line on both squares diagonally, then stack them with the other squares with their right sides facing, and sew on both sides of the line. Cut them apart along the marked lines, then press them open, and trim off the excess.
Step 3
Now, get the pieces for the remaining block unit, place a small square on top of one corner of the large square, then make sure their right sides are facing, and stitch them on the small square diagonally from corner to corner.
Step 4
Cut the excess layers off, then press the fabric open, and do the same steps for all the remaining corners. Put the block units together as demonstrated in the video, then stitch them per row one at a time, and the rows to each other making sure to press the seams as you go.

*All image credit belongs to Missouri Star via YouTube. Follow and subscribe to her channel for more!
Easy Dogwood Blossoms Quilt Tutorial