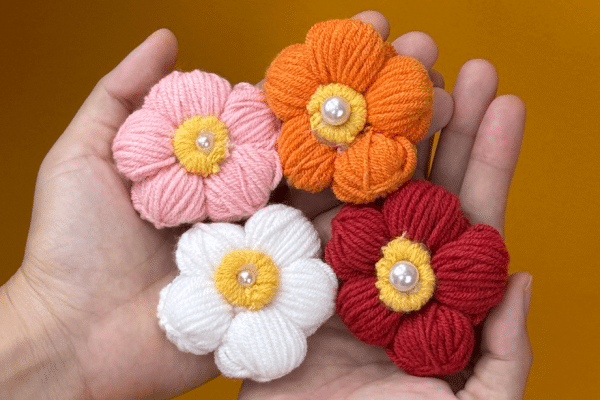
I first worked with yarn when I made a tote bag embroidered with fruits—perfectly fun and summery. After that, I ventured into the world of punch embroidery, which had its pros and cons, but was just as enjoyable to create. The next logical yarn project to explore is, of course, crochet. This is a bit trickier than embroidery because, unlike embroidery—which is essentially sewing—crochet follows a set pattern and flow. If you get it wrong, the project can easily be ruined.
For the longest time, I debated with myself whether to try crochet or wait. I was really interested because you can make almost anything with it—even clothes and toys! But as a beginner, I often felt intimidated… until I came across a project idea that’s basically crochet without all the complications and technicalities. It’s more like a DIY yarn project that gives you the look and feel of crocheting without having to go through the full process.
RELATED: Easy Crochet Yarn Bow Tutorial
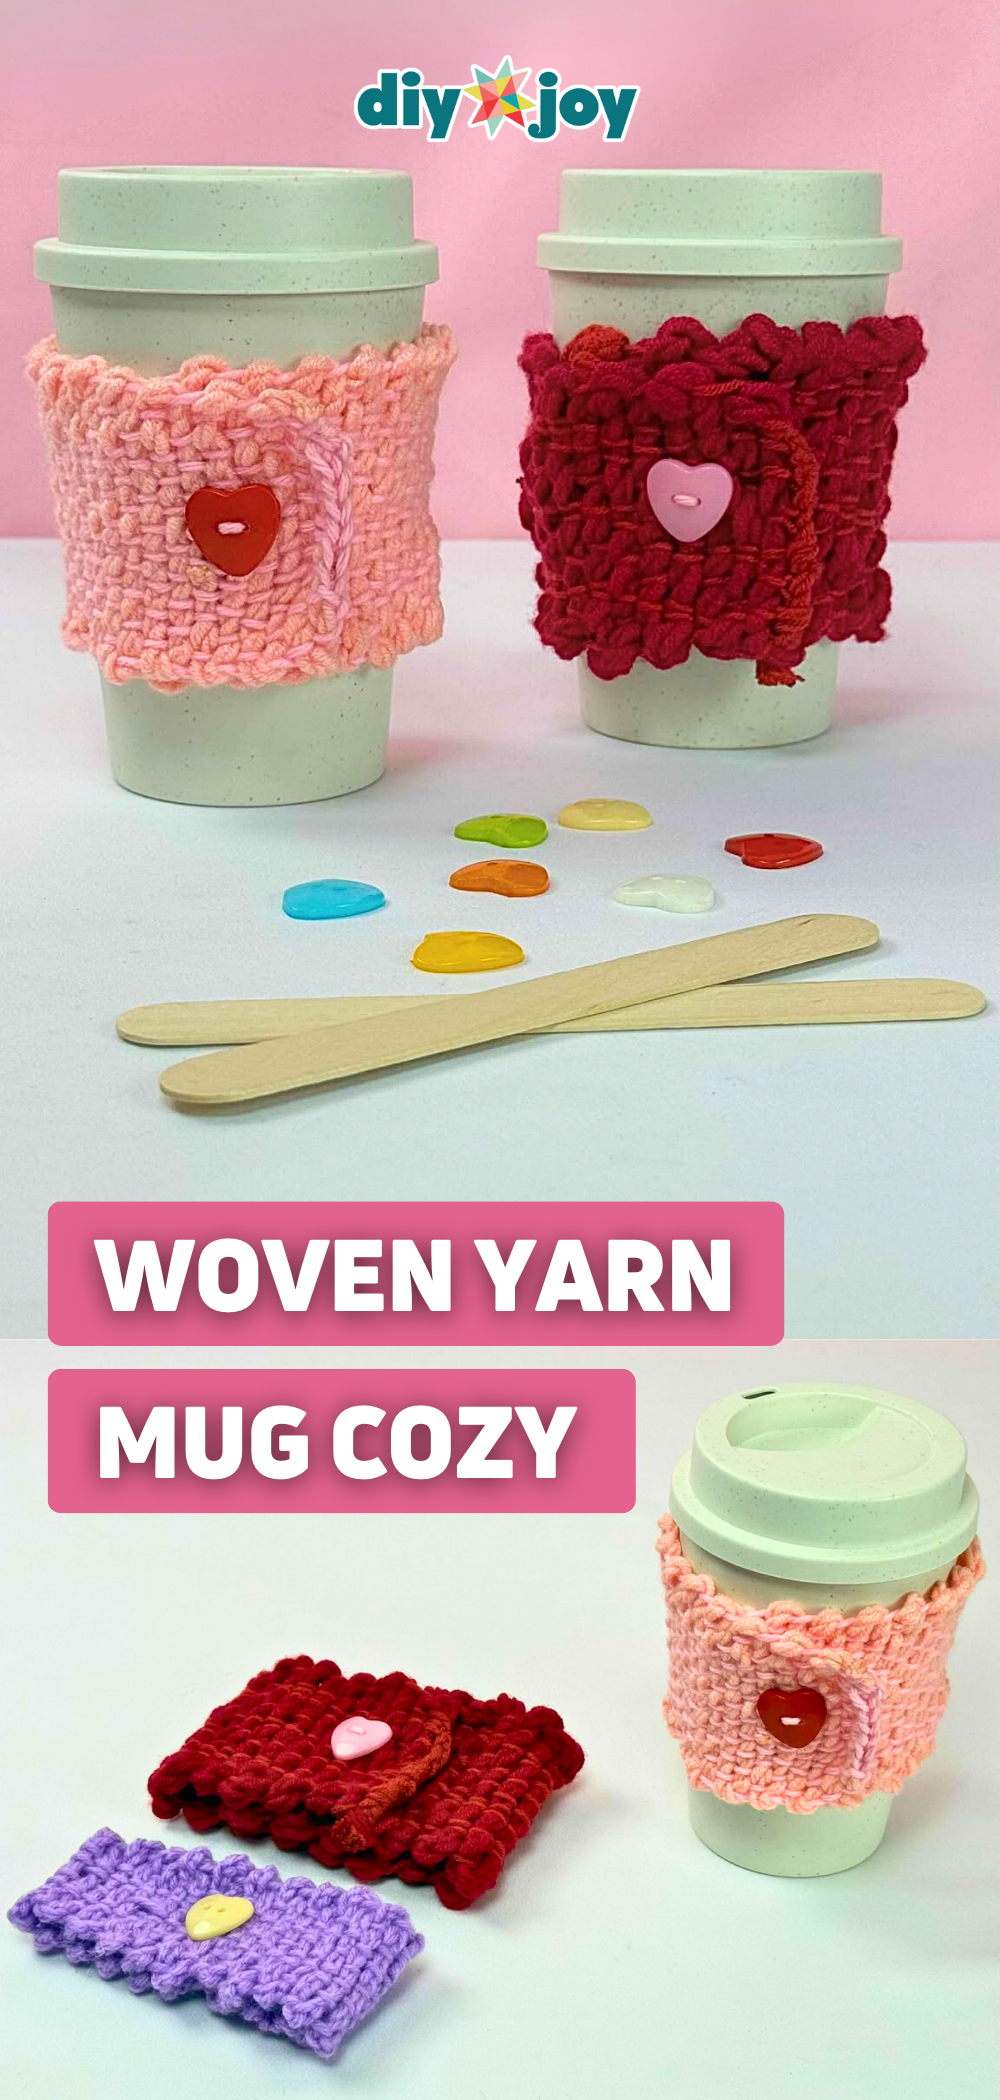
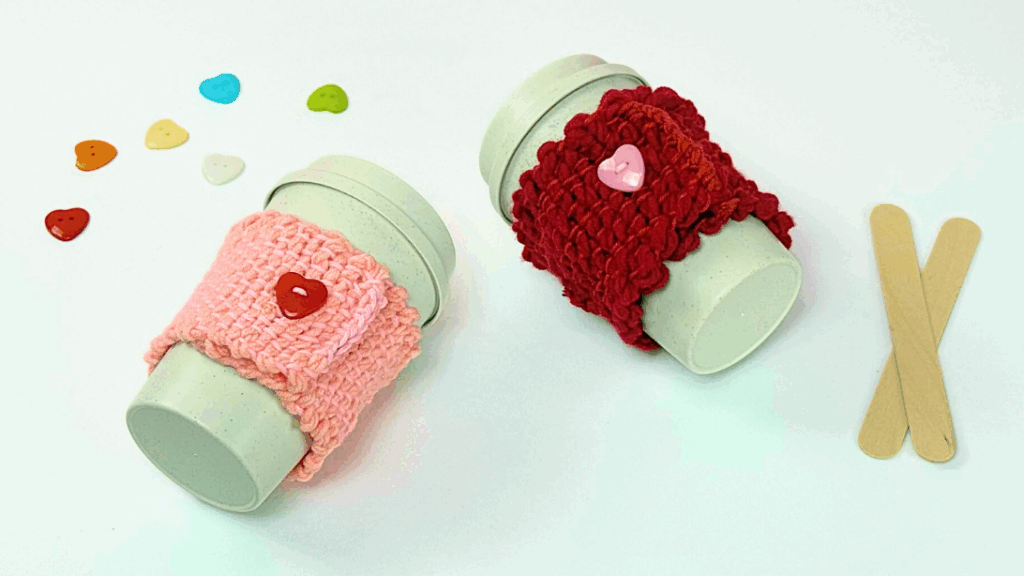
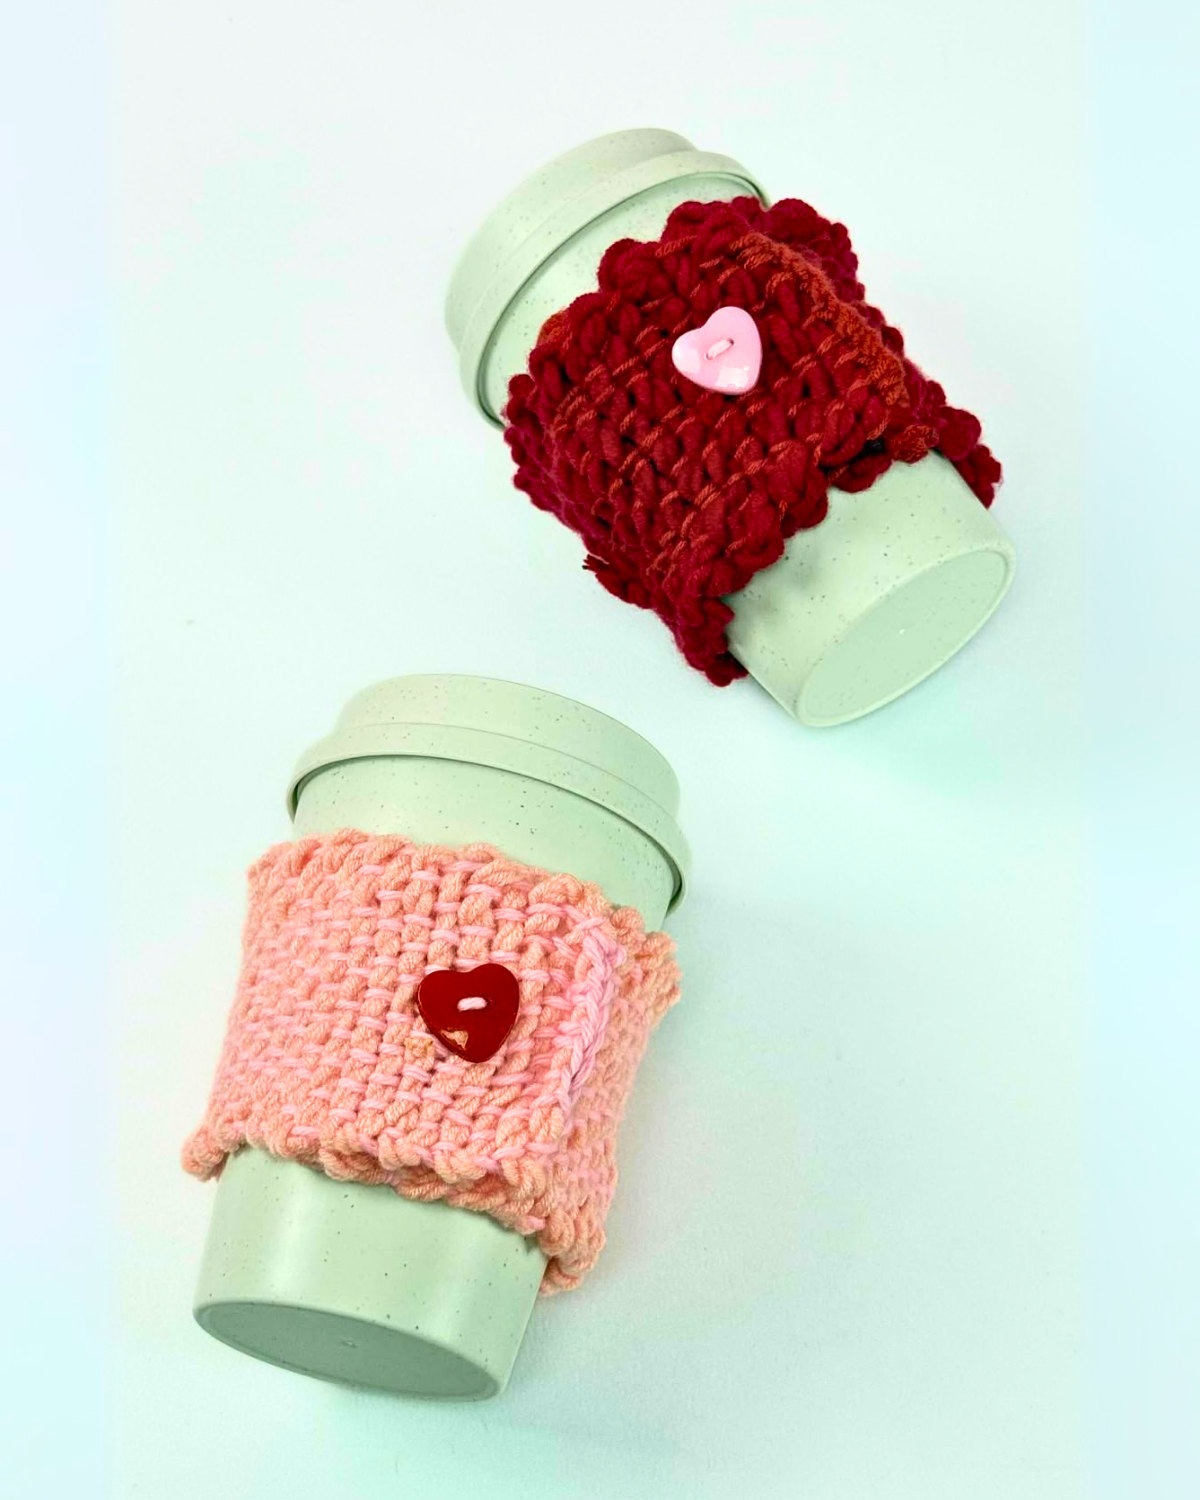
This tutorial will show you how to make a woven yarn mug cozy using just cardboard, yarn, and a popsicle stick. The weaving technique is basic; the only challenge is having the patience to keep going until you reach the end. There’s a touch of crocheting at the finish, but it’s nothing too difficult. Even if it’s your first time, this is a project you can definitely try!
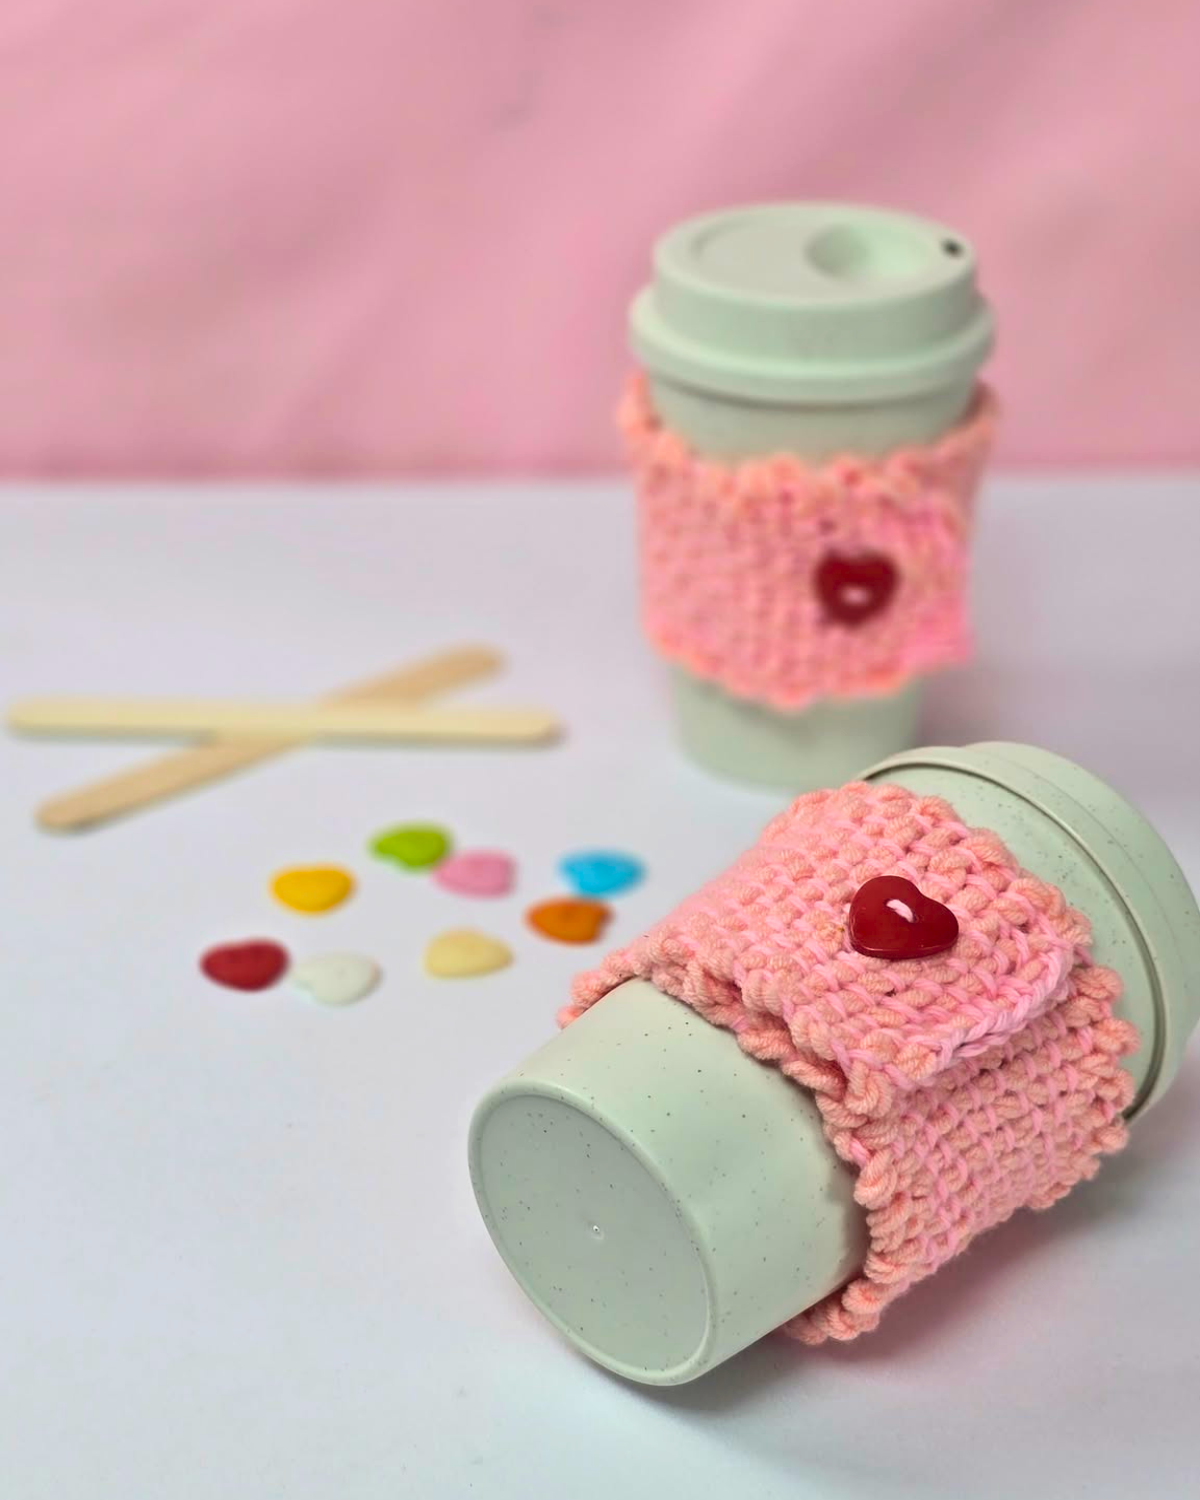
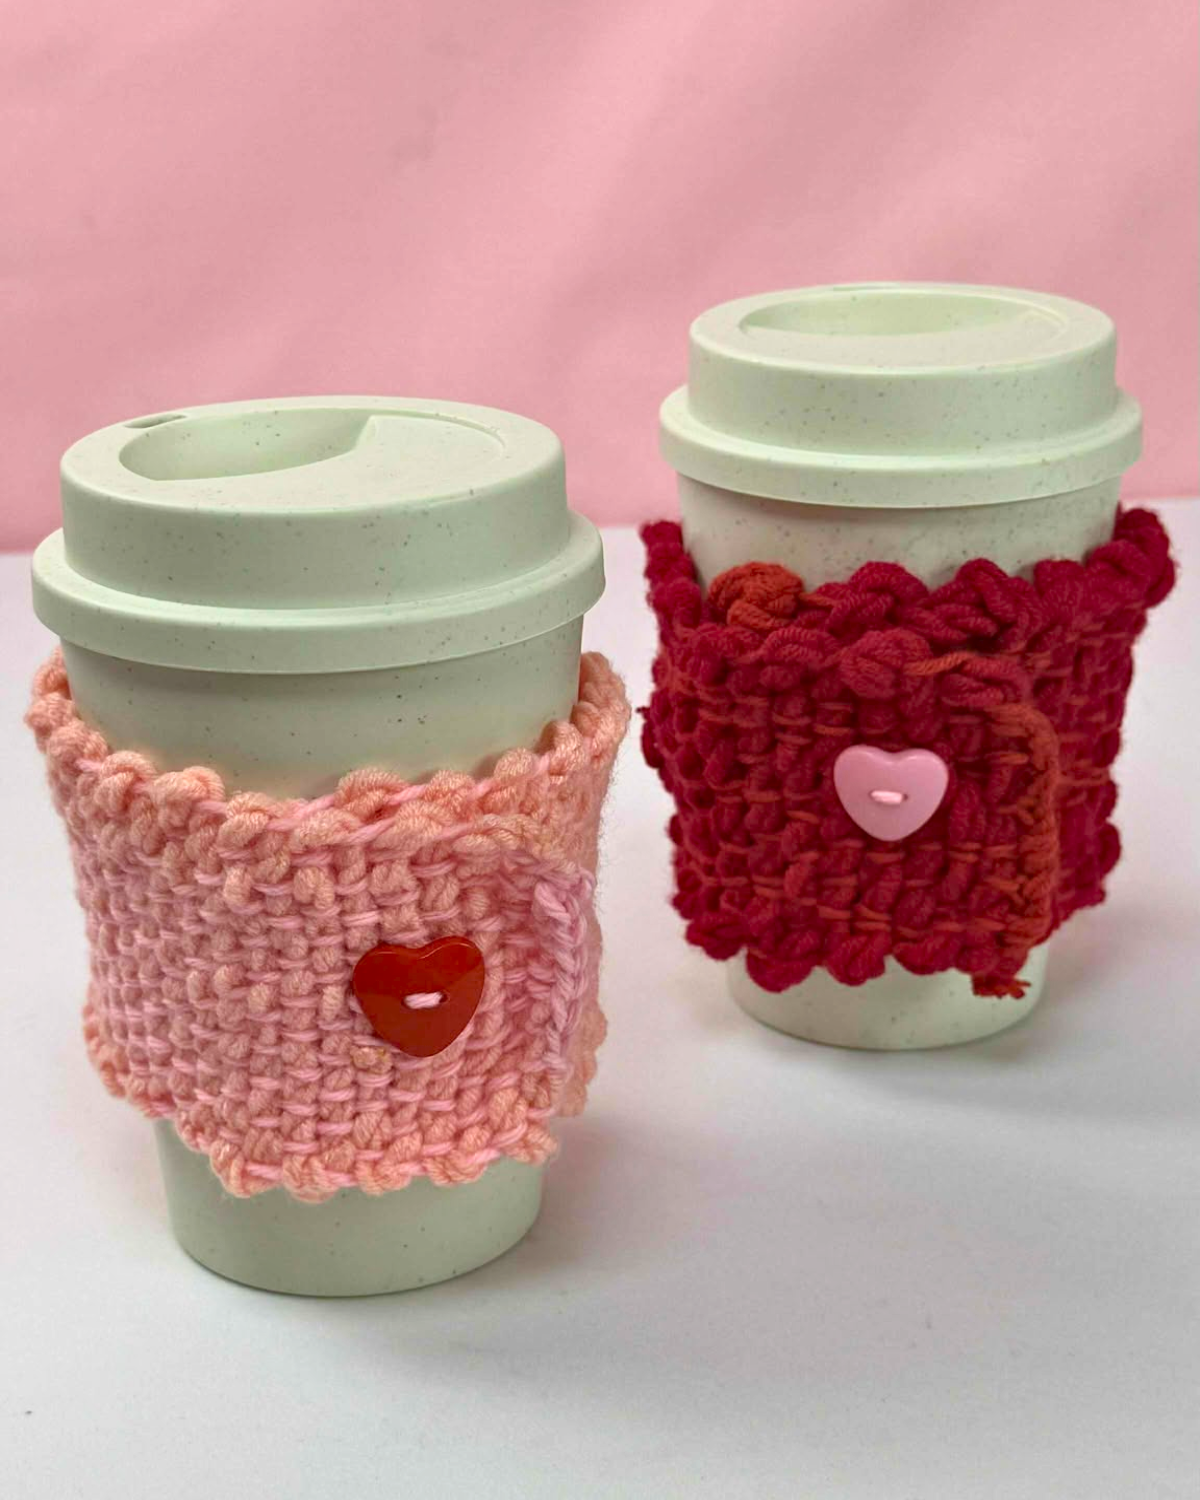
If you love handmade crafts that are simple yet practical, this DIY woven yarn mug cozy is perfect for you. With just a few basic supplies, you can create a cozy sleeve that keeps your coffee or tea warm and looks absolutely adorable. This project is beginner-friendly, relaxing to make, and also doubles as a thoughtful handmade gift.
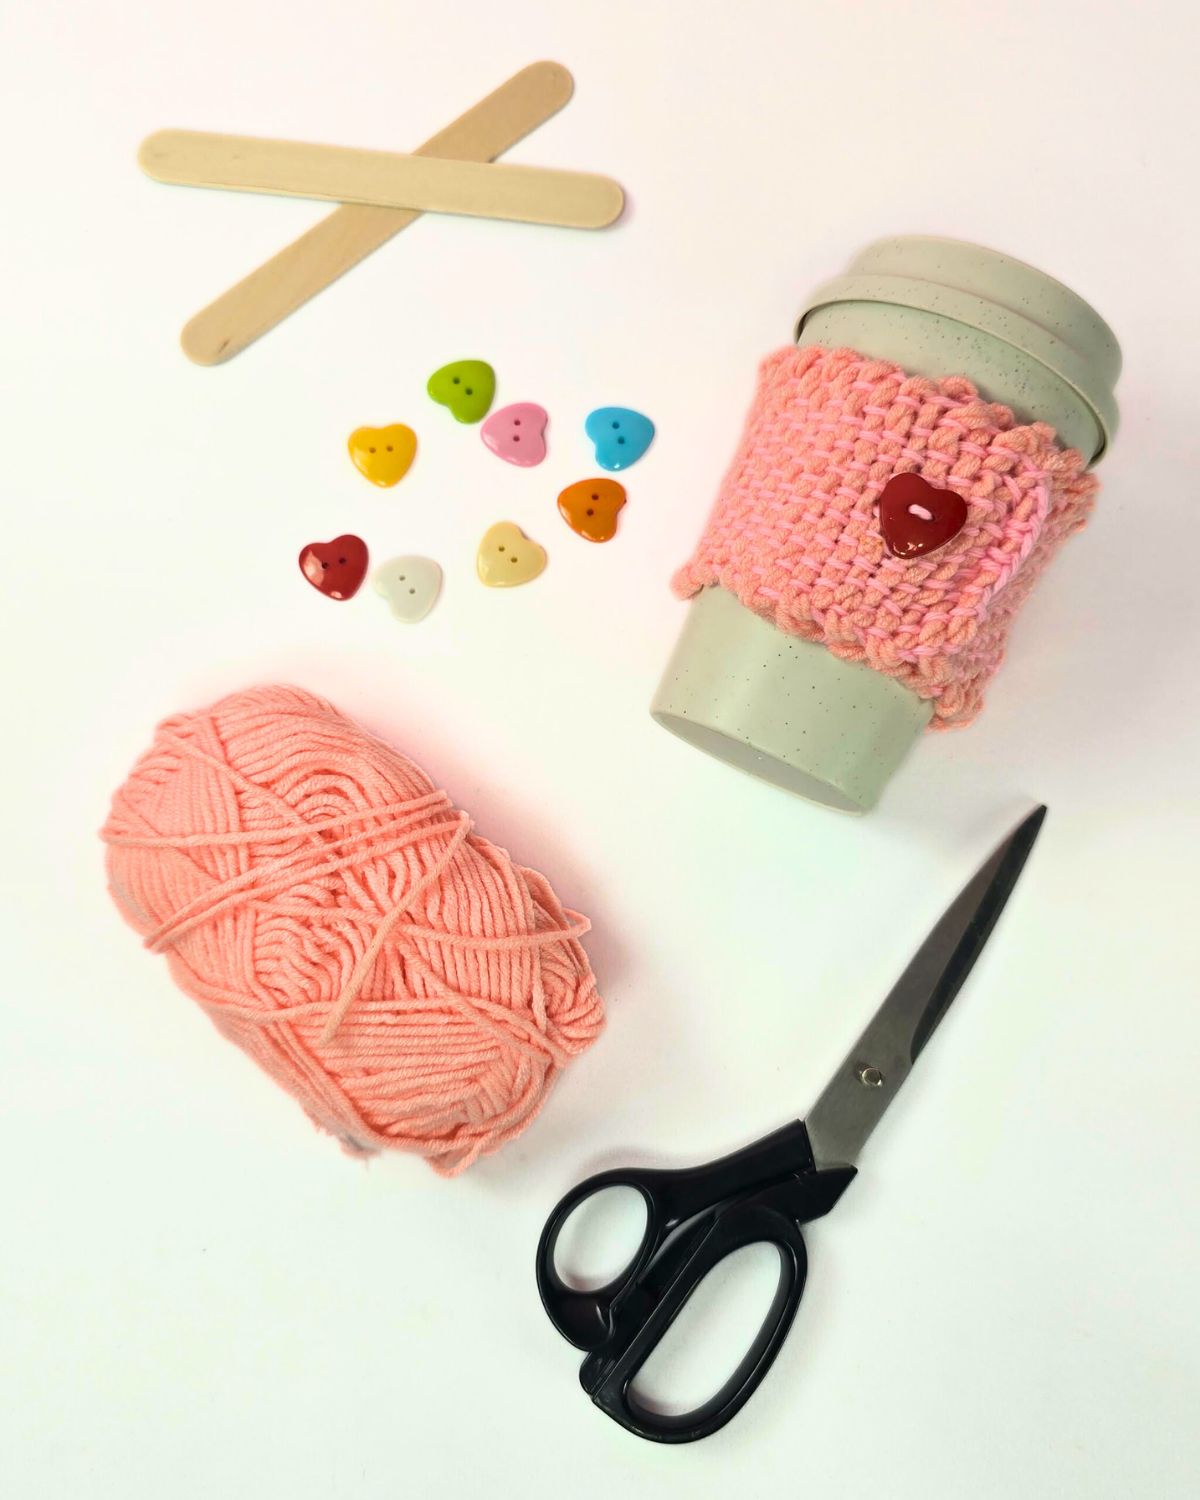
What You’ll Need for Woven Yarn Mug Cozy
How to Make a Woven Yarn Mug Cozy
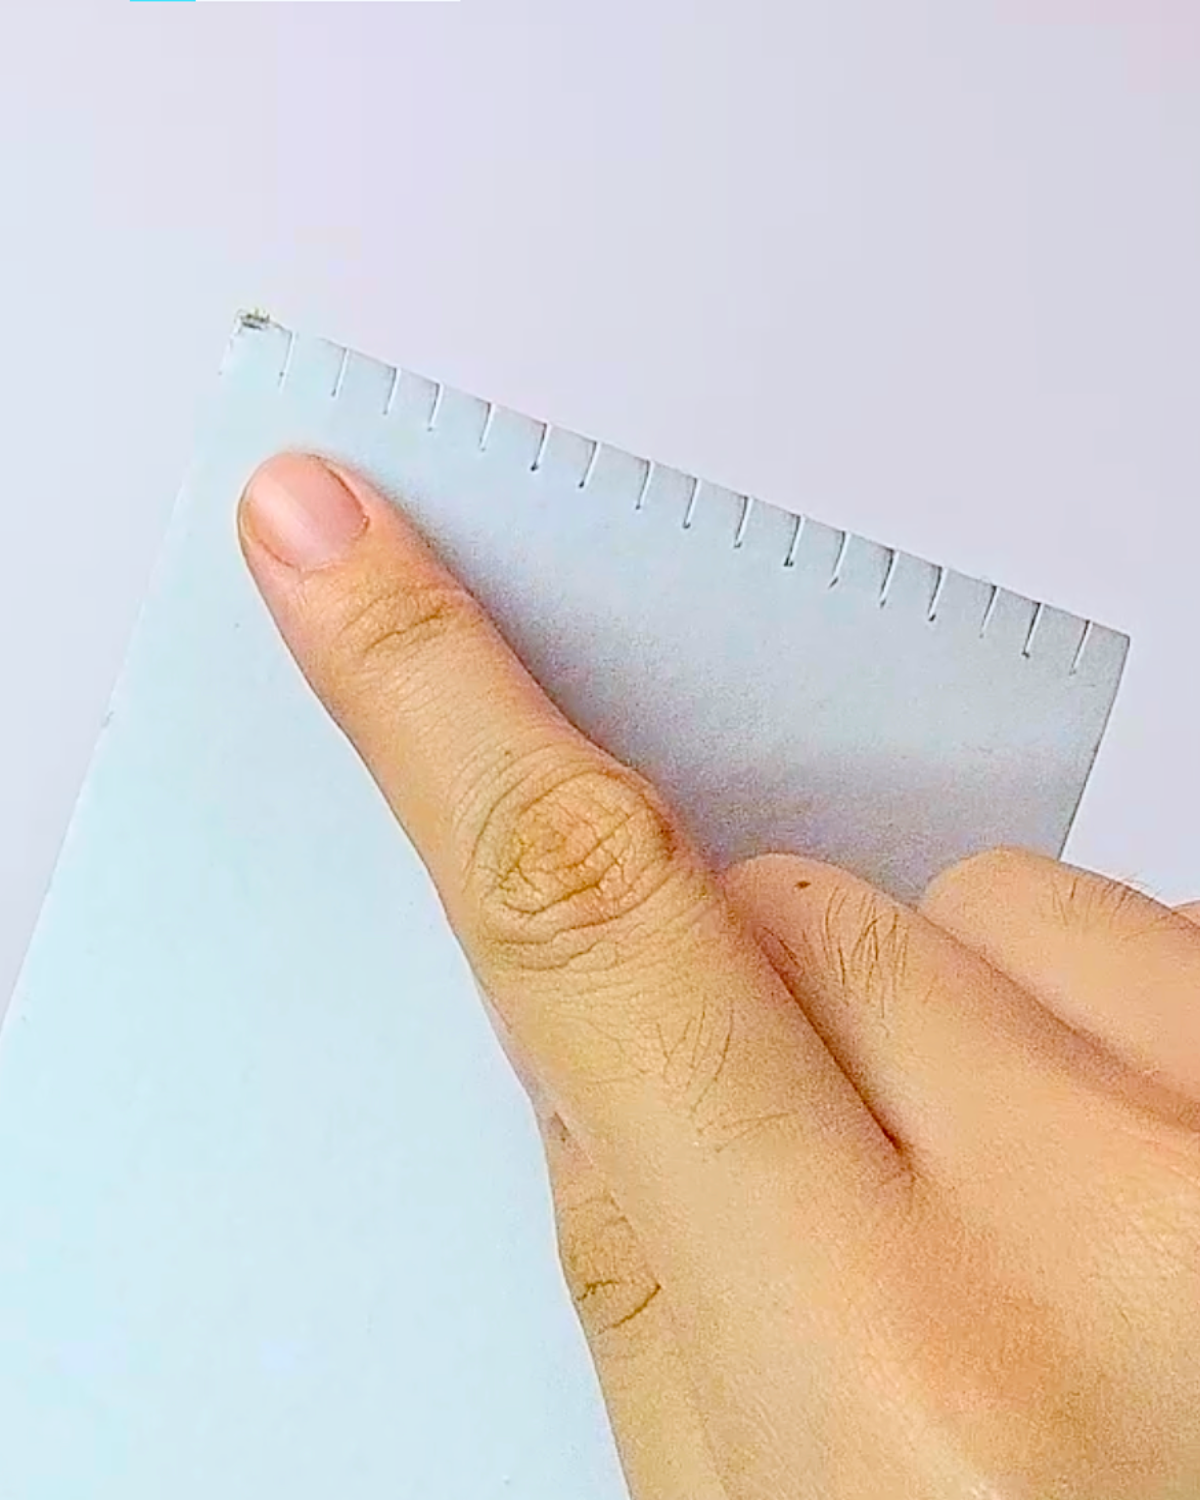
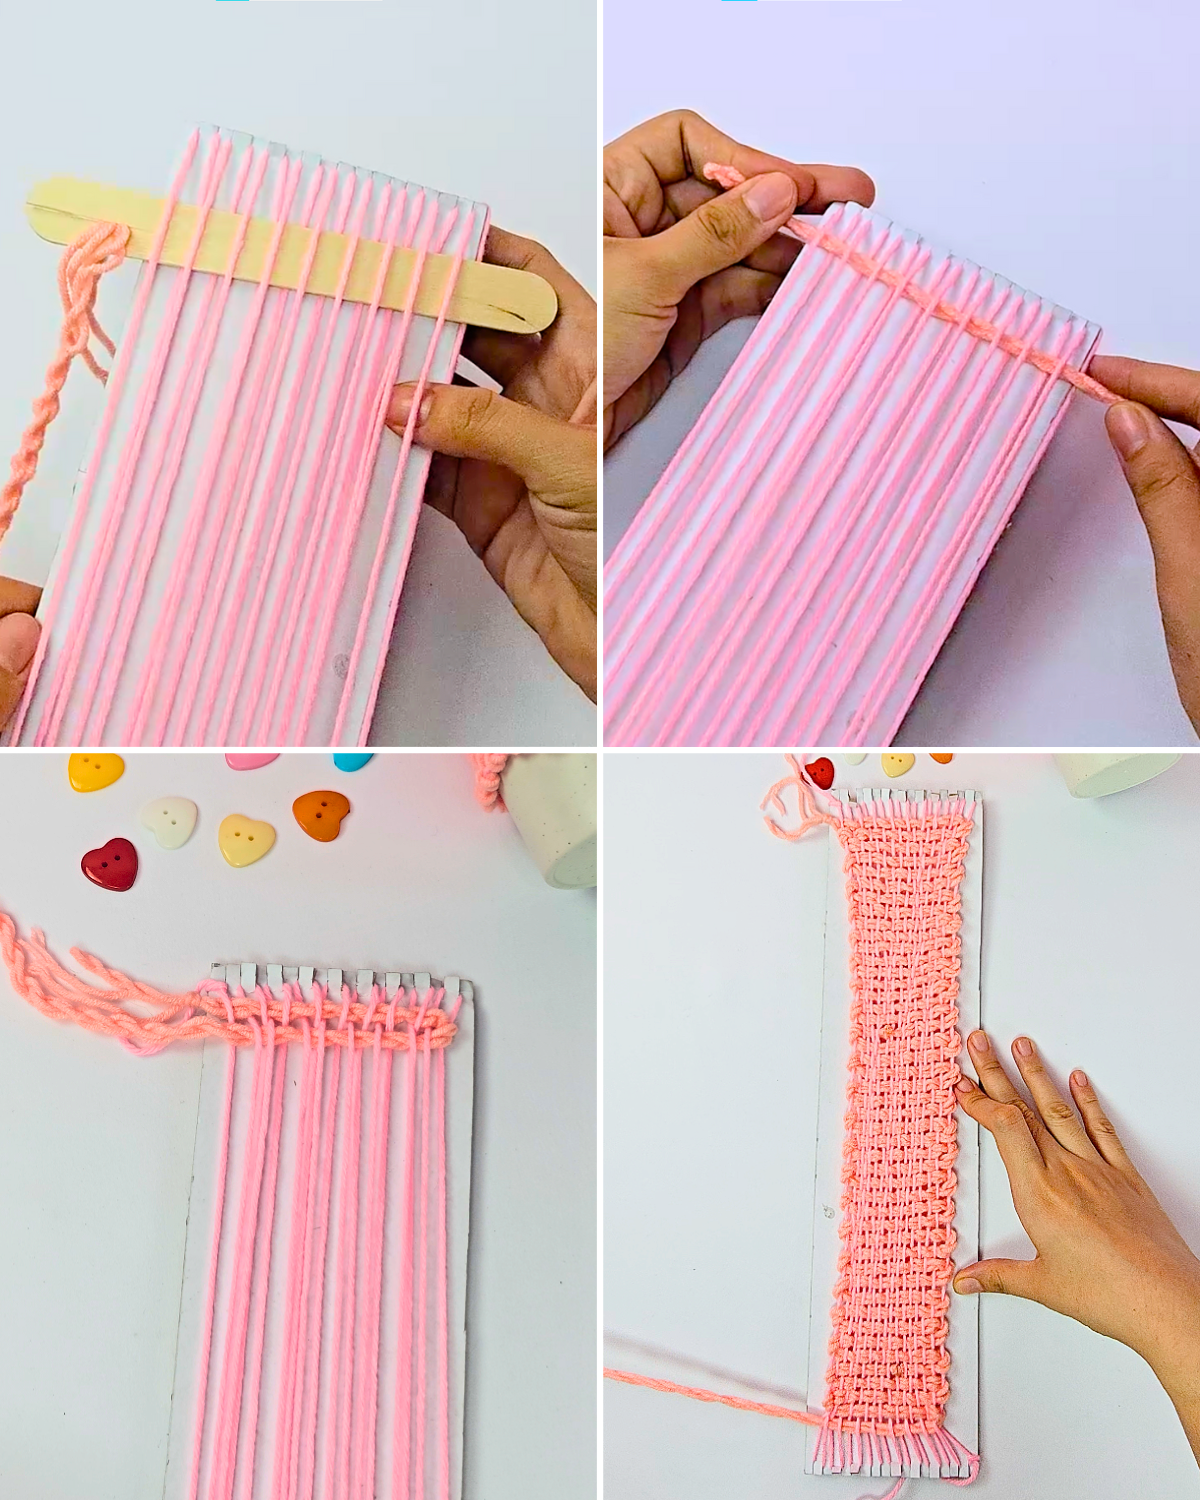
Step 1: Make the Cardboard Frame for Weaving

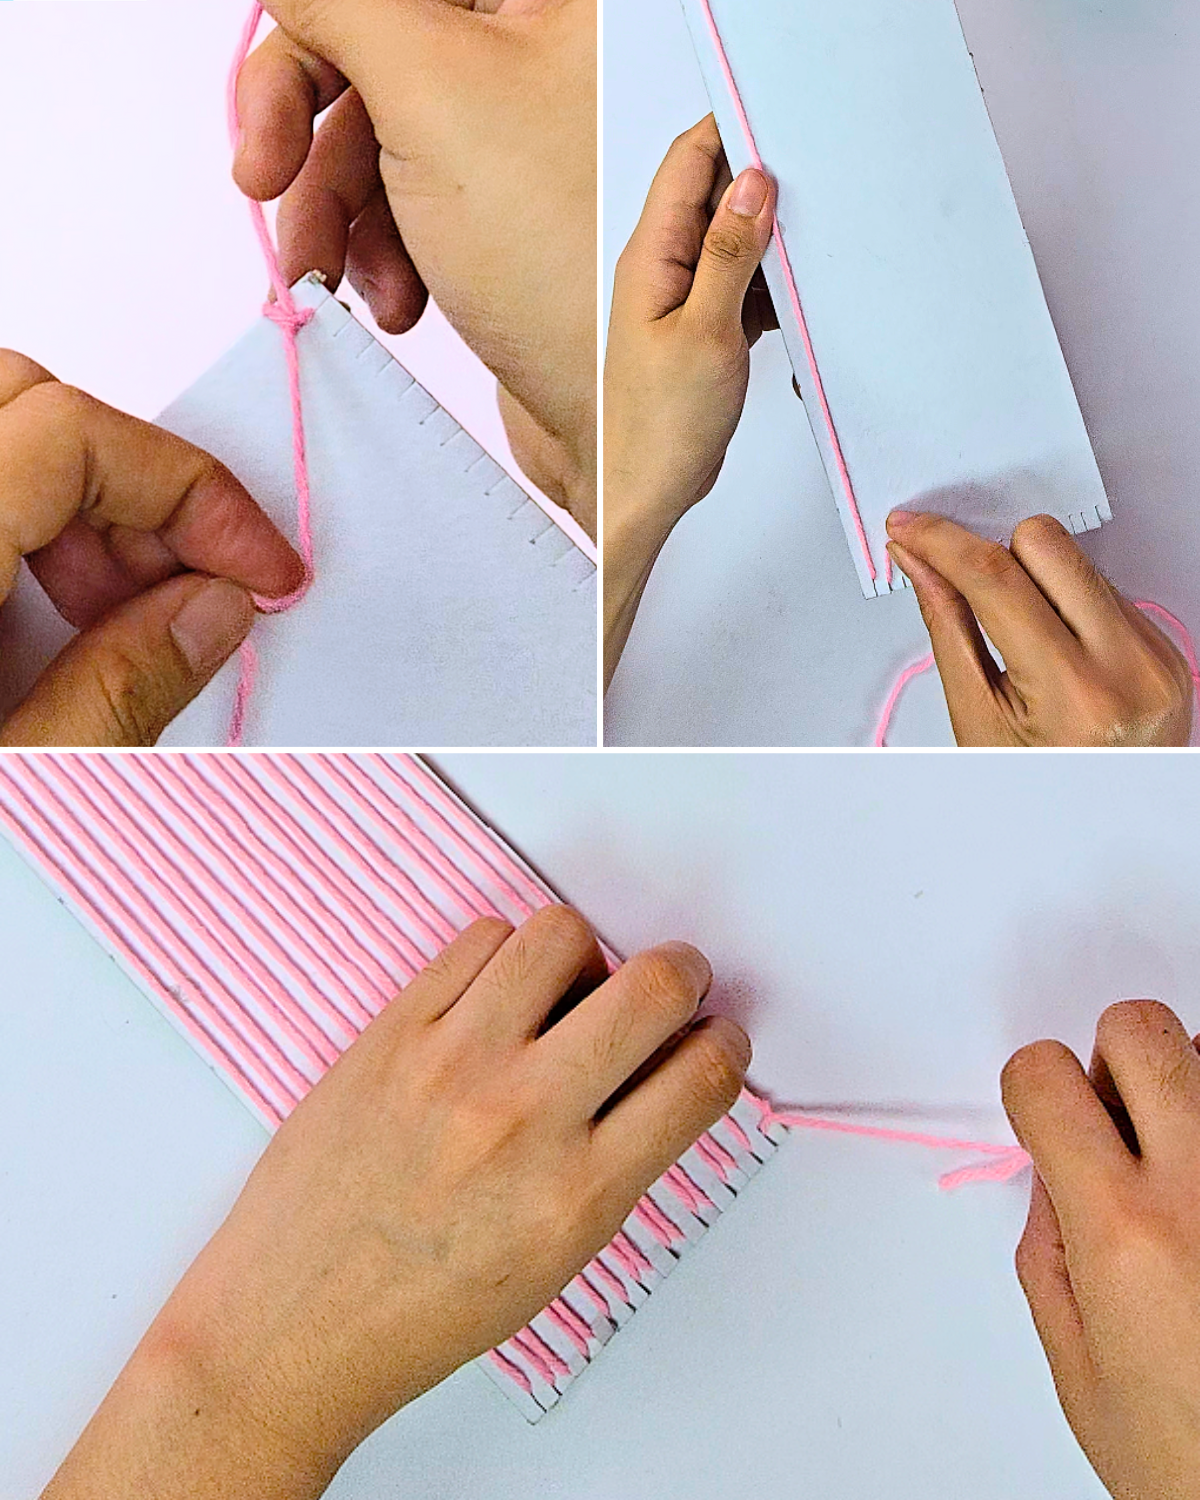
Measure the total diameter of your cup and use this as the size of your cardboard, adding a small allowance if you like. Decide on the width of the cozy, which will be the width of the cardboard, then cut the cardboard to these measurements. Finally, notch the ends about 1 cm deep and 1 cm apart—these slits will help hold the yarn in place while weaving.Step 2: Setting up the Yarn Strands for Weaving
Tie the yarn in a knot at the top slit to secure it, then stretch it down through the slits in an alternating pattern. Once all the strands are in place, knot the yarn again at the last slit to hold them securely. These vertical strands will serve as the base for weaving.Step 3: Optional – Adding Thickness and Texture to Your Yarn
You can skip this step and proceed to weaving with your yarn as is, but if you want more thickness and texture, follow these instructions.
Cut a long piece of yarn, fold it in half, and hold both ends taut. Twist the yarn at the same time in opposite directions. Once it’s tightly twisted, bring the ends together—it should twist over itself. Adjust the twists as needed to achieve the desired texture.
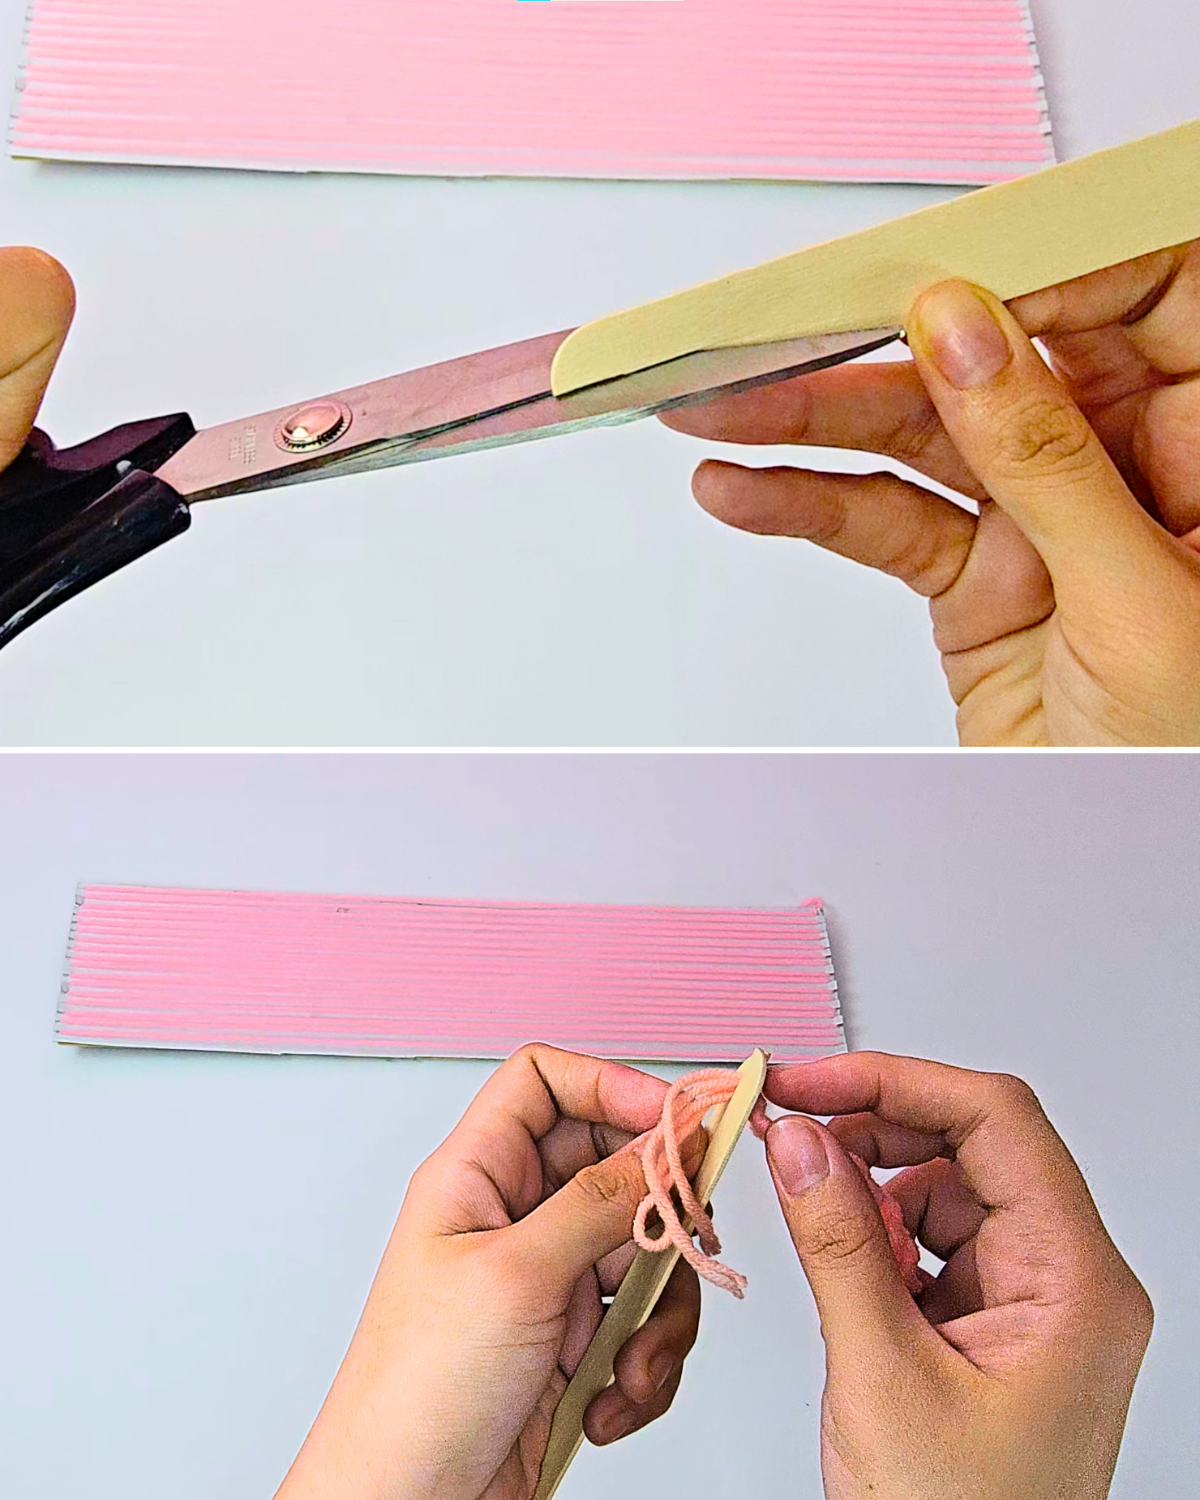
For the weaving yarn, I chose a different shade of pink, but you could use the same color as the yarn base if you like.Step 4: Preparing the Weaving Tool
Get a popsicle stick and cut a slit at one end, then insert the weaving yarn through that slit.Step 5: Weaving the Yarn
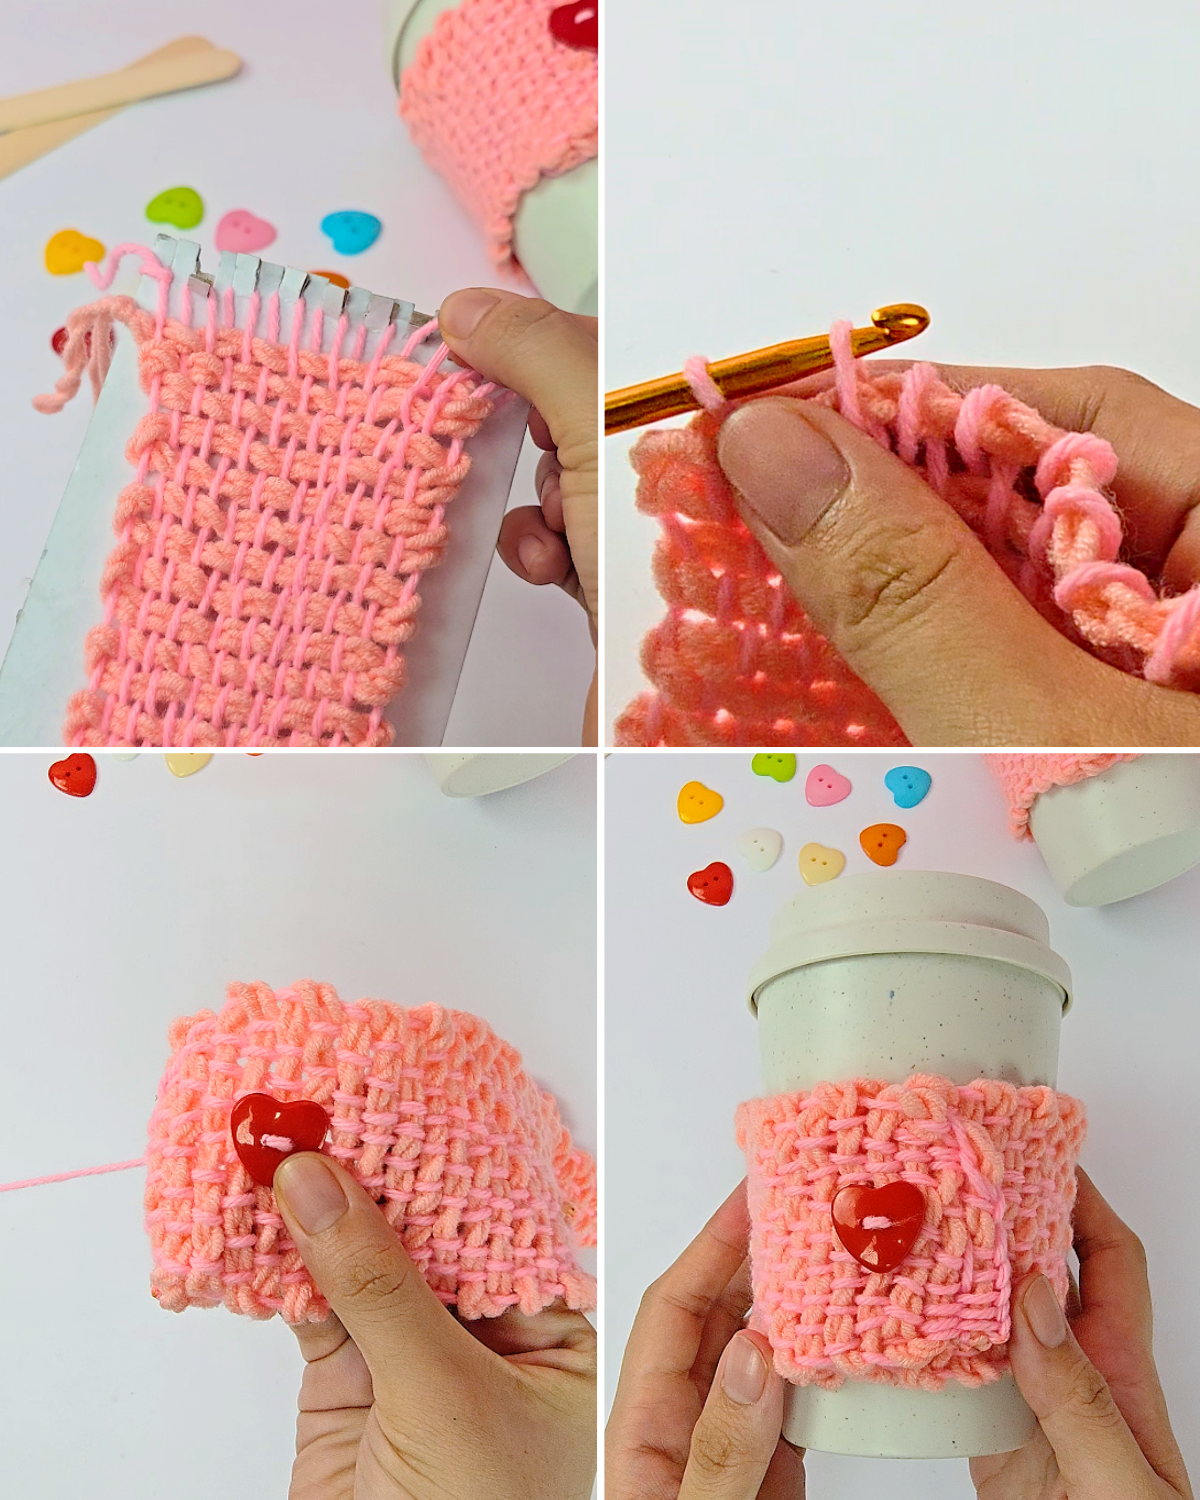
Insert the popsicle stick with the twisted yarn into the vertical yarn strands, skipping a strand each time in an alternating pattern. Pull the yarn through, leaving a little length, then weave the popsicle stick back in the opposite direction, picking up the strands you skipped. Continue weaving back and forth until the cardboard is fully covered with the twisted yarn.Step 6: Finishing the Cozy
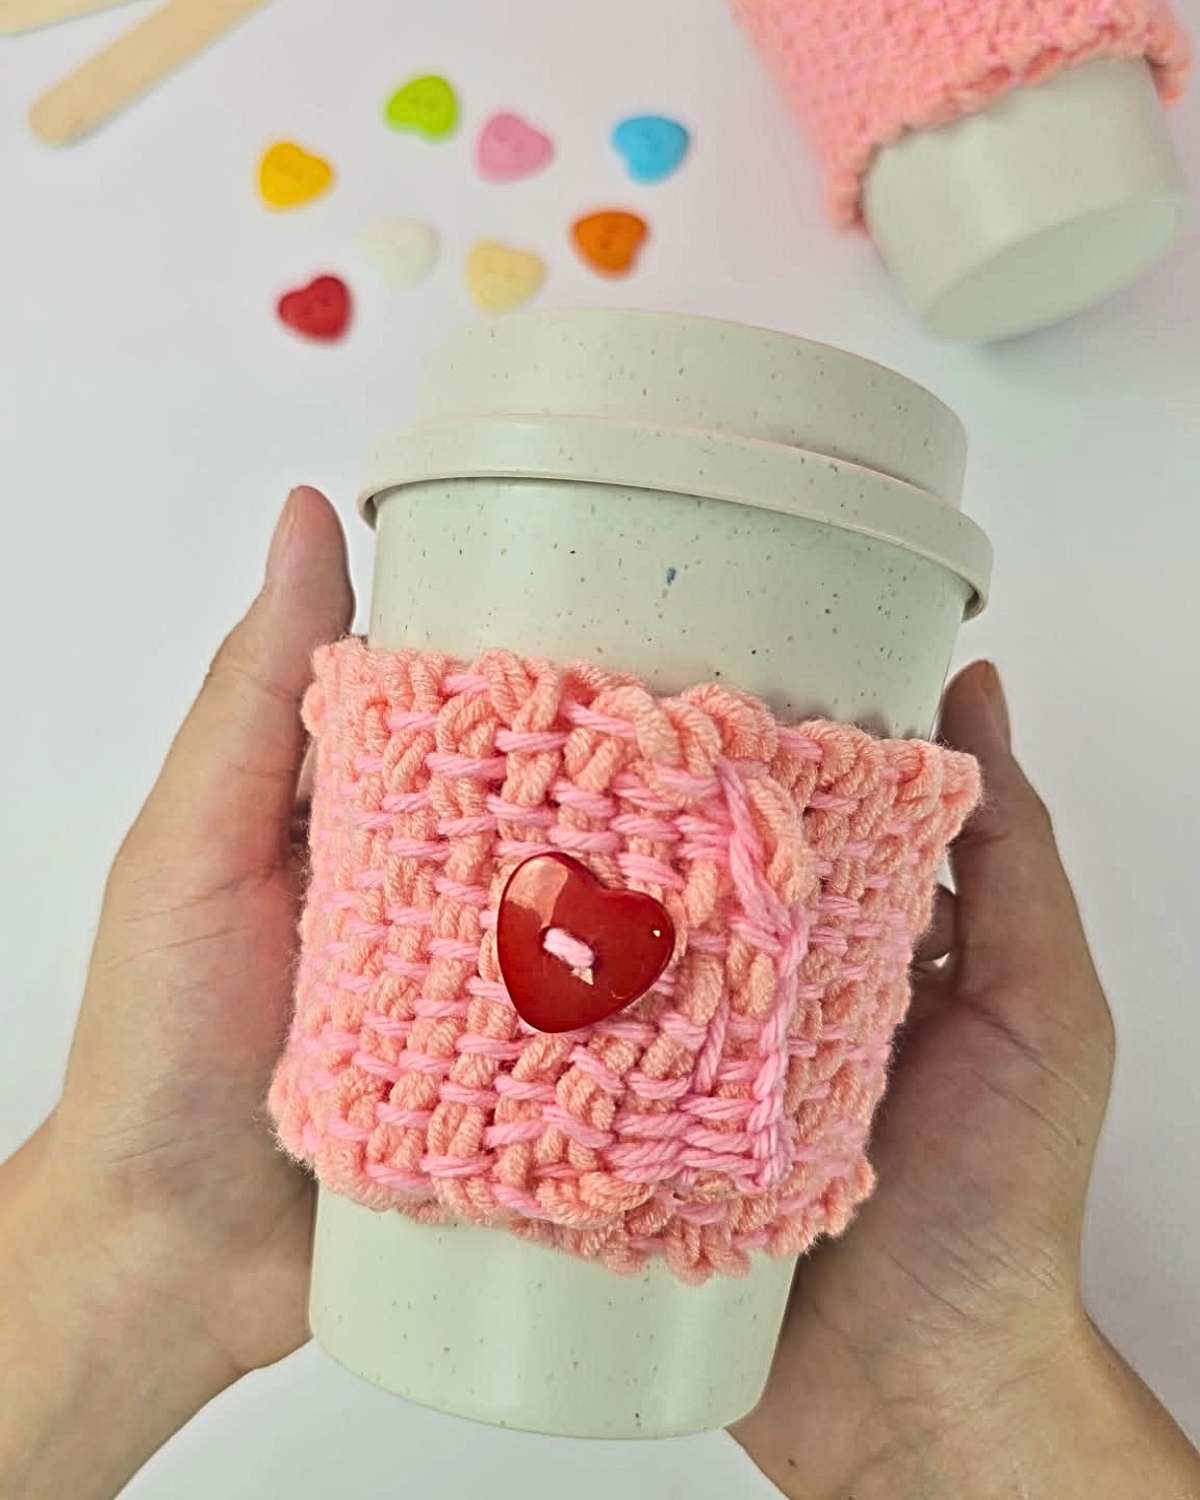
Carefully remove the yarn loops from the cardboard slits. Using a crochet hook, make chain stitches along both ends to secure the weave. Sew a heart-shaped button onto one end of the cozy. Place the woven yarn over the button, then gently pull the button through the weave until it sits on top.

Materials
- Yarn
- Popsicle Stick
- Needle
- Button
- Cardboard
- Scissors
- Crochet Hook
![]()
Pro Tips 💡
- KEEP THE TENSION EVEN – While wrapping and weaving, try to keep the yarn tight but not too tight. Uneven tension can make the cozy lopsided.
- ADD COLOR CONTRAST – Using a slightly different shade for the weaving yarn than the warp (base strands) adds depth and visual interest.
- SECURE YOUR ENDS – Knot all yarn ends tightly and hide them in the weave to prevent unraveling.
- CROCHET FINISHING – If you don’t have a crochet hook, a needle and thread can also secure the ends, but crochet gives a cleaner, more professional finish.
*If you love this craft, then visit our official website, follow our Facebook page, and subscribe to our YouTube channel for more!
Easy DIY Woven Yarn Mug Cozy