Are you looking for your next DIY craft to pass the weekend? Try this easy soft doll toy tutorial from Miarti – Creative Ideas on Youtube. It’s straight-up fun and easy, and the results will make you look like a pro! This adorable soft doll will never leave your bed, I’m sure. Learn to make it by following the tutorial below.
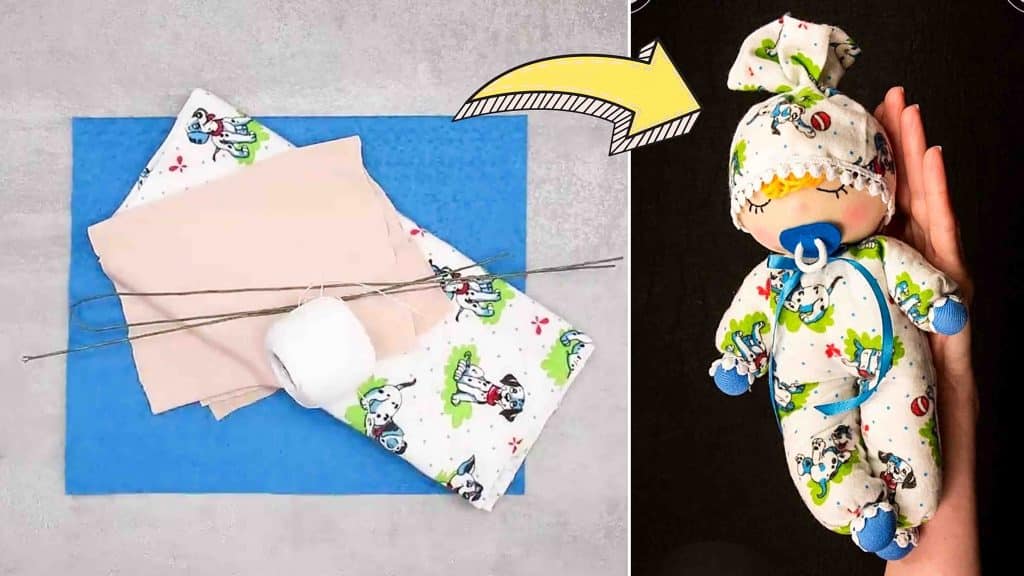
Materials:
- wire
- acrylic and textile yarn
- cotton fiber
- small pliers
- scissors
- felt paper
- cotton rope
- pair of socks
- needle and thread
- a fabric of your choice
- slinky fabric
Directions:
Step 1
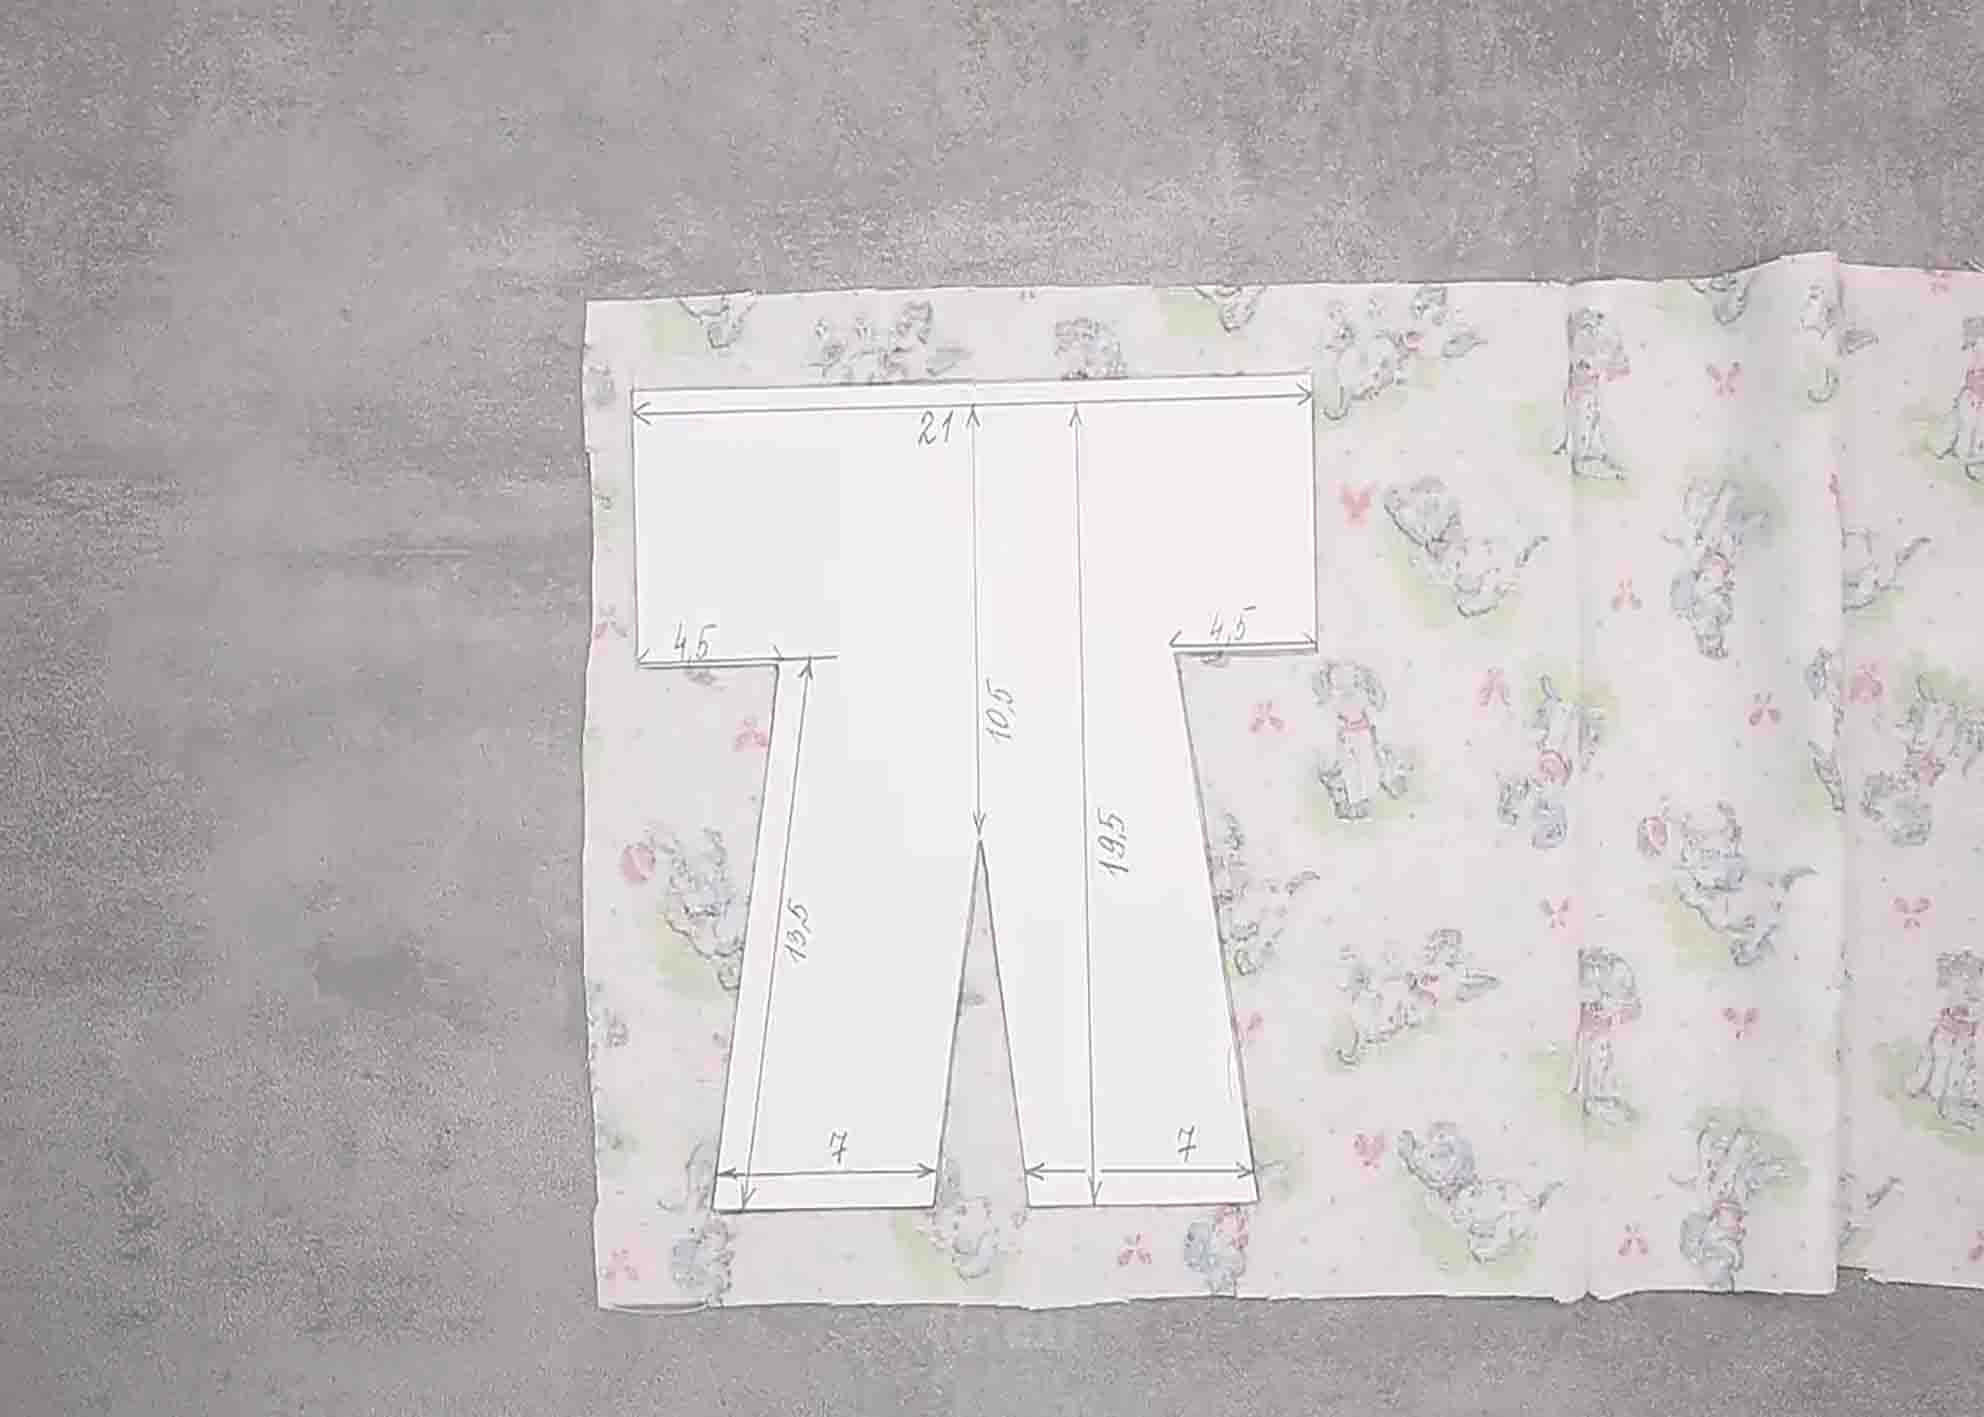
Start by putting together two pieces of the wire to create a T shape, tying them together using a textile yarn. Grab your cotton fiber and textile yarn again, then wrap them together around the wire. Using small pliers, twist each end of the wires forming a circle. Get the sock and cut out four identical pieces of circles. Sew it around on the edges, then put a bit of cotton fiber inside. After this, place and sew it on the wire ends, giving the soft doll toy is pair of hands and feet. Moving on with the body, get the fabric of your choice and cut out two identical body pieces using the pattern template. (See the image below for the template and dimensions.) Sew them together using a sewing machine. Next, put the soft doll toy skeleton inside the sewed fabric, then fill it with cotton fiber. Sew around just above the hands and feet to lock it, making sure the cotton fiber will not spill.
[social_warfare]
Step 2
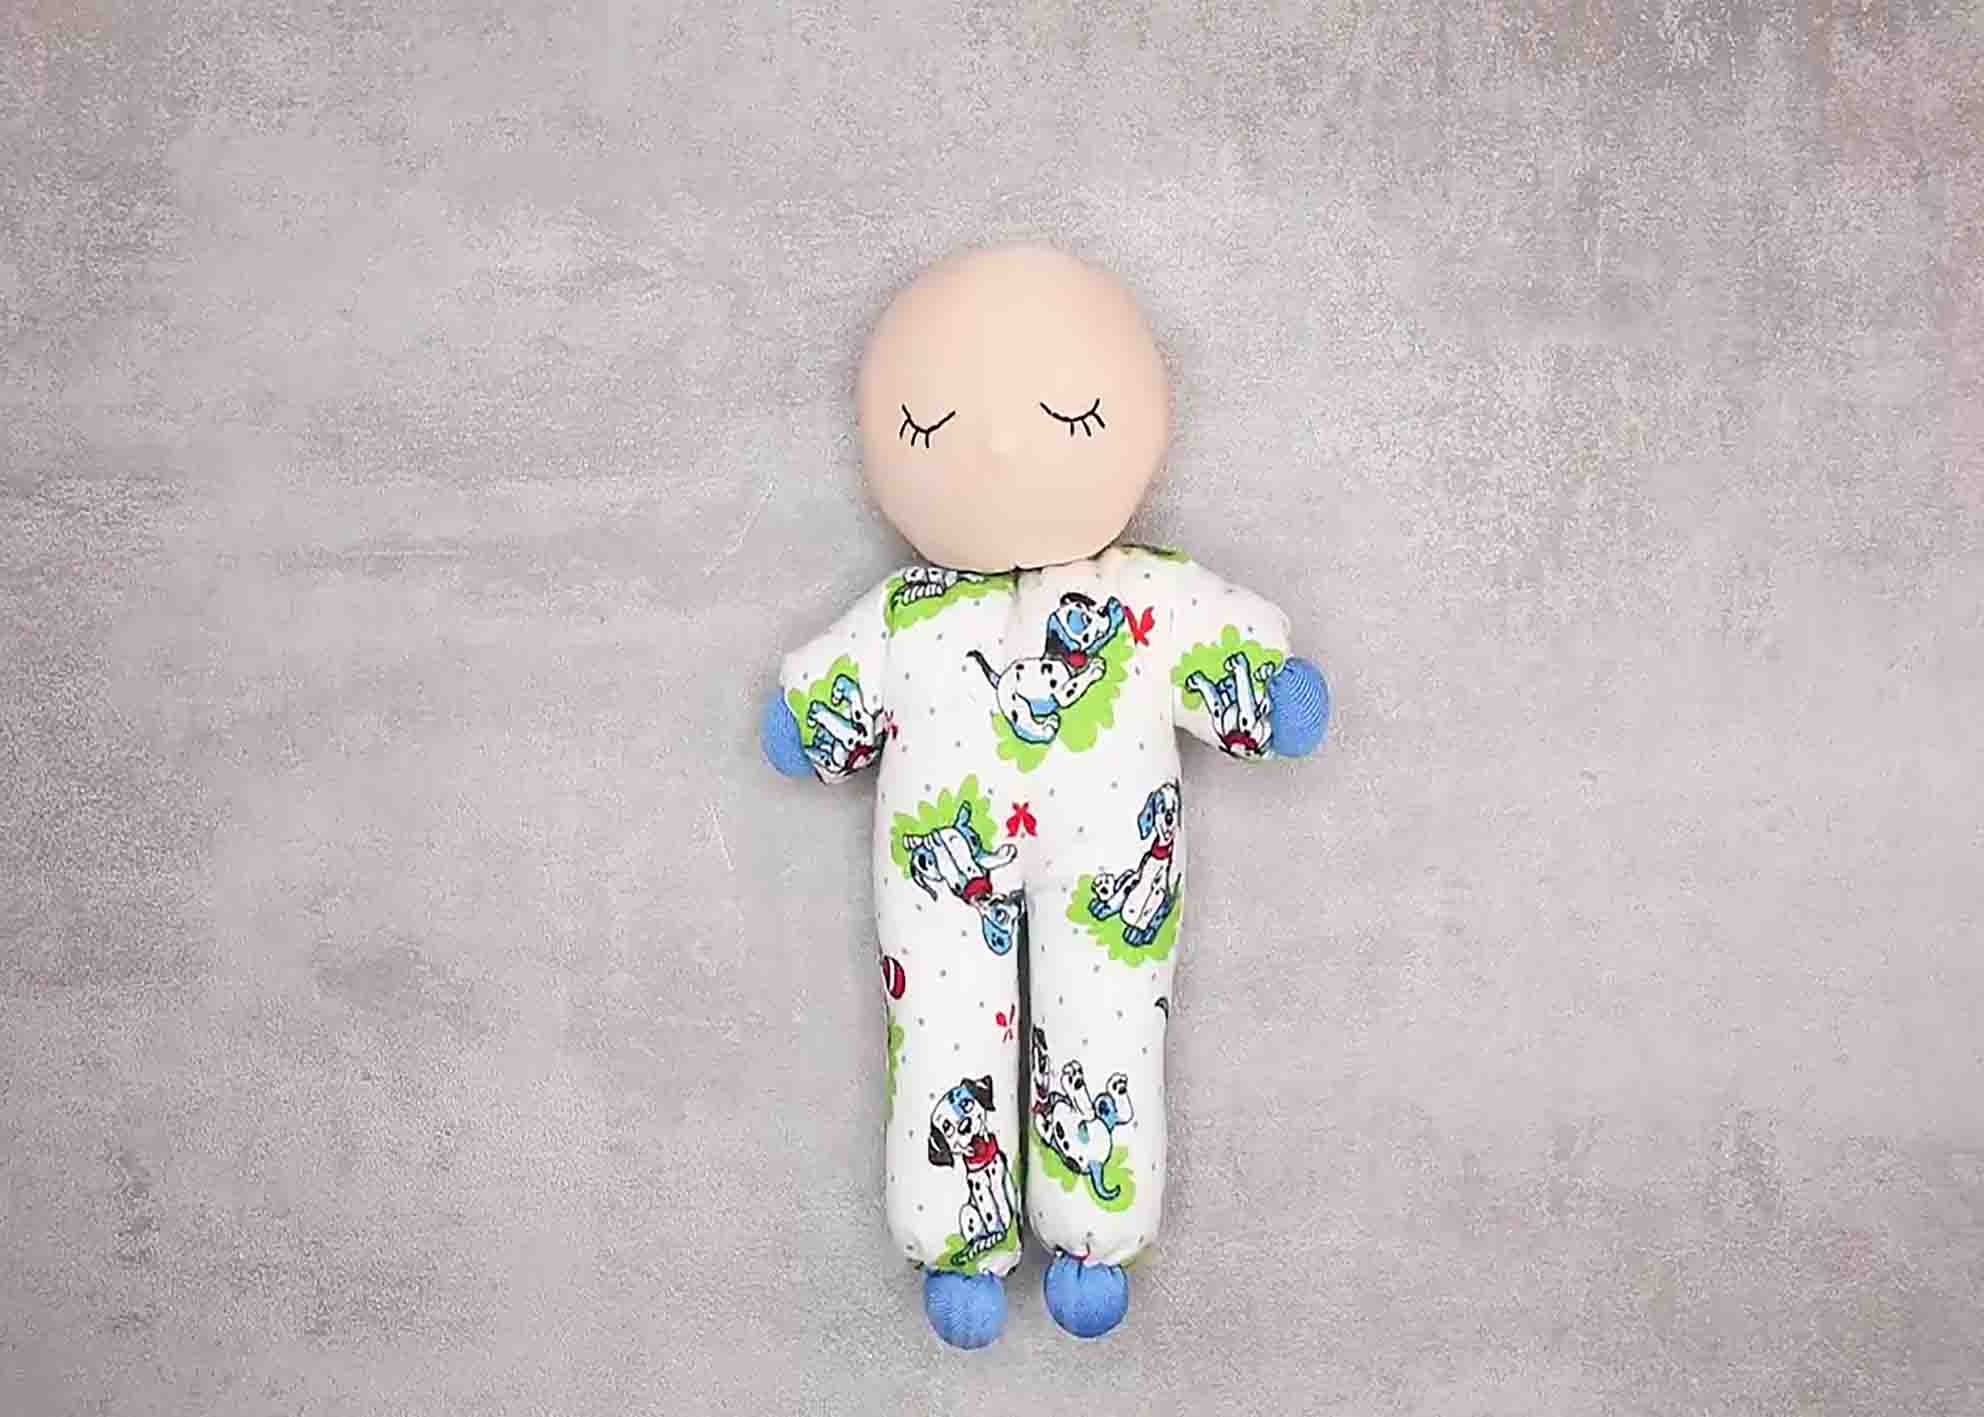
Making the head, grab your slinky fabric and cut out a circle of 13 cm in diameter. Sew it around the edges, then fill it with cotton fiber inside. After filling it, make sure to stitch it at the back to lock it. Grab a pencil to draw a guide for the eyes, then stitch a black thread manually on it, making two sets of eyes. After this, attach the head to the body.
Step 3
Start putting details on the doll. First, grab the same fabric you use for the body and cut out a piece for the hat. (The measurement is up to you on how big or small you want the hat for the doll.) Sew the hat to the doll’s head. Next, crumple a bit of acrylic yarn, mimicking baby bangs, then sew it to the forehead of the doll. To make the pacifier, cut out an oblong shape in a piece of felt paper and put cut two lines inside, then place a piece of cotton rope through it. Glue the pacifier onto the doll, making it the mouth part.
Easy DIY Soft Doll Toy Tutorial


