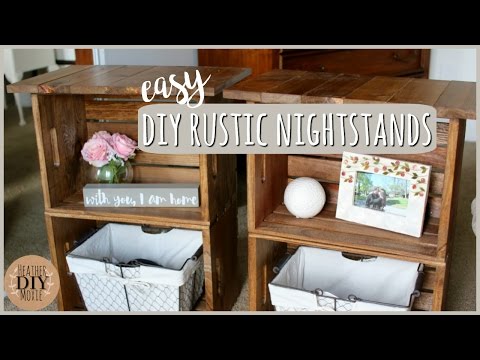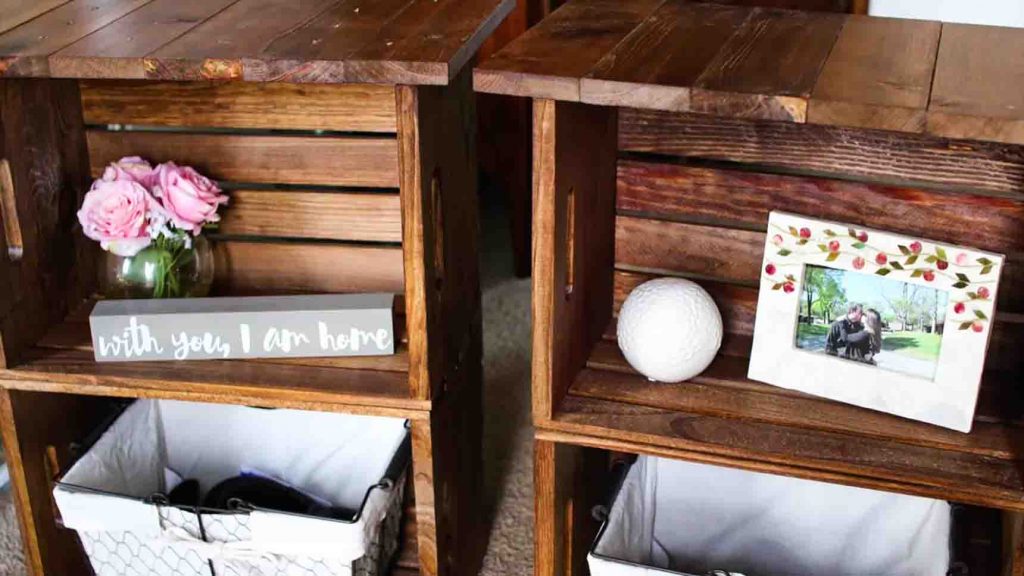
I love everything rustic, so when I saw this DIY rustic nightstand from Heather Moxie DIY on Youtube, I knew I had to try it. It was surprisingly easy, and the outcome really blew my mind. It’s perfect for my farmhouse-themed bedroom interior, and this project doesn’t look like a DIY at all! So if you’re still looking for a weekend project, try making this one!
Materials:
- 2 wooden crates for one nightstand
- 2 pcs. 8 ft 1×4, cut into 13″ pieces
- liquid nails
- caulk gun
- paint or stain
- foam brush
- damp cloth
- bracket/screws
- drill
Directions:
Step 1
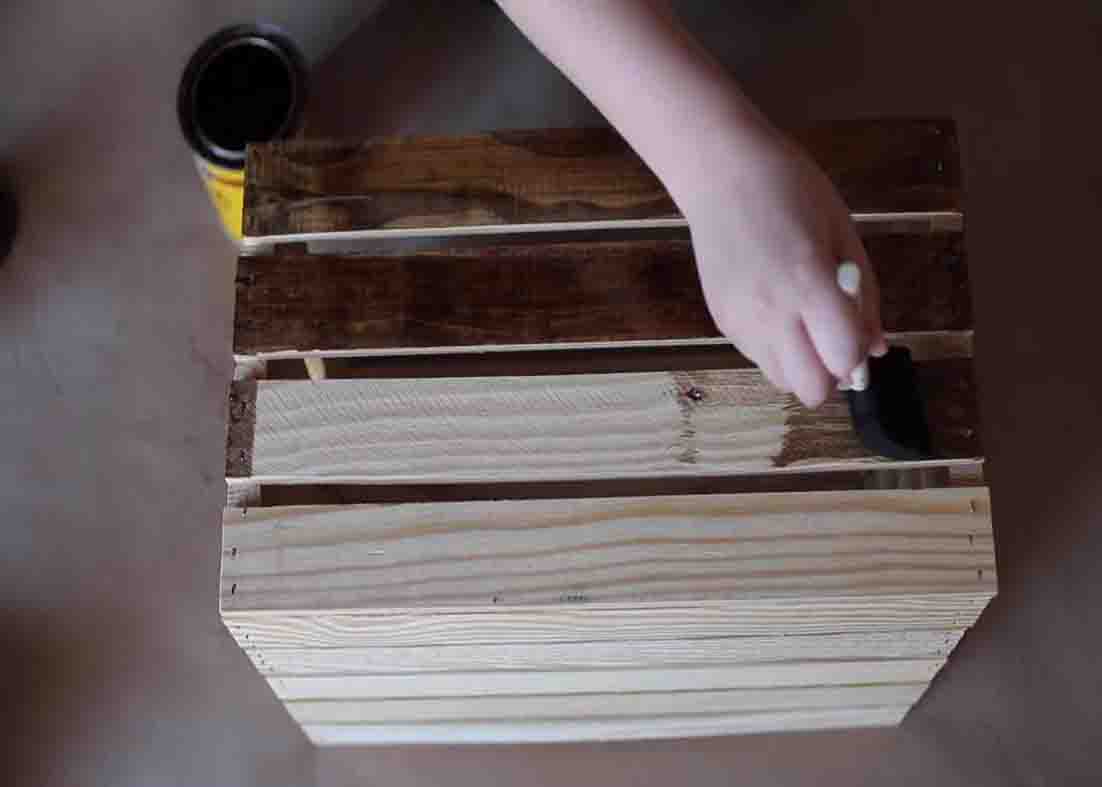
Stain your crates, doing one coat on each, then let them dry completely. Next, rough up one of the sides of the crate, then fix it to the other crate using liquid nails. Use a bracket and two screws to attach the back portions of each nightstand until the liquid nails dry.
[social_warfare]
Step 2
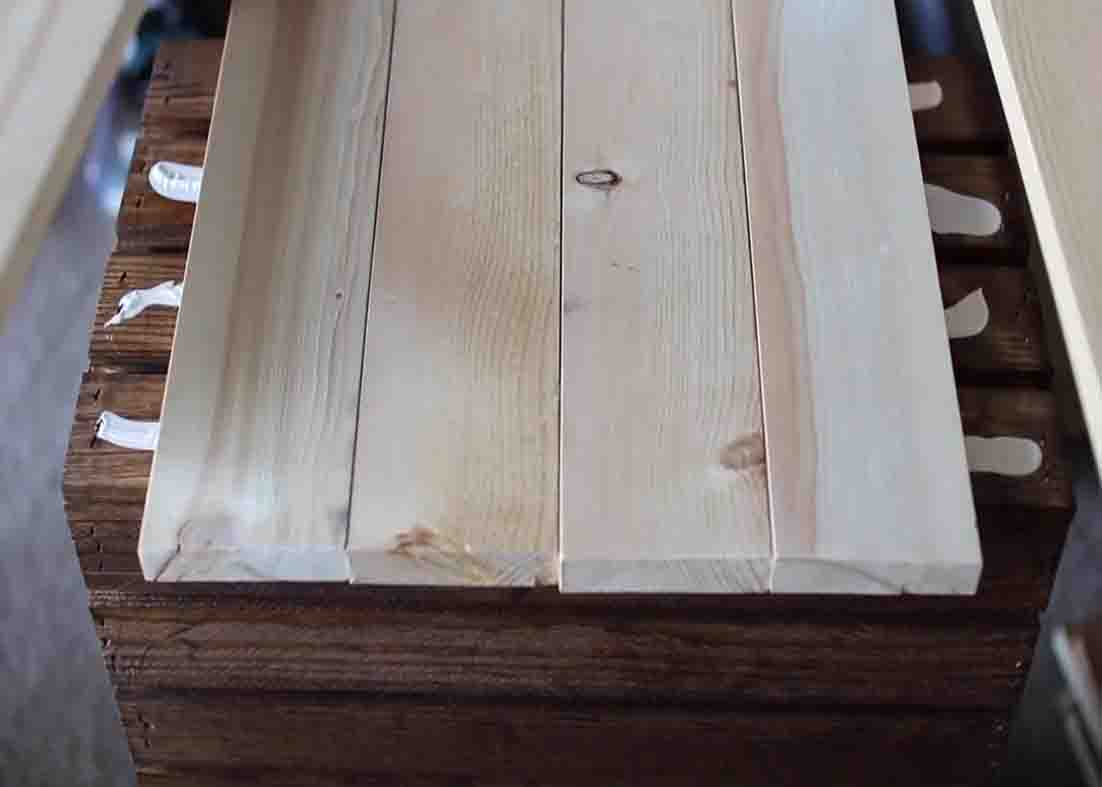
Moving on to the top, attach all of your 1×4 pieces by using liquid nails. After evening the wood pieces, place a heavy object on top and let everything dry. After this, stain it to make a uniform look with the base.
Easy DIY Rustic Nightstand Tutorial