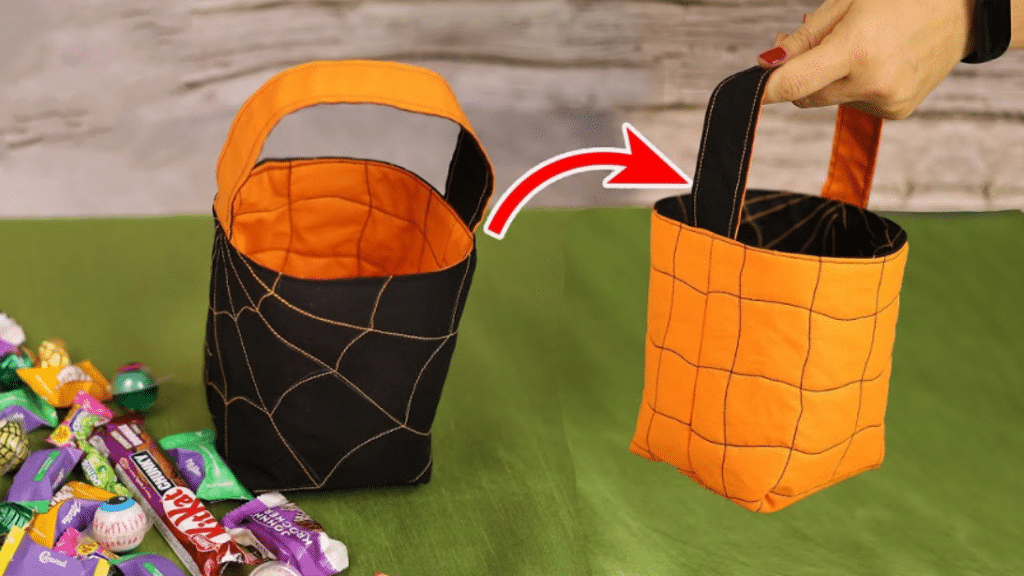
If you have kids in the family who want to go trick or treating this Halloween, then you might want to make this DIY trick-or-treat bag by Hello Sewing on YouTube. This bag is reversible so you can have 2 different styles or designs in one, plus, this is also reusable so you don’t have to worry about trick or treating next year because you already have a bag that you can use.
RELATED: How To Sew Mini Halloween Treat Bags
This is also way more inexpensive than store-bought ones and it’s sturdy, too, so guaranteed that you can use this for a long time. If you also want to be a little extra, then feel free to add more designs or embellishments to your bag. I’m sure the kids will appreciate this handmade bag, you can even give this as a gift or sell this if you like!
Materials for DIY Reversible Trick or Treat Bag:
- Black fabric, lining
- Orange fabric, main
- Fusible fleece
- Marking pen, pencil, or chalk
- Ruler
- Scissors or rotary cutter and a cutting mat
- Fabric pins
- Needle and thread
- Iron, for pressing
- Sewing machine
How to Make a Reversible Trick or Treat Bag:
Step 1
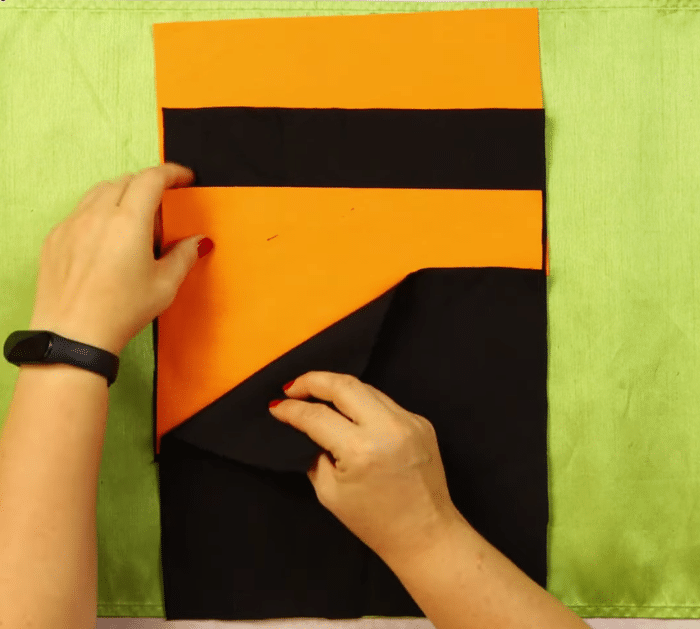
Cut the fabrics to size as instructed in the video, then stack the cotton fabrics together, mark the bottom corners with a 2¼” square, and cut them out. Do the same cut to the fleece squares, then place one on top of each orange fabric, make sure they are in the middle, and press them down.
Step 2
Draw a web on the black fabrics and any quilt design on the orange fabrics, then make the handles, and topstitch on the markings you drew on the black and orange fabric. Stack the black pieces with their right sides facing, stitch them on each side and the short edge, and do the same with the orange pieces.
Step 3
Pull the cut corners so that the edges are together and the seam is at the center, then stitch it straight, and repeat the same to the other side. Sew the handles to the orange bag, then turn the black bag right side out, and insert it into the orange bag so their right sides are facing, making sure their seams are matching.
Step 4
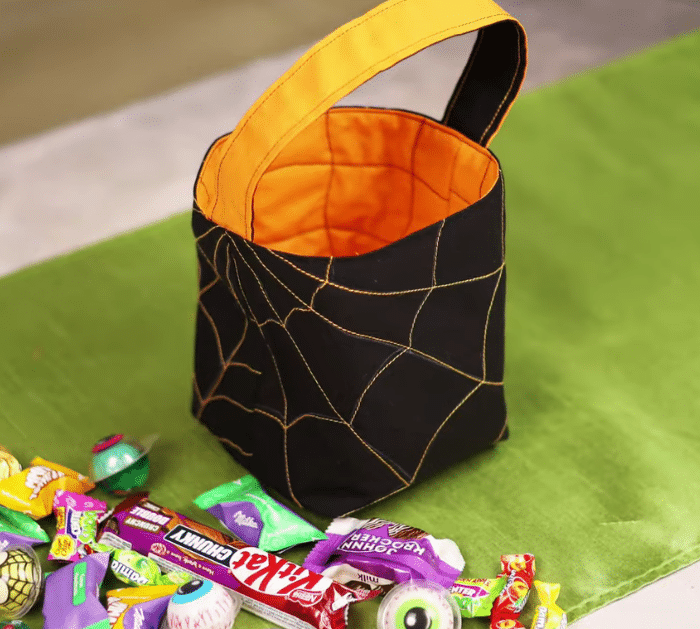
Stitch the edges at the top leaving about 2 inches of gap, then turn it right side out through the opening, and push the lining inside the bag. Tuck the edges, then clip them, and topstitch with 1/8 inch seam allowance. Your reversible trick-or-treat bag is now ready to use!

*All image credit belongs to Hello Sewing via YouTube. Follow and subscribe to her channel for more!
Easy DIY Reversible Trick or Treat Bag


