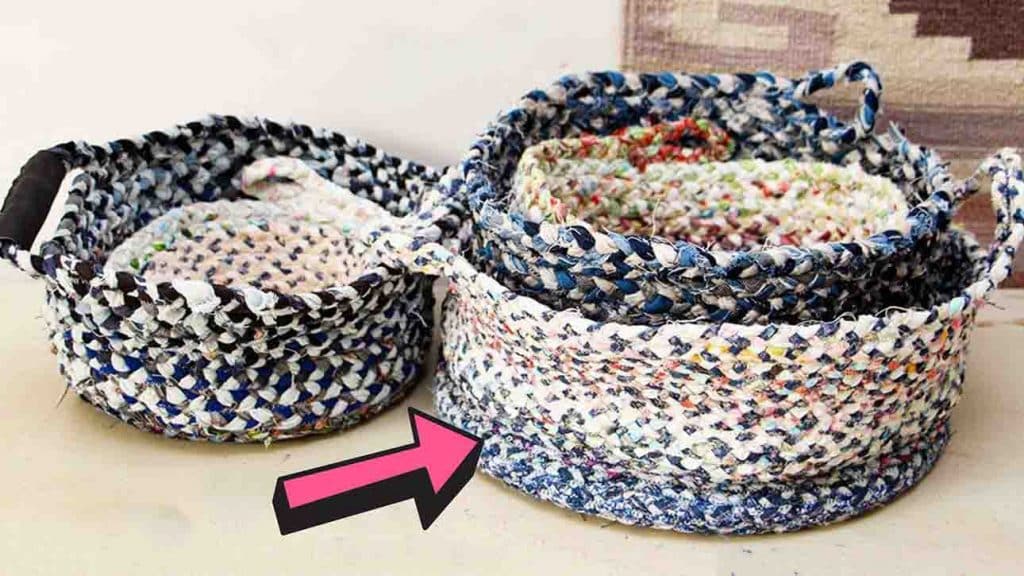
Believe it or not, textile waste can take up to 200+ years to decompose in a landfill, so recycling your old clothing is a big help for our environment. So let’s start repurposing our scrap fabrics and old clothing by making this DIY braided basket from Megan Nielsen on Youtube. This braided basket is not just beautiful but is also very useful, especially if you have a lot of things that need to be kept in one place. Watch the video tutorial down below to learn to make one.
Materials:
- fabric scraps
- old clothing
- scissors
- leather or denim needle
- sewing machine
Directions:
Step 1
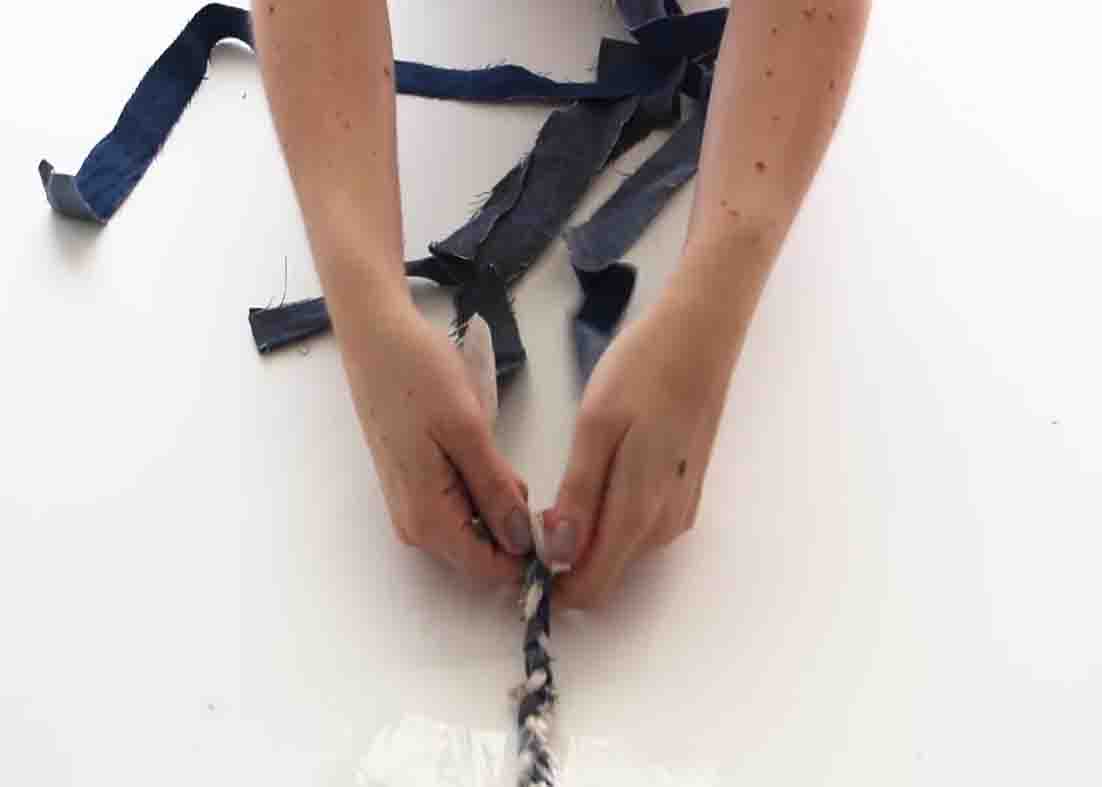
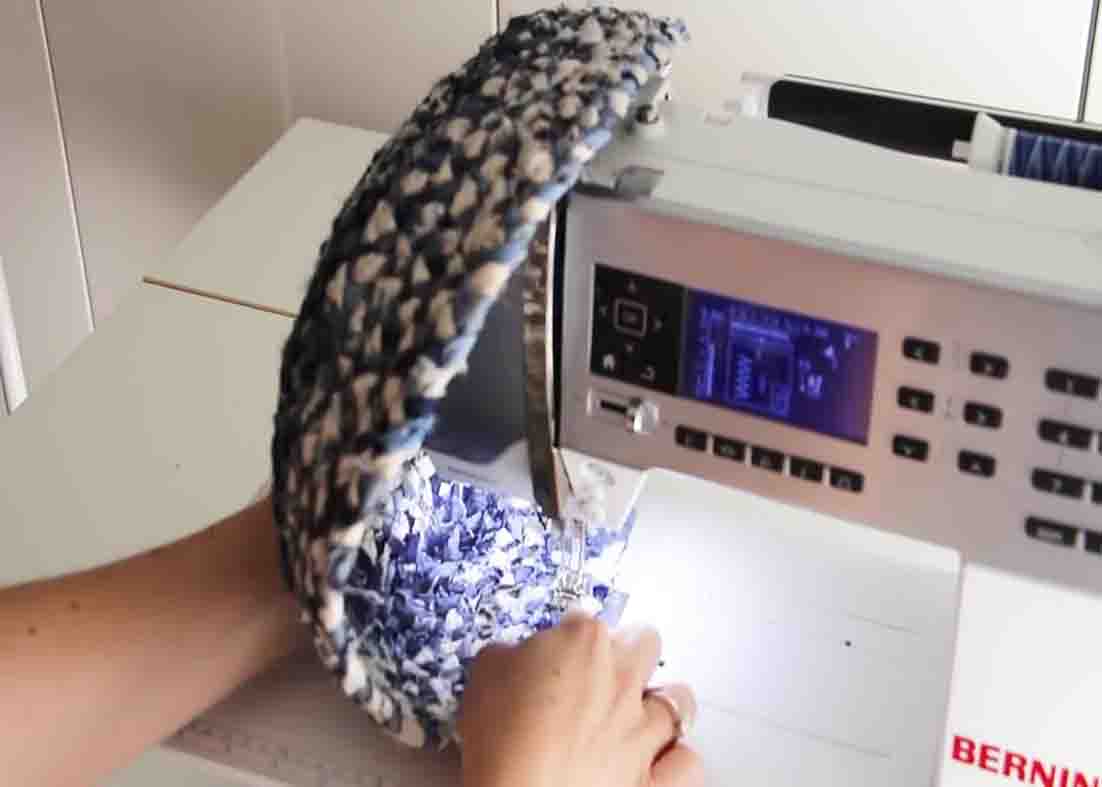
To begin, start braiding three strips of 1-inch wide fabric that you’ve secured on one end. (In this case, a safety pin was used and the braid was taped to the table.) If you reach the end of the strip, simply get another one, then place the new strip on top of the old one and wrap them together before you continue braiding. Keep braiding and adding more fabric until you have a nice pile of braided scraps. Now, set your sewing machine to a wide zigzag stitch and make sure you are using a sturdy needle, like leather or denim needle as you’ll be sewing through thick layers. Place all of your braids on the right side of your sewing machine, make a small coil shape, and sew them together. Fold under the end of your braid by about an inch and sew it together. Once you’ve done this, you can start turning more braids around the first coil and zigzagging to attach them. (Just go slowly, the first few turns are the hardest.)
[social_warfare]
Step 2
Keep going, adding more braids around the outside edge, and be careful that you don’t stretch your braid as you go or your basket will end up warped. You want the bottom of your basket to be nice and flat. Once you’ve sewn a coil that is as large as the base of the basket you want to make, start tipping your coil up towards the sewing machine as you sew. This will ensure that the walls of your basket are attached at an angle. Keep sewing and tipping your basket up towards the sewing machine until you almost run out of braids. To finish the basket, you can either just tuck the ends and zigzag over the top of them or you can create a decorative little loop handle.
Easy DIY Braided Basket Tutorial


