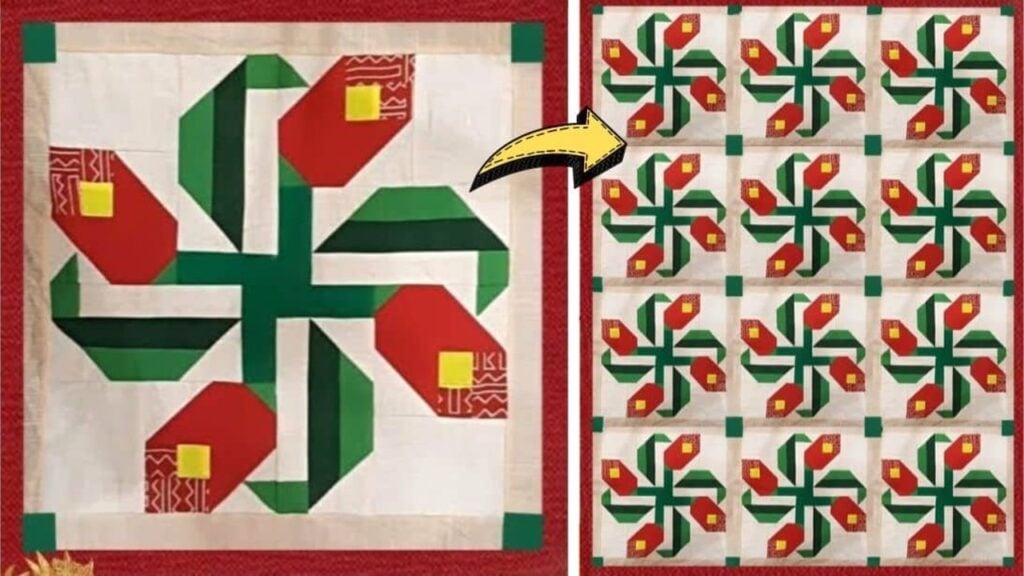
This quilt project idea by Anjatas Creation on YouTube is sure to challenge your skills and your brain! At first, this block seemed difficult to make but once you got the hang of it, you’ll be surprised by how fun and easy this is to piece together. This project will surely keep you busy for the week and the results are incredibly worth it. Try it out now and see for yourself, enjoy quilting!
Fabric Requirements:
White Fabric
- 4 pieces @ 1½ x 5½ inches
- 4 pieces @ 3½ x 4½ inches
- 12 pieces @ 2½ x 2½ inches
- 2 pieces @ 2⅜ x 2⅜ inches
- 2 pieces @ 1⅞ x 1⅞ inches
Red Fabric
- 4 pieces @ 2½ x 4½ inches
- 2 pieces @ 2⅞ x 2⅞ inches
Red Patterned Fabric
- 4 pieces @ 1½ x 2½ inches
- 4 pieces @ 1½ x 1½ inches
Green Fabric
- 4 pieces @ 1½ x 6½ inches
Light Green Fabric
- 4 pieces @ 1½ x 6½ inches
- 4 pieces @ 1½ x 1½ inches
- 2 pieces @ 1⅞ x 1⅞ inches
Medium Green Fabric
- 4 pieces @ 1½ x 3½ inches
Yellow Fabric
- 4 pieces @ 1½ x 1½ inches
Other Supplies:
- Pencil, pen, or chalk
- Fabric pins
- Ruler
- Scissors or rotary cutter and a cutting mat
- Needle and thread
- Iron, for pressing
- Sewing machine
Directions:
Step 1
First, lay the yellow square and the red patterned square together with their right sides facing, then sew them along one side, press them open, and trim each unit into a 2½-inch square. Take 2 red rectangles, then place 1 white square on top of the left side with their right sides facing, and place a small green square on top of the upper right corner with their right sides facing as well. Draw a diagonal line on each square from corner to corner, then sew along those marked lines, and trim off the excess fabric ¼ inch away from the stitching line.
[social_warfare]
Step 2
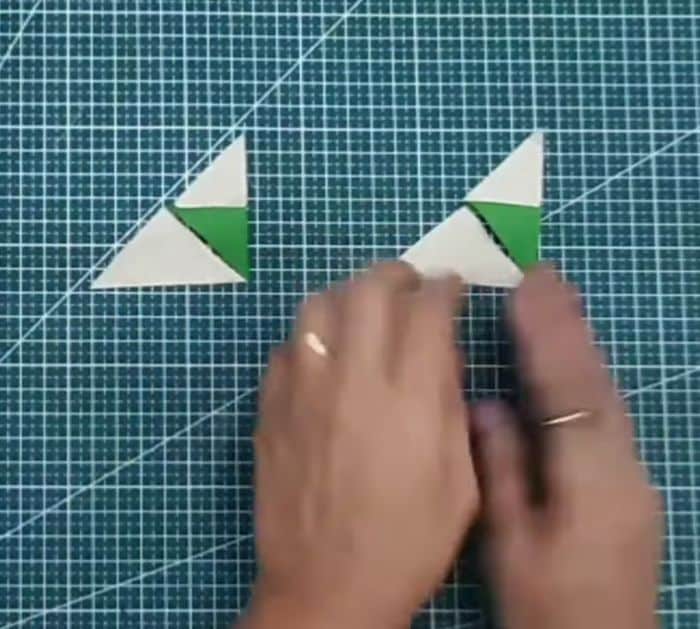
Press the units open and trim the edges nice and straight, then repeat this process to create a total of 4 units, and set them aside. Take 1 small white square and 1 small green square, then cut them in half diagonally, mix their colors together with their straight edges joined in the center, and sew them together in the middle to make a single triangle. Press and trim the units nicely, then 1 white 2⅜-inch square, and cut it in half diagonally. Lay them beside the green fabric, then sew them together to make a larger triangle, press nicely, and trim the unit.
Step 3
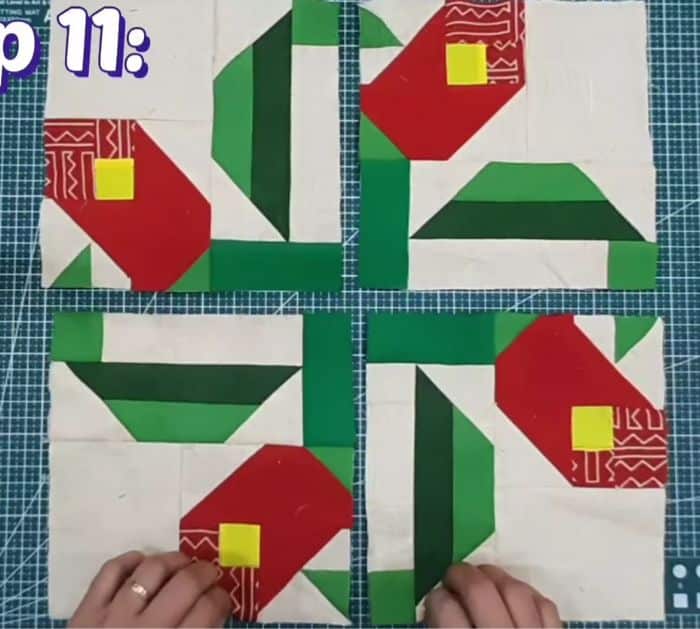
Take 1 red 2⅞-inch square, then cut it diagonally to make triangles, and sew them together with the triangle unit to complete a square. Give them a good press, then trim them into 2½ inches square, then repeat the process to make a total of 4 units, and set them aside. Once done preparing each unit together, start stitching them piece by piece as shown in the video until you’ve completed the block, then press and trim every now and then. All that’s left is for you to add the border fabric, give it a good press, and quilt however you want.
*All image credit belongs to Anjatas Creation via YouTube. Follow and subscribe to her channel for more!
Learn How To Make This Blooming Flower Quilt Block


