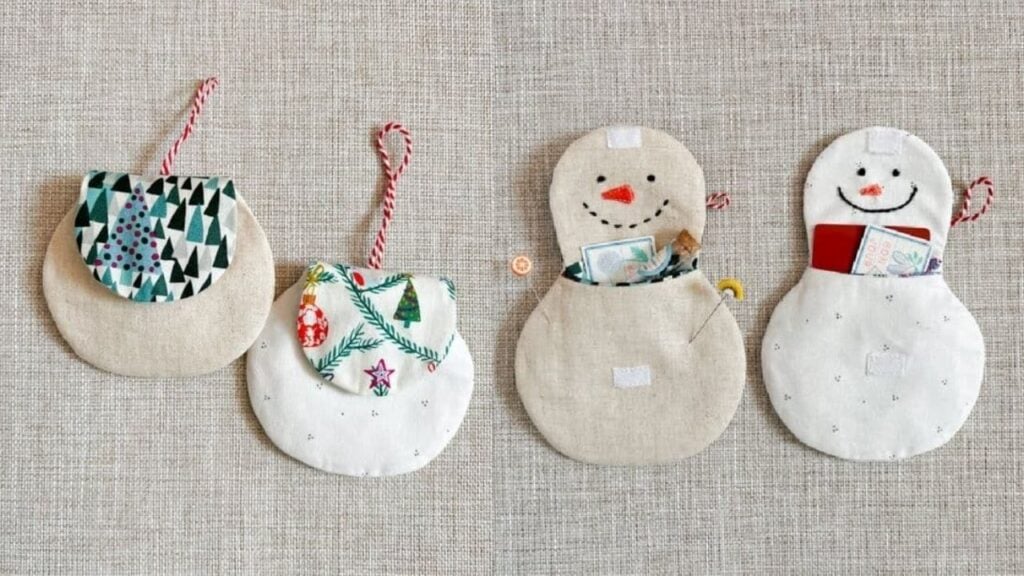
The best way to level up your gifts to your family and friends is through this handmade gift cardholder. There is nothing more heartwarming and sincere way to show how much you love them than by sewing one on your own. Don’t worry because this is very easy to follow and you can also mix and match scrap fabrics to make a lot of these. It is a fun activity that you can do to put your sewing skills into some practice. Enjoy this tutorial by Minki Kim on YouTube and tell us how you did!
Materials:
- White print fabric: 10’’(25cm) x 10’’(25cm)
- Lining fabric: 10’’(25cm) x 10’’(25cm)
- Woven fusible interfacing:10’’(25cm) x 10’’(25cm)
- Velcro
- String
- Black color embroidery floss
- A pair of scissors
- Pen
Directions:
Step 1
Fuse the woven on the wrong side of the light fabric then trace a snowman pattern and trim. Draw a face onto the lighter fabric and hand stitch with 2 strands of embroidery floss. Cut a felt nose and stitch all around it, next cut a small Velcro and stitch one part on the forehead of the snowman, fold and align the head onto the body then stitch the remaining Velcro.

[social_warfare]
Step 2
Switch the heads of the two fabrics, loop, and knot a string then place upside down on the body of the lighter fabric. Fold the head on top of the string, clip in place and sew straight the seam, open the fold, and press. Fuse the two fabrics with the right side facing each other, clip in place and sew around the top and bottom area with about a quarter inch seam allowance, leaving the side unsewn. Open the fabric and align the sides, clip it in place then sew around it. Make notches on the side then trim excess fabric. Flip it inside out then stitch the gap close.

*All image credit belongs to Minki Kim on YouTube. If you want to see more tutorials like this one, go and visit her channel!
DIY Snowman Gift Card Holder Sewing Tutorial


