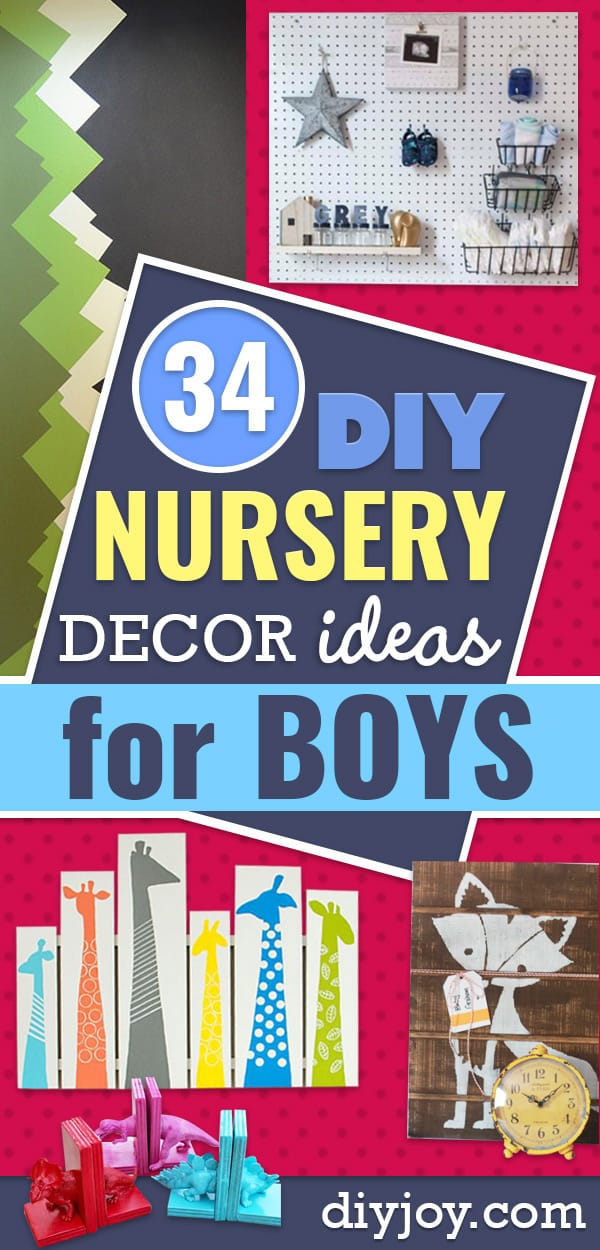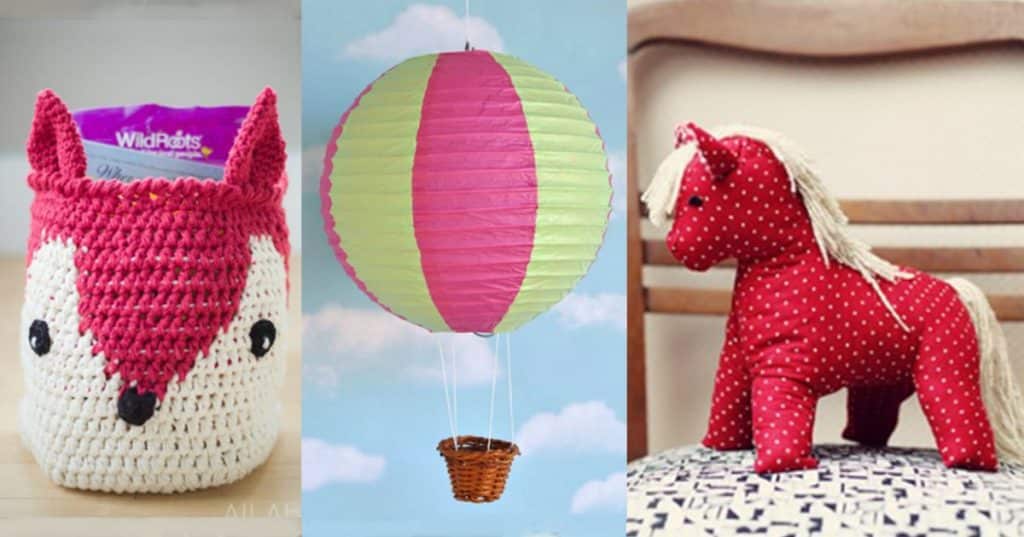
Nesting season hits hard, and these 18 DIY nursery decor ideas for boys give all that energy somewhere fun to go. A handmade nursery doesn’t need a big budget, just a free weekend, a few craft store basics and maybe a can of paint. You’ll find bold wall projects like a stamped triangle pattern and a painted full moon, cozy woodland touches like moss covered letters and a branch shelf for stuffed animals, plus playful pieces like dinosaur bookends and hot air balloon lanterns. Many of these grow right along with your little one, so the shelves, wall art and coat hooks still work in a big boy room years from now. Here’s a helpful tip: pick two or three colors first, then choose projects that pull from them, and the whole room will feel planned instead of piecemeal.
1. Arrow Decor DIY
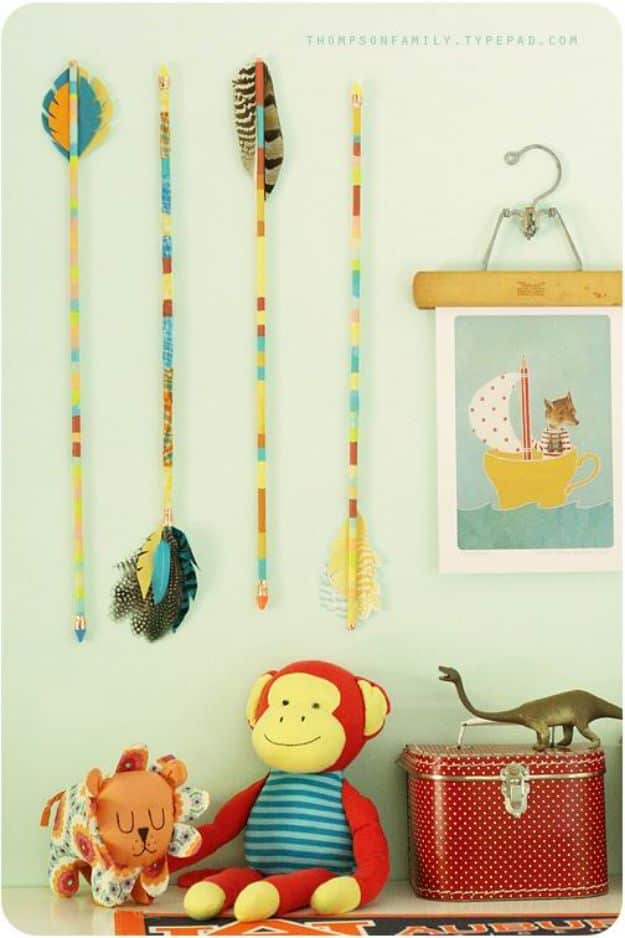
Arrow decor gives a boy’s room a vintage adventure feel for a fraction of what antique arrows cost. Cut wooden dowels to different lengths with heavy duty cutters or a saw. Decorate each shaft one of three ways: paint it, cover it in washi tape or wrap it in fabric scraps. Washi tape is the fastest. Wrap the ends in copper tape, then glue real feathers at one end with tacky glue and add an arrowhead cut from felt scraps at the other. Mix all three styles for a collected look above a dresser or crib.
Get the full tutorial at Modern Kiddo.
2. Button Elephant
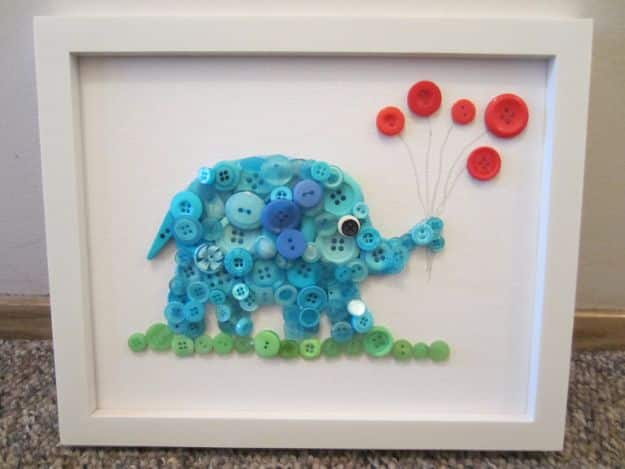
Button elephant art is cute enough for any baby’s room and easy to customize. Sketch a chunky elephant on a canvas board, or trace a card stock stencil, and quickly fill the outline with watered down paint so gaps between buttons won’t show. Hot glue a first layer of buttons over the shape without going past the edges, then add a second layer that overlaps the outline for straighter lines. Use bigger, darker buttons for the ear, black and white ones for the eye and a scrap of ribbon for the tail.
Get the full tutorial at Busted Button.
3. Drift Wood Wall Hanging
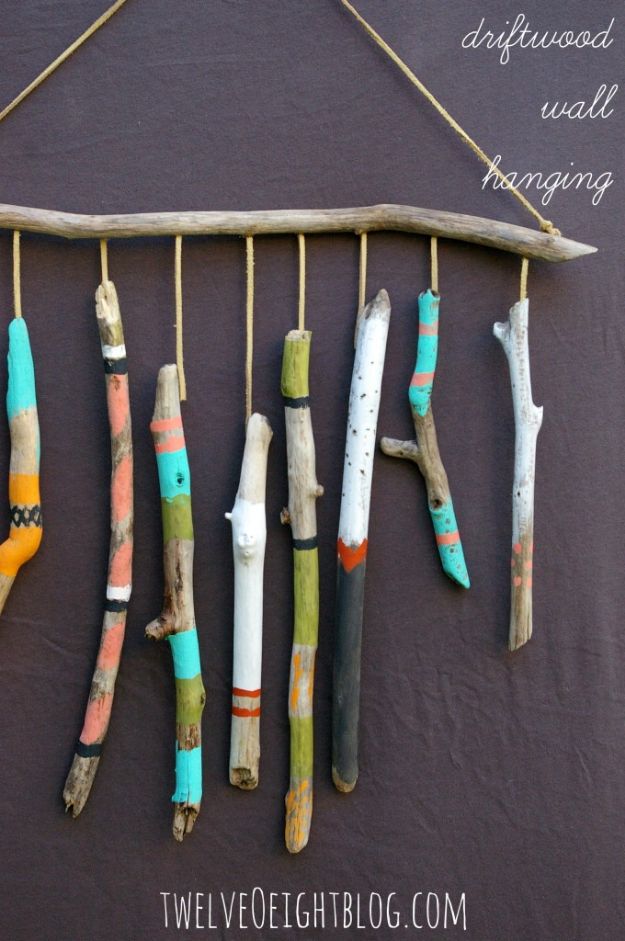
A driftwood wall hanging is practically free and comes together in under two hours. Gather a bundle of driftwood from a river or beach walk, or use small tree branches or wooden dowels cut to different lengths for a more modern look. Paint stripes, dots and lines on each piece in acrylic colors you love, using tape for crisp stripes or going freehand. Leave the top piece bare and twist a screw eye into each end about an inch in. Hang the painted pieces below it on string at staggered lengths, then hang it all on a nail.
Get the full tutorial at twelveOeight.
4. Paint Bucket Shelves
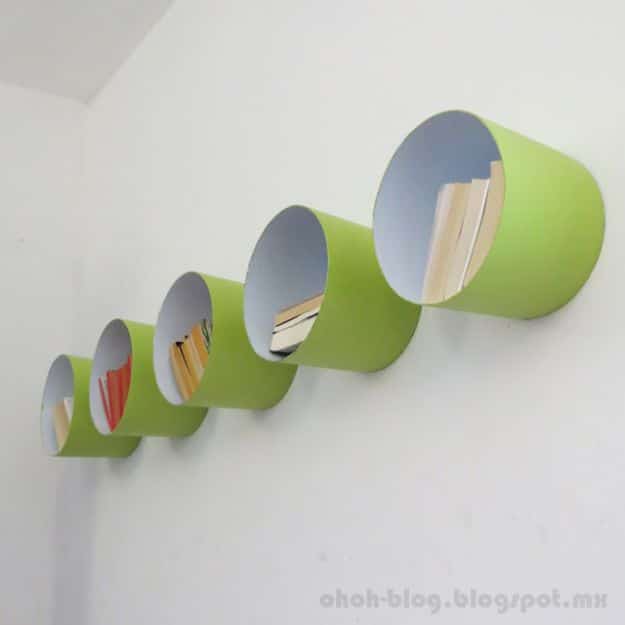
Paint bucket shelves turn plastic buckets into round wall cubbies for books and small toys. Clean each bucket and peel off the label, then carefully cut off the top portion with a saw. Paint the outside with a paint made for plastic in a bright color. Drill two holes in the back for screws and reinforce the inside of the back with a small piece of wood so it holds weight. Mount them to the wall with screws and anchors, staggering a few in a row for a playful look. They keep shelves of little things tidy.
Get the full tutorial at Ohoh deco.
5. Stamped Tribal Triangle Chain Wall
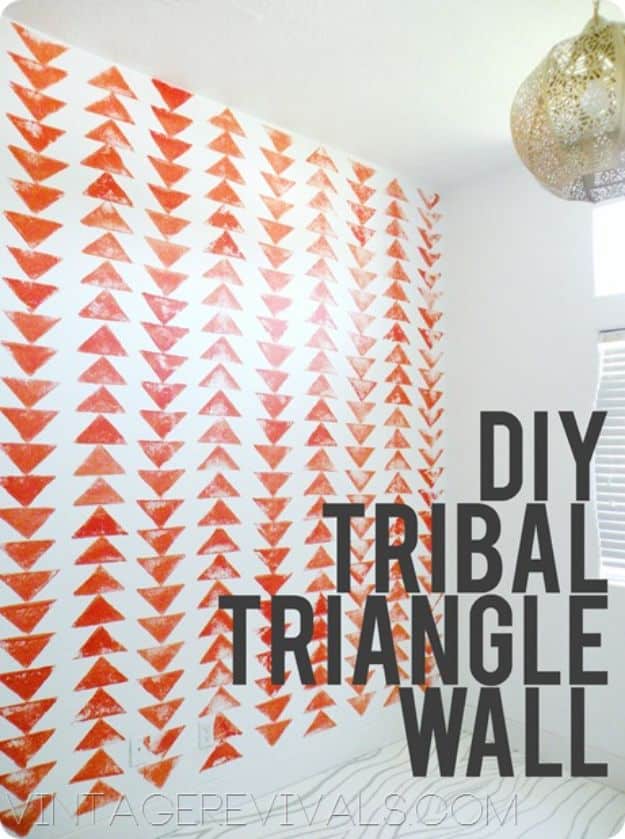
A stamped triangle chain wall looks hand painted but goes up much faster. Make a stamp from a triangular piece of wood by stapling a scrap of old sweatshirt over it, smooth on the front and bunched on the back for a handle. Pour paint onto a plate big enough for the triangle to lie flat, dip the stamp and blot it on paper so the color is thin and imperfect. Line up each column with a laser level and stamp so the points sit about three fingers apart. Imperfection is the whole charm here.
Get the full tutorial at Vintage Revivals.
6. Moss Letters
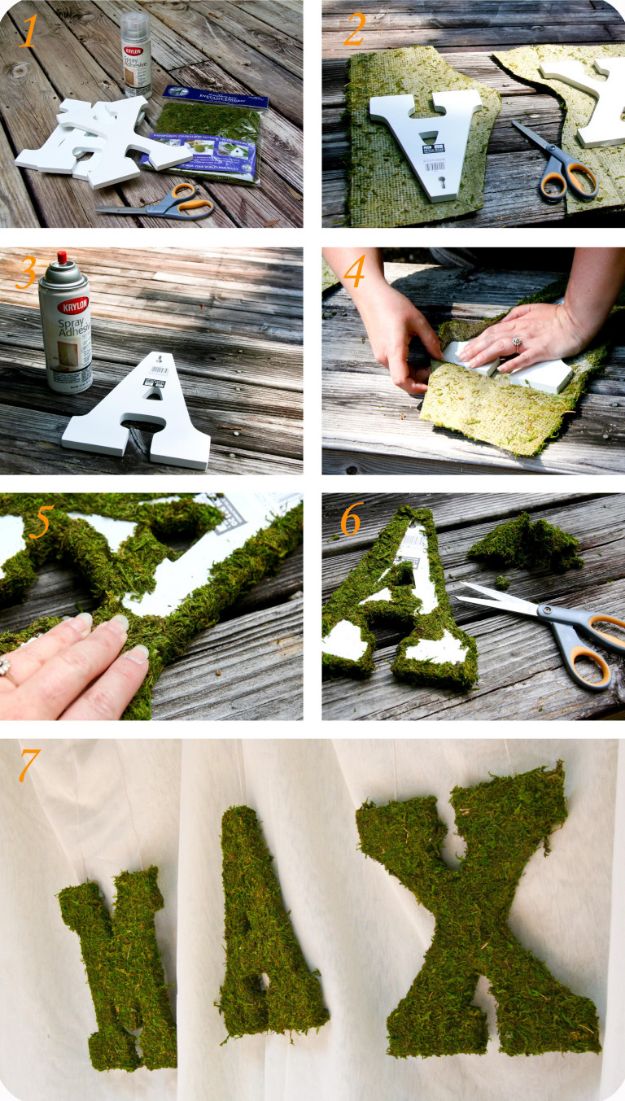
Moss letters add a soft woodland touch to a nursery wall or shelf. Start with wooden letters, or sturdy cardboard ones, and a sheet of craft moss. Lay a letter on the moss and cut around it, leaving enough extra on every side to wrap over the edges and onto the back. Spray the front and sides of the letter with spray adhesive, press it onto the moss and pull the moss snugly around the sides, holding a few seconds so it sticks. Patch bare corners with small sprayed pieces of moss. They blend right in.
Get the full tutorial at Feelin' Crafty.
7. DIY Paper Lantern Hot Air Balloons
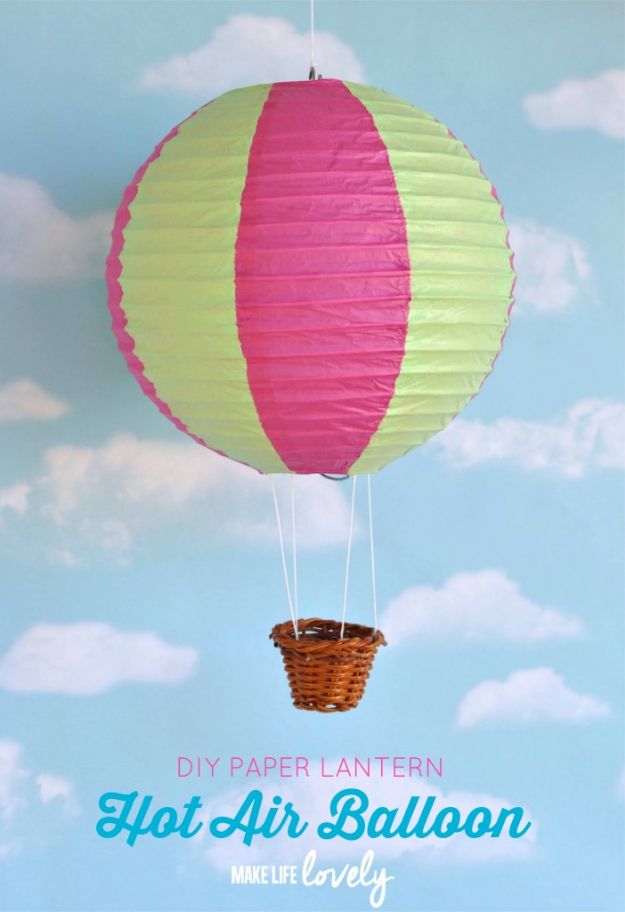
Paper lantern hot air balloons are a whimsical nursery decoration that takes minutes. Open a paper lantern and paint alternating sections, following the thin paper seams as a straight edge. Use one color per lantern or mix soft, bold and metallic shades. Snip the handle off a small 2 inch basket. Cut four pieces of string, about 6 inches each for an 8 inch lantern, and hot glue one end of each inside the lantern along a paint line. Glue the other ends inside the basket and hang a cluster at different heights.
Get the full tutorial at Make Life Lovely.
8. Dinosaur Bookends with Hot Glue
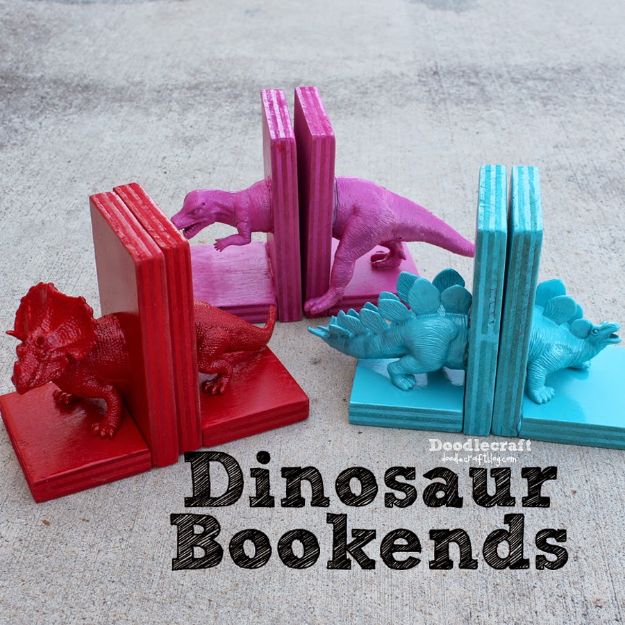
Dinosaur bookends are a playful way to upcycle plastic toys. Cut scrap wood into blocks, two about 6 inches tall and two about 3 inches tall, and hot glue each short block to the bottom of a tall one to make an L. A strong glue stick holds best. Slice a plastic dinosaur from the dollar store, or an old toy, in half lengthwise with a craft knife. Run a band of glue around the body and feet and press each half onto a block. Paint each bookend one bold color so it reads as a single piece.
Get the full tutorial at Doodlecraft.
9. DIY Modern Industrial Wood Slice Shelves
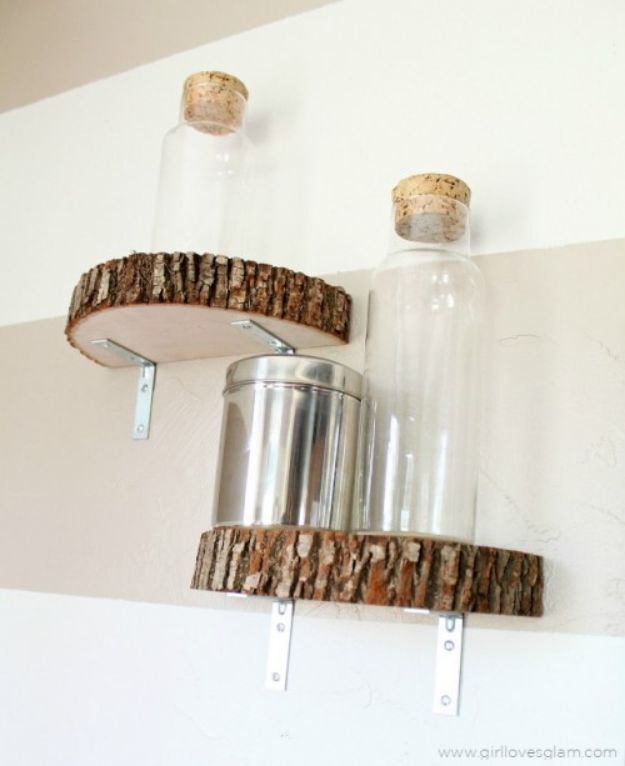
Modern industrial wood slice shelves mix rustic bark with simple metal hardware and go up quickly. Start with 14 inch wood slices, 4 inch L brackets, a saw, a drill and screws. Find the center of each wood slice and cut it in half so you have two flat edged half rounds. Line the L brackets up with the straight back edge of a shelf and screw them into the wood. Then screw the brackets into the wall, checking that each shelf sits level. Two or three staggered shelves make a sweet spot for jars and keepsakes.
Get the full tutorial at Shelterness.
10. DIY Moon Painting
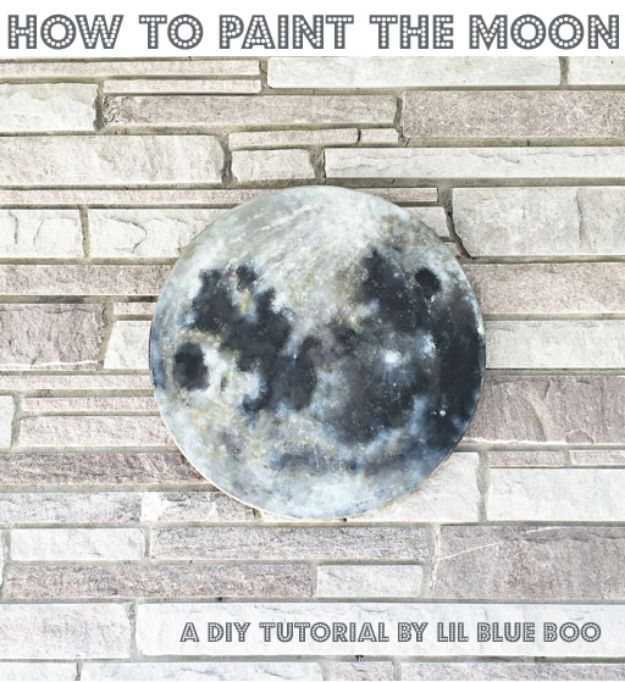
A DIY moon painting brings a full moon indoors on a round wood table blank. Prime the round with white paint, then sketch a grid with willow charcoal, which paints over cleanly where pencil would show through. Use the grid to block out the large dark and light areas first with a sponge or brush. Keep layering section by section, sponging some layers and dry brushing others with very little paint. Splatter white paint for the craters and add fine lines with a small brush. Round canvas or wood art panels work too.
Get the full tutorial at Lil Blue Boo.
11. Moon Cradle Made of Pallets
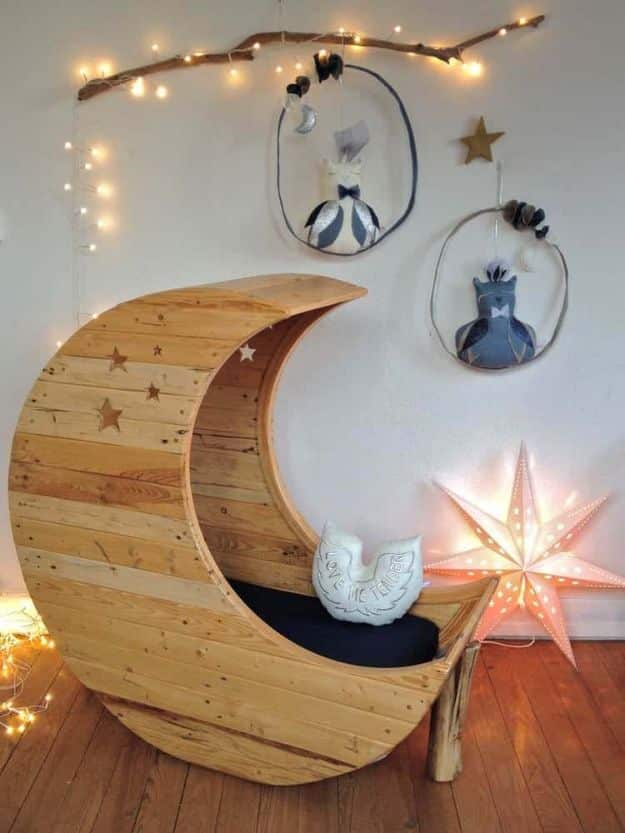
A moon cradle made of reclaimed pallet wood is a dreamy statement piece for a starry nursery. The design is a half moon built from pallet slats, with a curved cradle that sits on the floor and little star shapes cut into the side. It was made on demand by a French designer who works with repurposed materials, and the showcase page offers a free guide for building one. Add fairy lights, a star lamp and soft bedding to finish the look. Anyone building it should follow current crib and cradle safety guidelines.
Get the full tutorial at 1001 Pallets.
12. DIY Monogram Door Letter
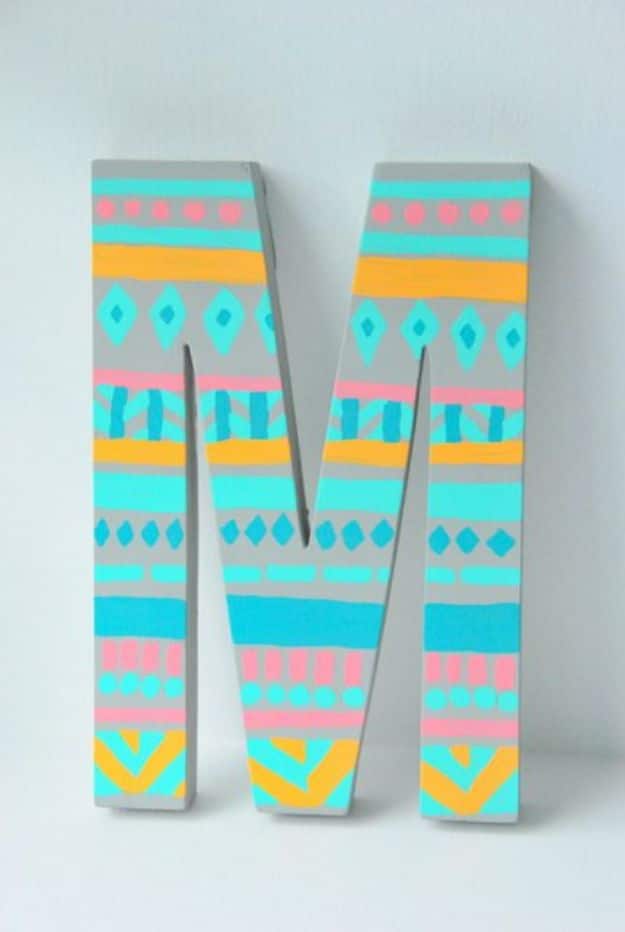
A DIY monogram door letter marks a little one’s room with something bright and personal. Find a large craft letter in a simple font; a clearance one can cost as little as $2. Paint the whole letter in a light gray first so any marks disappear. Lightly sketch a tribal style pattern freehand, using a favorite scarf or fabric as inspiration, then fill it in with bold colors like pink, aqua, dark turquoise and orange. Pull the colors from the room’s existing decor and hang it on the outside of the nursery door.
Get the full tutorial at The Sweetest Digs.
13. DIY Modern Woodland Mobile
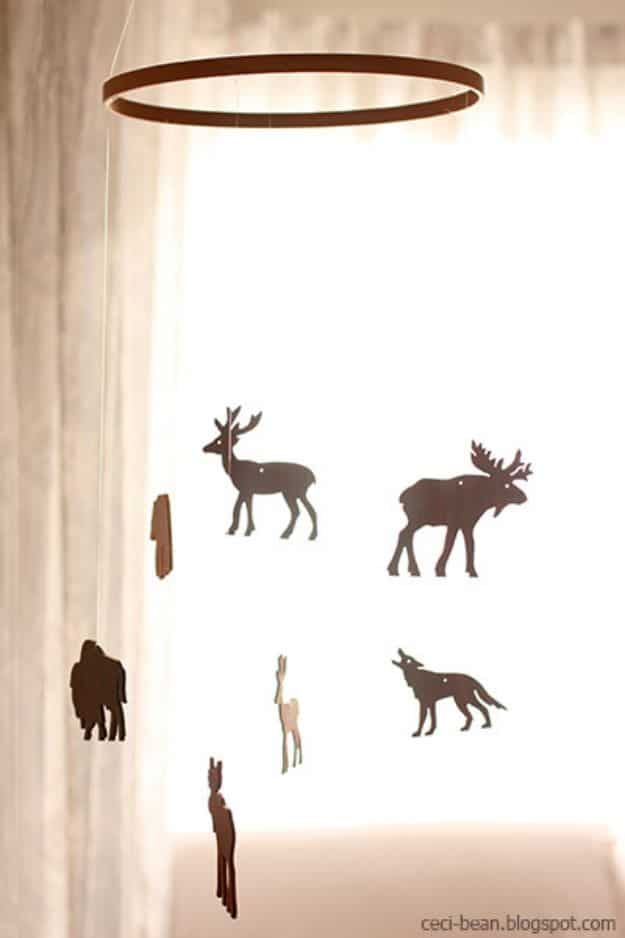
A modern woodland mobile needs no artistic talent and only scissors for a tool. Pick up a 10 inch wooden embroidery hoop, beading cord and a set of wooden animal cutouts. Decide how low the mobile should hang, then cut six cords a few inches longer than the distance from hoop to ceiling, plus a seventh a little longer. Tie all seven together at the top and tie six evenly around the hoop so it hangs level. Hang one animal from the center cord and the rest at varying lengths around the hoop.
Get the full tutorial at CeciBean.
14. DIY Branch Swing Shelves
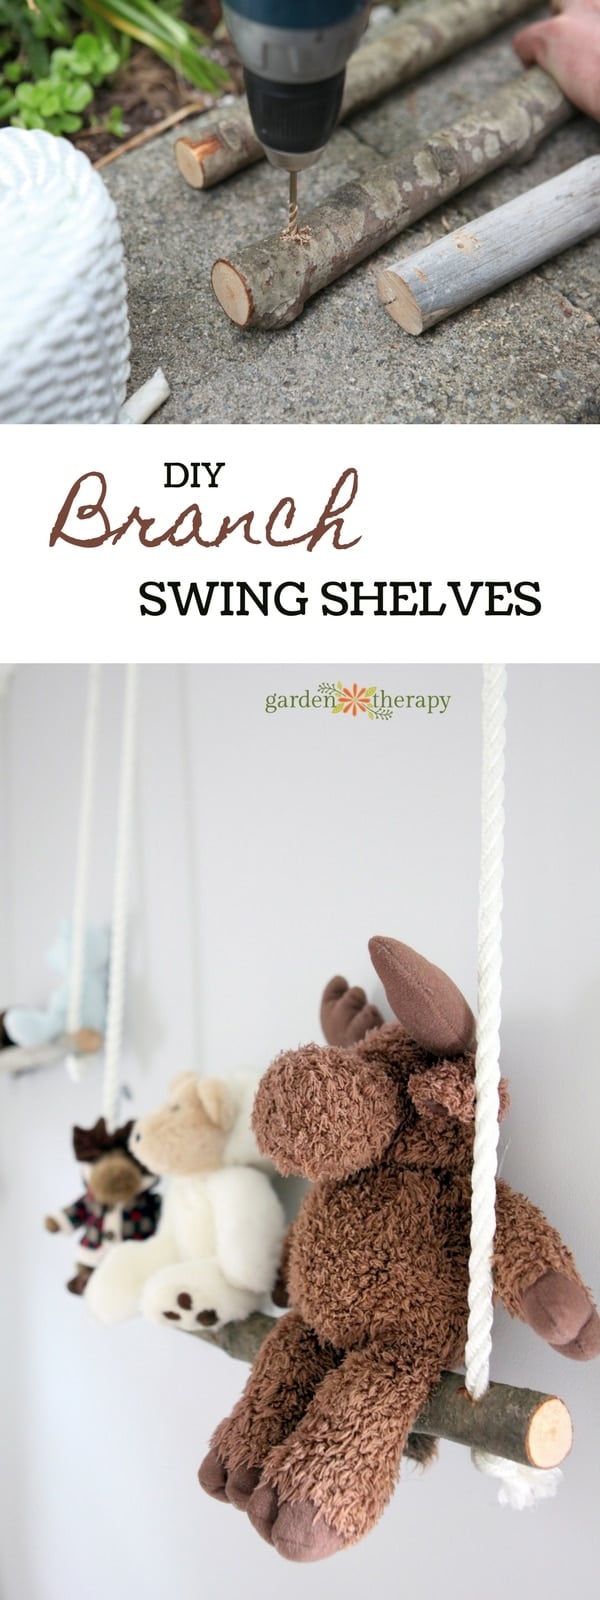
Branch swing shelves give stuffed animals a cozy place to sit and look like a million bucks for very little money. Choose dry, fairly straight branches about 1.5 to 2 inches across and cut them to length with a hand saw. Drill a small pilot hole through each end about 2 inches in, then widen it with bigger bits until rope fits through. Cut rope to the hanging length plus about 14 inches for knots, and wrap the ends in masking tape so they feed through easily. Knot underneath and hang.
Get the full tutorial at Garden Therapy.
15. Wooden Baby Gym
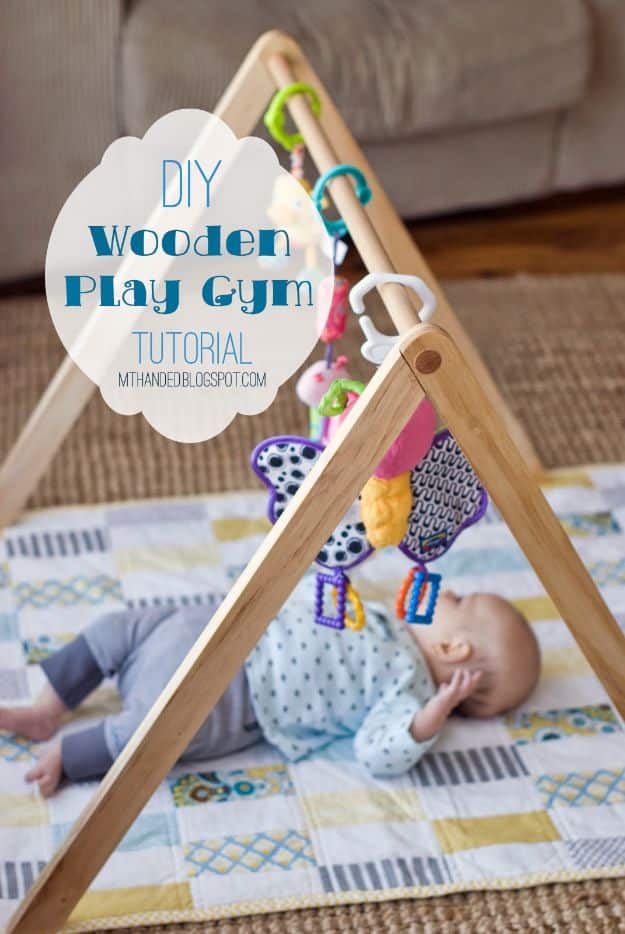
A wooden baby gym is a beautiful handmade alternative to plastic play gyms. Cut four legs about 740 mm long from 40 by 20 mm timber and a 25 mm dowel about 750 mm long for the top bar. Decide how tall and wide it should be, lay two legs at the angle you want and mark where they cross. Cut out the crossover with a saw and chisel so they fit flush, then angle the bottoms to sit flat. Drill through each joint for the dowel, glue and clamp, sand well and seal with Danish oil.
Get the full tutorial at Empty Handed.
16. Fox Basket
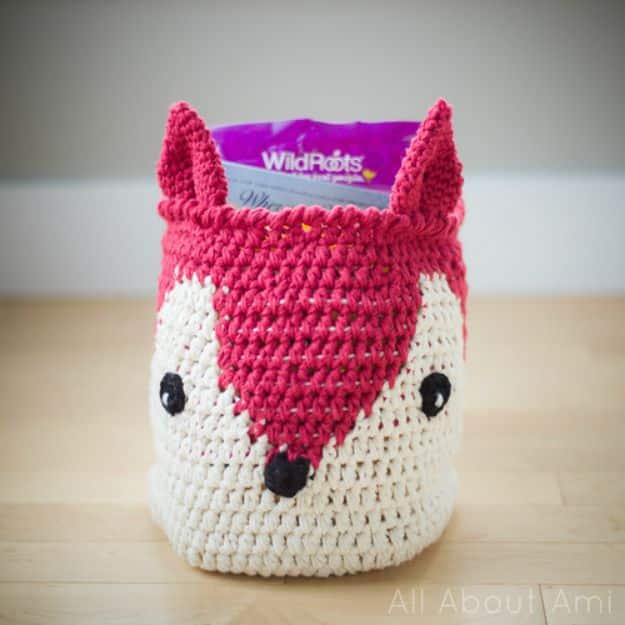
A crocheted fox basket is a sweet nursery storage piece and a lovely baby shower gift. It is worked in cotton yarn held double, about four skeins of off white and two of red, with a 6 mm hook for the basket and a 4 mm hook for the ears and eyes. Start with the round base in beige, work the increase rounds, then build up the sides. The red fox face uses tapestry crochet, carrying both colors and stitching over the one not in use. Add a black nose and pointy ears last.
Get the full tutorial at All About Ami.
17. Animal Bums Coat Hook
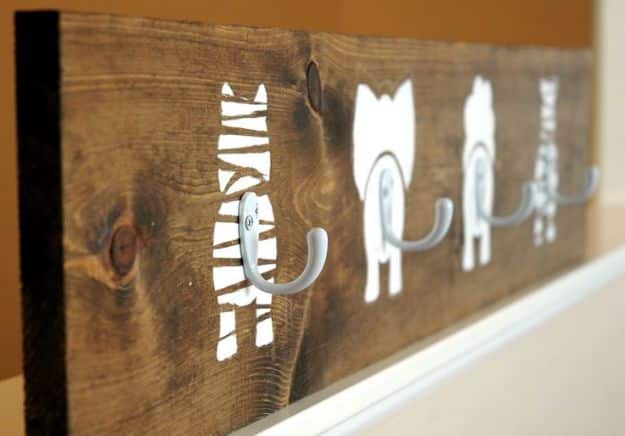
An animal bums coat hook makes everyone giggle and keeps little jackets off the floor. Cut a 1 by 6 board about 3 feet long and stain it a dark walnut. Mark where each hook will go, spacing them evenly. Trace animal templates, like a tiger, elephant, lion and zebra seen from behind, onto the board, and cut the tiger and zebra stripes from masking tape so they stay wood colored. Paint the animals white, peel the tape and screw a hook into each spot so it looks like the tail. Stained wood suits any decor.
Get the full tutorial at The Turquoise Piano.
18. 1950's Toy Horse
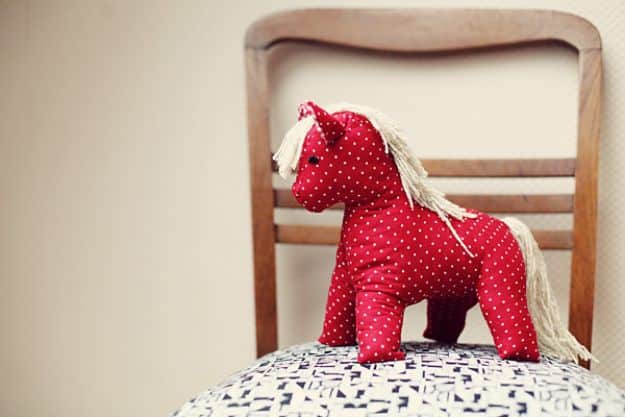
A sewn 1950s toy horse is a sweet heirloom gift for a brand new baby. The project uses a vintage style pattern found on Etsy and a small polka dot fabric close to the one on the pattern cover, with a soft yarn mane and tail. It is a tiny make, but the construction is well thought out, and it comes together more easily than it looks. The fun is in the little hand stitched finishing details. Set it on a shelf or a vintage chair as nursery decor, or tuck it into a baby gift basket.
Get the full tutorial at little home by hand.