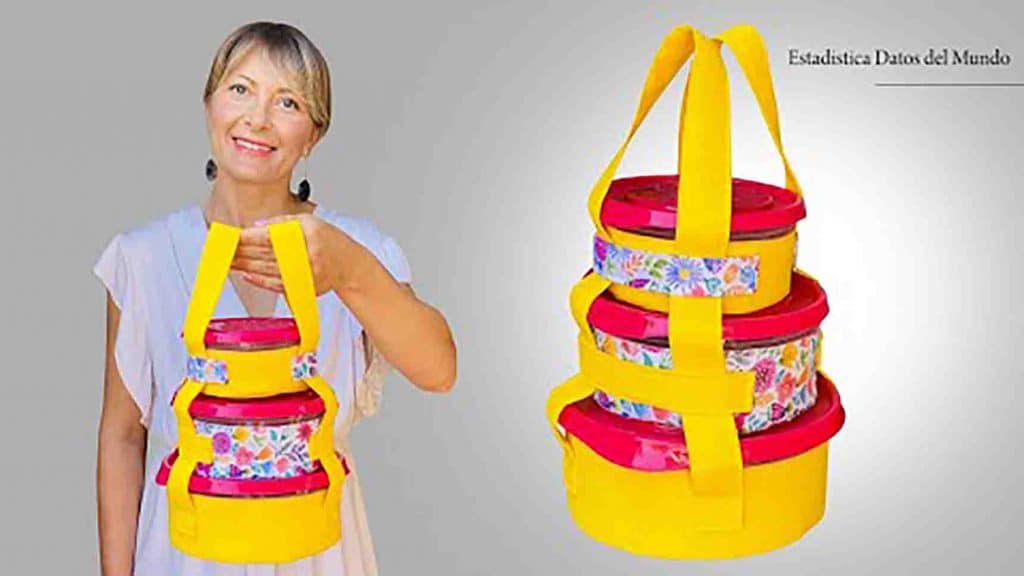
Do you love picnics as much as I do? If yes, then you will love this DIY food carrier from Estadistica Datos del Mundo on Youtube! This food carrier just made my picnics more fun because I can carry my food containers much more easily. You don’t also have to worry if you’re a beginner in sewing, this may look complex, but it’s actually super easy to make. Just watch the video tutorial below to learn the process and start making it today.
Materials:
- your food containers
- thin thermo-adhesive wadding
- cotton fabric
- canvas fabric
- pen for marking
- scissors
- tape measure
- pins
Directions:
Step 1
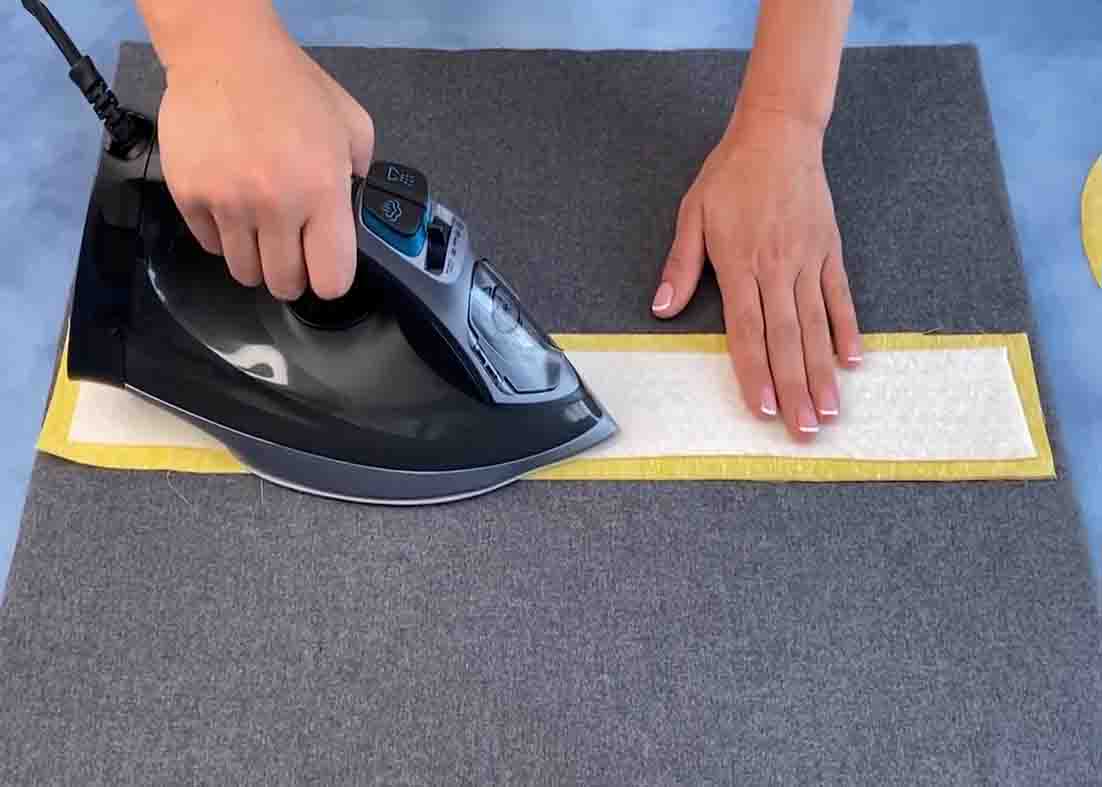
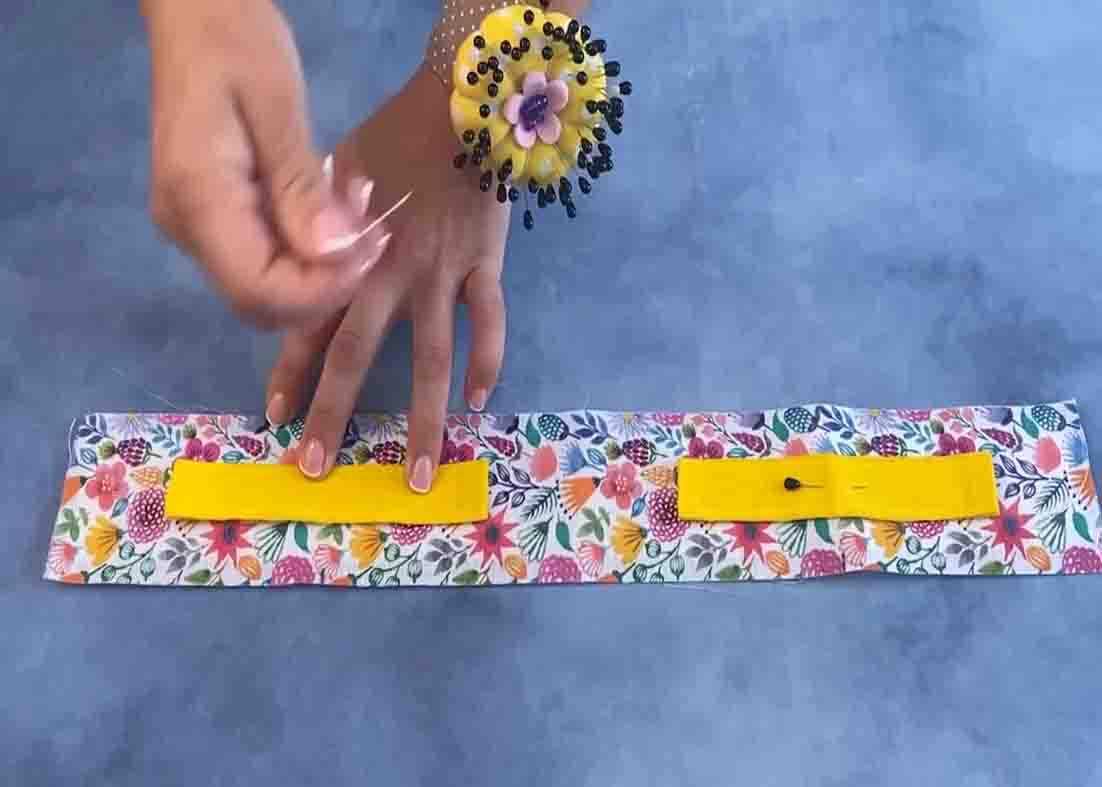
First, outline your container to the thermo-adhesive wadding, then cut it. Outline your container to the canvas fabric and increase it to 1.5 cm using a tape measure. Cut it. Next, trace the 1.5 cm canvas to the cotton fabric. After this, measure the length of the container and add 3 cm for sewing, then measure the height of the container and add 2 cm for the seam. Next, cut 3 pieces of long cloth from each of the fabrics. 56 x 6 cm cotton, 58 x 8 cm canvas, and 58 x 8 cm thermo-adhesive wadding. After this, put the wadding on top of the canvas fabric and iron it to paste them together, then merge the long piece of wadding and the canvas by ironing also. Now, stack your container and measure the length of the handles, in this case, it was 70 cm. Then, cut 2 pieces of 70 x 12 cm canvas fabric for the handles. Fold each end by 1 cm and press, then fold in half and press again. After this, fold each edge to the center and press. Take it to the sewing machine and sew with a 0.3 cm seam. Next, get the long pieces of fabric that you’ve merged, fold them in half and mark the center, then fold again in half minus 1 cm and mark again at the center, then measure 4.5 cm on two sides and 5 cm down from the 4.5 cm mark. Place the handles on these marks and pin them in place. Mark 2 cm on each handle. Repeat this step on the other half of the fabric. After this, take it to the sewing machine and sew each handle. After sewing, pin the handles on the opposite side and place a cotton fabric of the same size and pin it in place. Mark 13 cm for the hole, then sew it with a 1 cm seam on the bottom edge.
[social_warfare]
Step 2
After sewing, open it up, fold it in half, then sew the side with a 1 cm seam. Now, get the circular fabrics that you’ve traced earlier and sew them at the bottom and top of the food carrier with a 1 cm seam. Leave a gap for turning it. After sewing, turn it right side out, then align the fabrics and stitch it. The bottom part is now finished. Now, measure the second container and just add 2 cm. Repeat the process on top, just tweaking the measurements for the second container. In this case, the measurement was 48 x 5 cm cotton fabric, 50 x 7 cm wadding, and 50 x 7 cm canvas. Iron the wadding to the canvas to merge them, then measure a 15 cm length plus 1 cm on the handles of the bottom carrier. Cut 2 pieces of canvas with 17 x 10 cm measurements. Fold the ends by 1 cm and press, then fold in half and press, and finally, fold each side to the center and press again. Sew each with a 0.3 cm seam. Now, fold the pressed wadding and canvas earlier, fold it in half again minus 1 cm and mark the center. Place the strips on each half of the canvas, then sew them. Next, place a cotton fabric on top, sew it on one side, then open it up. Fold it in half, wrong side up, and sew on the side with a 1 cm seam. Now, sew the circular fabrics on each opening, leaving a gap, to turn it inside out later. After sewing, align the fabrics and stitch. Repeat this step to the third container. Now, after you’ve finished all the parts, stack the containers, then put the handles through the strips and your food carrier is now ready.
DIY Food Carrier For Work Or Travel


