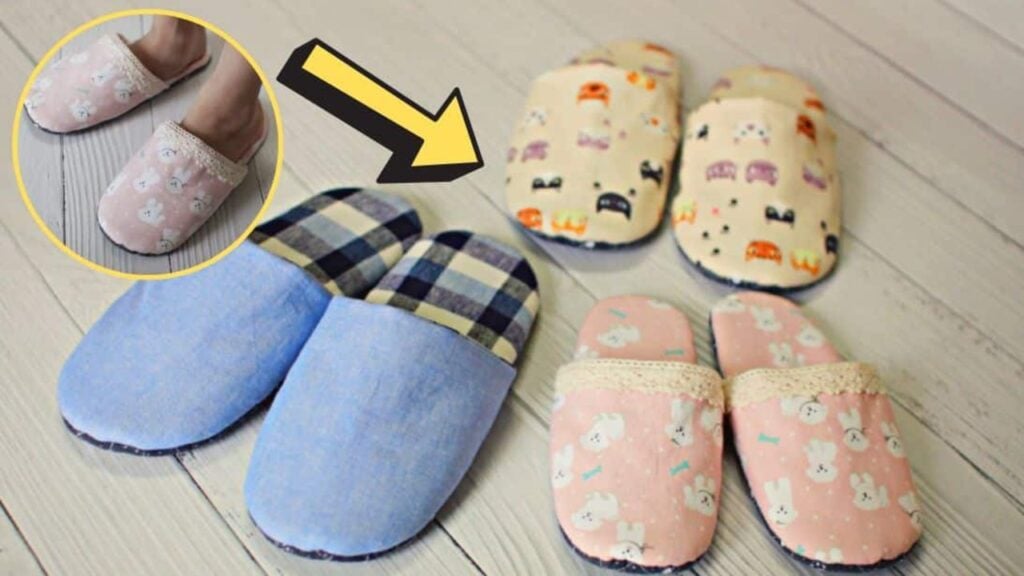
If you love sewing and have a lot of fabric to use, then you might as well try this sewing project idea by made by JOJO on YouTube. What I love about this project aside from its simplicity, is the fact that it is much better than what you can buy from the store because it’s cheaper and comfier to use.
Materials:
- Quilted batting fabric
- Quilted non-slip fabric
- Linen, for the outer fabric of the sole
- Cotton, for the outer fabric of the toe cover
- Linen, for the lining fabric of the toe cover
- Fabric pins or clips
- Marking pen
- Scissors
- Needle and thread
- Sewing machine
- Pattern (Click here to download the free pattern)
Directions:
Step 1
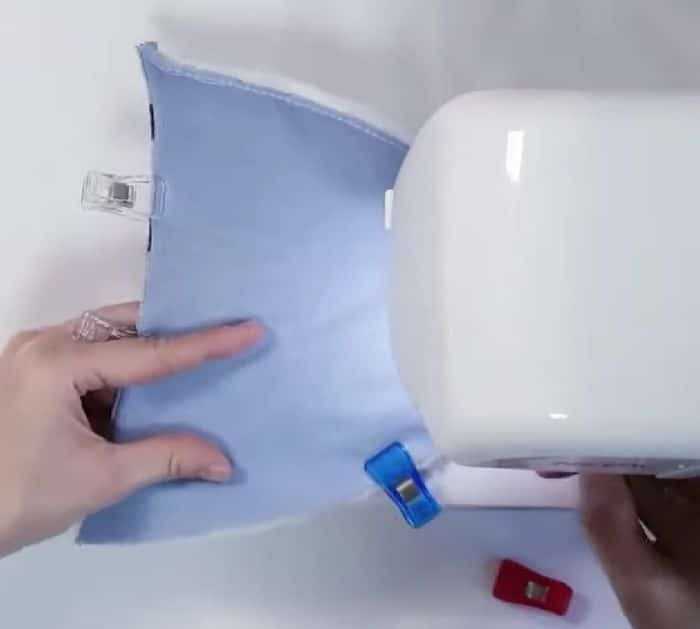
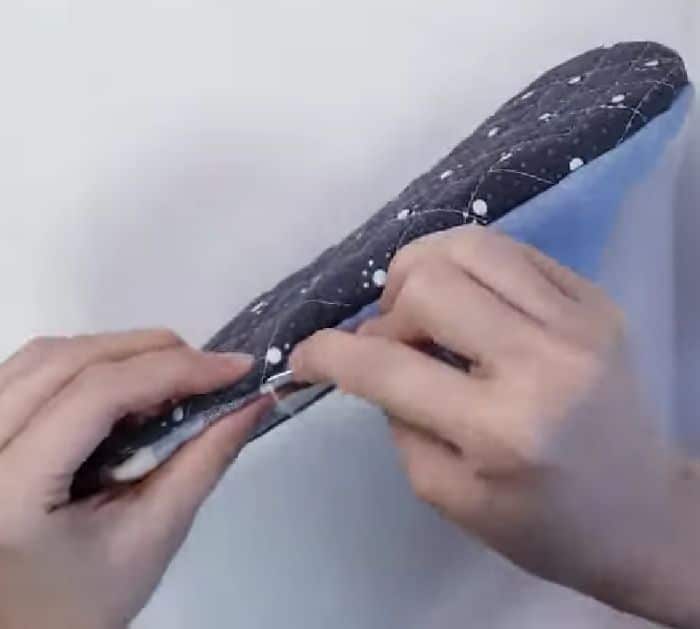
The first thing that you have to do is to print out the pattern, then cut out the size that you wanted to use, and add about 3/8″ of seam allowance around it. For the sole of the slippers, you need to prepare 1 linen (outer), 2 quilted batting (middle), and 1 quilted non-slip fabric. Next, prepare 1 cotton (outer), linen (lining), and 1 quilted batting for the toe cover or the vamp. Working on the vamp or toe cover first, lay them on top of each other with the batting at the bottom, then the front on top of it followed by the lining, make sure that their right sides are facing, and clip or pin them together in place. Sew them together at the straight bottom with a 3/8″ seam allowance, then trim it as close to the stitching as possible, then trim the curve with a ¼” seam allowance. Turn the inner fabric over to the batting so that the right sides are out and the batting is sandwiched between the two fabrics. Press the seam at the bottom nicely using your fingers, then clip them around, sew the curve with a ¼”seam allowance, and trim.
[social_warfare]
Step 2
Now for the sole, lay 2 quilted batting at the bottom, then place the outer fabric on top with its right side facing down, and clip or pin in place. Sew along the outer edge with a ¼” seam allowance, then trim the excess batting off, and fold in half lengthwise to find and mark the midpoint. Get the vamp or toe piece, fold it in half, then find the midpoint, and mark. Match the midpoint or the sole and the vamp, then clip or pin in place, and match the edges of the rest of the pieces making sure that their right sides are facing. Sew them together with a ¼” seam allowance, then fold the fabric of the toe or vamp down and flat, and place the quilted non-slip fabric on top lining up the edges nicely with its right side facing down. Sew it around with a 3/8″ seam allowance, then leave a 4″ gap, and trim the excess. Turn the slippers right side out through the allotted gap, then hand sews the opening to close it, and you’re done!
*All image credit belongs to made by JOJO via YouTube. Follow and subscribe to her channel for more!
3 Sizes DIY Fabric Slippers Sewing Tutorial


