How To Transfer A Photo to Wood

Advertisement
How To Transfer A Photo to Wood | DIY Joy Projects and Crafts Ideas
Advertisement
Advertisement

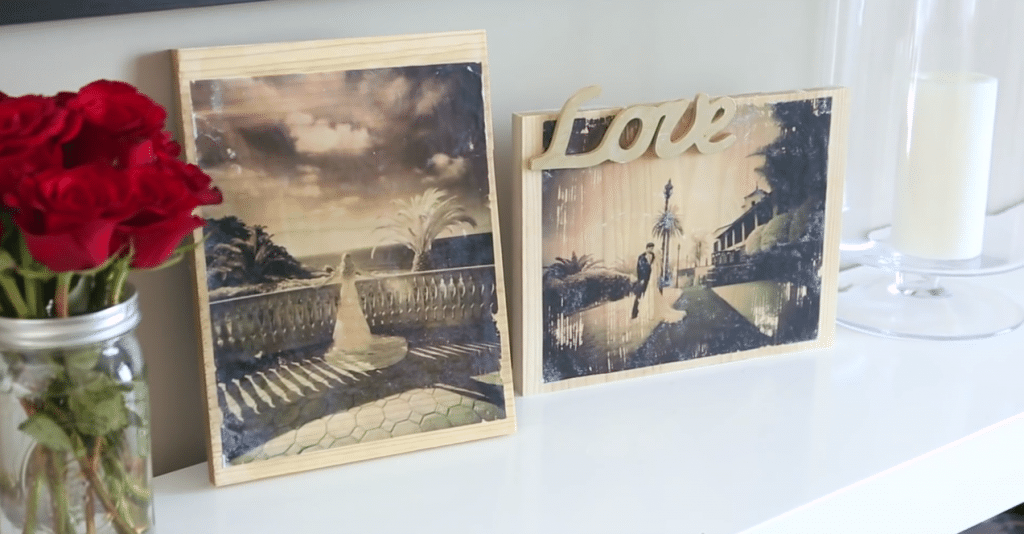
A DIY photo transfer to wood is a rustic alternative to the everyday picture frame. This mod podge craft makes great DIY gifts for men and women alike and can be made from mostly repurposed materials. Display this DIY home decor project on your mantel or attach a wire to the back of it and add it to your wall art.

–DIY TUTORIAL VIDEO BELOW —

In 5 easy steps you can transfer your old traditional family photos and memories into a unique keepsake! This cute way to display your pictures will surely become a new conversation piece for you and your friends.

Advertisement

Photo Transfer to Wood

DIY Photo Transfer to Wood

DIY Craft Ideas for Teens | Upcycling Ideas for the Home | Mod Podge Photo Transfer | DIY Projects and Crafts from DIY JOY

What You Need:

  • Any photo printed from a laser printer. Make sure your photo is printed onto regular computer paper.
  • Smooth piece of wood
  • Gel medium with a gloss finish
  • Paintbrush
  • Mod Podge finish
  • Embellishments
  • Ruler or any Straightedge

//

DIY Craft Ideas for Teens | Upcycling Ideas for the Home | Mod Podge Photo Transfer | DIY Projects and Crafts from DIY JOY at http://diyjoy.com/diy-crafts-photo-transfer-to-wood

Step 1

Paint a thick layer of the gel medium onto the front of your picture. Make sure to coat the paper completely.

DIY Craft Ideas for Teens | Upcycling Ideas for the Home | Mod Podge Photo Transfer | DIY Projects and Crafts from DIY JOY at http://diyjoy.com/diy-crafts-photo-transfer-to-wood

Step 2

Gently lay the photo face down onto the center of the wood and use a ruler or straightedge to gently smooth out any wrinkles in the paper.

It’s easier to start with the ruler at the center and work your way toward the edges of the paper.

DIY Craft Ideas for Teens | Upcycling Ideas for the Home | Mod Podge Photo Transfer | DIY Projects and Crafts from DIY JOY at http://diyjoy.com/diy-crafts-photo-transfer-to-wood

Step 3

Let the picture dry completely overnight so the wood can soak in the colors from the photo. Then, use a wet rag to gently scrape off the paper using round motions until it as smooth as possible.

You can rinse the wood under a faucet to remove any last little bits of paper.

DIY Craft Ideas for Teens | Upcycling Ideas for the Home | Mod Podge Photo Transfer | DIY Projects and Crafts from DIY JOY at http://diyjoy.com/diy-crafts-photo-transfer-to-wood

Step 4

Once you’ve smoothed the surface completely, paint a single layer of the Mod Podge finish over you image and let it dry for a couple hours.

DIY Craft Ideas for Teens | Upcycling Ideas for the Home | Mod Podge Photo Transfer | DIY Projects and Crafts from DIY JOY at http://diyjoy.com/diy-crafts-photo-transfer-to-wood

Step 5

If you choose to, you can now glue any crafty embellishments to your finished product.

DIY Craft Ideas for Teens | Upcycling Ideas for the Home | Mod Podge Photo Transfer | DIY Projects and Crafts from DIY JOY at http://diyjoy.com/diy-crafts-photo-transfer-to-wood

Now you’ve made your own unique frame to show off all of your pictures!

DIY Craft Ideas for Teens | Upcycling Ideas for the Home | Mod Podge Photo Transfer | DIY Projects and Crafts from DIY JOY at http://diyjoy.com/diy-crafts-photo-transfer-to-wood

DIY Craft Ideas for Teens | Upcycling Ideas for the Home | Mod Podge Photo Transfer | DIY Projects and Crafts from DIY JOY at http://diyjoy.com/diy-crafts-photo-transfer-to-wood

How to Transfer Photos to Wood | Easy Picture Framing Ideas for DIY Rustic Home Decor | DIY JOY Crafts and Gifts


Don’t Miss Out! Sign up for the Latest Updates