
Bucket hats are all the rave this season, especially on TikTok. I found this amazing video by Rosery Apparel on how to sew an oversized bucket hat. These cute and trendy hats are perfect for the beach, a picnic, lake day, or even just doing some gardening work this summer. I will be wearing mine basically every day this summer, and can’t wait to make some more. The tutorial even shows you how to add a chin strap to the has so they won’t blow off in the wind, and the wide brim is perfect for blocking out the sun.
Materials Needed For This DIY Project:
- Material Of Your Choice (you could even use an old shirt)
- Scissors
- Sewing Machine
Directions:
Step One
Cut your fabric into the measurements specified in the video description down below.
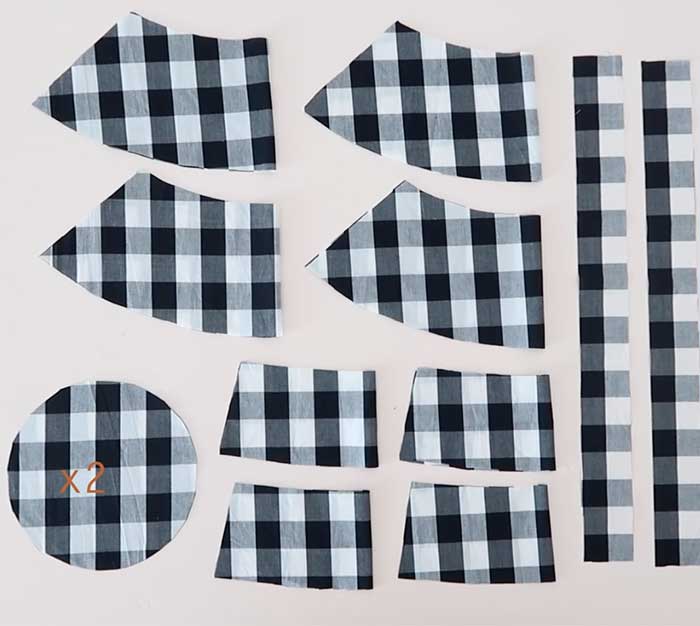
Take the two band pieces of the hat and sew them together. Then take the crown (top) of the hat and pin it to the band. If you want a chin strap for your bucket hat, create it during this step.
Step Two
Pin the brim of the hat to the base of the band of the hat.
Step Three
Repeat steps one and two. You need two hat bases for this project. This will ensure the hat isn’t too floppy.
Step Four
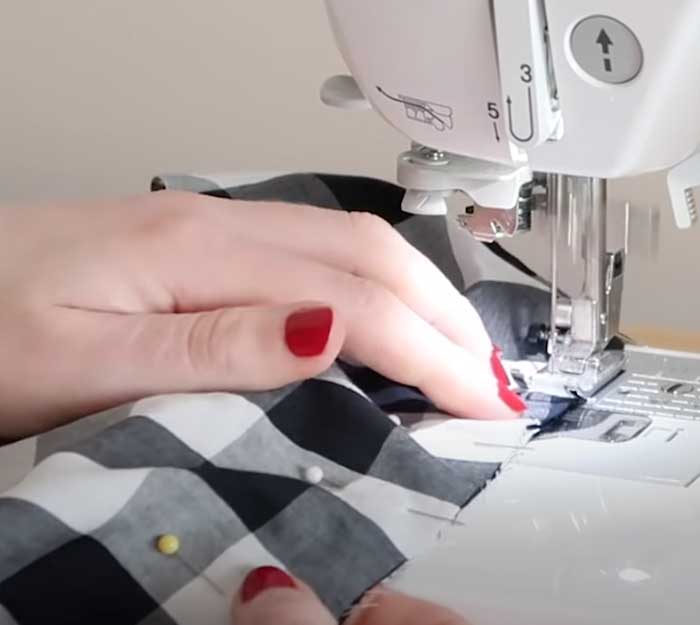
Pin and then sew the two bucket hat pieces together connecting the brims of the hats together. Stitch around the brim multiple times to give it more structure and the signature bucket hat look. Line the presser foot up with the last row of stitches to make sure the stitches align evenly. That’s it! This hat is so simple to make and looks super trendy.
DIY Oversized Bucket