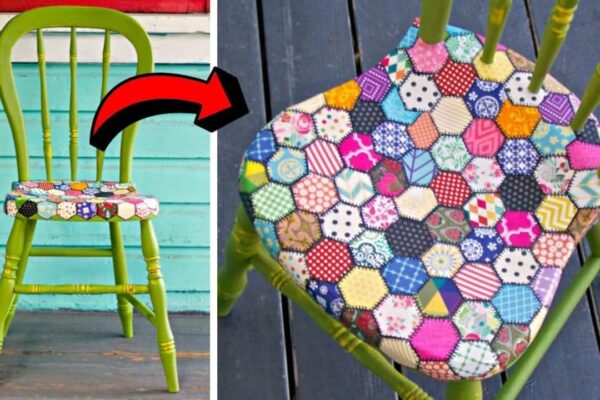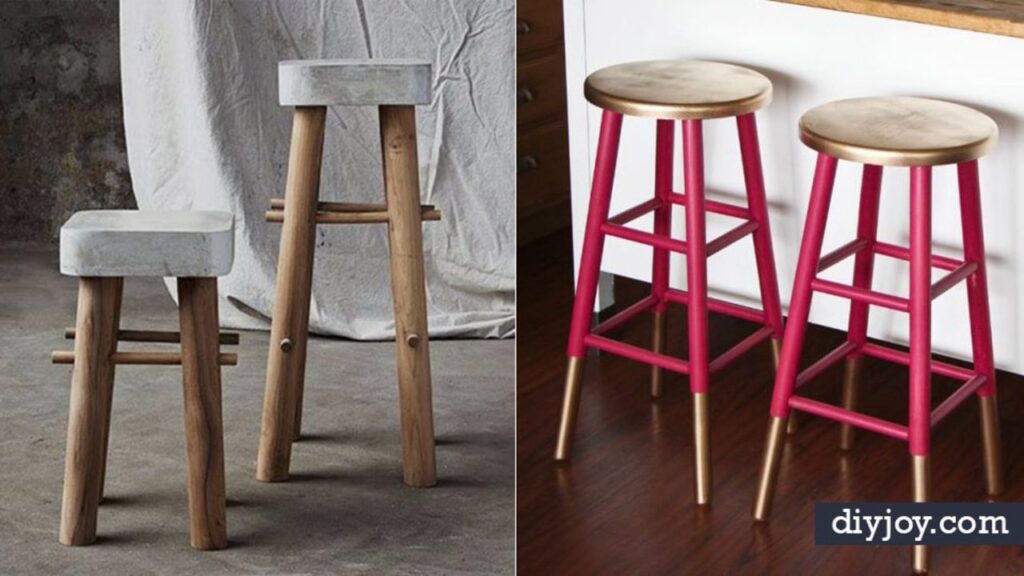
Counter seating is the one piece of furniture people put off buying, because a decent bar stool costs more than it has any right to and you usually need three of them. So build them. These 19 DIY barstools split into two camps: real builds, where three 2x4s and a box of pocket screws turn into a stool that costs about $15, and makeovers, where a $4 yard sale stool gets a paper doily stencil, a gold dipped leg or a whole new seat and stops looking like a $4 yard sale stool. There are pipe fitting stools that need no saw at all, adjustable ones that wind up and down a length of threaded rod, and a cedar pair built to live outside. Every tutorial is linked to the maker who worked it out.
1. DIY Industrial Bar Stool
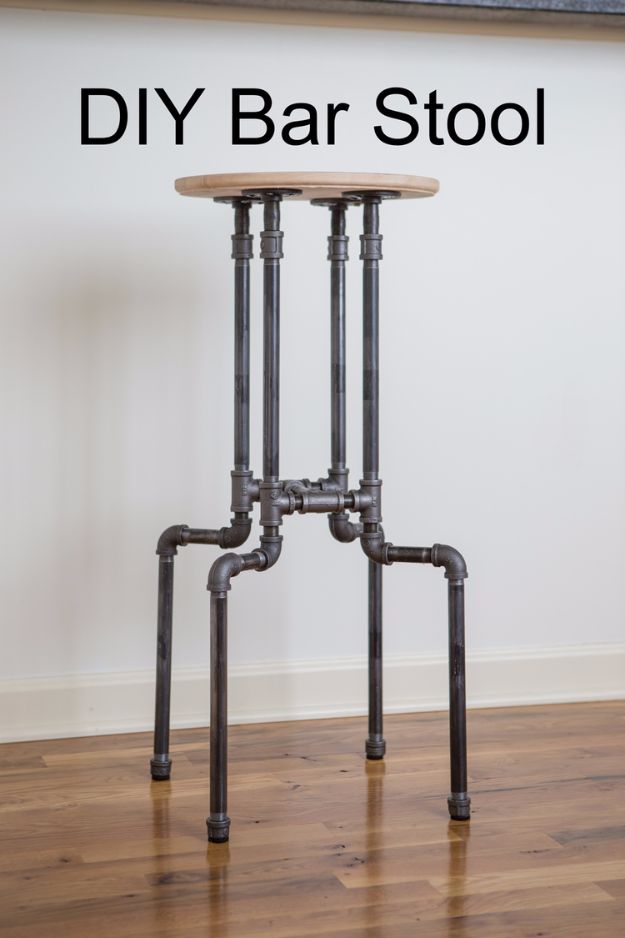
Pipe stools look like a welding job and are really a screw together puzzle. One stool takes four floor flanges, eight 12 inch lengths of half inch pipe, four 3 inch pieces, five 4 inch pieces, six tees, eight 90 degree elbows, eight close nipples and four caps, with a round wooden seat glued on at the end. Vice grips give you the leverage to snug the last joints. Those 4 inch pieces across the bottom set the height at roughly 21 to 22 inches, so buy longer ones if you want counter height. Budget about $55 for the short version.
Get the full tutorial at Yoga By Candace.
2. Half Lap Bar Stools
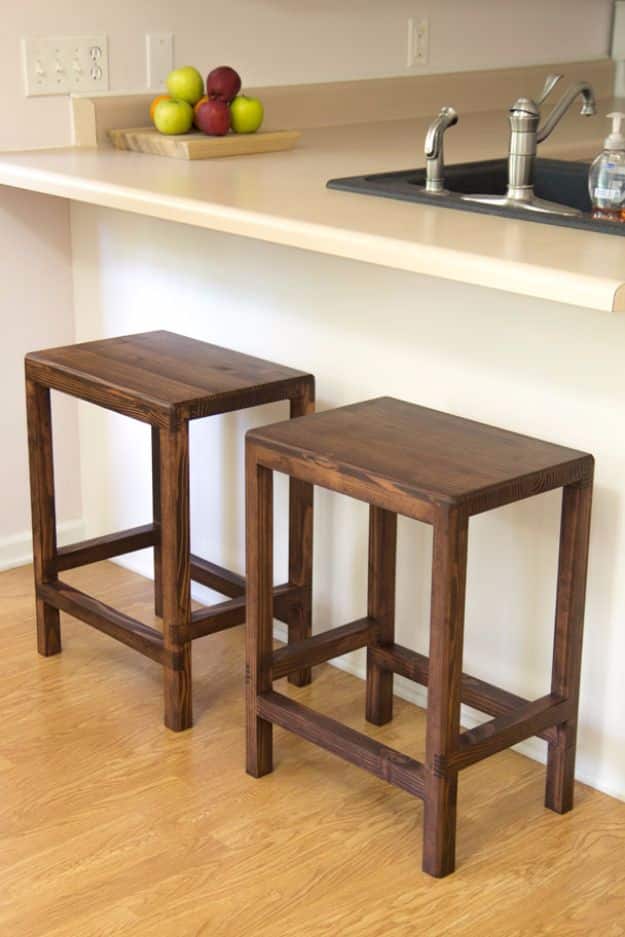
This is the woodworking one. Roughly three 8 foot 2x4s per stool, ripped down to 1 inch strips for the glued up seat and 1 1/2 inch squares for the legs, then every frame piece gets a half lap cut on a dado stack raised to exactly half the stock thickness. Finished height is 24 inches, material cost about $21.50 a stool. A table saw with a crosscut sled does the accurate work, a chamfer bit softens the edges, and the maker finished his in Rustoleum Carrington stain under several coats of satin lacquer.
Get the full tutorial at Jay's Custom Creations.
3. Gold Dipped Bar Stools
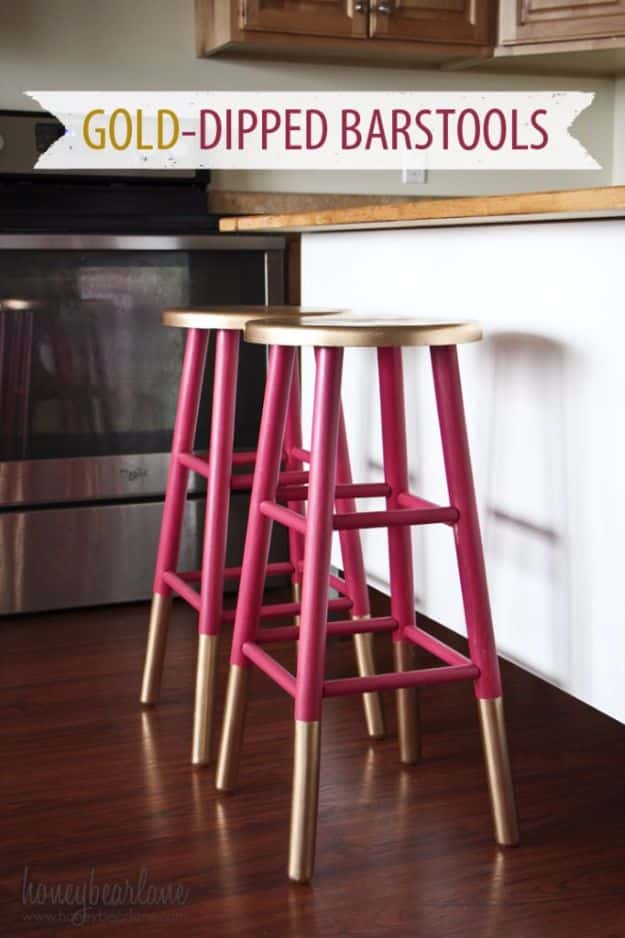
These started life as 1990s bar stools inherited from the in laws, which tells you how far a can of spray paint can carry a piece. The bases go raspberry pink first and dry fully, then the legs get wrapped in craft paper while the seats take a few light coats of Krylon gold. The clever part is the shield for the dipped legs: cut a 10 inch square of cardboard, trace and cut a leg sized hole in the middle, then slide it down the leg so it masks everything below your tape line. Seal with poly or wax.
Get the full tutorial at Honeybear Lane.
4. DIY Modern Stool
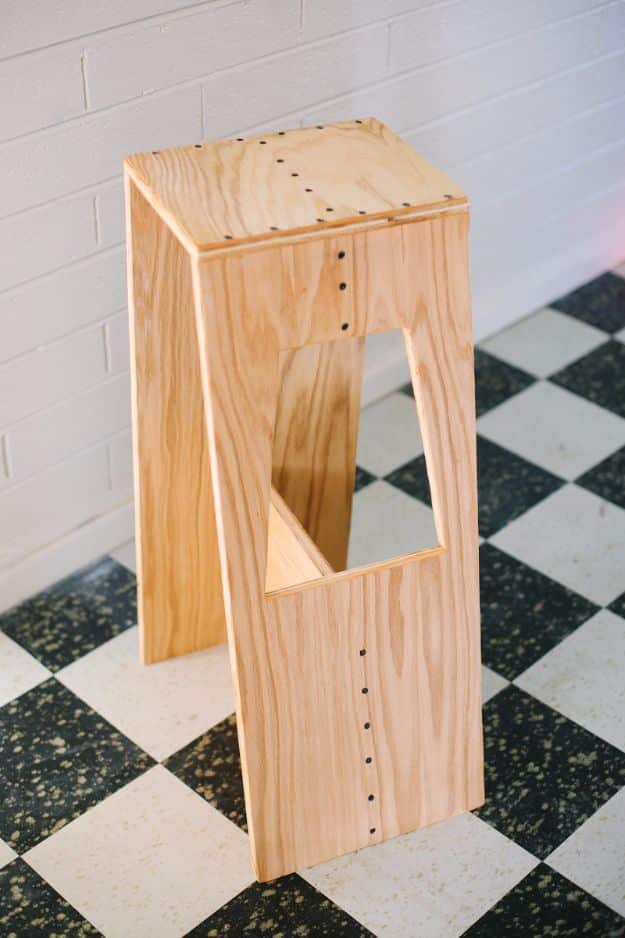
Four flat panels of pale plywood, a row of screws down each visible edge and a cut out handle through the side: that is the entire stool. It reads as a designer piece because there is no frame, no apron and no turned leg, just the panels themselves doing the structural work, and the exposed screw line becomes the only decoration. The cut out doubles as a carrying handle, which matters more than it sounds when a stool lives in a kitchen and gets moved five times a day. Left raw, the plywood edge is the whole look.
Get the full tutorial at A Beautiful Mess.
5. Rustic Industrial Bar Stools
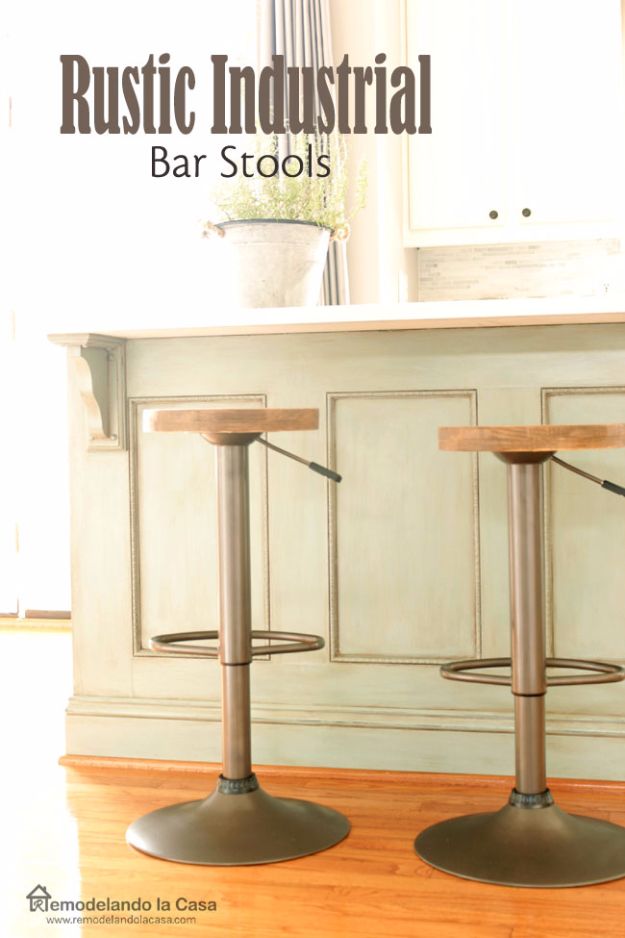
The starting point was a pair of Winsome air lift stools off Amazon, under $70 for the two, with chrome bases and plastic seats. New tops were cut from 1×5 and 1×6 pine and poplar scraps joined with pocket holes, glue and 1 1/4 inch screws, using a 12 inch plywood offcut as the circle template. Two coats of Thompson’s WaterSeal stain in mahogany went on the wood. The chrome got sanded and hit with Rust-Oleum Hammered spray in brown, with black on the connecting pieces, which is what kills the showroom shine.
Get the full tutorial at Remodelando la Casa.
6. How to Make a $7 Stool Using Only One 2×4
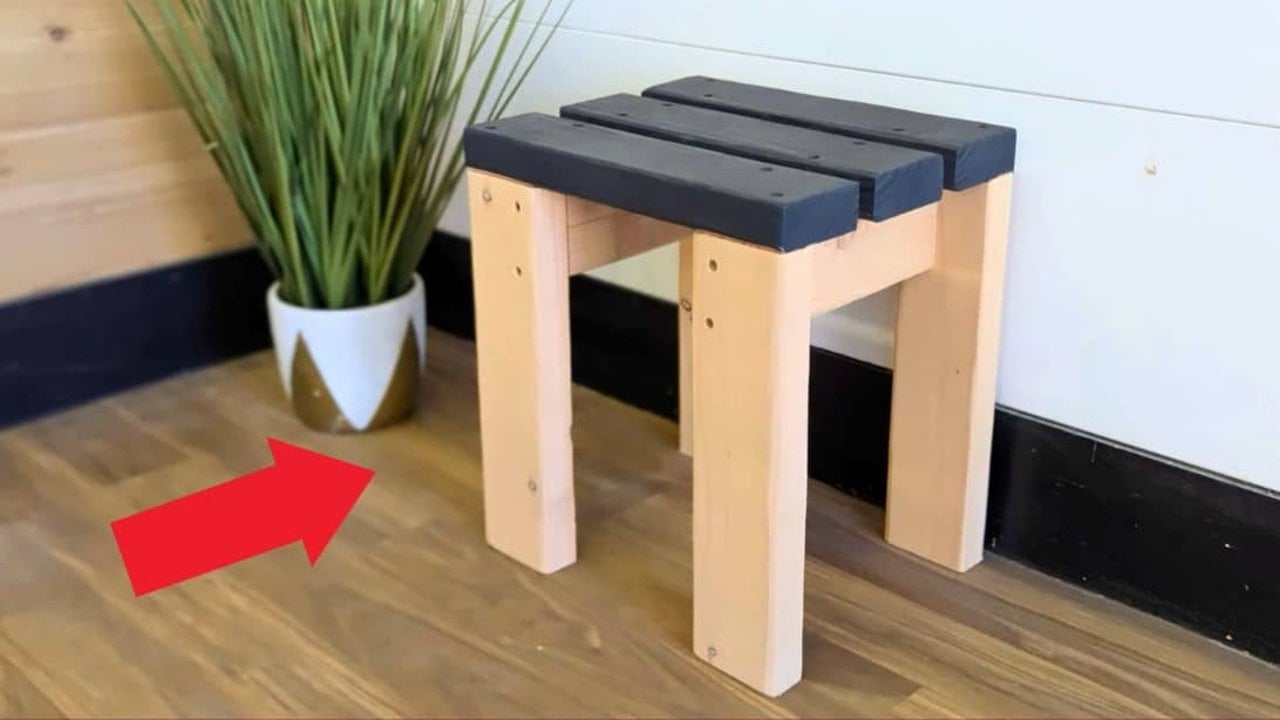
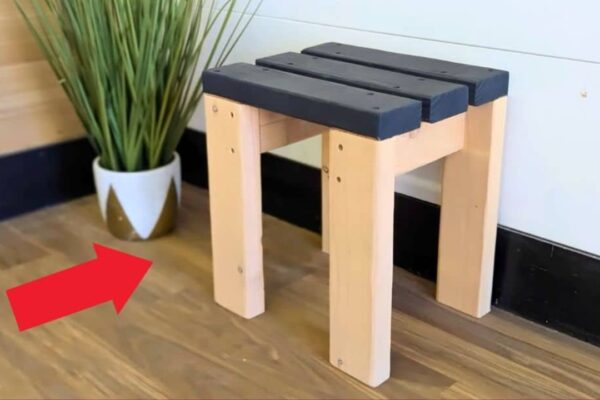
One 2×4, ten feet of it, and seven dollars. The board breaks down into nine pieces: four at 14 1/2 inches, three at 14 inches and two at 9 inches, and the finished stool measures 16 inches high by 14 wide by 12 deep. Two of the long pieces plus a 9 inch block make each end frame, predrilled and screwed, then the two frames stand a foot apart with the three 14 inch pieces laid across the top. That is the whole build. A sanding block and 2 1/2 inch construction screws finish it.
Get the full tutorial at DIY Joy.
7. Painted Grain Sack Stripe Bar Stool
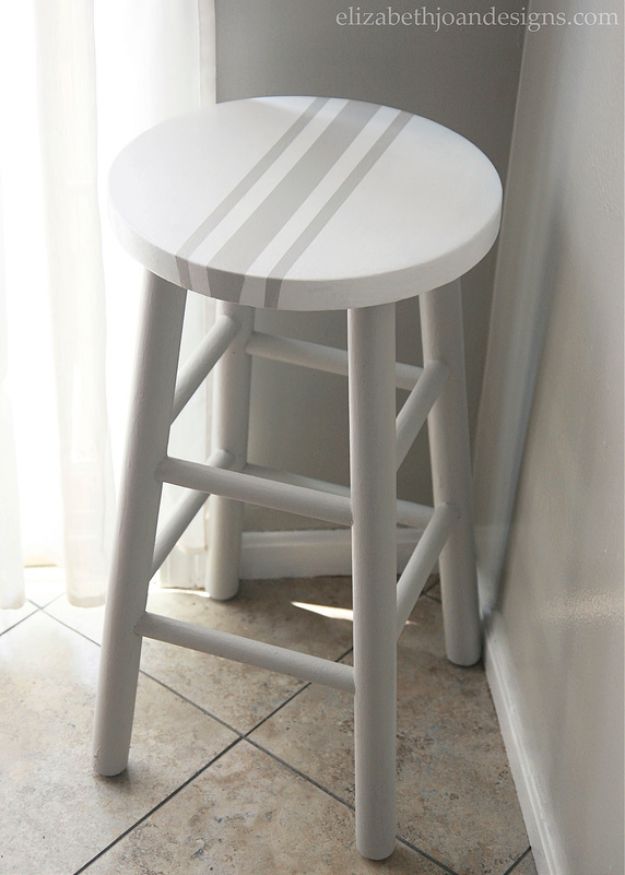
The stool came off a curb. Legs, rungs and the stripes are Benjamin Moore Stonington Gray, the seat is a couple of coats of Super White, and the stripes are masked with Frog Tape: center stripe first, let it dry, then space and tape the outer pair off it. The tip that makes it look professional is running a damp paper towel along the tape edge before you paint, which seals the edge, and pulling the tape while the paint is still wet so it does not lift a ridge. No sealer, no sanding drama.
Get the full tutorial at Elizabeth Joan Designs.
8. Industrial Adjustable Height Bolt Bar Stool
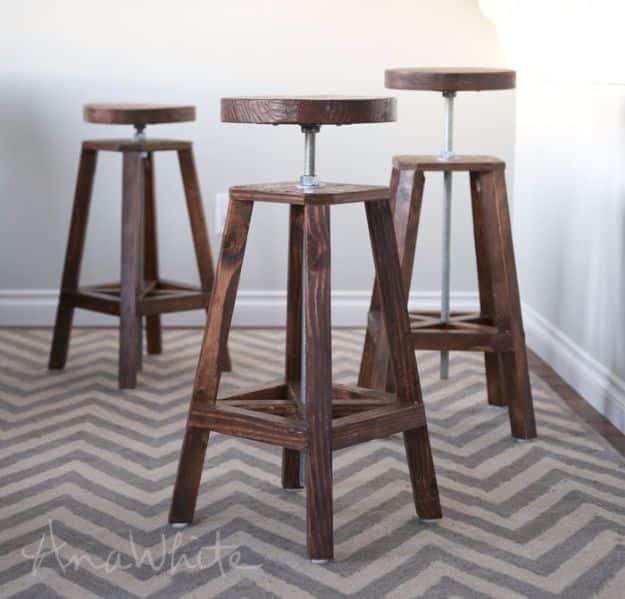
This one is genuinely advanced and the plan says so. The shopping list is two 8 foot 2x2s, 3/4 inch plywood scraps for the top plate, a 12 inch round or a 2×12 for the seat, 18 inches of 5/8 inch all thread and four 5/8 nuts and washers. The seat rides up and down that threaded rod. Because a normal floor flange was not trusted at this height, the makers welded 5/8 nuts to 1/8 inch steel plates instead, and the plan suggests handing a few nuts to a welding shop if you do not own a welder. Legs are cut at 10 degrees.
Get the full tutorial at Ana White.
9. DIY Bronze Dipped Bar Stool
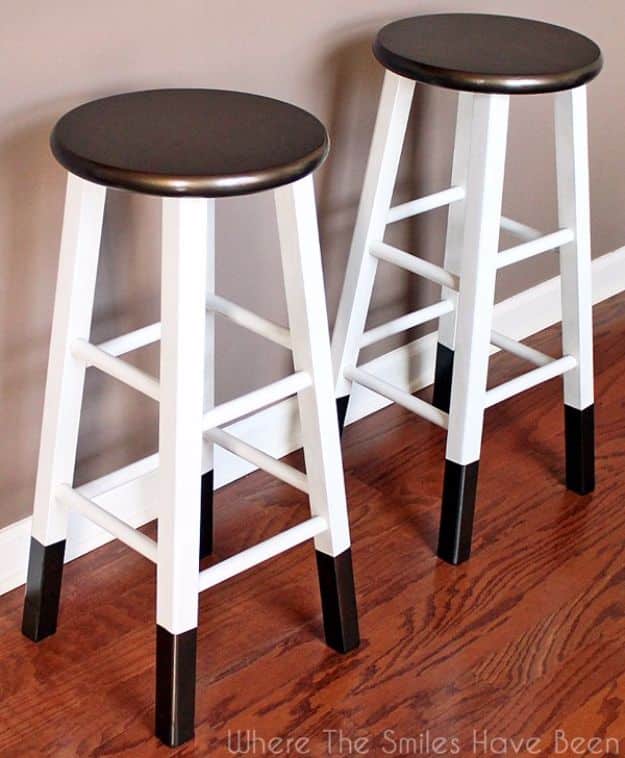
White painted stools with round seats in a dark metallic bronze, and the bottom few inches of every leg dipped in the same finish. Repeating one metallic in two places is what makes a pair like this read as designed rather than simply painted: the seat and the feet answer each other and the white frame sits between them. The line is the only thing that can give it away, so tape all four legs at a measured height up from the floor rather than down from a rung, and pull the tape while the paint is still soft.
Get the full tutorial at Where The Smiles Have Been.
10. Bar Stool DIY
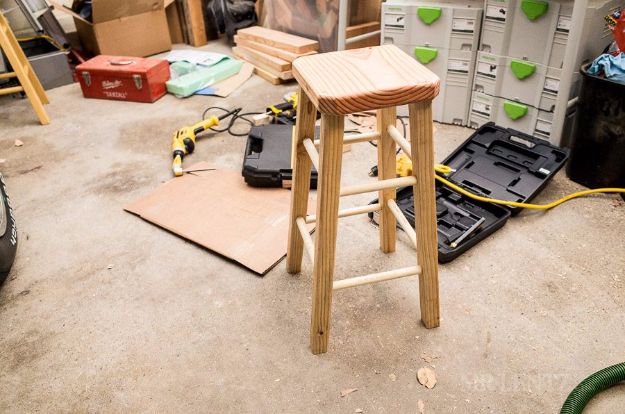
A shop floor, a pile of offcuts and a stool that is mostly straight cuts. What the photo shows is the honest version of this project: a saw, a cordless drill, a sheet of cardboard on the concrete and a simple four leg frame with a shaped seat sitting on top. Pine like this is soft enough to shape a saddle into the seat with a sander, which is the one detail that separates a stool you want to sit on from a plank on legs. Predrill every hole; softwood at the end of a leg splits easily.
Get the full tutorial at Mr Lentz.
11. DIY Bar Stools Using Only 2×4
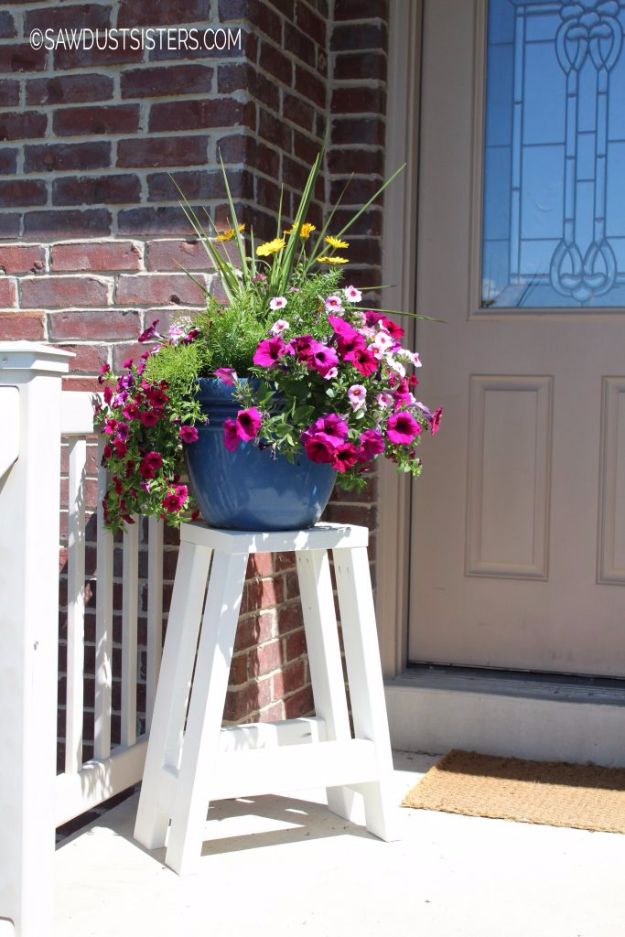
Painted white and living on a front porch holding a pot of petunias, which is a fair advert for how sturdy this build is. The shape is the giveaway: four splayed legs braced with a full skirt just under a square top, all cut from 2×4 stock, which means one trip to the lumber rack and no sheet goods at all. Splayed legs are worth the extra angled cuts because they widen the footprint without widening the seat, so the stool stops rocking. Prime the end grain before you paint or it will drink the first coat.
Get the full tutorial at Sawdust Sisters.
12. Dollar Store Doily Stenciled Stool
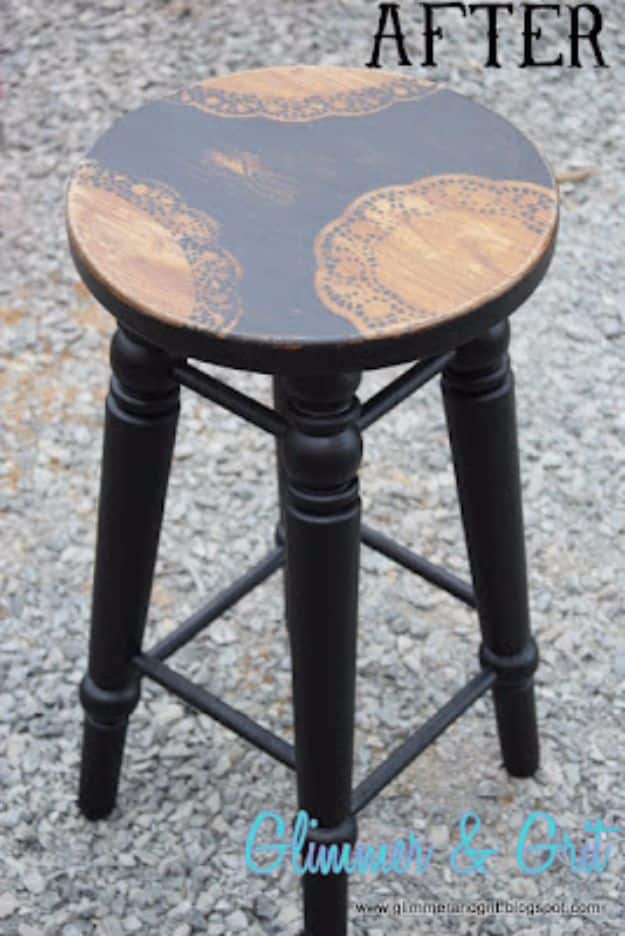
A $4 yard sale stool, three paper doilies from the dollar store, two oval and one round, and a can of flat black spray paint. Lay the doilies on the seat, fold the bottom edge under slightly to crease them so they stay put, hold them down and mist several light coats over the top. Lift each doily straight up while the paint is still wet so you do not smear the lace edge. Then sand the edges and across the top for the worn look, which conveniently hides any spot where the paint crept under.
Get the full tutorial at Glimmer and Grit.
13. Painted Kitchen Stools
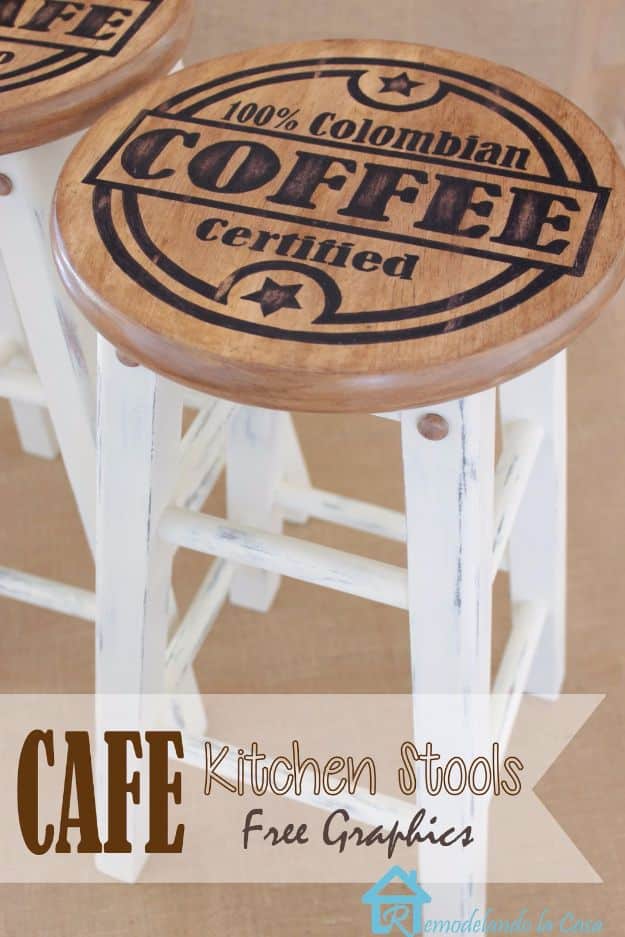
These went through more layers than most makeovers: sanded, spray painted red and blue, then black, then two final coats of chalk paint on the legs so the earlier colors show through the distressing. A wooden skirt made from 1x2s was added with pocket holes, plus decorative wooden screw covers. The coffee stamp graphic on each seat was transferred with graphite paper and filled in by hand with a black Sharpie, no stencil and no transfer medium. Seats and covers got two coats of Varathane stain and poly in Dark Walnut.
Get the full tutorial at Remodelando la Casa.
14. Vintage Industrial Bar Stools
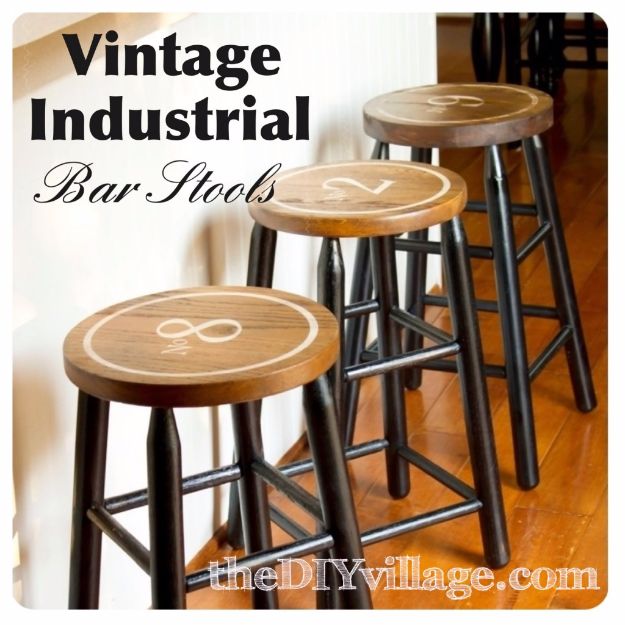
Three secondhand oak stools that turned out to be too short for the kitchen bar, saved by a stencil rather than a saw. Sand the whole stool properly first, because any paint that goes over a missed patch has to come off again. Tape the seats off with paper and paint the bases, then cut the design on a vinyl cutter, apply transfer tape, squeegee the stencil down working out from the middle and peel the transfer tape away slowly. Paint inside it, lift the stencil, and leave it a full day before staining the tops in Minwax Gel Stain Walnut.
Get the full tutorial at The DIY Village.
15. Extra Tall Bar Stools
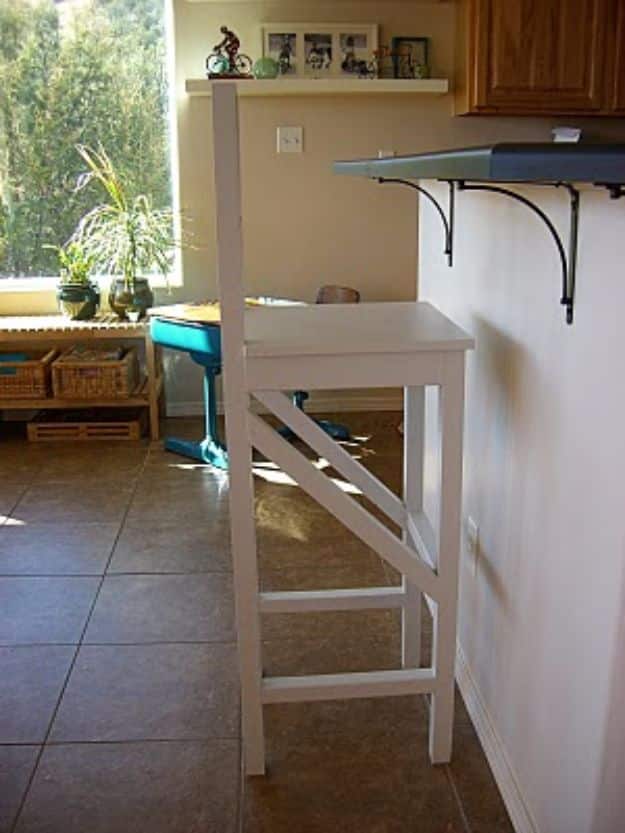
Built for a 45 1/2 inch island, which is why they run 33 inches tall when a standard stool is 30. Three 8 foot 2x2s and one 8 foot 2×3 per stool, a half inch solid wood or plywood seat, 2 1/2 inch screws and glue, and the whole thing came in around $15 including paint. Backs use the 50 inch legs, fronts use the 33 inch ones, and every hole is predrilled and countersunk. The plan rates itself intermediate for one reason only: at this height an out of square frame becomes a wobble you will feel.
Get the full tutorial at Ana White.
16. Easy Wooden Bar Stools
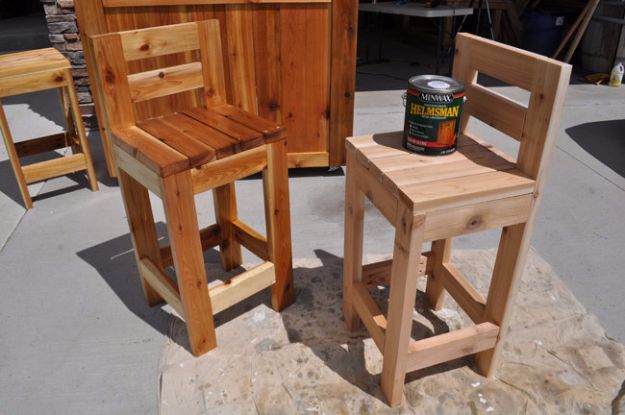
Four cedar 2x4x8s per stool, Kreg screws, exterior glue and a urethane topcoat. Finished size is 18 inches wide, 16 deep and 42 tall, with the seat landing at 30 inches, which is the standard bar height and the number to check before you cut anything. Back legs are 42 inches, front legs 28 1/2, and the pocket holes get drilled at the 1 1/2 inch setting on every board except the legs and seat. Cedar is the reason these can live outside, and Minwax Helmsman Spar Urethane is what keeps them there.
Get the full tutorial at DIY Projects with Pete.
17. Upcycled Bar Stools
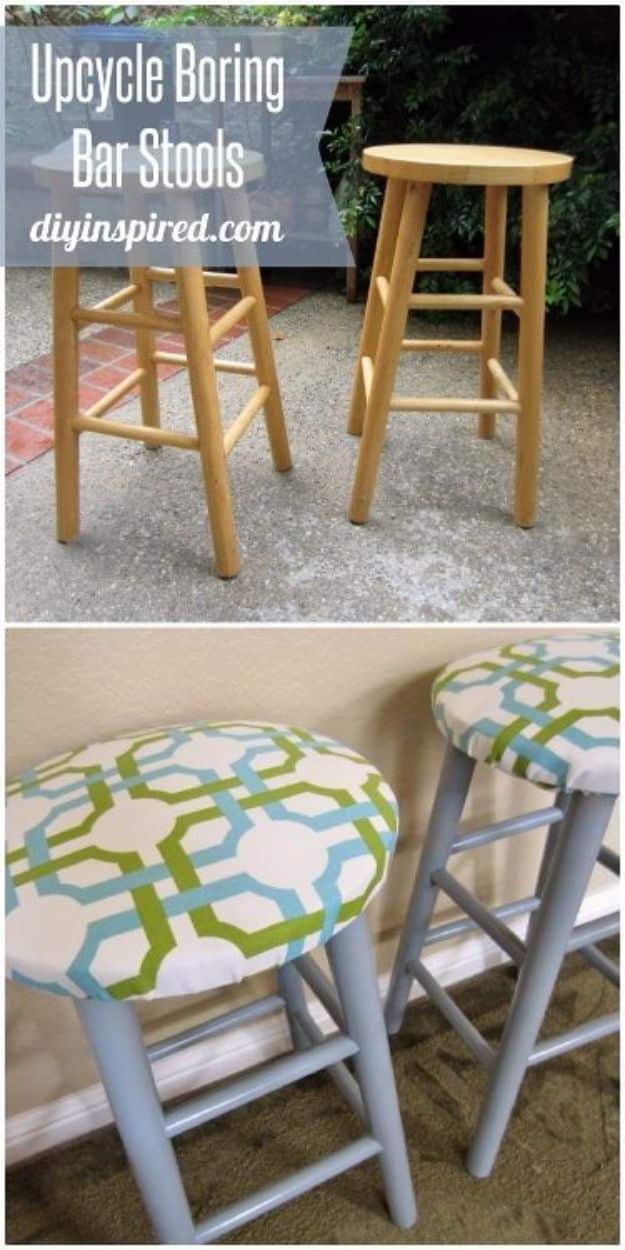
Fifteen year old stools of the sort that turn up at every thrift store, given gray metallic spray on the legs and a new padded top. A magic eraser does the prep, which is faster than sanding on a slick painted metal leg. For the seat, cut your fabric about three inches larger than the top all round, pile on polyester fiberfill, around $2.99 a bag, and staple roughly half an inch in from the edge working all the way around. The maker has redone the same stools three times, which tells you how forgiving the method is.
Get the full tutorial at DIY Inspired.
18. Make Your Own Bar Stools
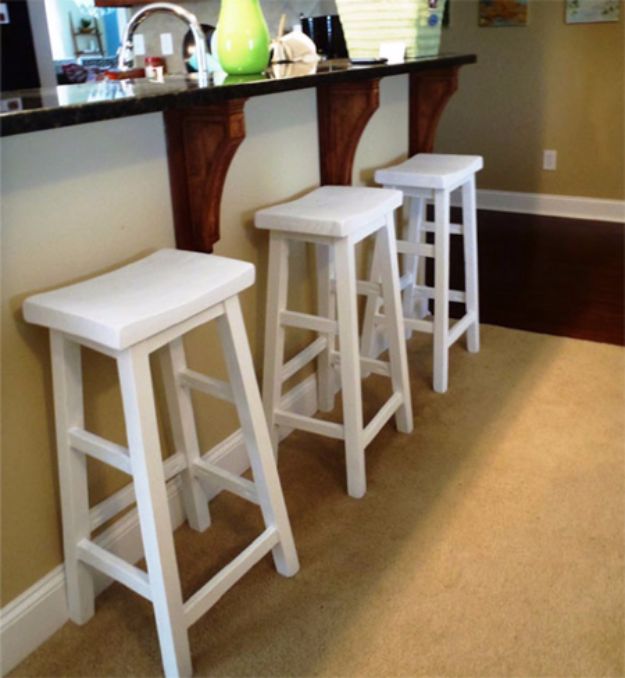
A South African plan in millimeters, so read it carefully: legs are 44 x 44 x 760mm PAR pine, aprons are 20 x 150mm and 20 x 260mm, and the seat is two 270 x 380mm pine boards laminated together. The shaped top is the interesting part. You glue the two boards up, then cut the curve with a circular saw or a Dremel Saw Max in progressively deeper passes and sand the ridges out, starting at 80 grit and working through 120 to 240. Joints are pocket holes, dowels or biscuits, clamped and left overnight. About R120 a stool.
Get the full tutorial at Home Dzine.
19. DIY Industrial Pipe Stools
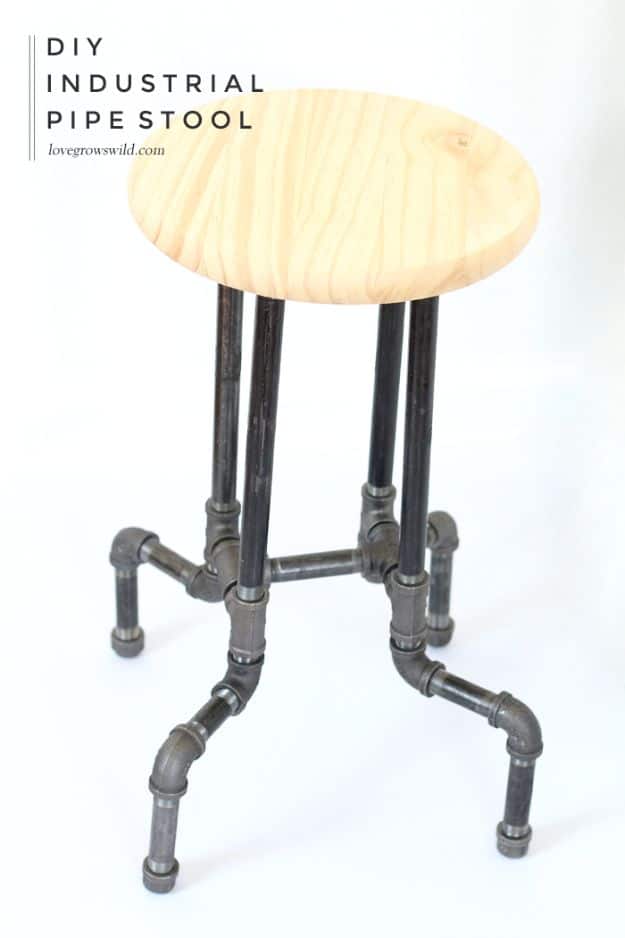
Same family as the pipe stool above but with a published cost and a no tools claim that actually holds. Per stool: a 12 inch round wooden seat, four half inch floor flanges, four 12 inch pipes, four 3 inch, five 4 inch, six tees, eight 90 degree elbows, eight close nipples and four caps. It stands about 21 to 22 inches with a 12 inch base spread, and the legs flare outward for stability. The seat is glued on with Elmer’s ProBond Advanced and clamped under paint cans for 12 hours, no screws. Around $54 a stool.
Get the full tutorial at Love Grows Wild.