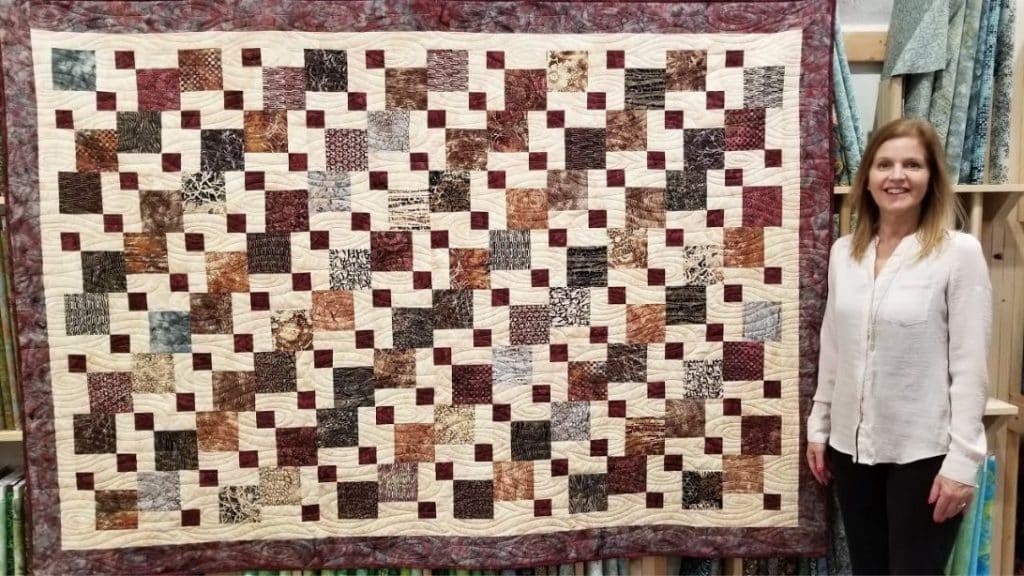
I am just beginning my quilting journey and found this disappearing nine-patch quilt tutorial by Jordan Fabrics. I instantly fell in love with it – the design is very eye-catching! I knew it was going to be my first big project, so I immediately bought the fabrics I needed to start. It took me a long time to make the first blocks, but when I got used to the process, everything became easier and faster. I definitely enjoyed this beginner-friendly design – it was so much fun to sew. If you want to make this quilt, read on or watch the video below to find the full instructions. Happy quilting!
Materials:
- 96 pieces of 5″ charm squares
- 24 pieces of 5″ squares – dark accent
- 96 pieces of 5″ squares – light accent
- 7 pieces of 2 1/2″ width of the fabric for inner border
- 5/8 yard for binding
- 5 1/2 yards for backing
[social_warfare buttons=”facebook,pinterest,twitter,whatsapp”]
Instructions:
Step 1:
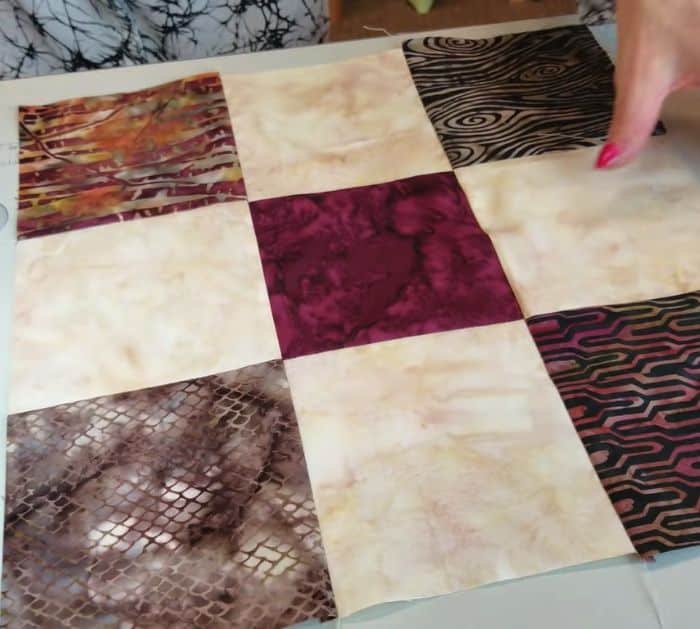
Take 4 light squares, 4 dark squares, and 1 charm square. Arrange them into a nine-patch block: the 4 dark squares on the corners, the light squares in between, and the accent print in the center. Sew the squares with a 1/4″ seam allowance, then iron the seam allowances flat. Repeat until you have a total of 24 blocks.
Step 2:
Get one of the nine patch blocks and cut it in the center horizontally and vertically using a ruler and rotary cutter. Now you have 4 smaller blocks.
Step 3:
Arrange the blocks to match the pattern below and sew them back together.

Step 4:
Do the same with the remaining blocks. Arrange the 24 blocks into a 4 x 6 block quilt top as shown on the finished quilt. Sew the blocks into rows first then sew the rows together.
Step 5:
Sew the inner border onto all four sides of the quilt, then do the same for the outer border. Quilt it however you like and bind it.
Disappearing Nine-Patch Quilt


