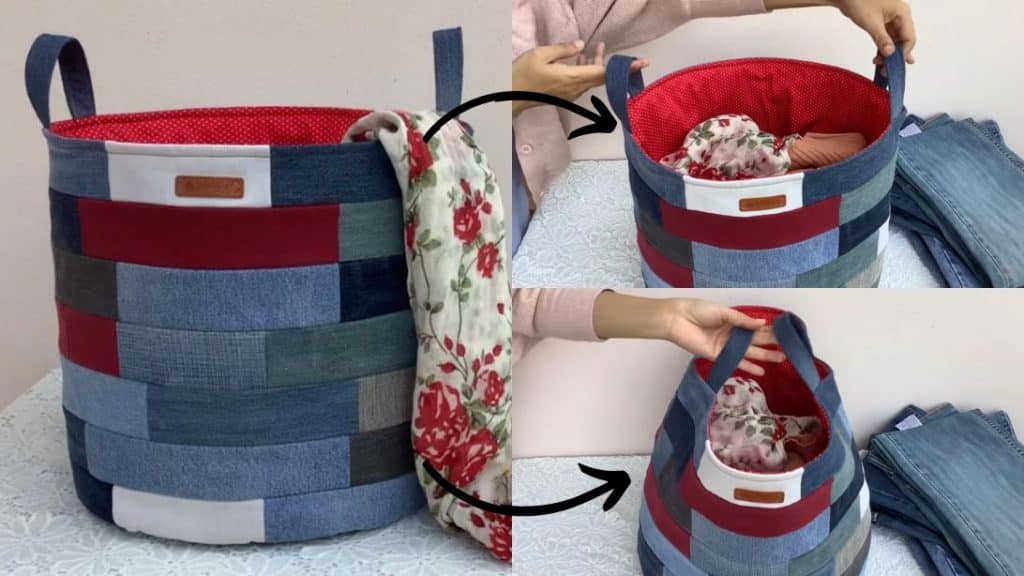
I love anything denim, may it be bags, hats, or organizers. Once I saw this project by wandee easy sewing on Youtube, I knew I had to make it! It’s so beautiful and perfect for the old denim jeans that I have. Read on or watch the video below for the denim laundry basket tutorial.
Materials:
- old scrap of jeans
- 2 pieces each – 21 3/4″ by 13 1/2″:
- fusible interfacing
- batting 140 gm
- 2 pieces each – 21 3/4″ by 13″:
- denim fabric from old jeans
- 1 piece each – 13″ diameter:
- fabric
- fusible interfacing
- batting 220 gm
- 2 pieces each – 3 1/2″ by 8″:
- denim fabric from old jeans
- fusible interfacing
- 2 labels
[social_warfare buttons=”facebook,pinterest,twitter,whatsapp”]
Instructions:
Step 1:
Make a 19″ square pattern from a piece of paper. Fold it in half twice. Measure 6 1/2″ from the folded corner going to the side. Mark it, then change the angle of the ruler and mark it again. Keep changing the angle and marking it until you form a quarter circle. Connect the dots, then cut the shape.
Step 2:
Measure the half circle. It should be 20 3/4″.
Step 3:
Make the pattern for the basket. Cut a rectangle on a piece of paper measuring 13 1/2″ by 21 3/4″.
Step 4:
Cut a 2 1/2″ wide strip from a piece of paper. Use it to make strips of denim in different lengths.
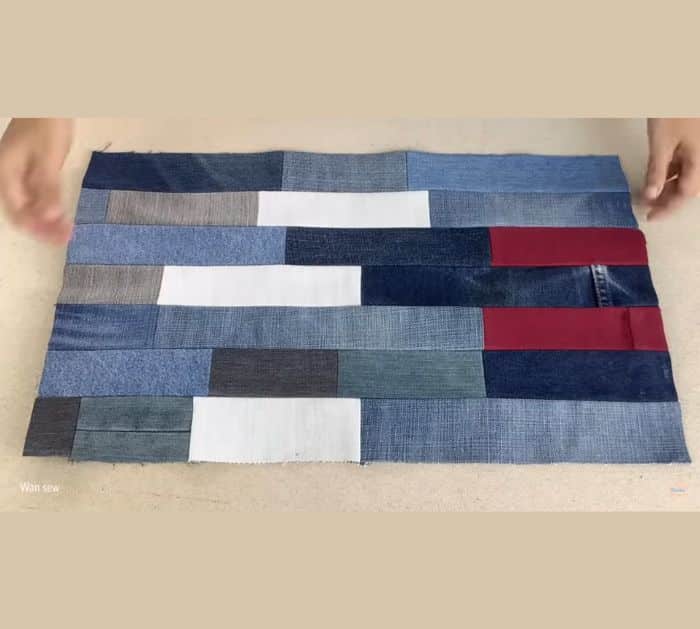
Step 5:
Lay the strips to make a big rectangle – you should have 7 rows. Sew them in rows, then press the seams open. Next, sew the rows together with a 1/4″ seam allowance. Press the seams open.
Step 6:
Flip your denim patchwork, right side down. Get your pattern for the basket and place it on top. Trace it and cut the denim.
Step 7:
Place the fusible interfacing on top of the rectangular denim patchwork, then press with an iron. Next, place it on top of the batting, right side up. Sew the edges with a 1/4″ seam allowance. Cut the excess batting to remove bulk.
Step 8:
Get the midpoint of one of the long sides and put the label just an inch below.
Step 9:
Repeat steps 5 to 8 to make the other rectangle.
Step 10:
Place the two rectangles right side together then sew the sides with a 1/4″ seam allowance. Do not sew the top and bottom.
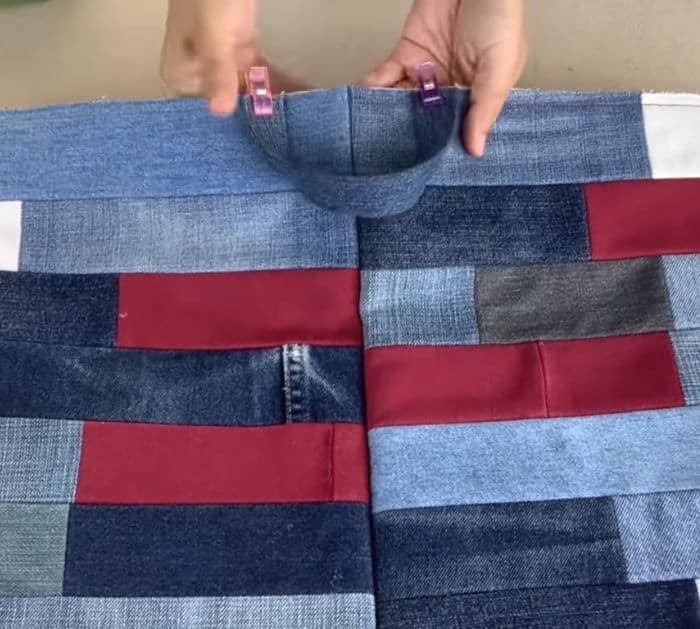
Step 11:
Make the handle. Press the small rectangular fusible interfacing on the denim of the same size. Fold the edges towards the center, fold them in half, and sew them on the edges. Repeat for the other handle. Sew the handles on two sides.
Step 12:
Use the round pattern to cut a circle on the denim. Press the fusible interfacing at the back, then sew the batting. Trim off excess. Get the midpoints and mark them.
Step 13:
Get the midpoints of the basket then sew it to the round bottom.
Step 14:
Place the lining right sides together then mark the midpoints. Sew the round lining fabric at the bottom, but make sure to leave an opening. Flip it so that the right side is inside.
Step 15:
Place the basket inside the lining and sew the top edges. Flip the basket right side out through the opening. Top stitch the edges.
Denim Laundry Basket Tutorial


