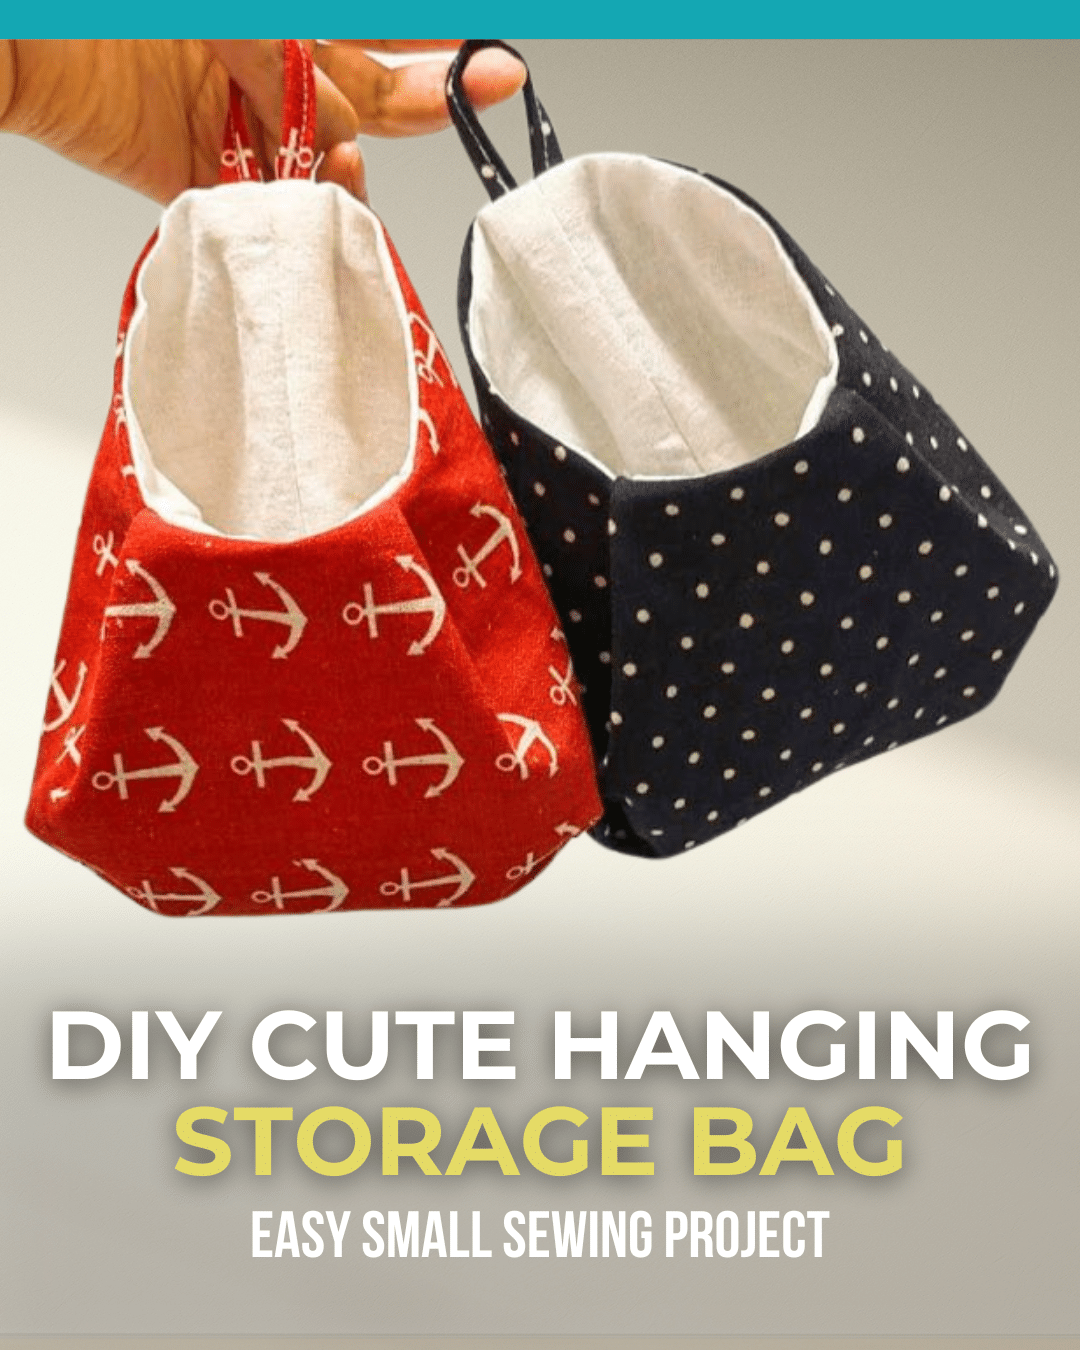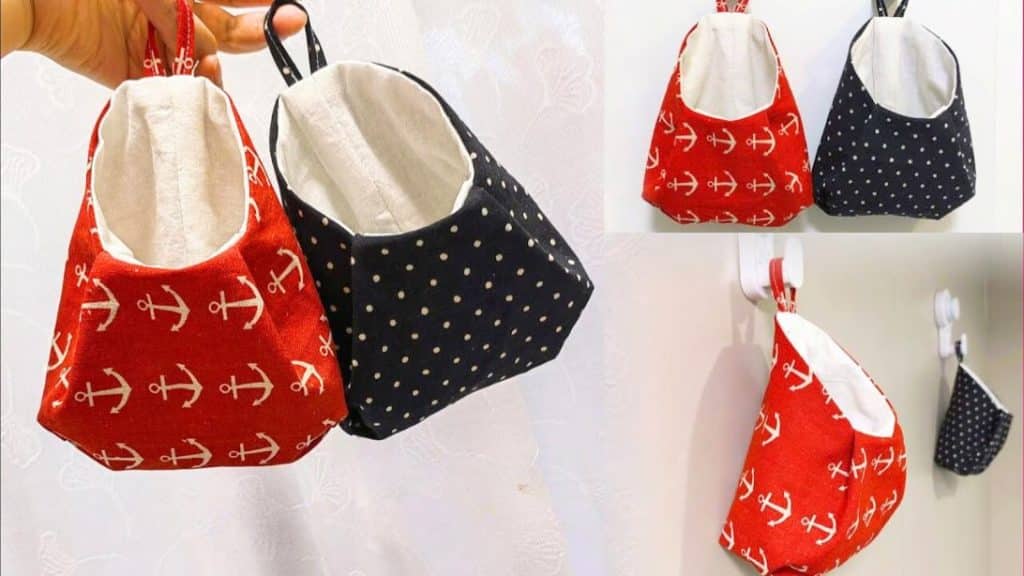
Do you have leftover fabric from your past sewing projects? Take them out of your closet and use them to make these DIY cute hanging storage bags! How adorable is Cici Yi’s Sewing Diary‘s small sewing project idea? You can put keys, coins, pieces of jewelry, and knick-knacks inside the bag and hang it on your wall.
RELATED: DIY Doll-Shaped Wall Hanging Organizer
Aside from that, these hanging storage bags are also great for the holidays, as you can use them as decorations. You can put flowers inside, a cute toy, balls, chocolates, and many more. It’s easy to make and not as complicated as it may seem. Watch the video below for full instructions.
Here’s another fun sewing project for you: Make a Bag Using Fabric Circles
Easy DIY Hanging Storage Bag Materials
- 40 x 20 cm main fabric
- 40 x 20 cm lining fabric
- 3 x 10 cm main fabric
How to Make a Hanging Storage Bag
Step 1:
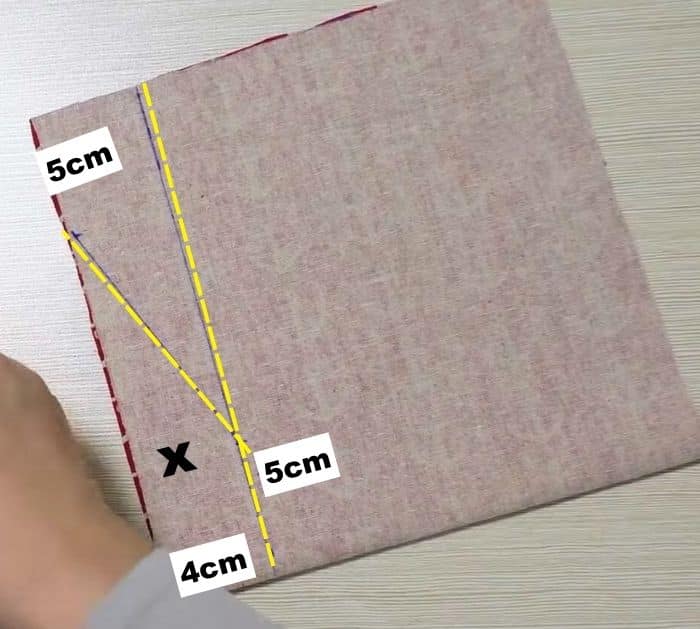
Fold the 40 x 20 cm main fabric in half wrong sides together. Measure the exact measurements just like in the photo below. Fold the lining fabric in half and place it on the back of the folded main fabric. Cut the x part.
Step 2:
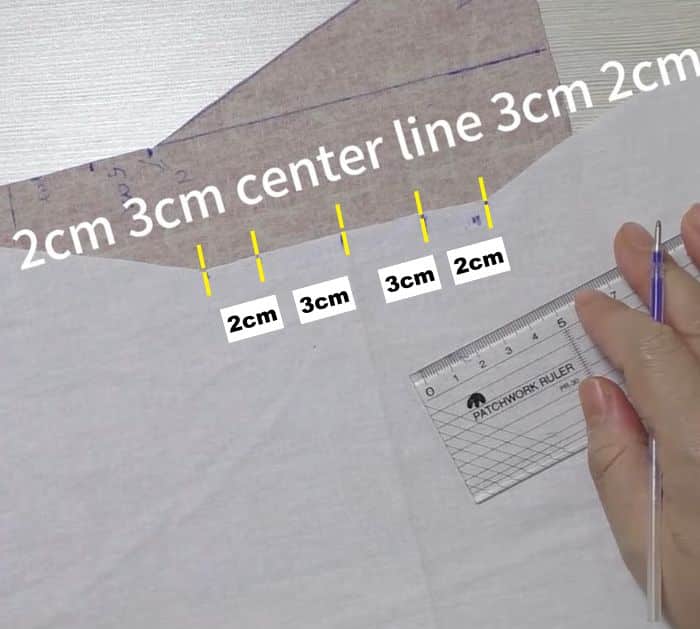
Measure 2 cm and 3 cm from the center line on each side on the top part of the lining and main fabric. Fold the sides of the main fabric and the lining fabric where the points are located. Pin them in place.
Step 3:
Fold the lining fabric in half wrong sides together. Sew on the side. Repeat with the main fabric. Press the seams open. Next, sew the bottom part close, making sure that the centers are aligned. For the lining fabric, leave an opening. Draw a 3 cm by 3 cm square on the bottom corners of both the lining and main fabric. Open one corner to make a pointed end, then sew on the line. Repeat on the other corner to make boxed corners. Trim off the corners.
Step 4:
Get the small piece of main fabric and fold the long sides toward the center, then fold again in half lengthwise. Sew on the edges.
Step 5:
Fold the small cord in half and sew on the top of the main fabric.
Step 6:
Flip the lining right side out, then place it inside the main fabric. They should be right sides together. Sew all the way around.
Step 7:
Flip it right side out through the opening. Sew the opening closed.
DIY Cute Hanging Storage Bag