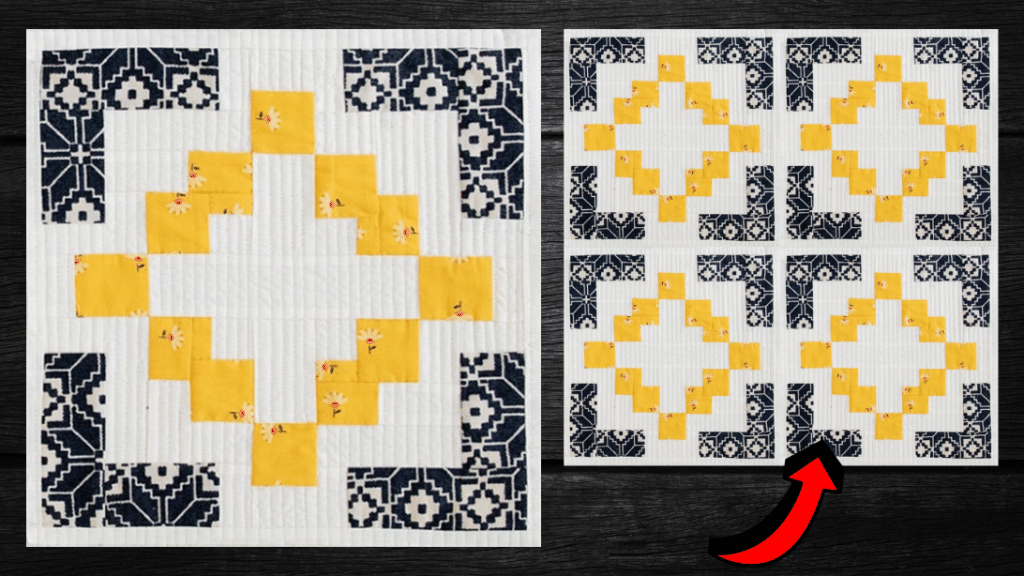
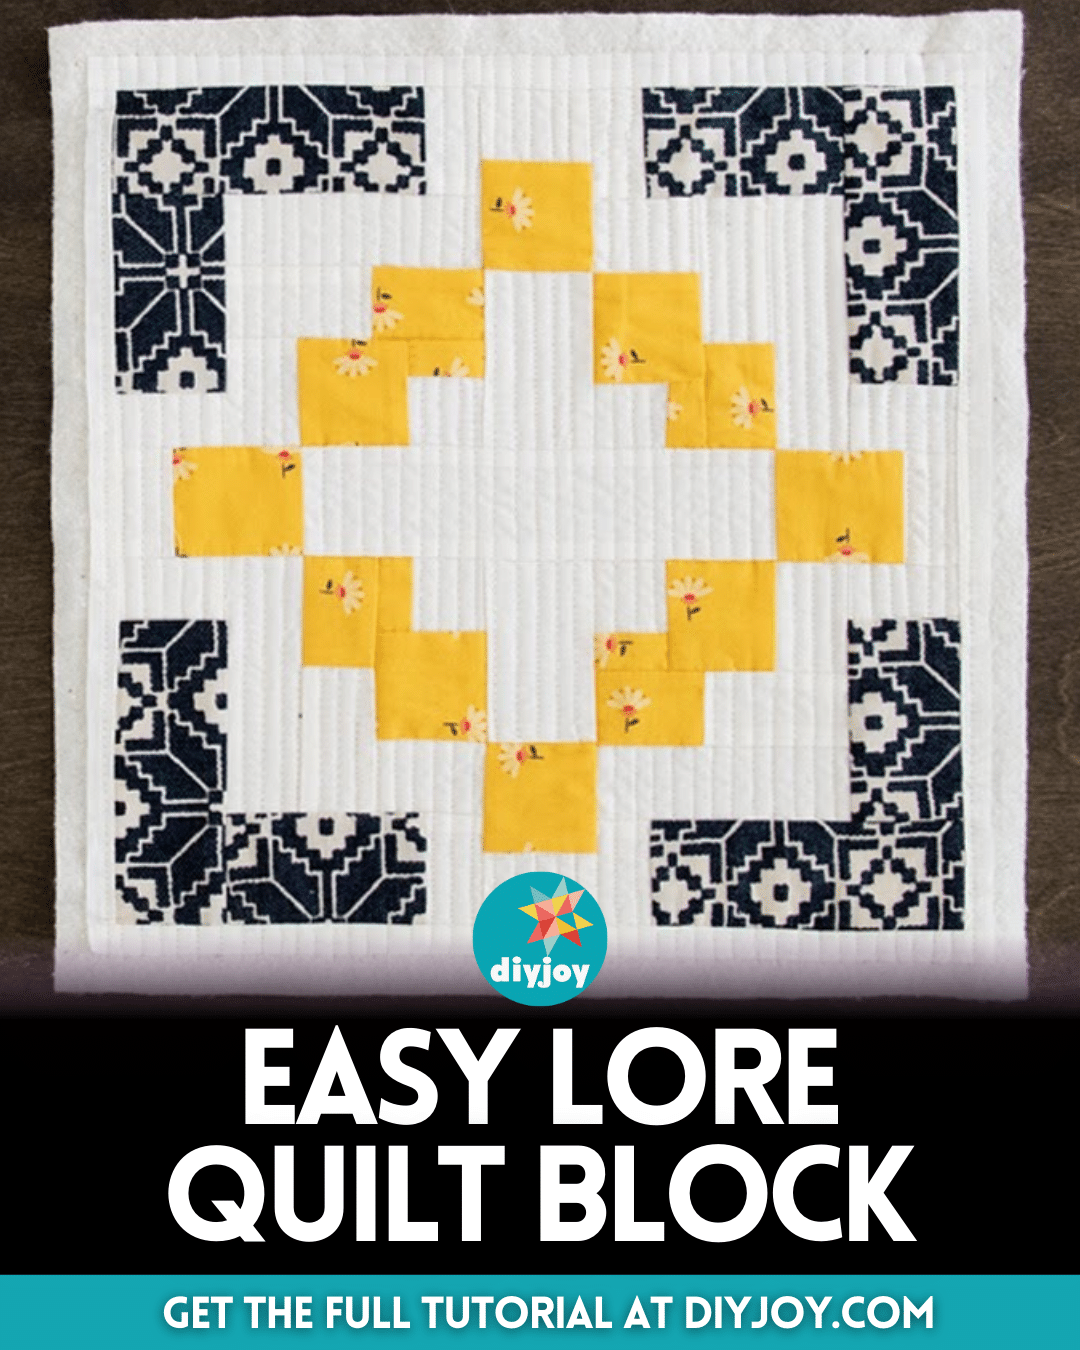
I love combining fun fabric prints and colors in tricky patterns, just like this lore quilt block by Art Gallery Fabrics on YouTube. This quilt block isn’t as difficult to make as you think and you can probably finish a whole quilt block in just a couple of minutes!
RELATED: Lovely Quilt Using 1 Block and Few Sashing
This is a great project idea for beginners to try because it will challenge and improve their skills. If you want to learn how now, then proceed to read the written instructions down below, and while you’re at it make sure to watch the video tutorial as well for more details.
Materials for Lore Quilt Block:
- Yellow print fabric
- Black fabric
- White fabric
- Marking pen, pencil, or chalk
- Ruler
- Scissor or rotary cutter and a cutting mat
- Needle and thread
- Iron, for pressing
- Sewing machine
- Pattern (Click here to download the pattern)
How to Make a Lore Quilt Block:
Step 1
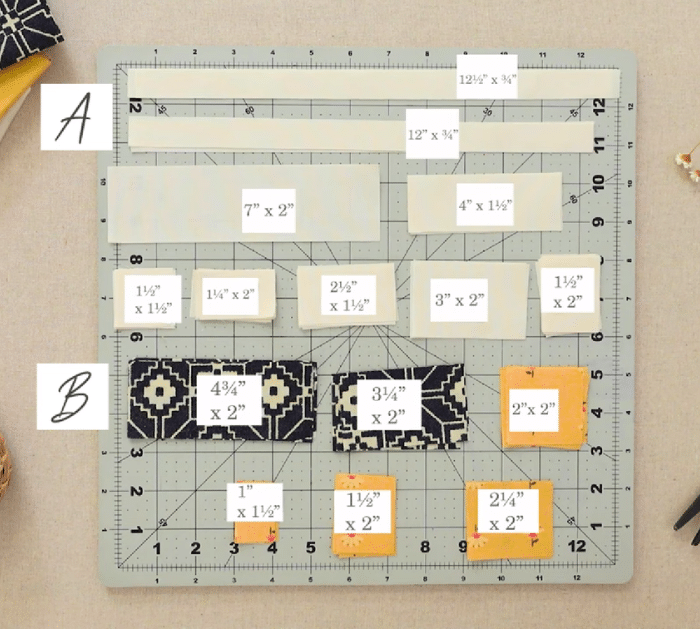
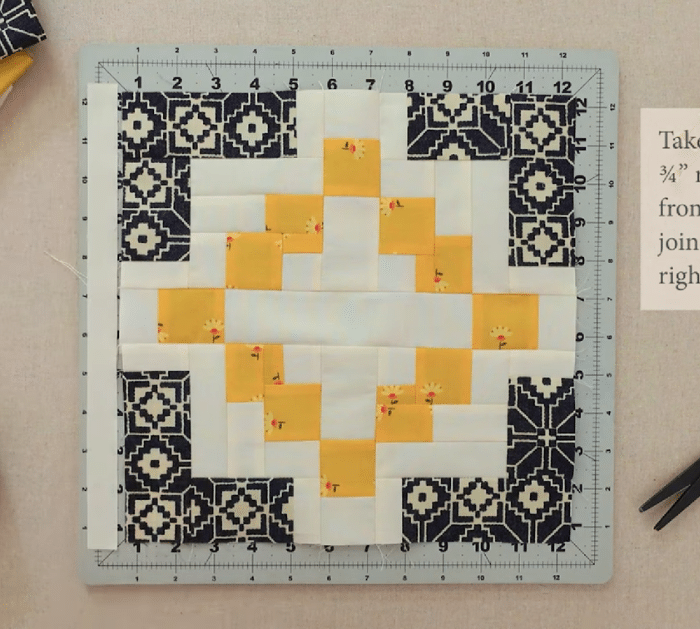
Cut the fabrics to size as instructed in the pattern, then take one 1½ square from fabric A, and join one 1″ x 1½” rectangle from fabric C at the bottom. Take one 2″ square from fabric C and join to the right side, then take one 1½” x 2″ rectangle of fabric A, and join to the right side.
Step 2
Take one 1½” x 2″ rectangle from fabric C and one 2½” x 1½” rectangle from fabric A, then join to the right side and join the strip to the bottom of the unit. Take one 4″ x 1½” rectangle from fabric A and join it to the bottom of the unit, then take one 1¼” x 2″ rectangle from fabric A, and join one 3¼” x 2″ rectangle from fabric B at the bottom.
Step 3
Join the piece to the right side of the unit, then take one 1¼” x 2″ rectangle from fabric A and one 4¾” x 2″ rectangle from fabric B, and join at the right. Join the strip to the bottom of the unit, then repeat these steps 3 more times for a total of 4 units.
Step 4
Take one 1½” x 2″ rectangle from fabric A and one 2″ square from fabric C, then join at the right side, take one 3″ x 2″ rectangle from fabric A and join to the right side. Repeat to have two strips, then sew one strip to the right side of one unit, and sew another unit to its right side.
Step 5
Take one 1¼” x 2″ rectangle from fabric A and one 2¼” x 2″ rectangle from fabric C, then join it to the right, take one 2¼” x 2″ rectangle from fabric C, and join it to the right as well. Take one 1¼” x 1¼” x 2″ rectangle and join to the right, then join at the bottom of one long rectangle unit, and join this piece to the remaining unit.
*All image credit belongs to Art Gallery Fabrics via YouTube. Follow and subscribe to their channel for more!
Easy Lore Quilt Block Tutorial


