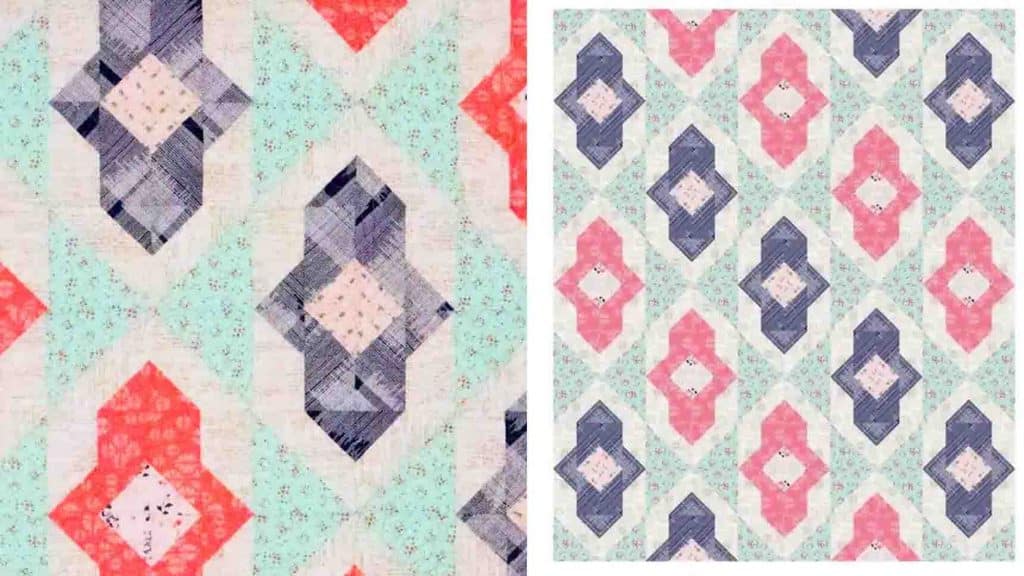
You won’t believe how easy this locket quilt from Fat Quarter Shop on Youtube is to make. It’s a trendy pattern you can make if you are planning to give it to someone or just want a unique quilt pattern. It’s simple to do; just follow the step-by-step instructions by watching the video tutorial below.
Materials:
- 2 & 3/8 yards PPE 347 (fabrics A & B)
- 1 & 1/3 yards PPE-348 (fabric C)
- 1 & 1/2 yards PPE-342 (fabrics D & E)
- 1/2 yard PPE-341 (fabric F)
- 1 & 1/3 yards PPE-345 (fabrics G & H)
- 1/2 yard PPE-343 (fabric I)
- 3/4 yard PPE-346 (fabric J)
(note: all fabrics are from Art Gallery Fabrics)
Cut PPE-347 fabric into:
- 30 – 6 & 7/8″ squares (fabric A)
- 60 – 3 & 1/2″ x 6 1/2″ rectangles (fabric B)
Cut PPE-348 fabric into:
- 30 – 6 & 7/8″ squares (fabric C)
Cut PPE-342 fabric into:
- 32 – 3 & 1/2″ x 6 & 1/2″ rectangles (fabric D)
- 64 – 3 & 1/2″ squares (fabric E)
Cut PPE-341 fabric into:
- 32 – 3 & 1/2″ squares (fabric F)
Cut PPE-345 fabric into:
- 28 – 3 & 1/2″ x 6 1/2″ rectangles (fabric G)
- 56 – 3 & 1/2″ squares (fabric H)
Cut PPE-343 fabric into:
- 28 – 3 & 1/2″ squares (fabric I)
Cut PPE-346 fabric into:
- 8 – 2 & 1/2″ x WOF (fabric J)
Directions:
Step 1
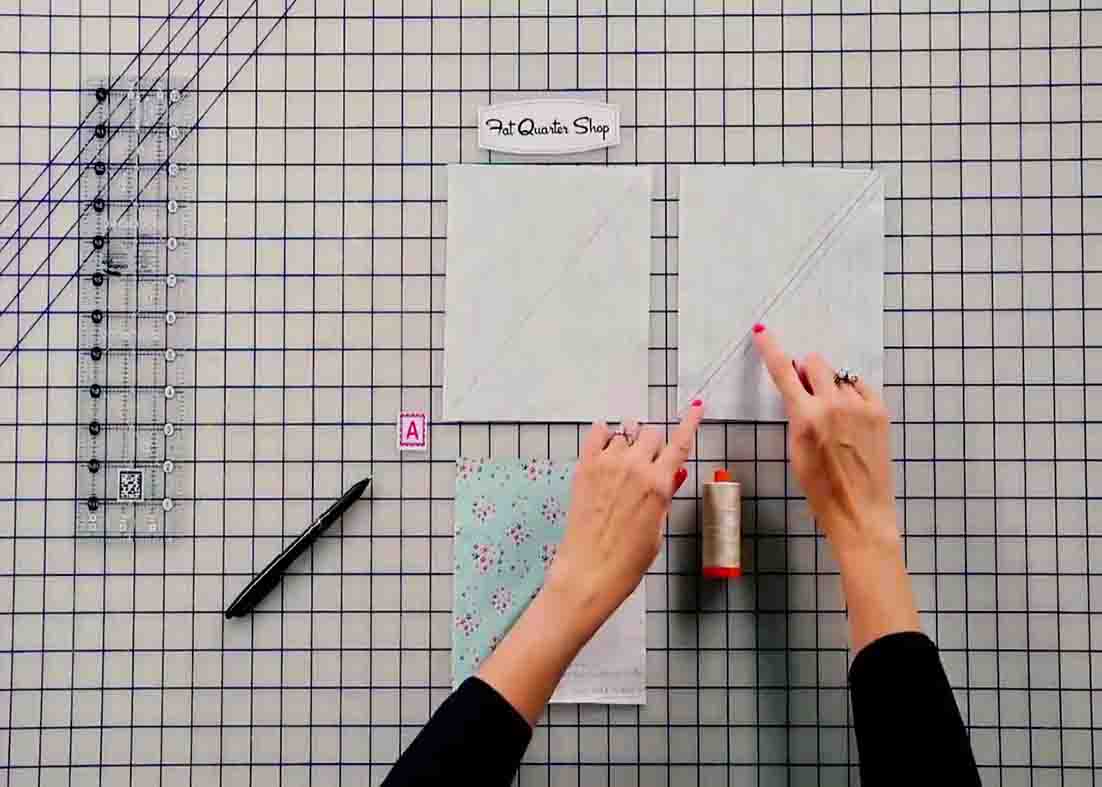
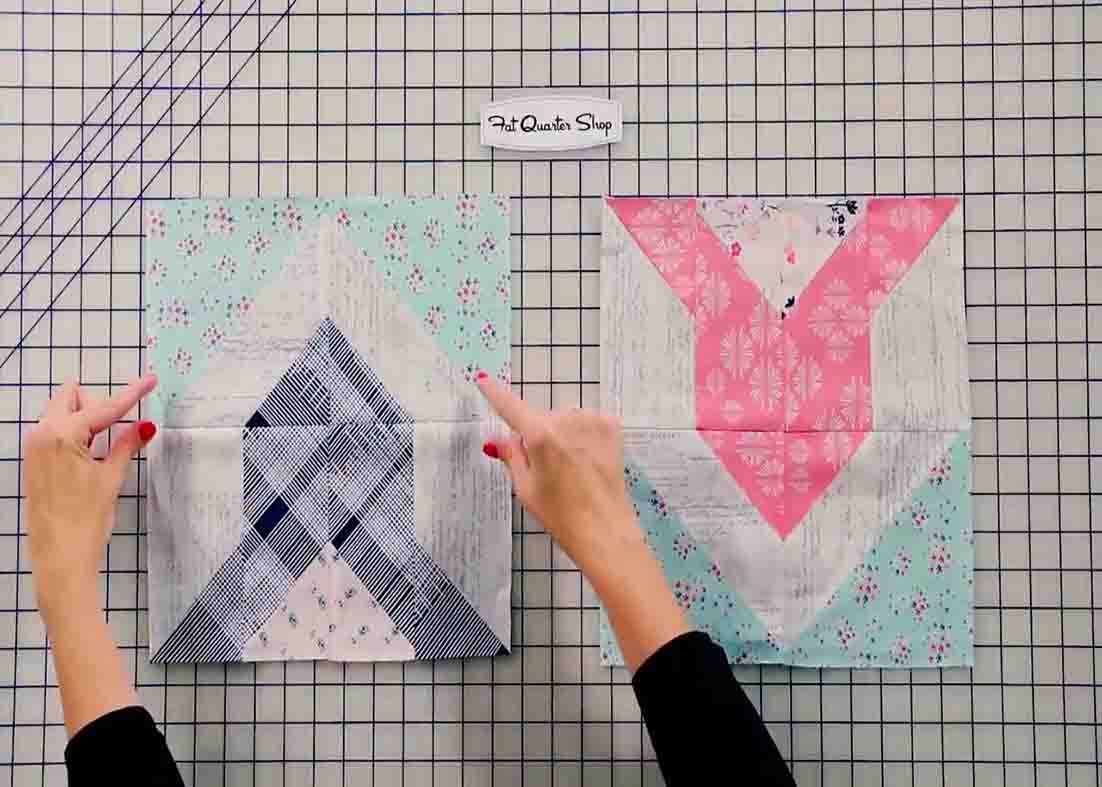
On the wrong side of your fabric A squares, draw a line from corner to corner. Layer a fabric A square with a fabric C square, pin it in place, then stitch a quarter inch away from your drawn line on both sides. Press open and make 60 of these. Now, add corner squares to your half-square triangles. Take a fabric E square, draw a line from corner to corner, and add it to your fabric A side of the half-square triangle. Next, stitch on the line, trim a quarter inch away, and press. Make 32 of these. Do the same thing with your fabric H squares, make 28. Now, join the units you just made, making 16 navies, and 14 pinks. After this, continue with your corner squares, doing the same technique. Add a fabric E square to the bottom of a fabric B rectangle. Make 16 each in opposing directions so they’re mirror images. Go on to the pink with fabric H squares and make 14 in each opposing direction as well.
[social_warfare]
Step 2
Continue with your corner squares, then add fabric F squares to your fabric D rectangles. Make 16 in opposing directions. Do the same thing with the pink with the fabric I squares and fabric G rectangles. Now, take all the units you made with the corner squares and join them together. Make 16 navies and 14 pinks. To complete the blocks, take your top piece and your bottom piece, and join them together with 16 navies and 14 pinks. Now, put your quilt together. Each row has five blocks, join them together, and press.
Locket Quilt Pattern Tutorial